Easy Refrigerator Dill Pickles: Quick Pickling Recipe
This post may contain affiliate links, please see our privacy policy for more information.
Late summer is here, and the garden is officially bursting with delicious vegetables! We grow excess vegetables each year with the specific intention to can them for winter storage. This year, I planted several cucumber plants, which means we are going to be eating lots of delicious pickles!
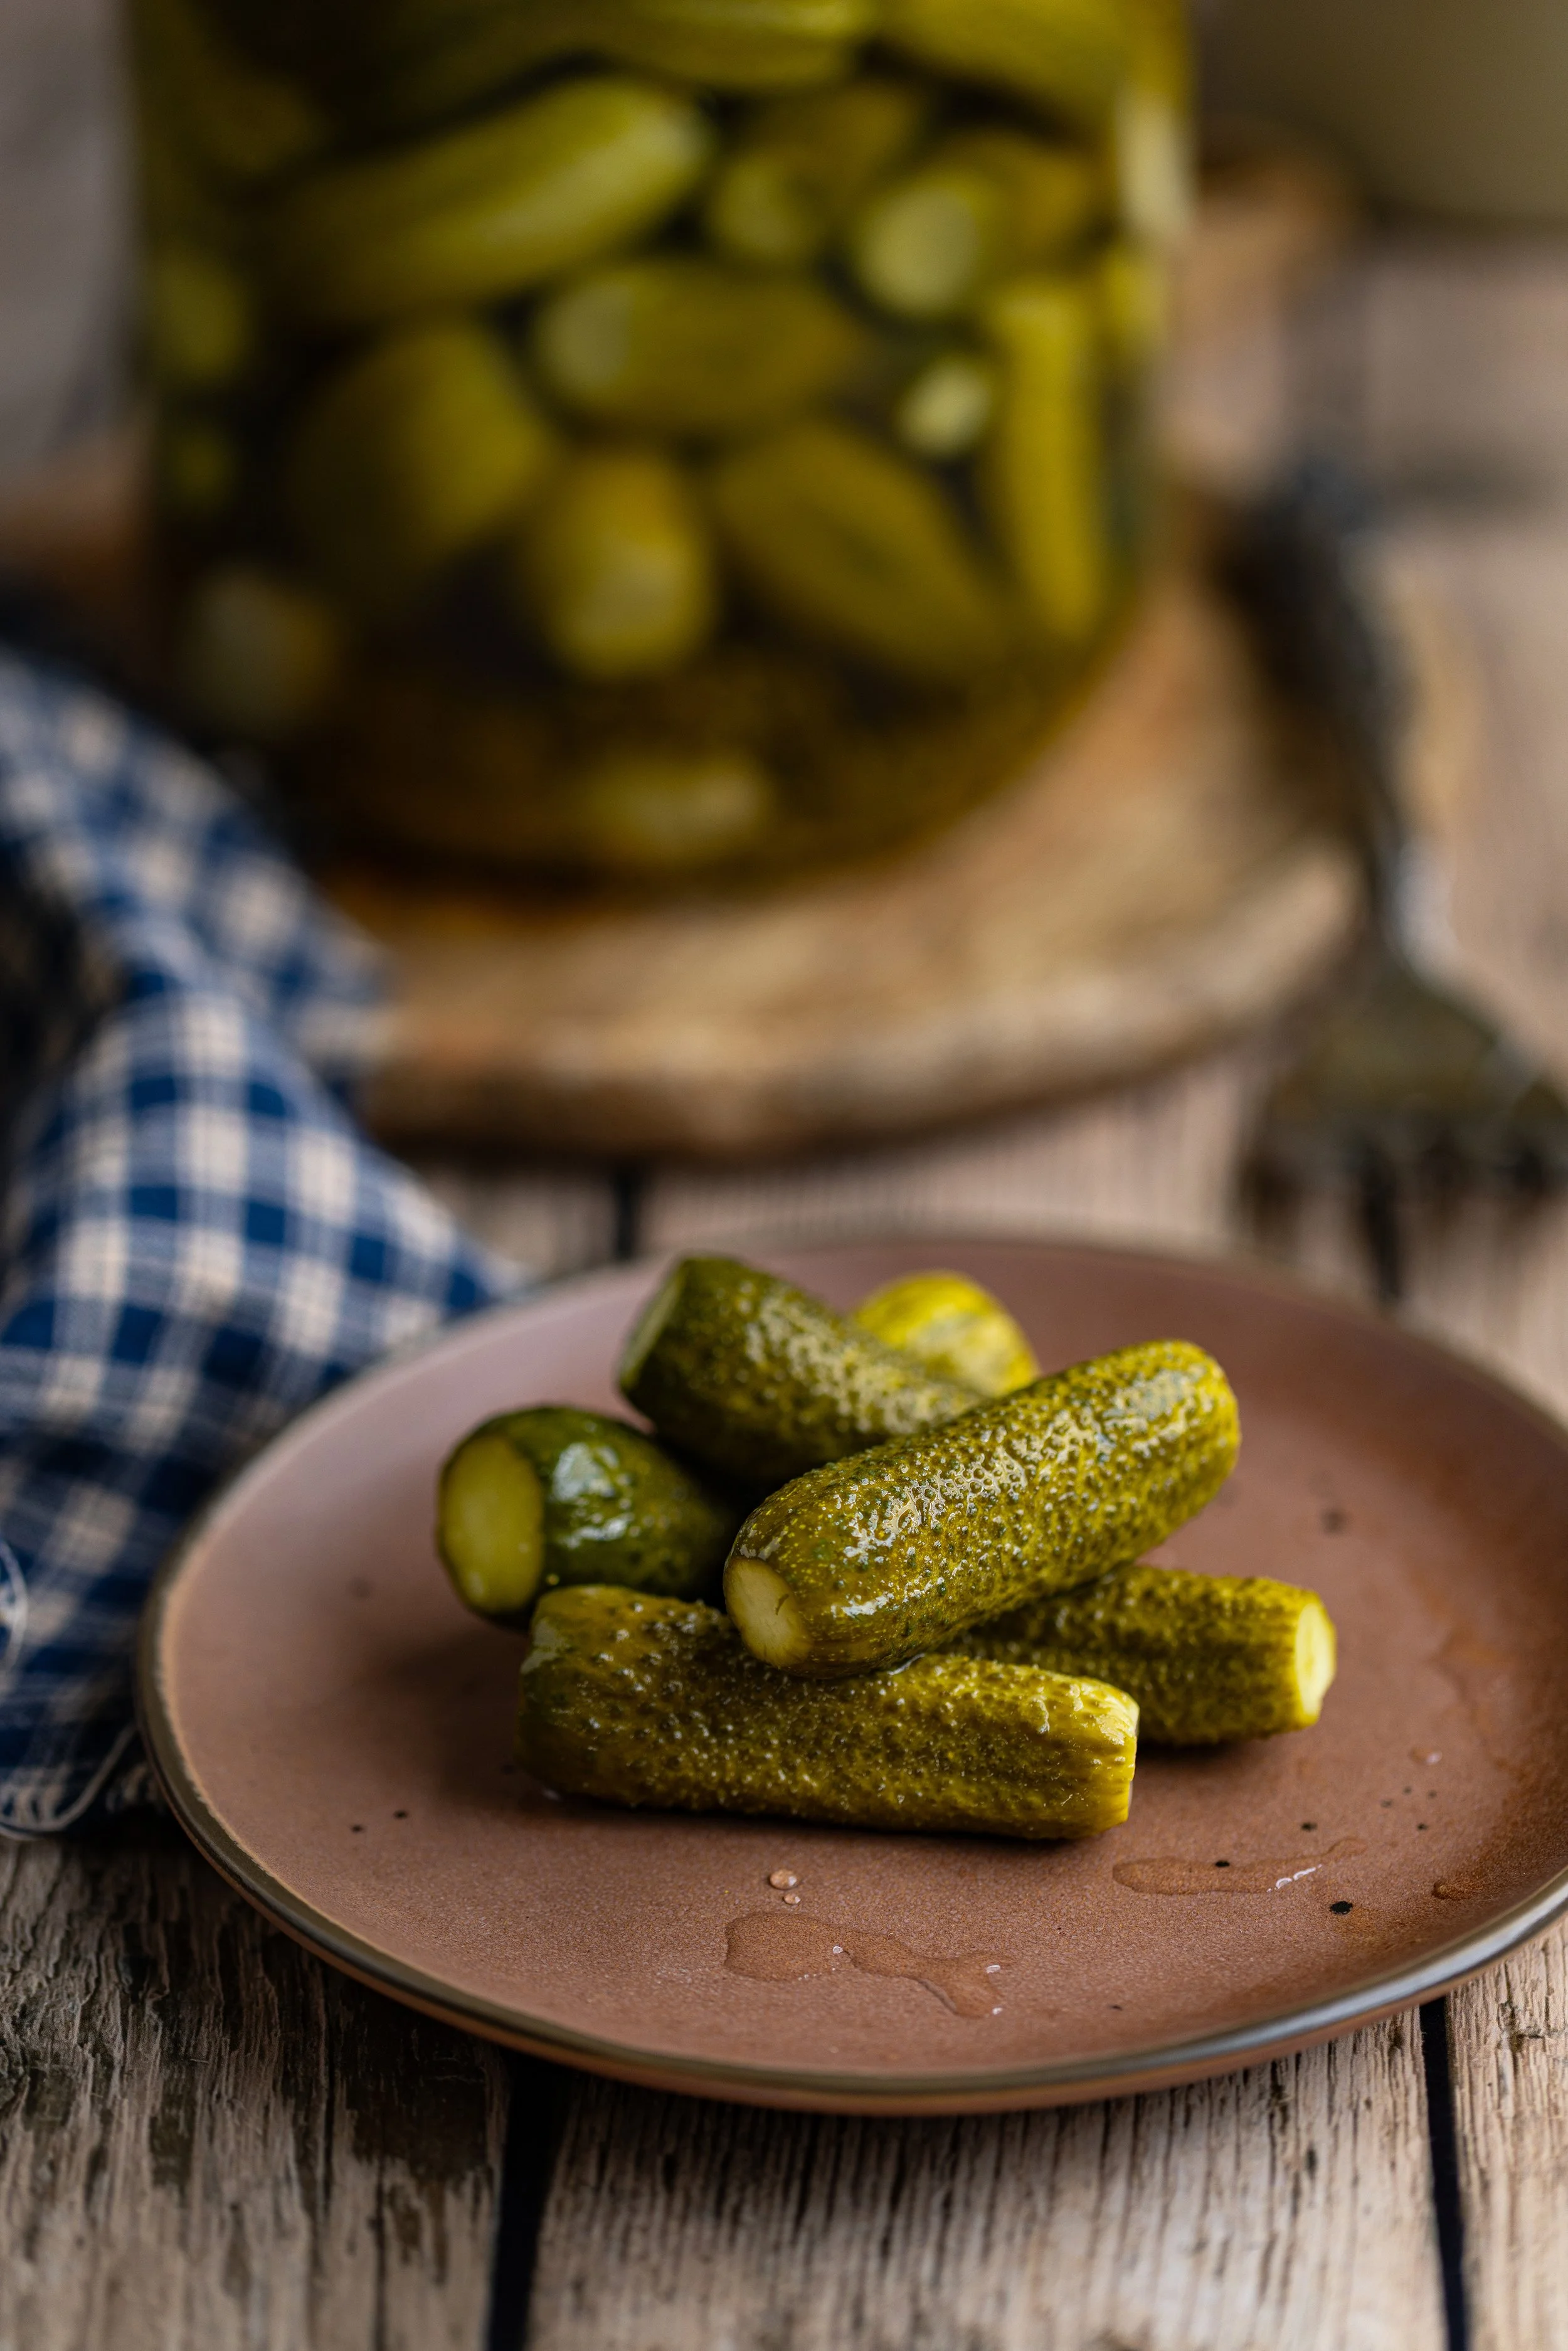
These easy refrigerator dill pickles are a quick and simple recipe to make crunchy pickles in just 1 to 2 weeks. The process is done entirely in the fridge, so there is no canning involved, though I have included instructions for how to hot water bath can your pickles below. These yummy, tangy pickles can be kept in your fridge for up to 3 months!
While I love long term shelf storage for most of my food, which typically means I will hot water bath can or pressure can my produce, the results of canned pickles can be mushy or squishy. This has always been a big hit or miss for me, so I decided this year to try my best to figure out what I could do differently to produce a firm and crunchy pickle to enjoy even in the depths of winter.
After several years of working on pickles, this easy brine recipe is the perfect mix for crispy and crunchy pickles! You will also find some tips below to help you achieve super crunchy pickles. I generally prefer refrigerator pickles more than anything because they are so easy to throw together and the results happen almost instantly.
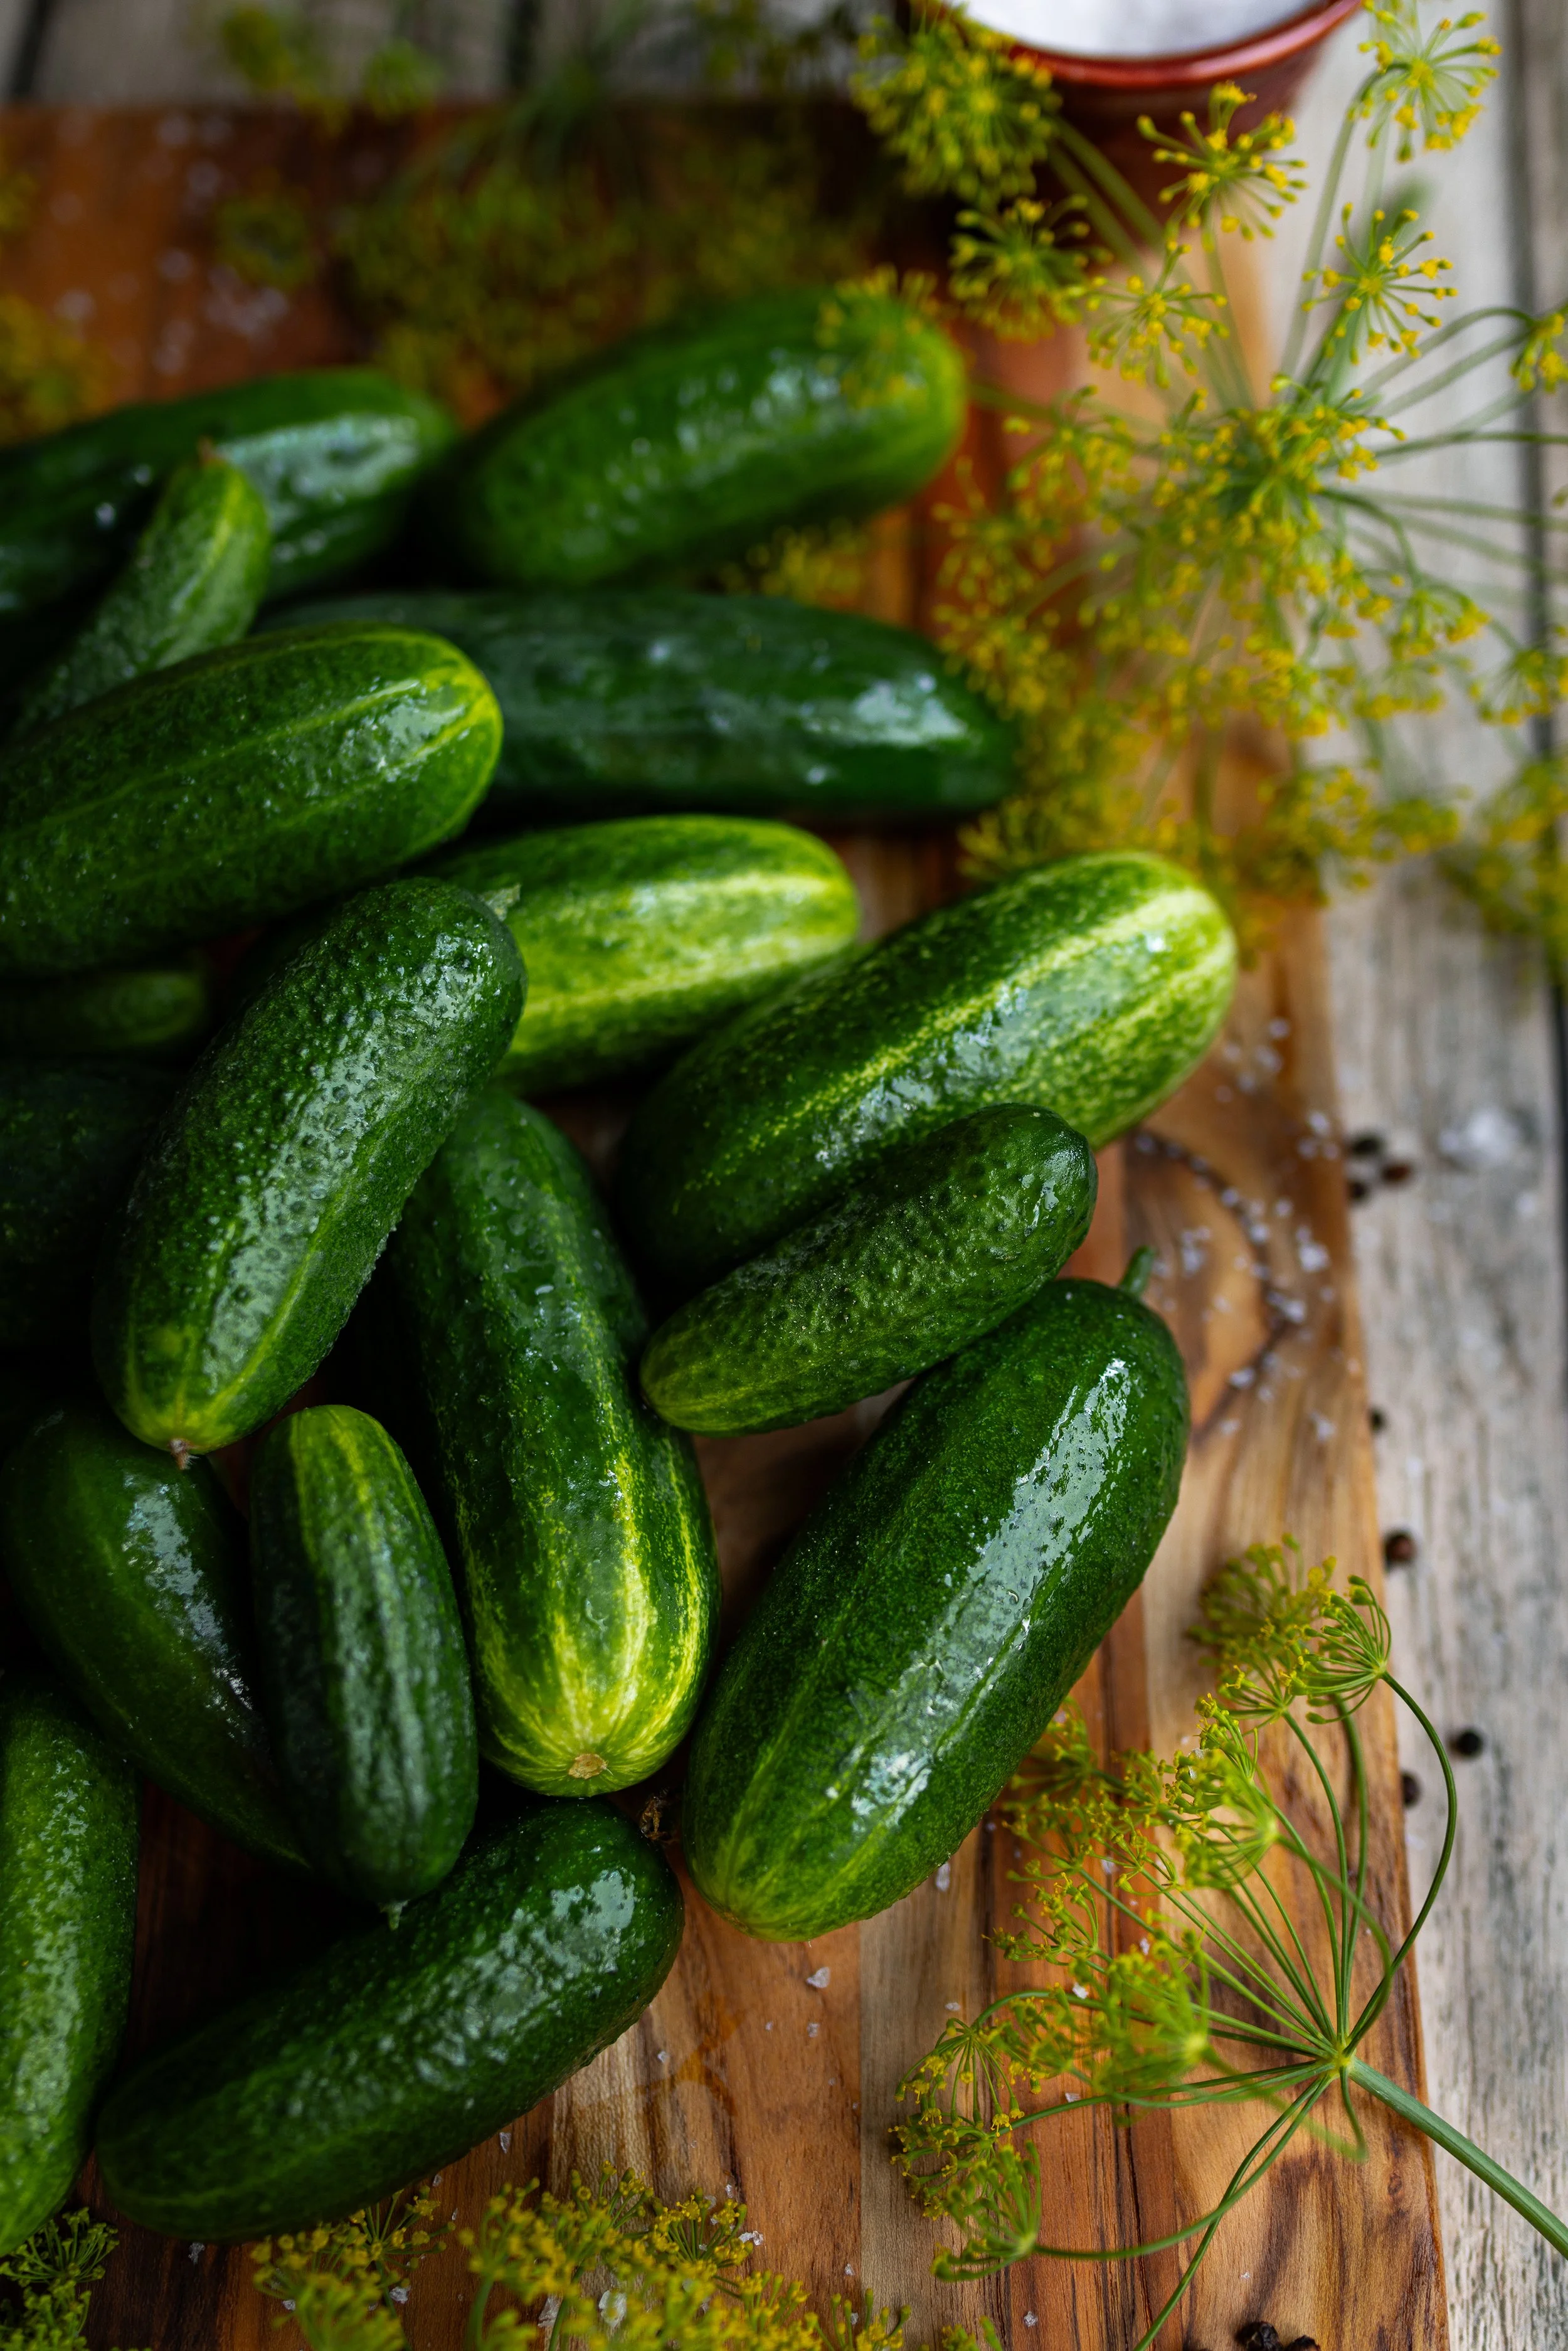
Best Cucumbers for Quick Pickling
For quick pickles, any type of cucumber will work, but there are some varieties that are more enjoyed than others! Here are my favorite cucumbers for making pickles:
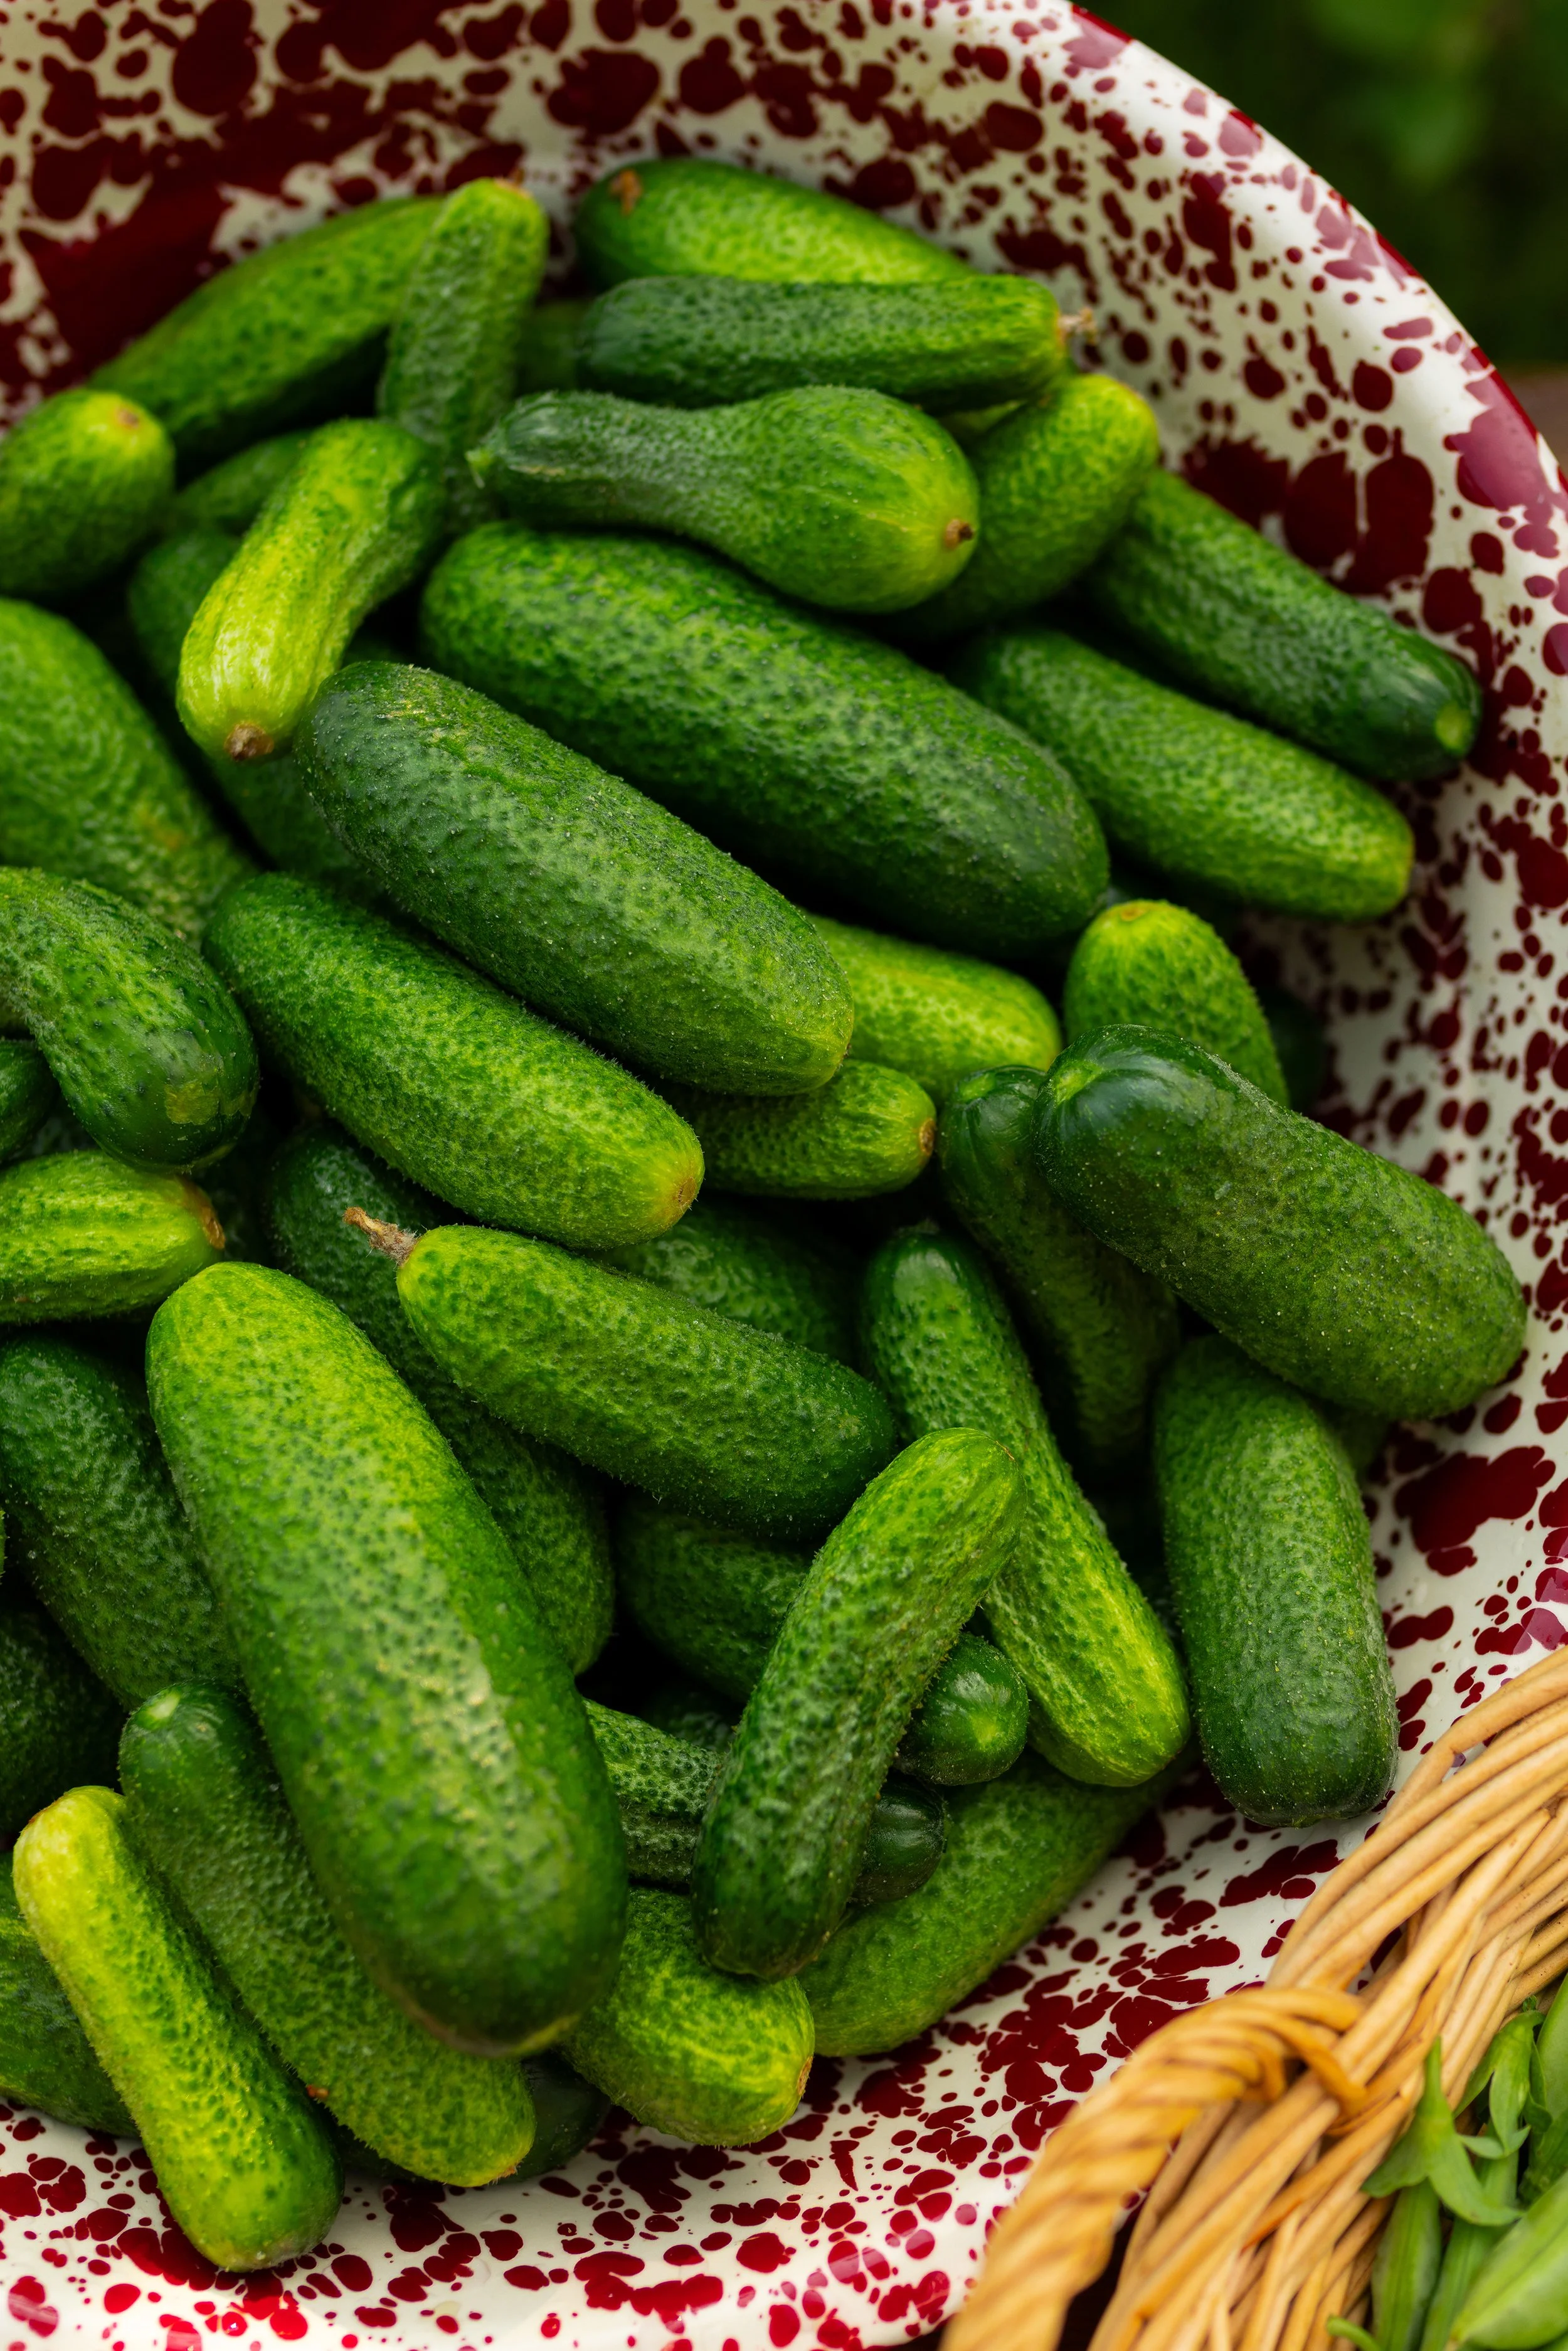
Adam Gherkin. This is going to be a common variety to find, and they’re excellent for making whole pickles because of their small size! The fruits can be grown in a wide range of climates and have a European ‘cornichon’ style. It has a crisp texture and tiny spines.
Gershwin. These cucumbers have less spines and a dark green, thicker skin, though they’re just as delicious. When isolated from other cucumber varieties, it will remain seedless, making it an excellent choice for pickling.
Diamant. Similar to gherkins, these pickles are uniform and grow on compact vines making them great for small gardens with limited space.
tips for crunchy pickles
Soak Pickles in an Ice Bath. This is best done for several hours, but at the least 1 hour is good enough. You can let these soak on the counter and continually add new ice or leave them floating in the fridge. This keep the cucumbers cold and crisp before pickling. I like to keep them in the ice water and cut them as I can them so that they remain cold as long as possible!
24 Hours Vine to Brine. When it comes to making super crisp and crunchy pickles, the fresher the better. This can be difficult if you do not grow cucumbers yourself! There is an old saying that goes, “24 hours from vine to brine” and that really rings true here. Cucumbers should really pickled the same day that they are picked, if possible. Because cucumbers are mostly made up of water, they begin to lose their firmness as soon as they are off the vine. If you cannot get to them that quickly, then make sure to give the ice bath trick a try. I also like to use older cucumbers for bread and butter pickles since they don’t necessarily need to be super crunchy!
Cut Off Blossom Ends. The blossom end of the cucumber, or the narrower end if you did not pick them yourself, can make the pickle go limp in the brine. It’s best to cut this off. If you are unsure which end is the blossom end, then just trim off both ends about 1/8-inch.
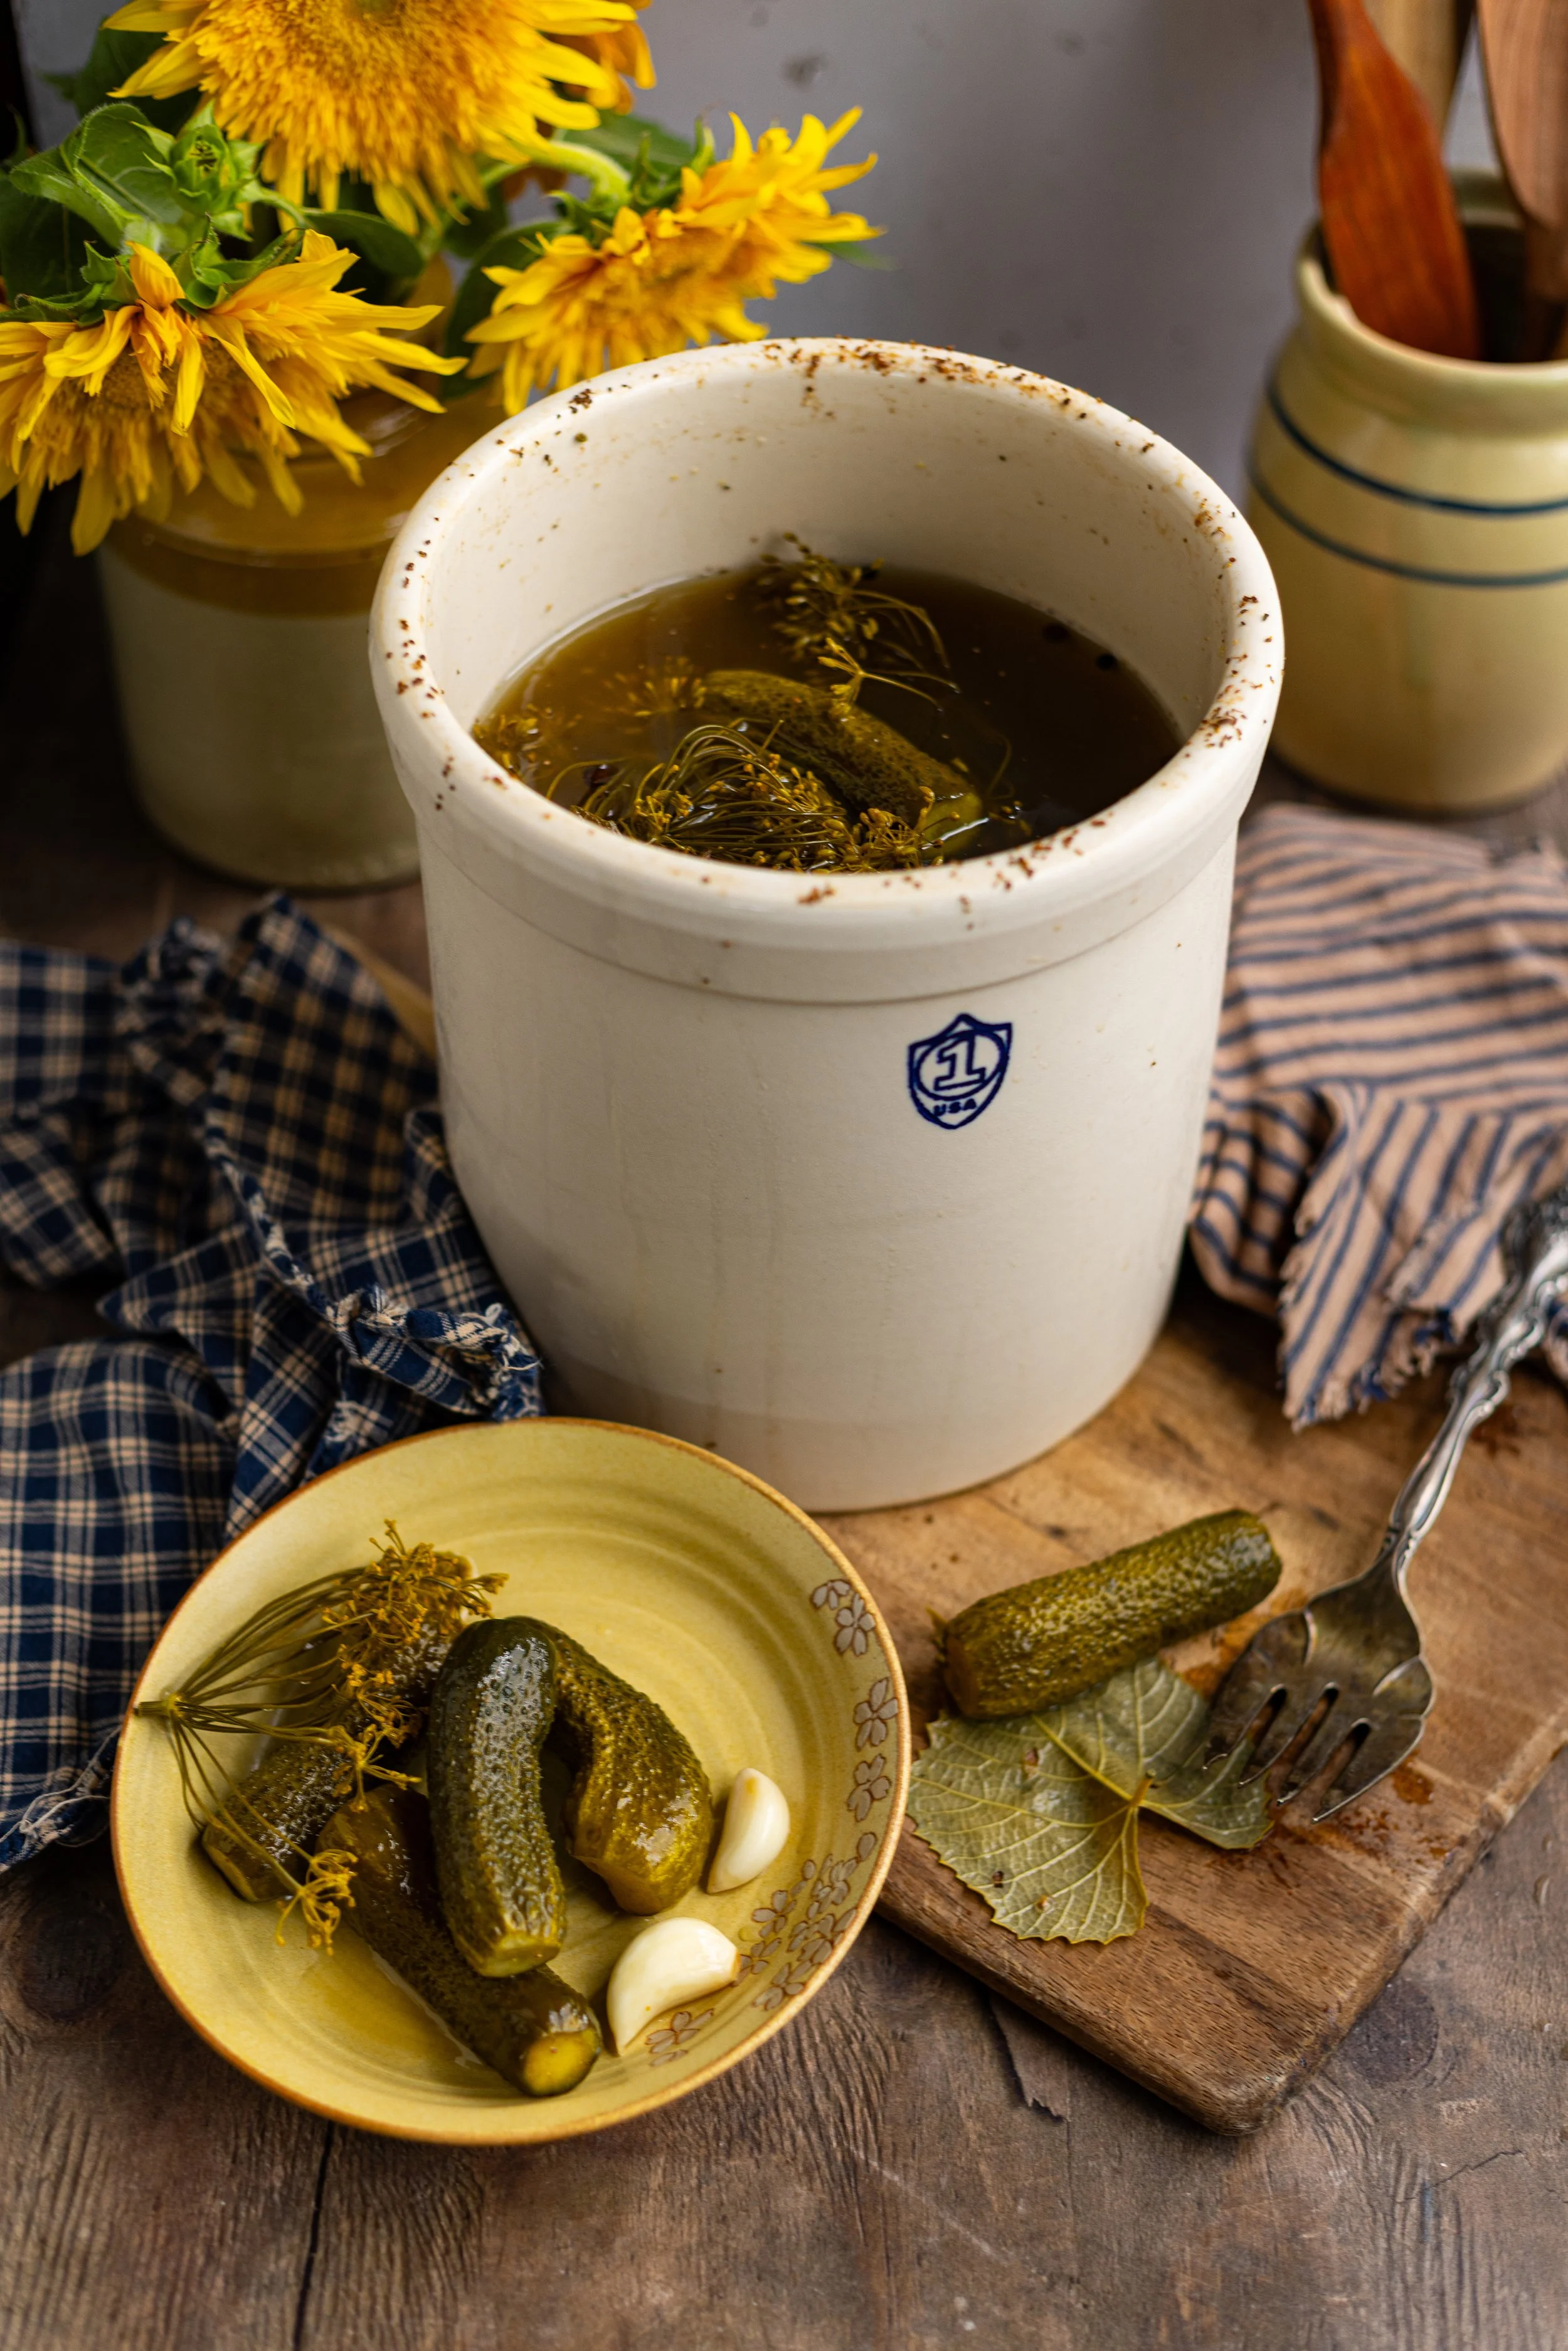
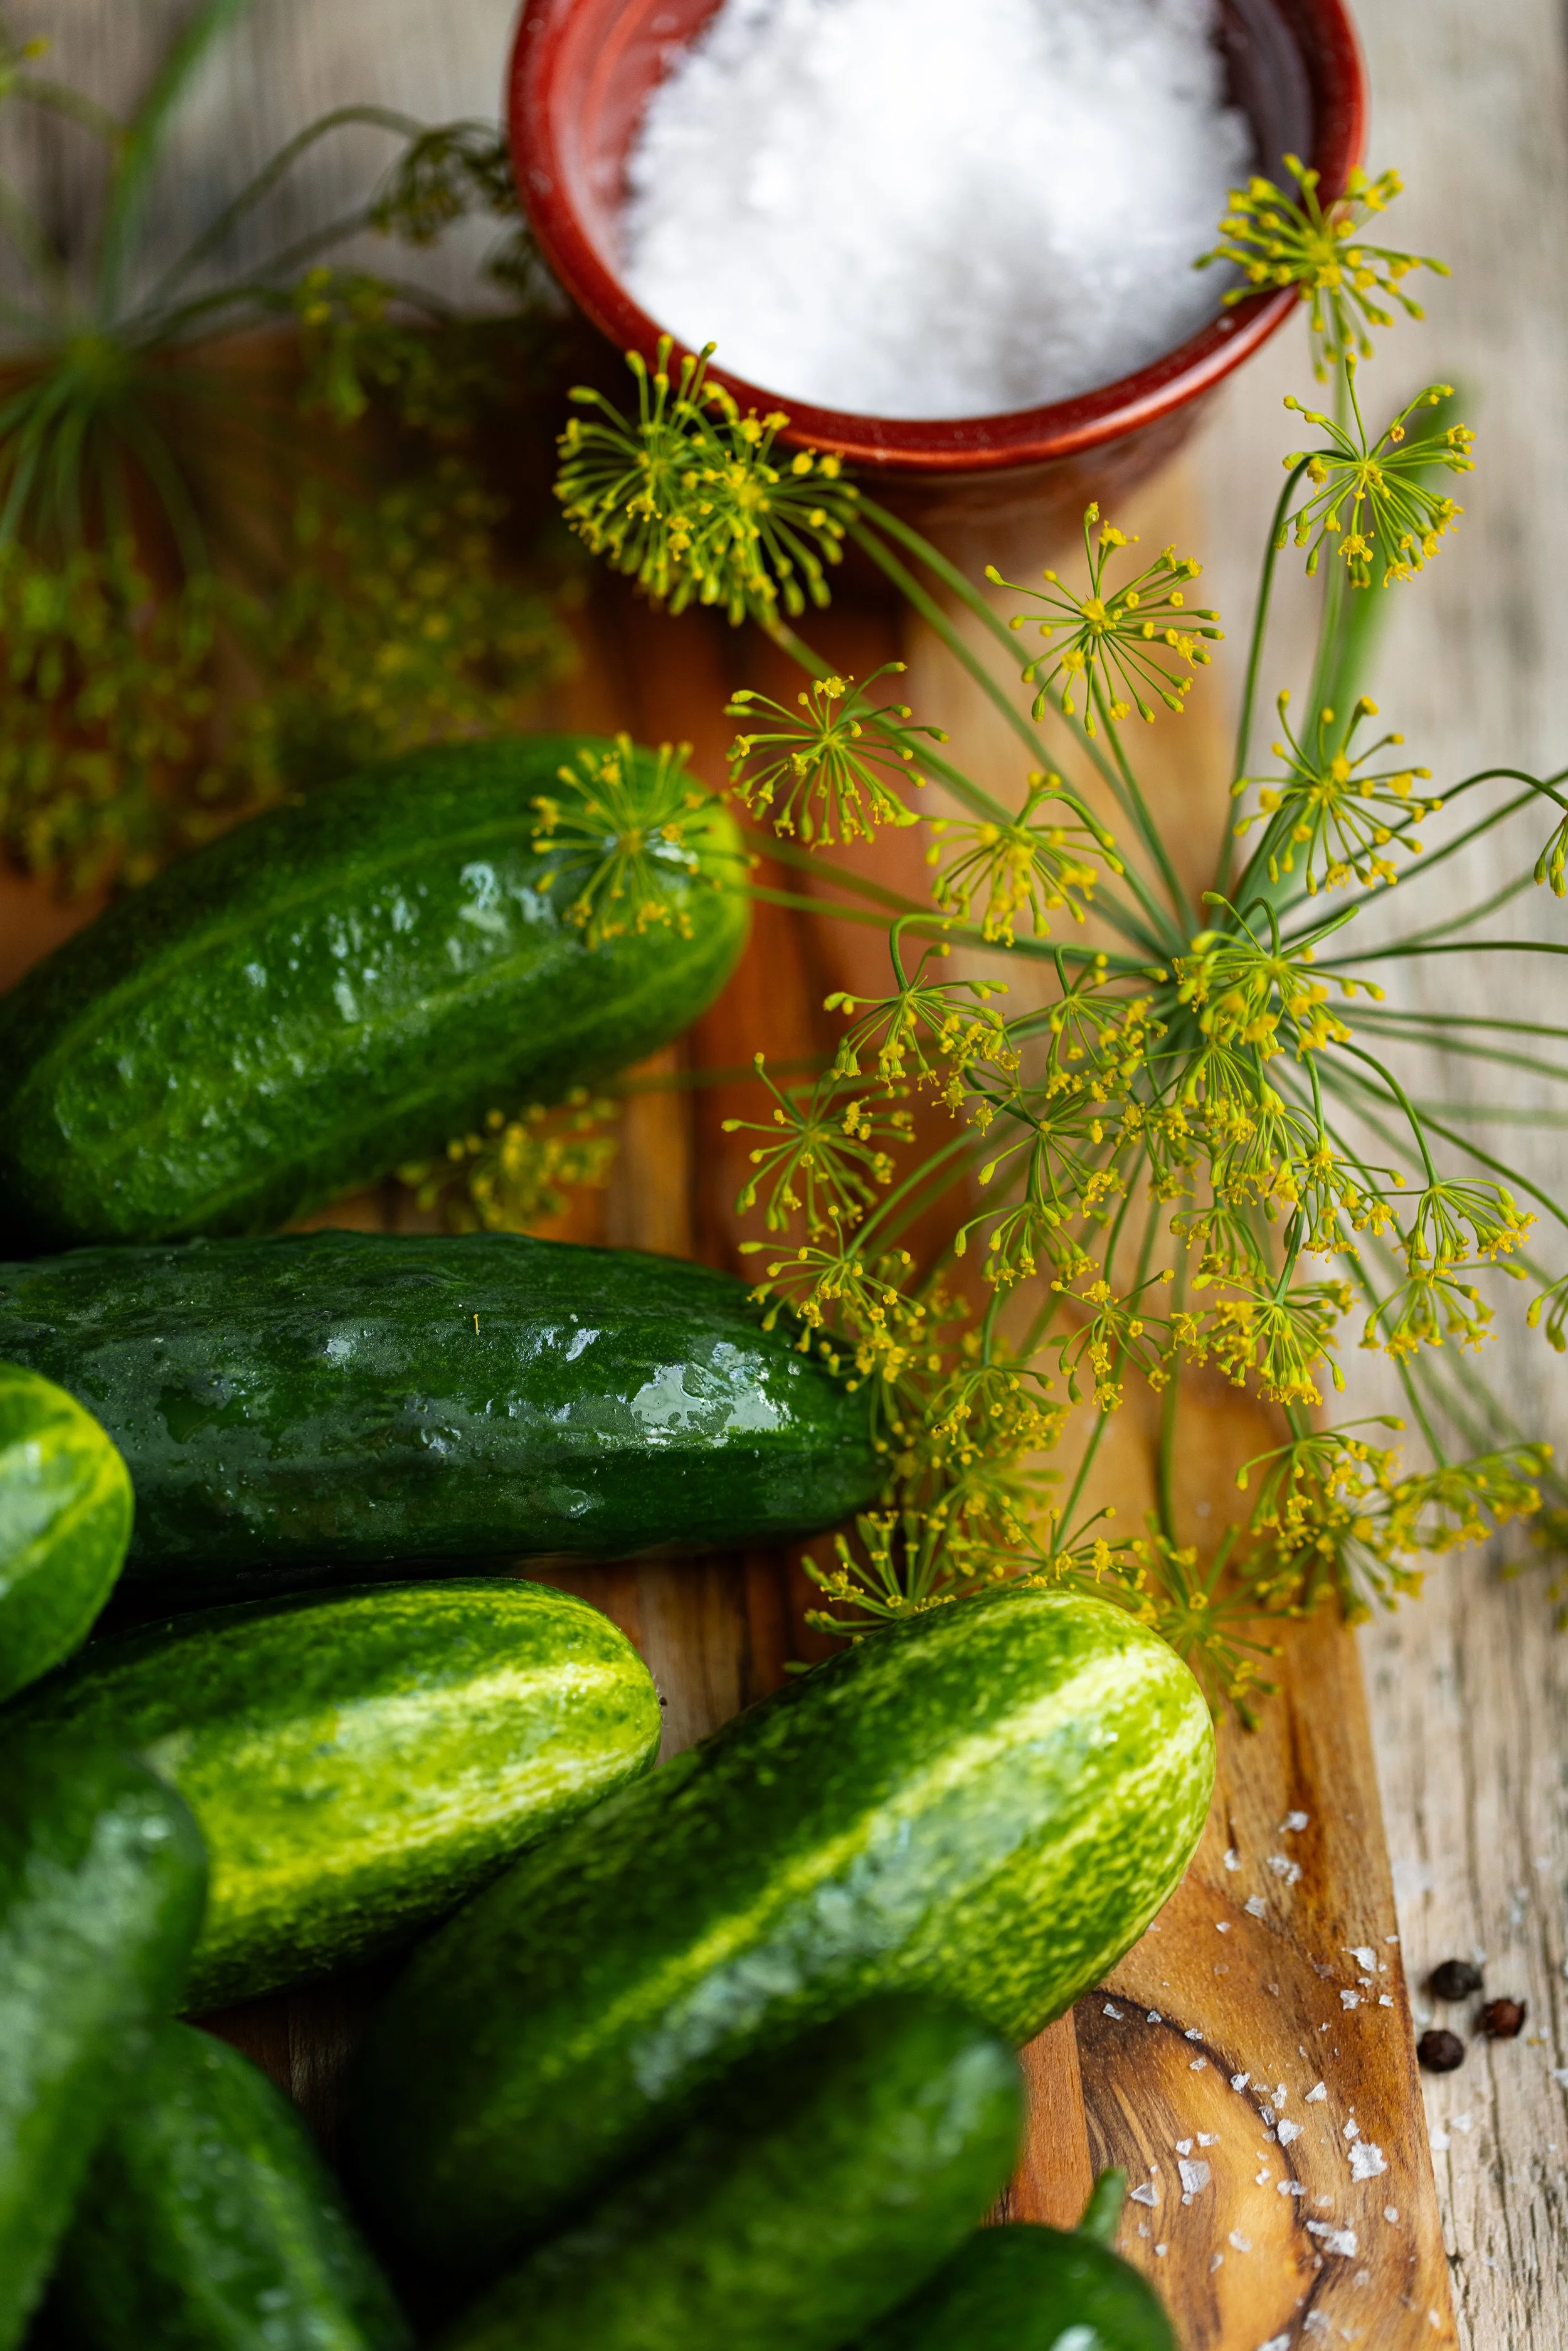
Add Grape Leaves. Grape leaves and oak leaves have tannins that help keep the cucumbers firm in the brine. Adding a couple of grape leaves to your jar will naturally improve the crispness of your pickles and give it a really good crunch! This is typically done when fermenting pickles in water.
Use Ball® Pickle Crisp. I love this stuff! It’s simply calcium chloride that helps to improve the quality and crunch of your pickles. I prefer using this over a pickling lime, which is generally not recommended for modern pickling anymore as it has the potential to be dangerous.

Canning Safety Notes
Follow tested recipes and USDA guidelines to ensure safety.
Use new lids for canning. Most canning jar companies only recommend using lids once, in case that seals become damaged after storing food in a previous season. Using old lids can result in a false seal and spoiled food.
Assembly line can rather than batch canning. This means filling one jar at a time rather than filling all of the jars at once. This ensures that the jars stay hot, keeping them from going through temperature shock when being put into the water bath canner.
Use plastic utensils to prevent cracking your jars.
Pickles are safe for water bath canning due to the added vinegar, which ensures proper acidity— HOWEVER. This is NOT a tested and approved recipe, so be cautious.
Use distilled white vinegar at 5% acidity to ensure proper pH.
Leave 1/2-inch (1-cm) headspace in jars.
Process jars in a boiling water bath for 15 minutes (adjust for altitude if needed).
Pickling Supplies You’ll Need
Pint-size Mason Jars or Weck Jars
Mandoline Slicer or Sharp Knife
Small Saucepan
Vinegar (Distilled white at 5% acidity)
Pickling or Canning Salt. Pickling salt is a pure form of salt without additives like iodine or anti-caking agents. This makes it safe for pickling and long-term food preservation, preventing cloudiness in the brine and ensures consistent results.
Calcium Chloride (optional). You do not need this ingredient, but it can help give your pickles extra crunch! Various canning brands sell this ingredient and it can be found at most grocery stores near the preservation tools and ingredients.
Fermentation Weights (optiona). These weights can help to keep your radishes underneath the brine so they can receive optional flavor absorption from the brine.
How to Make Refrigerator Dill Pickles
Step One: Clean and sanitize jars, lids, and bands. If canning, prepare your hot water bath canner.
Step Two: Wash and trim both ends off the cucumbers, about 1/8-inch. Place the cucumbers in an ice water bath and place in the refrigerator for at least 1 hour to help them crisp up.* I personally think 3 hours is best!
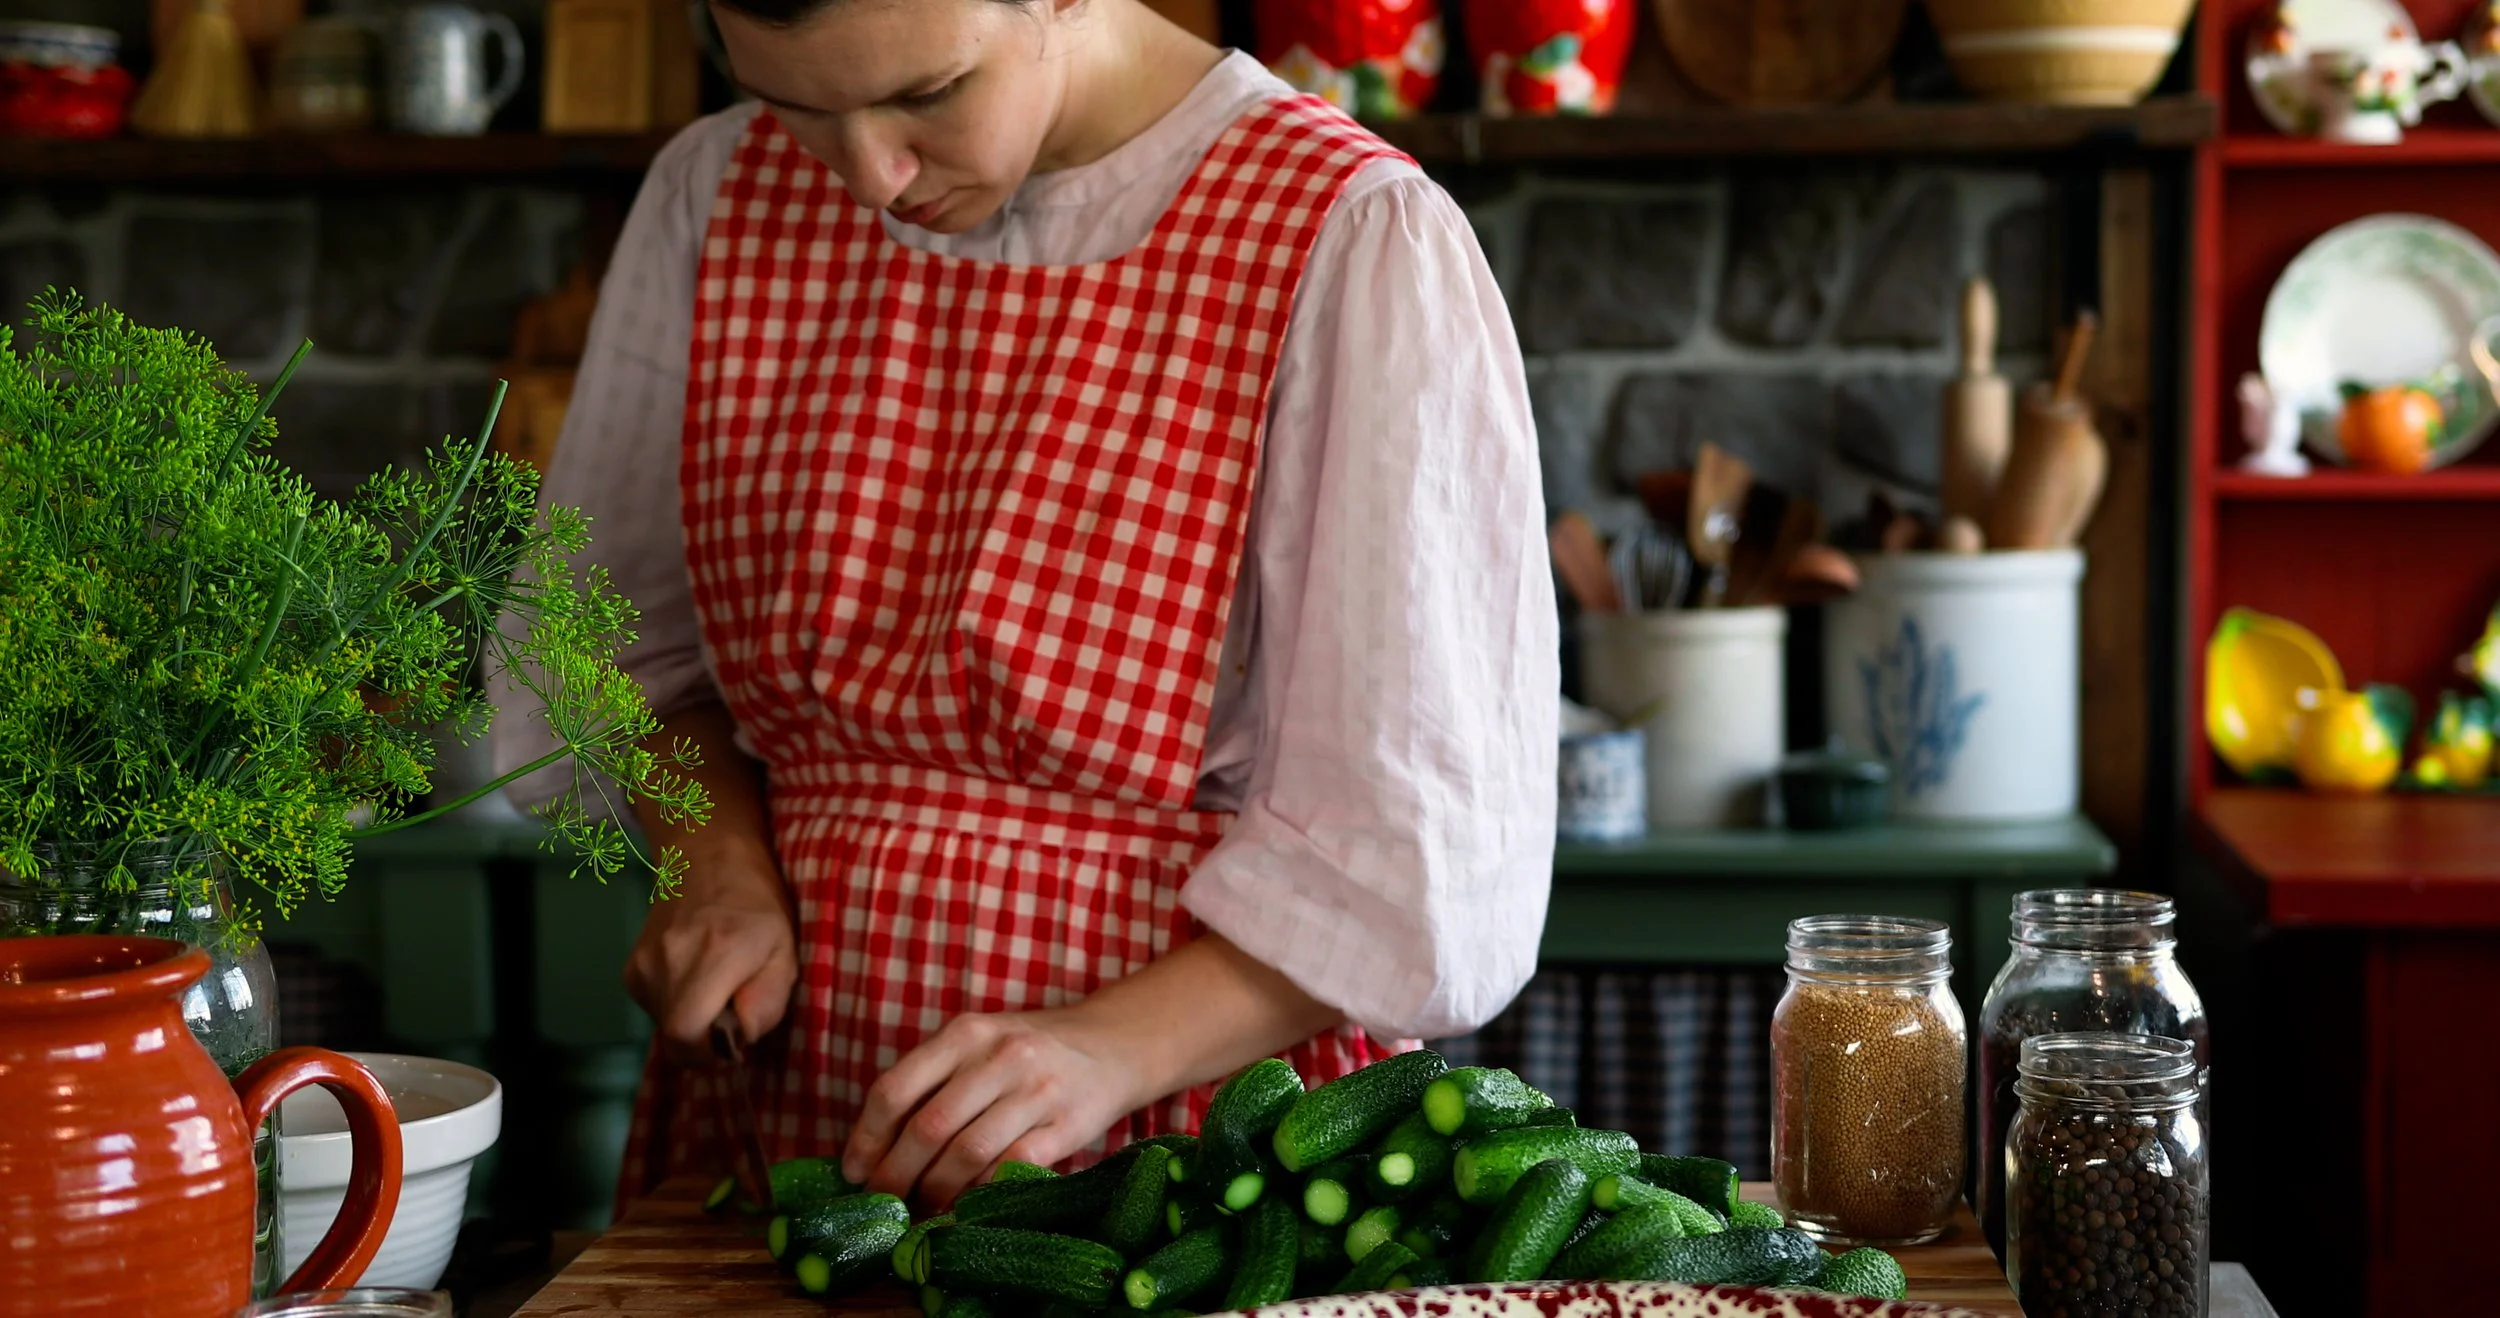
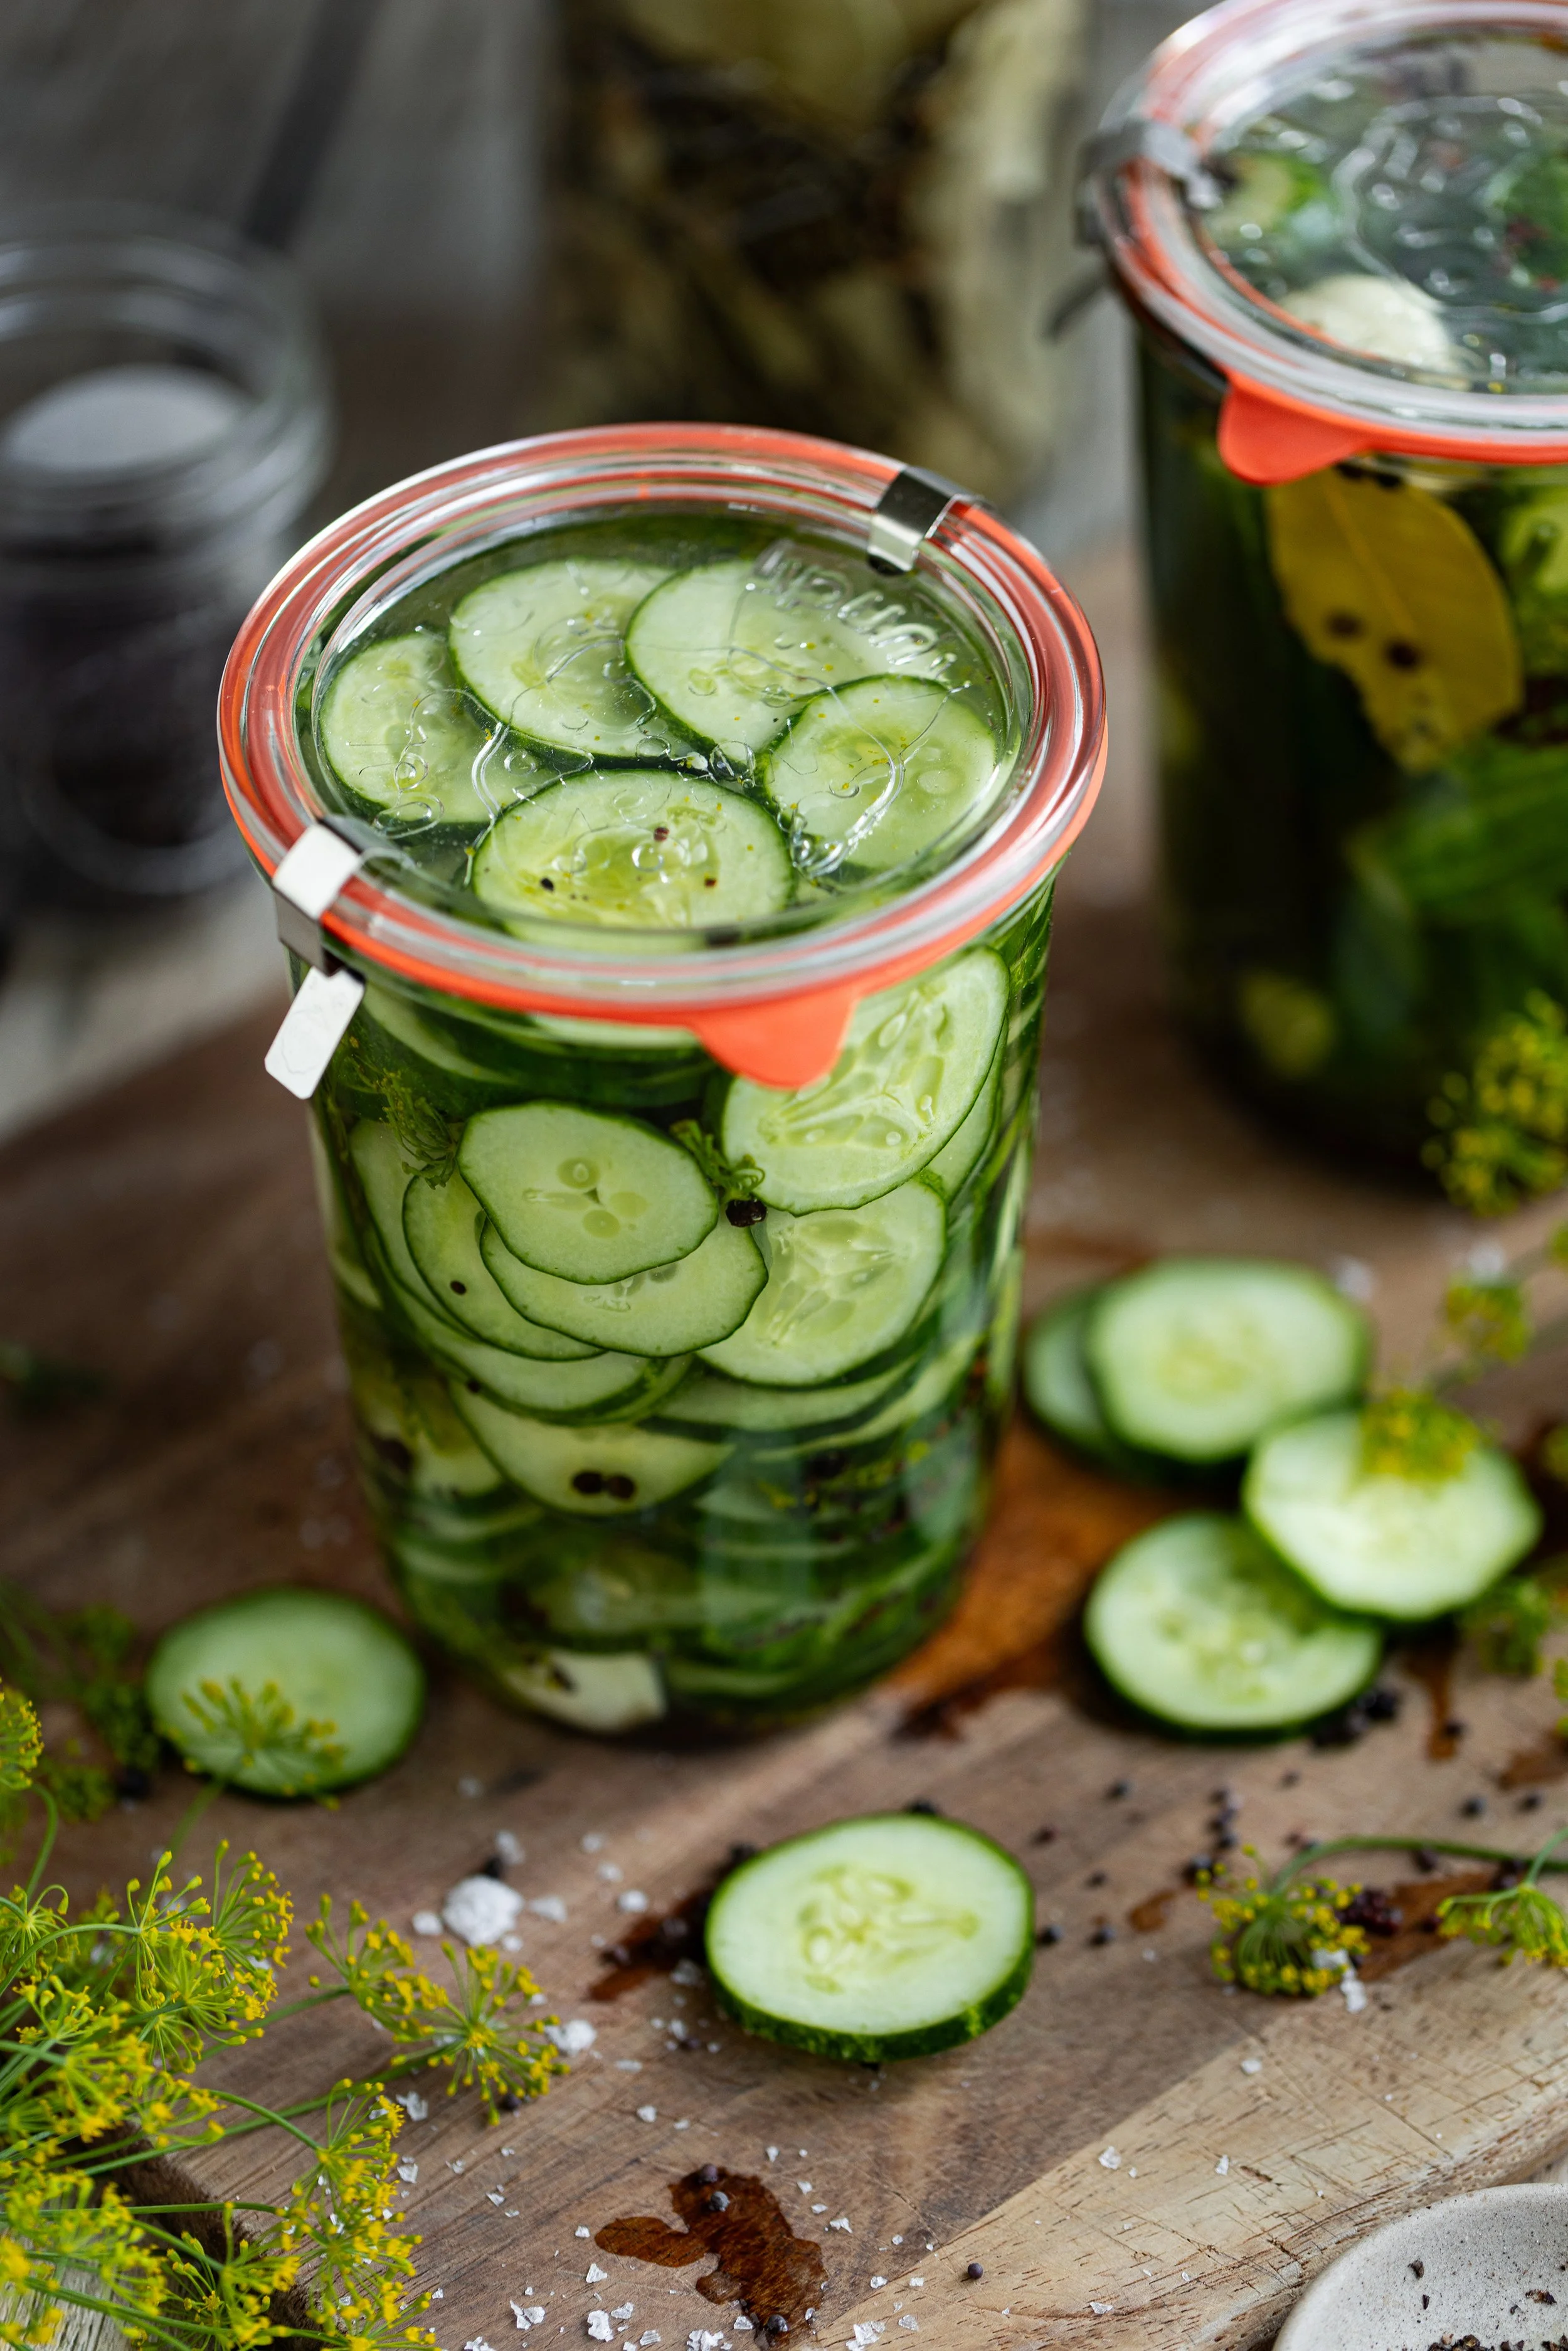
Step Three: After chilling, slice the cucumbers any way that you prefer for pickling, such as leaving them whole, slicing thickly or thinly, spears, etc.
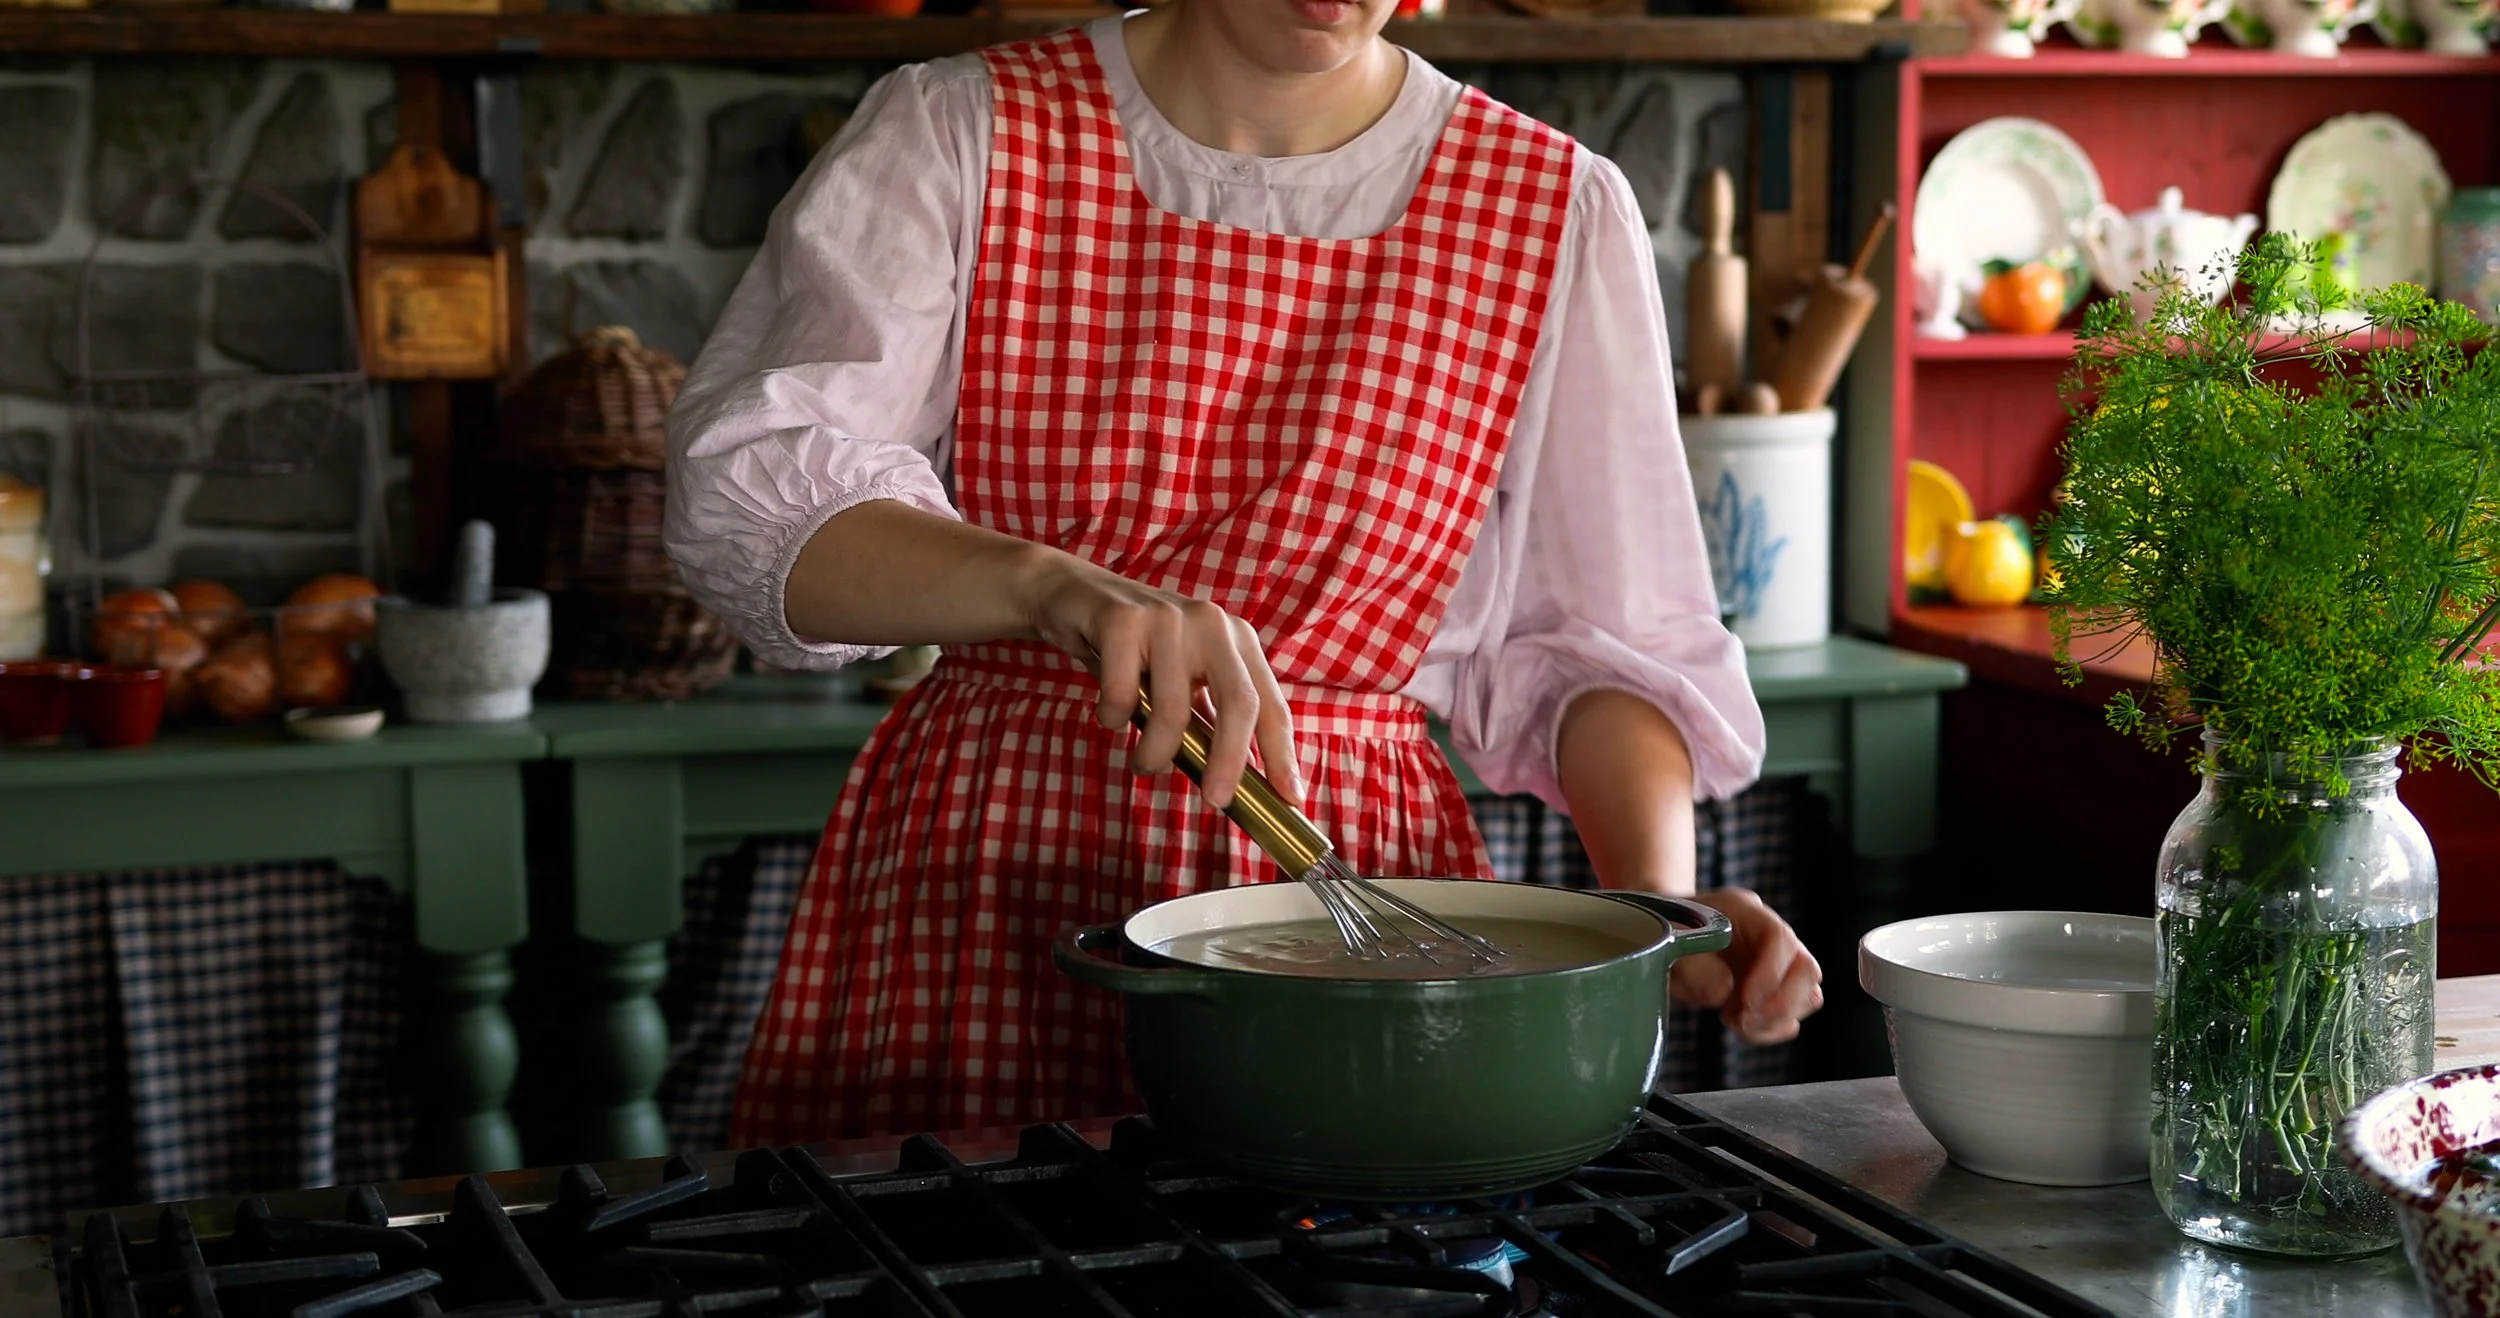
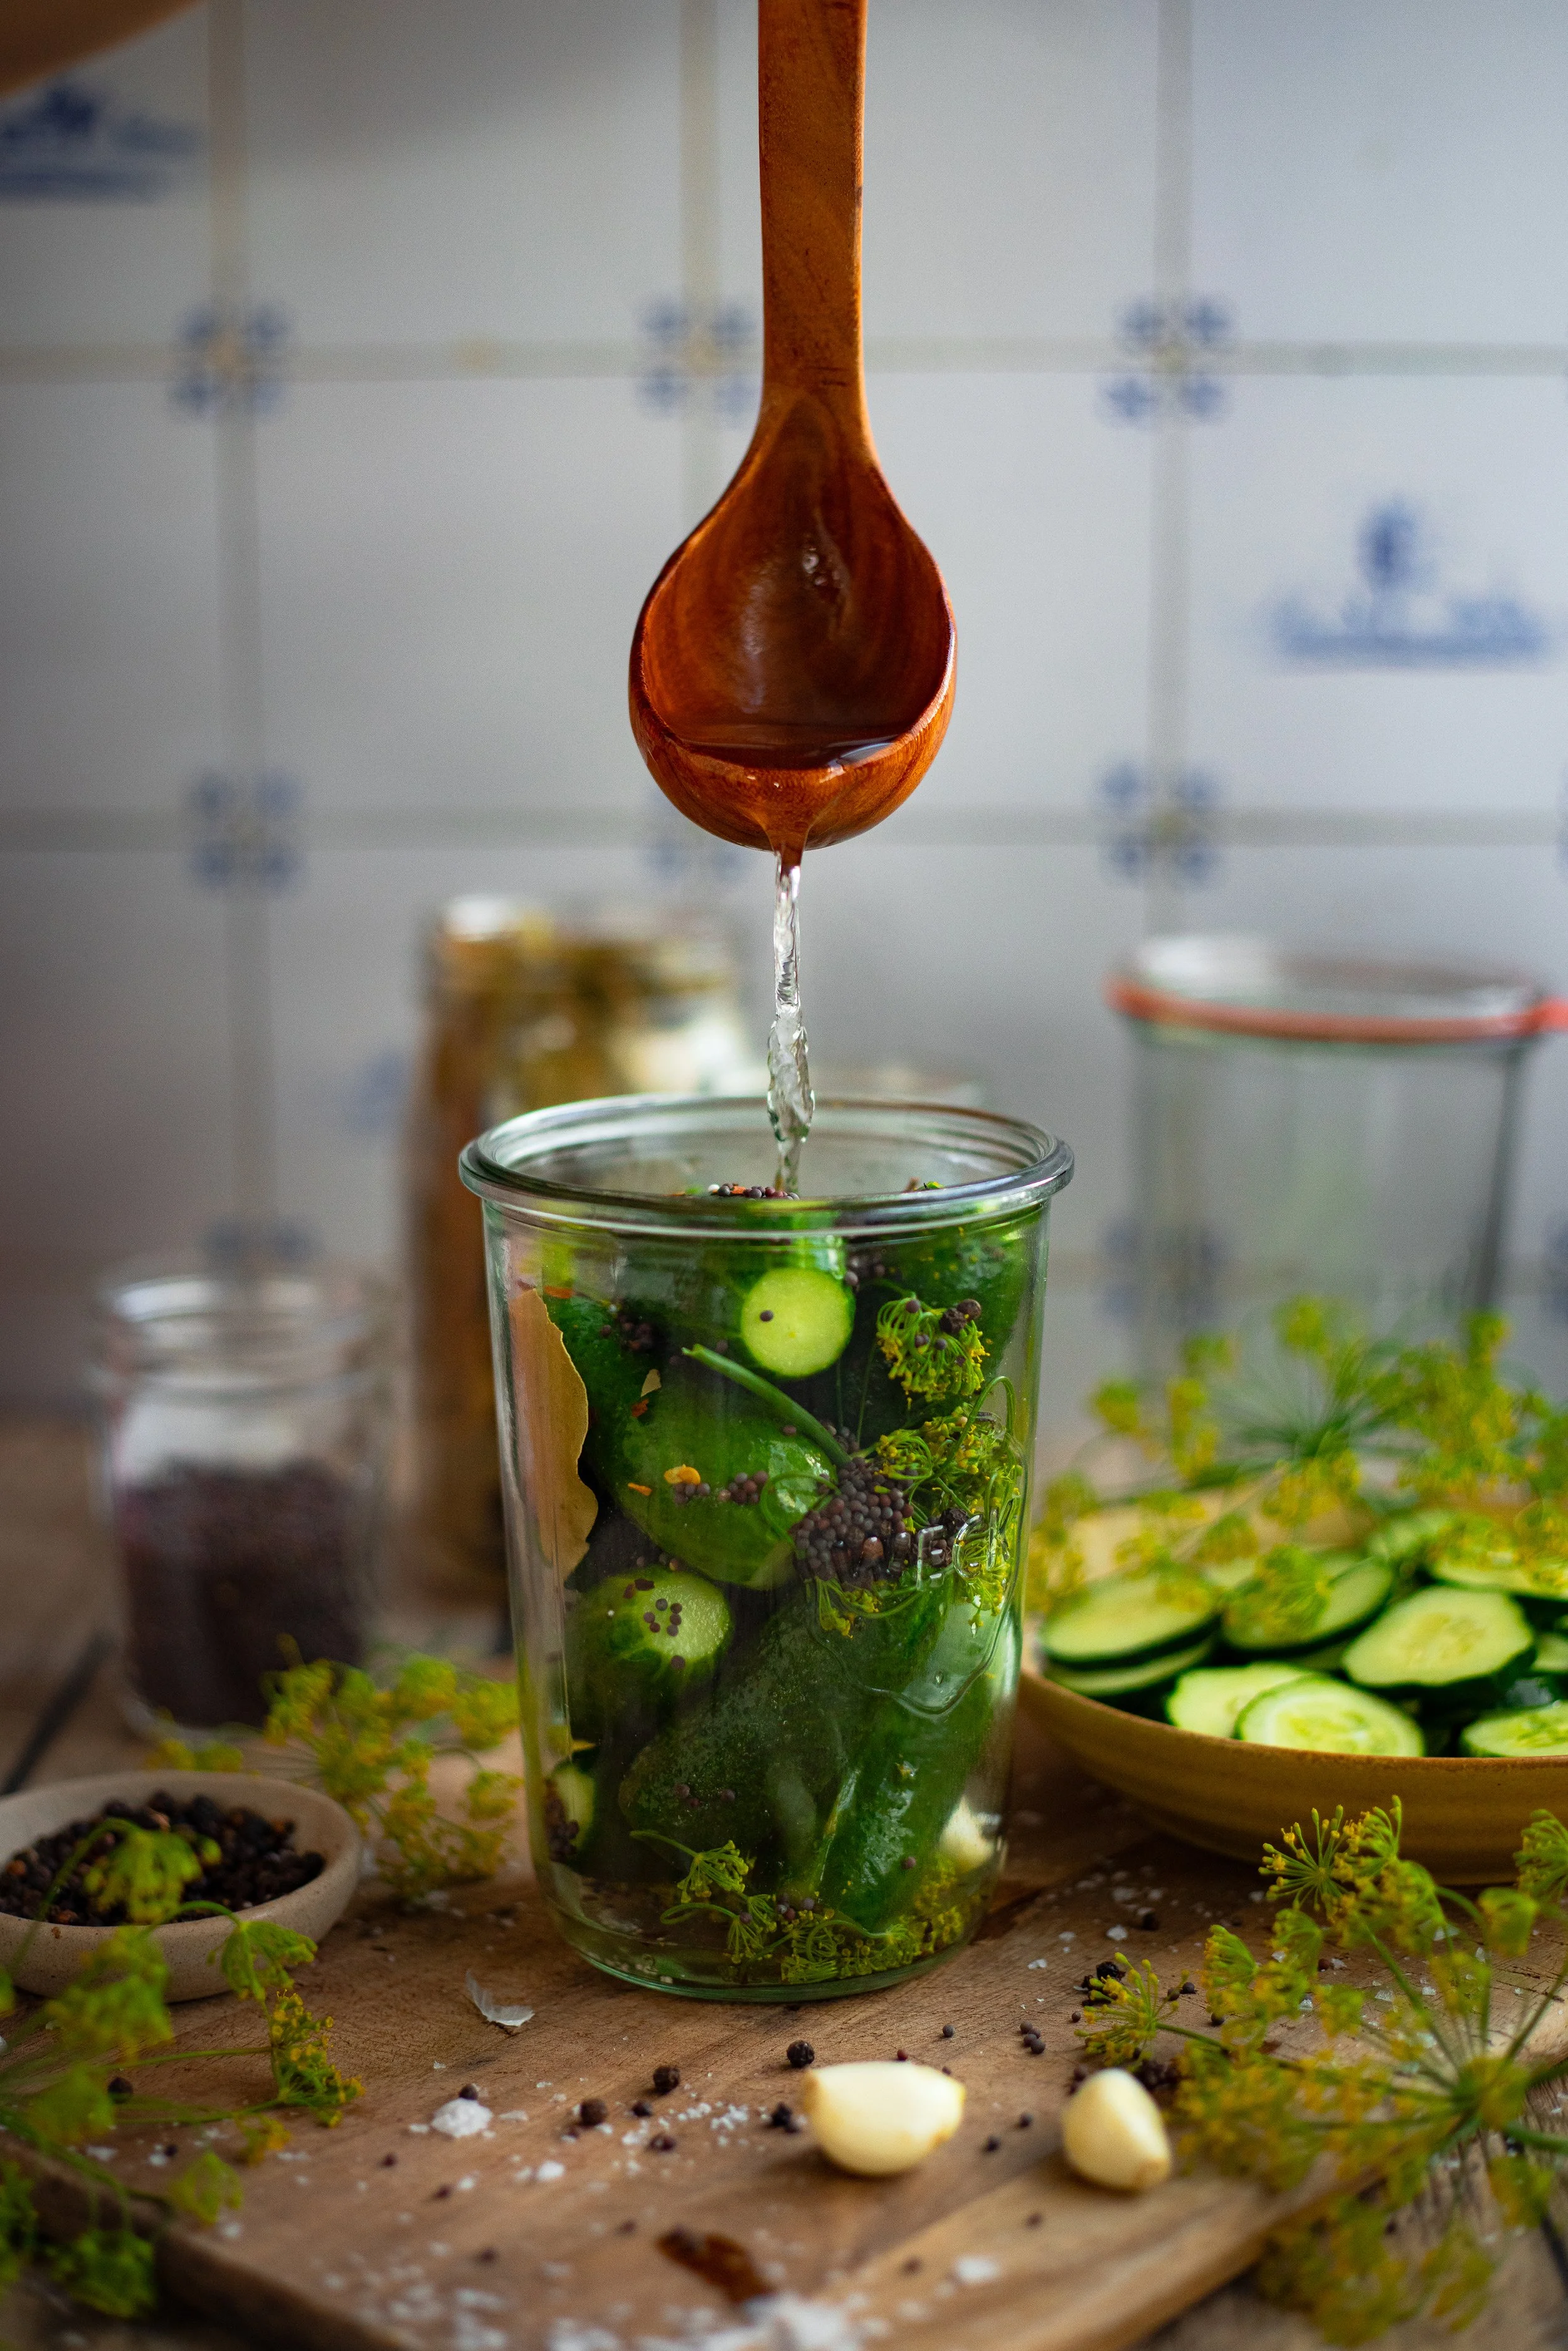
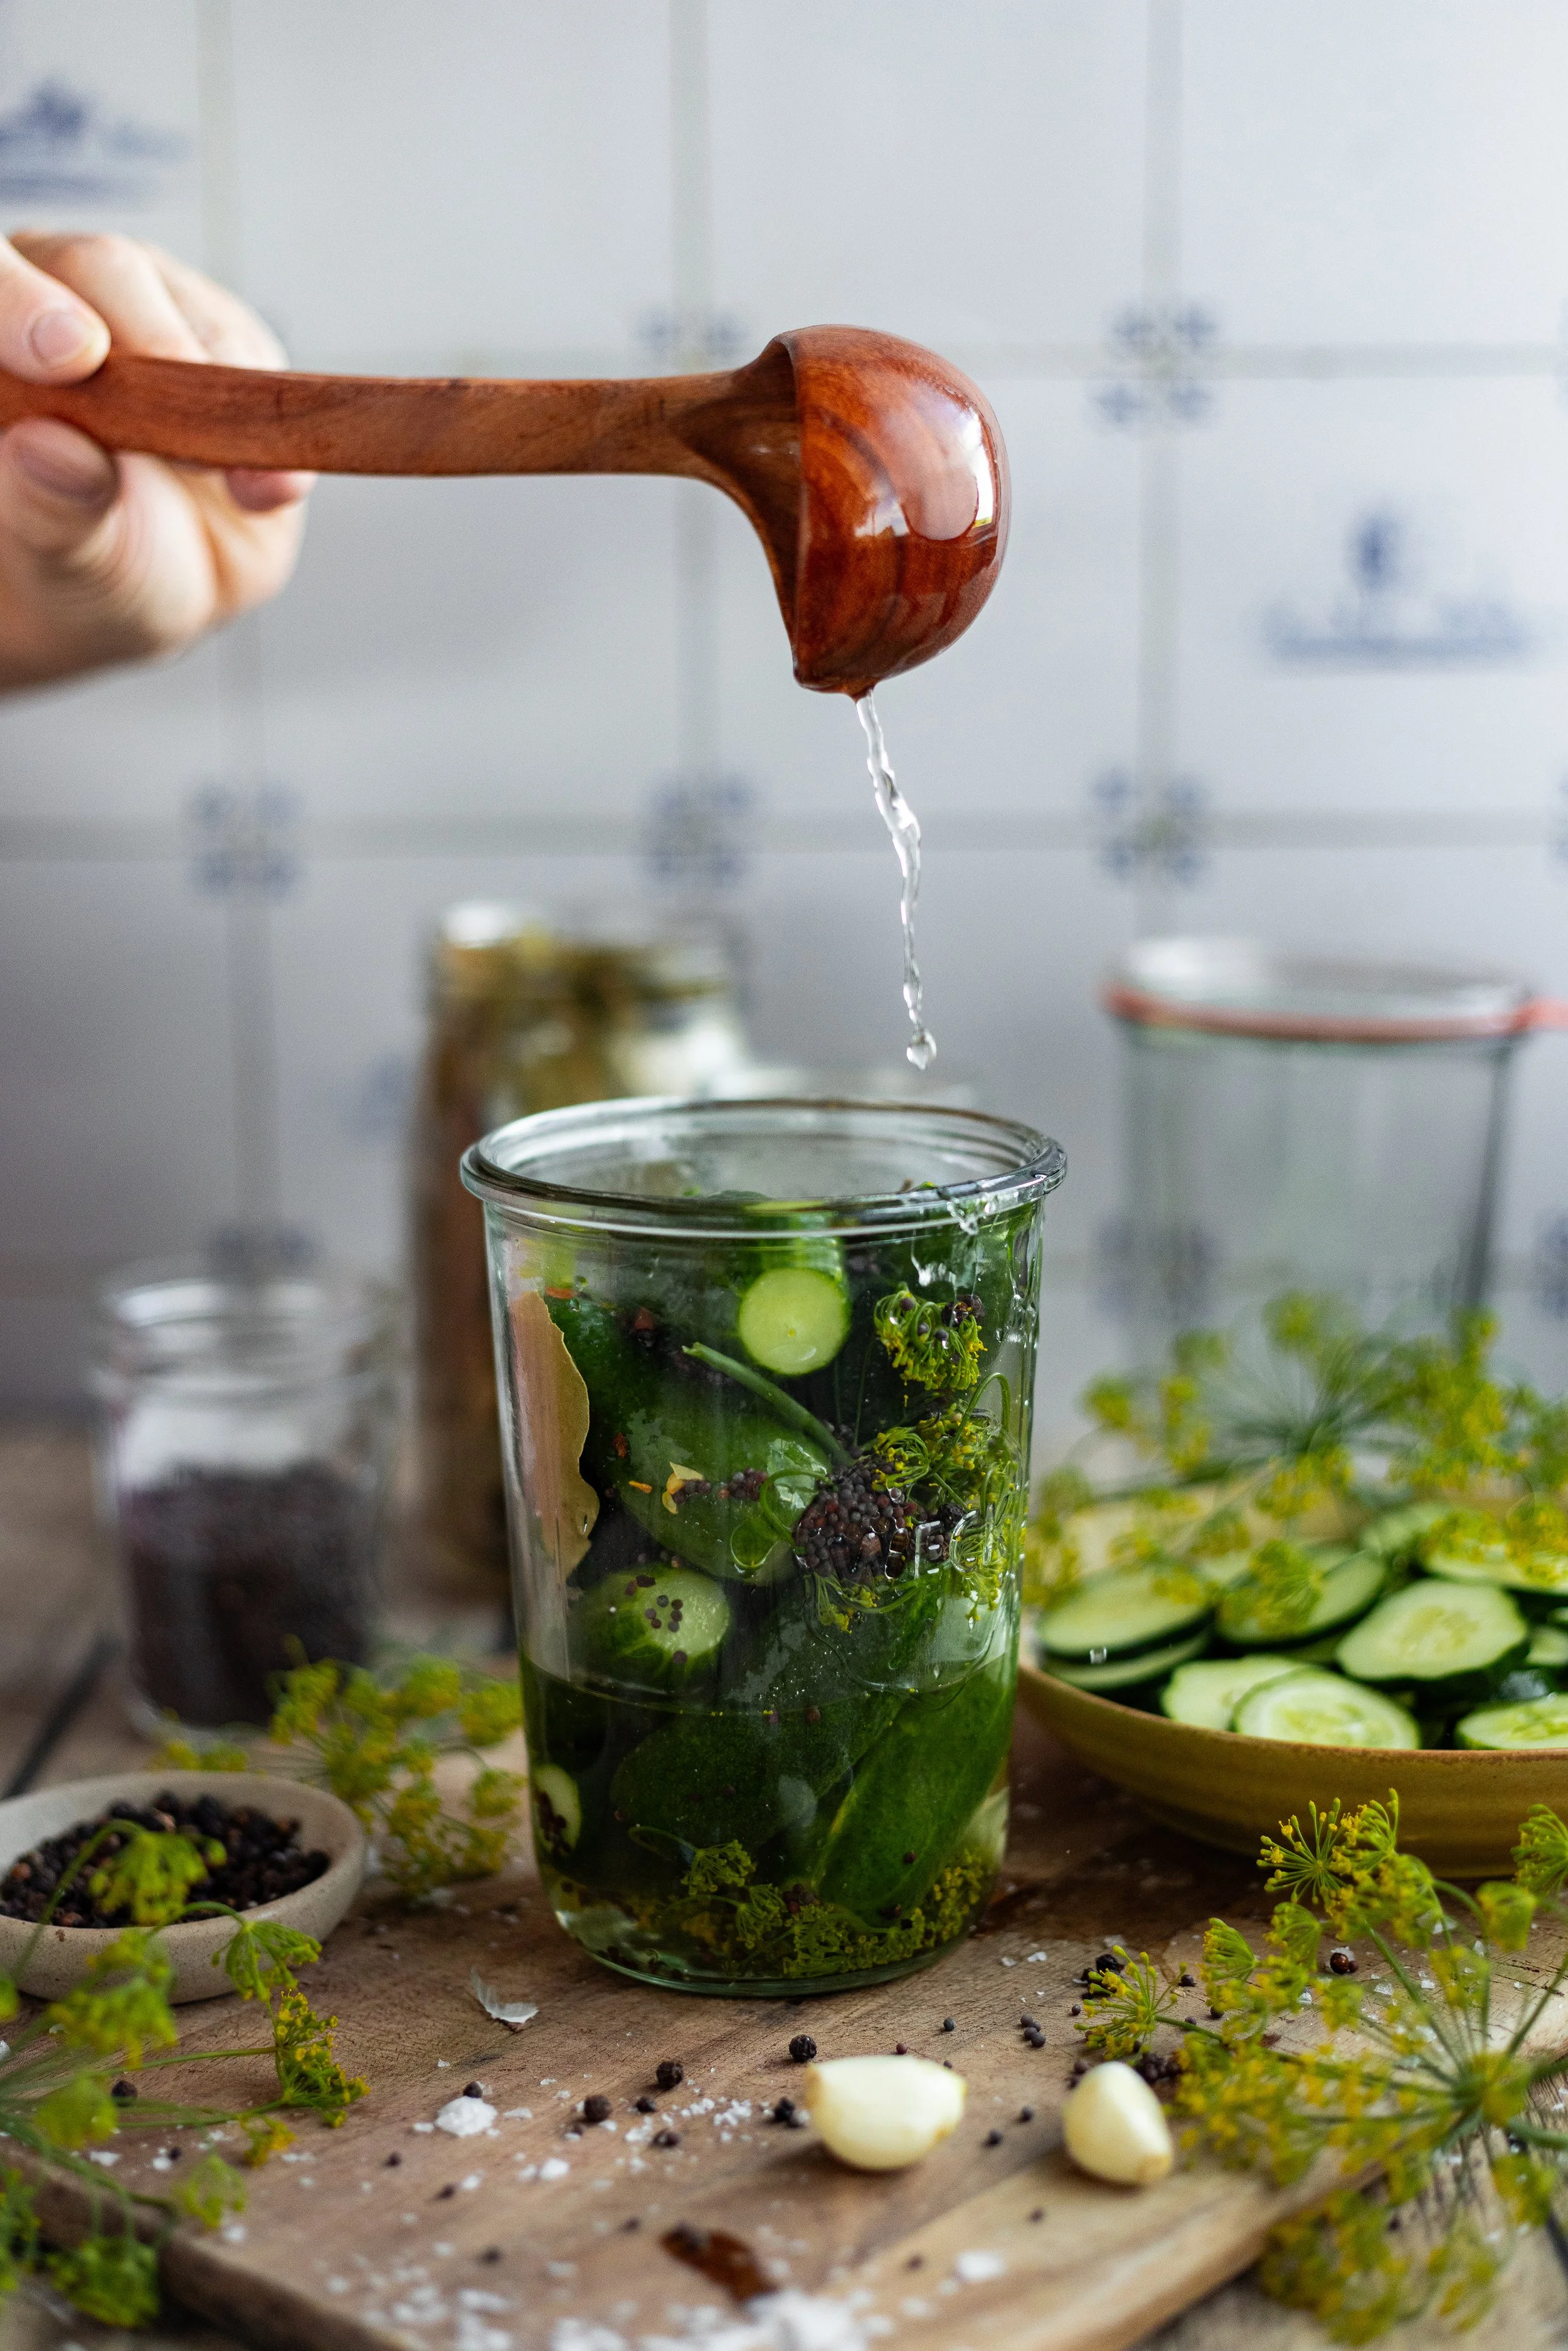
Step Four: In a large saucepan, combine the vinegar, water, pickling salt, and sugar. Whisk until the salt and sugar are dissolved. Bring to a boil over medium-high heat and immediately remove from heat, if pickling in the refrigerator. If you are canning the pickles, keep the brine at a simmer.
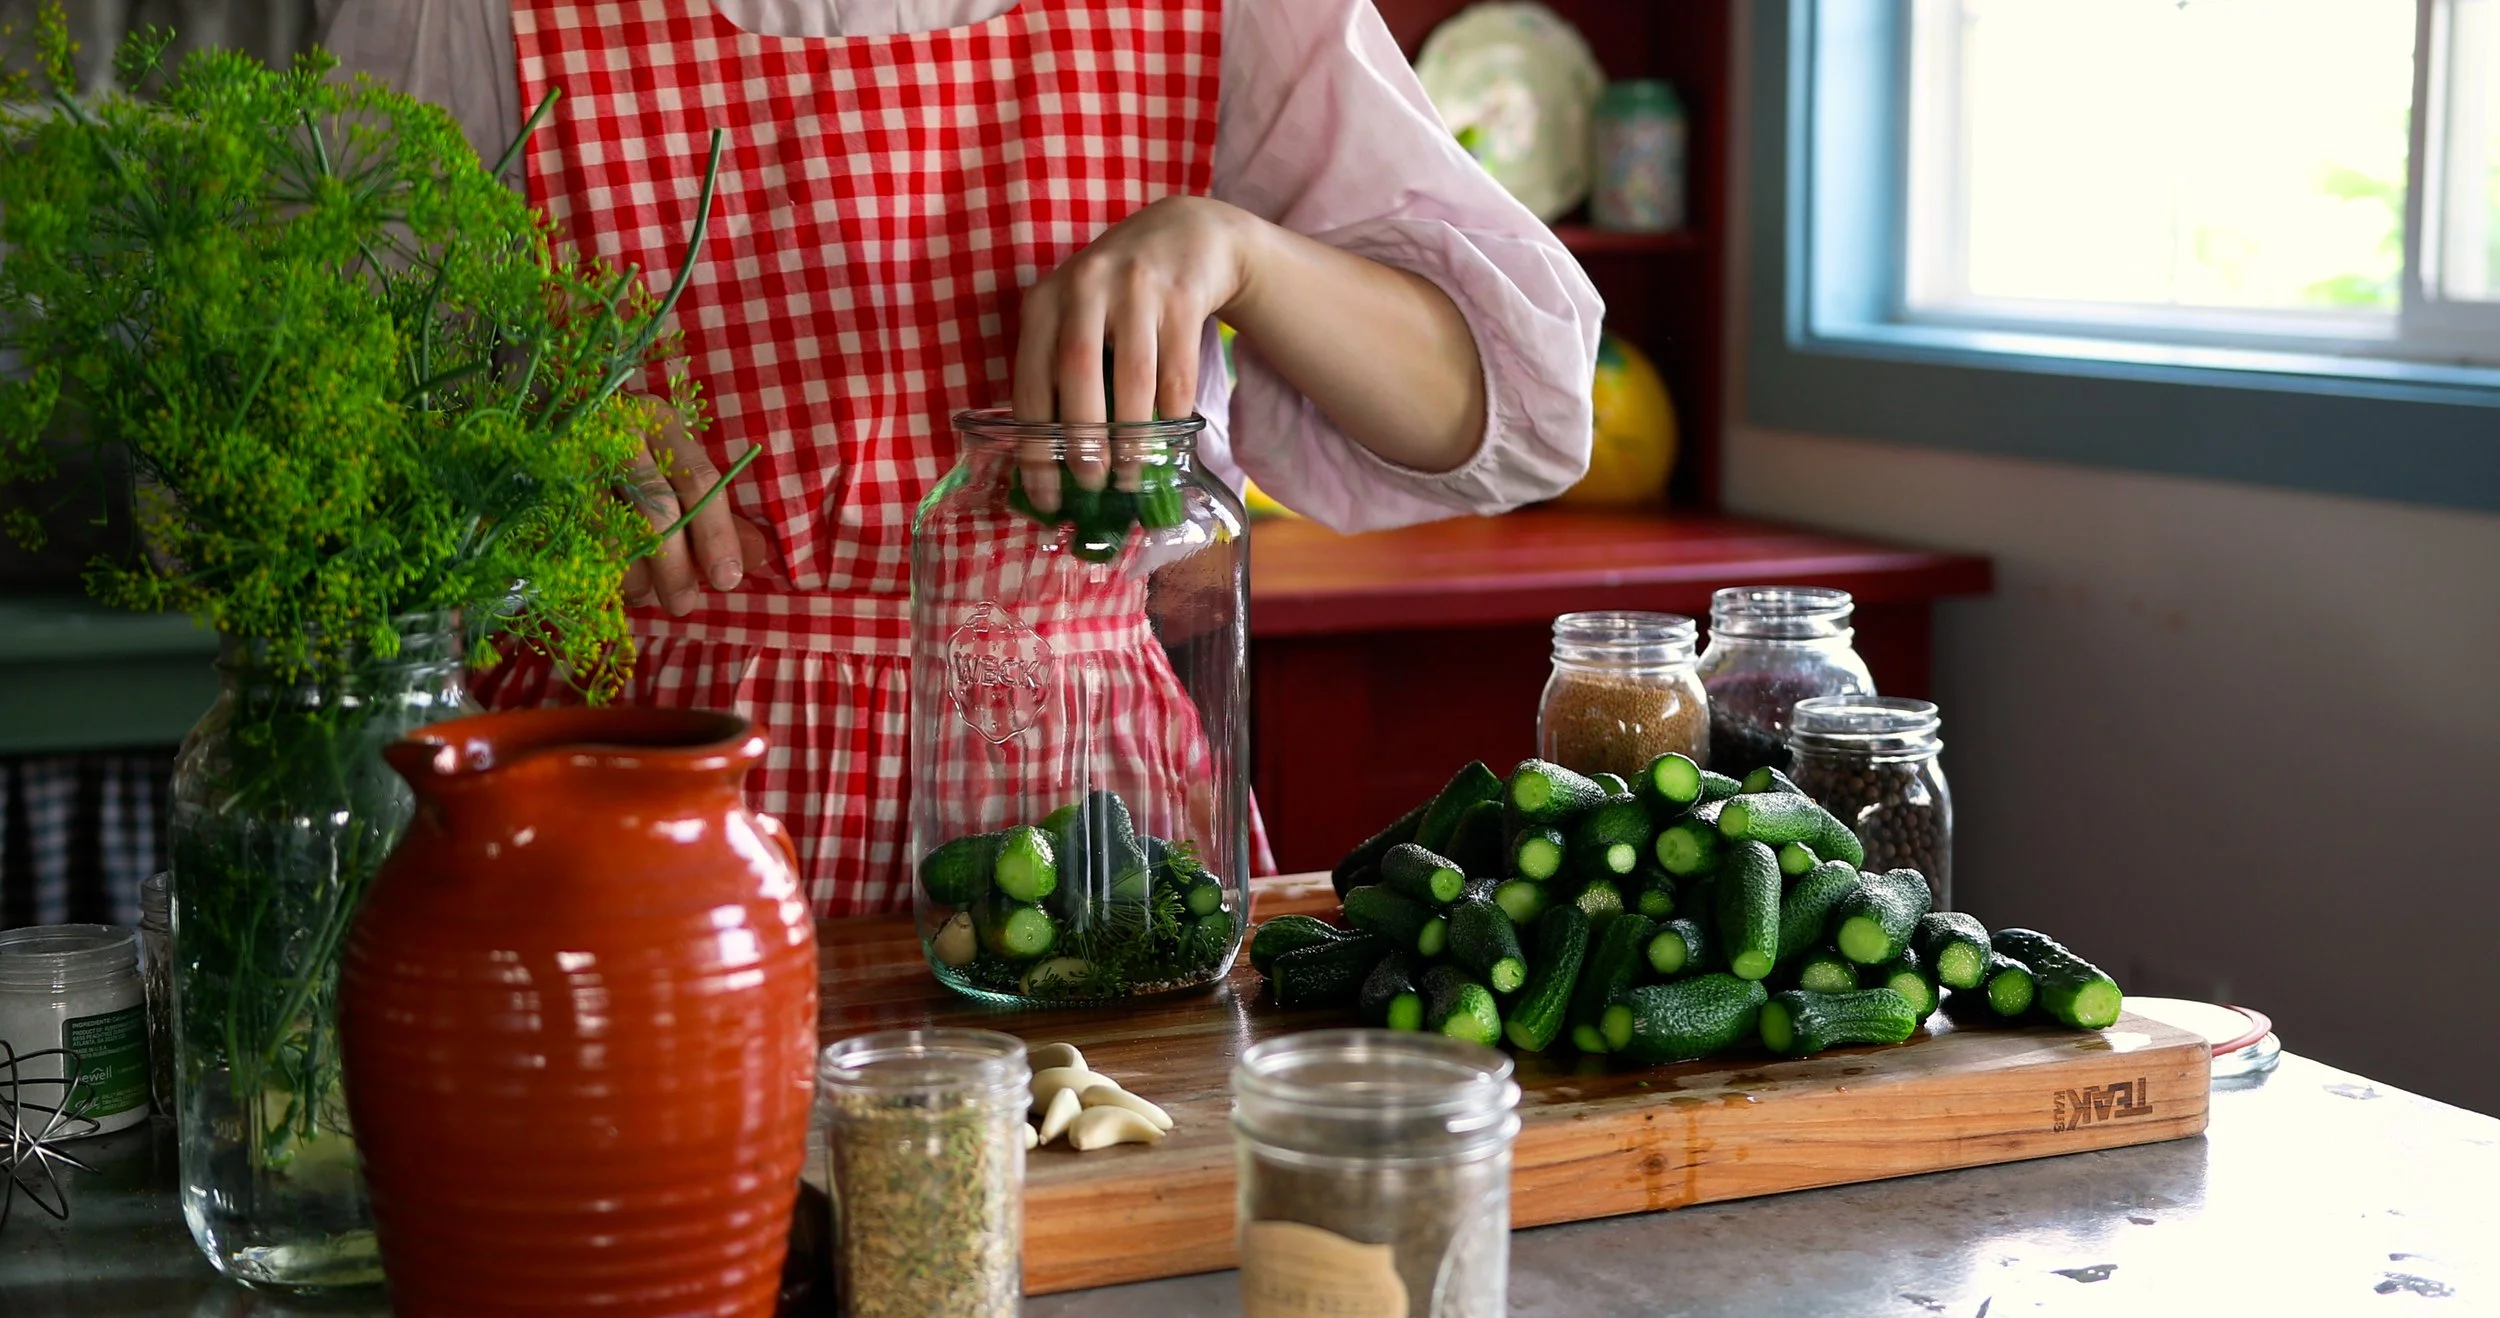
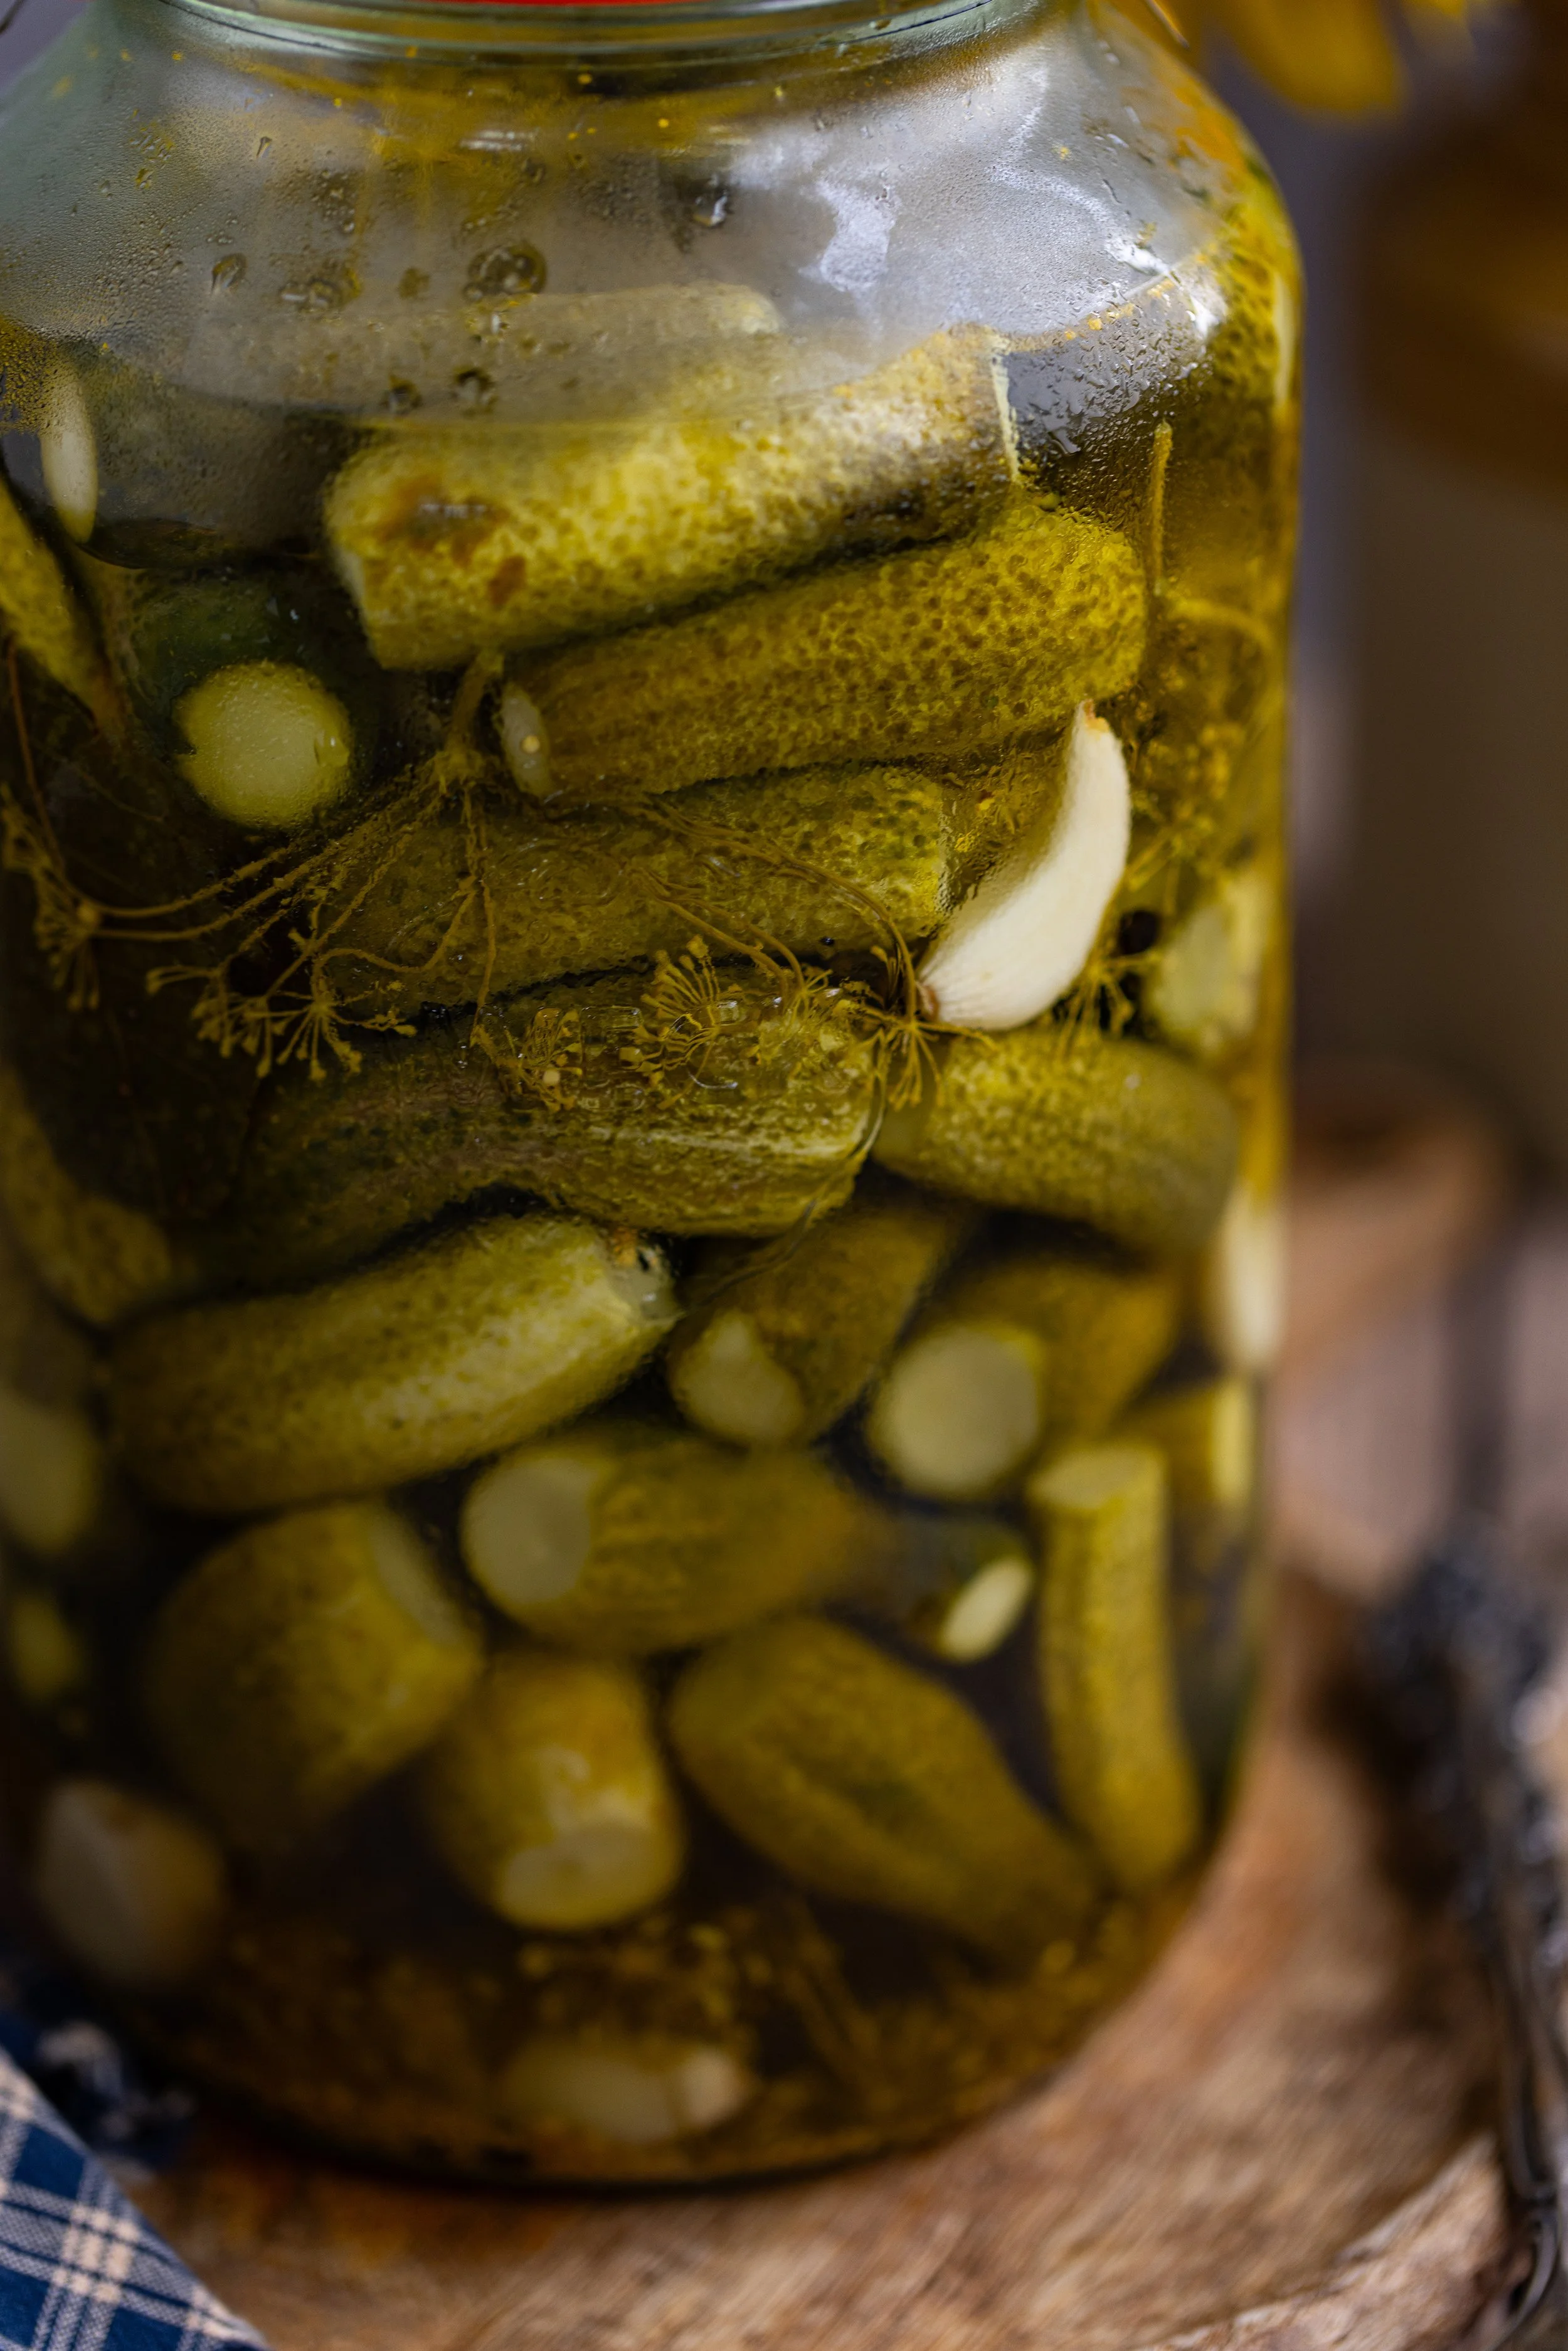
Step Five: Fill each clean PINT jar with 2 garlic cloves, 1/2 tsp mustard seed, 1 bay leaf, 2 dill flower heads, a whole nutmeg, 1/4 tsp mixed peppercorns, 3 cloves, 2 slices of ginger, and 1/8 tsp Ball® pickle crisp. DOUBLE this amount if using QUART jars.
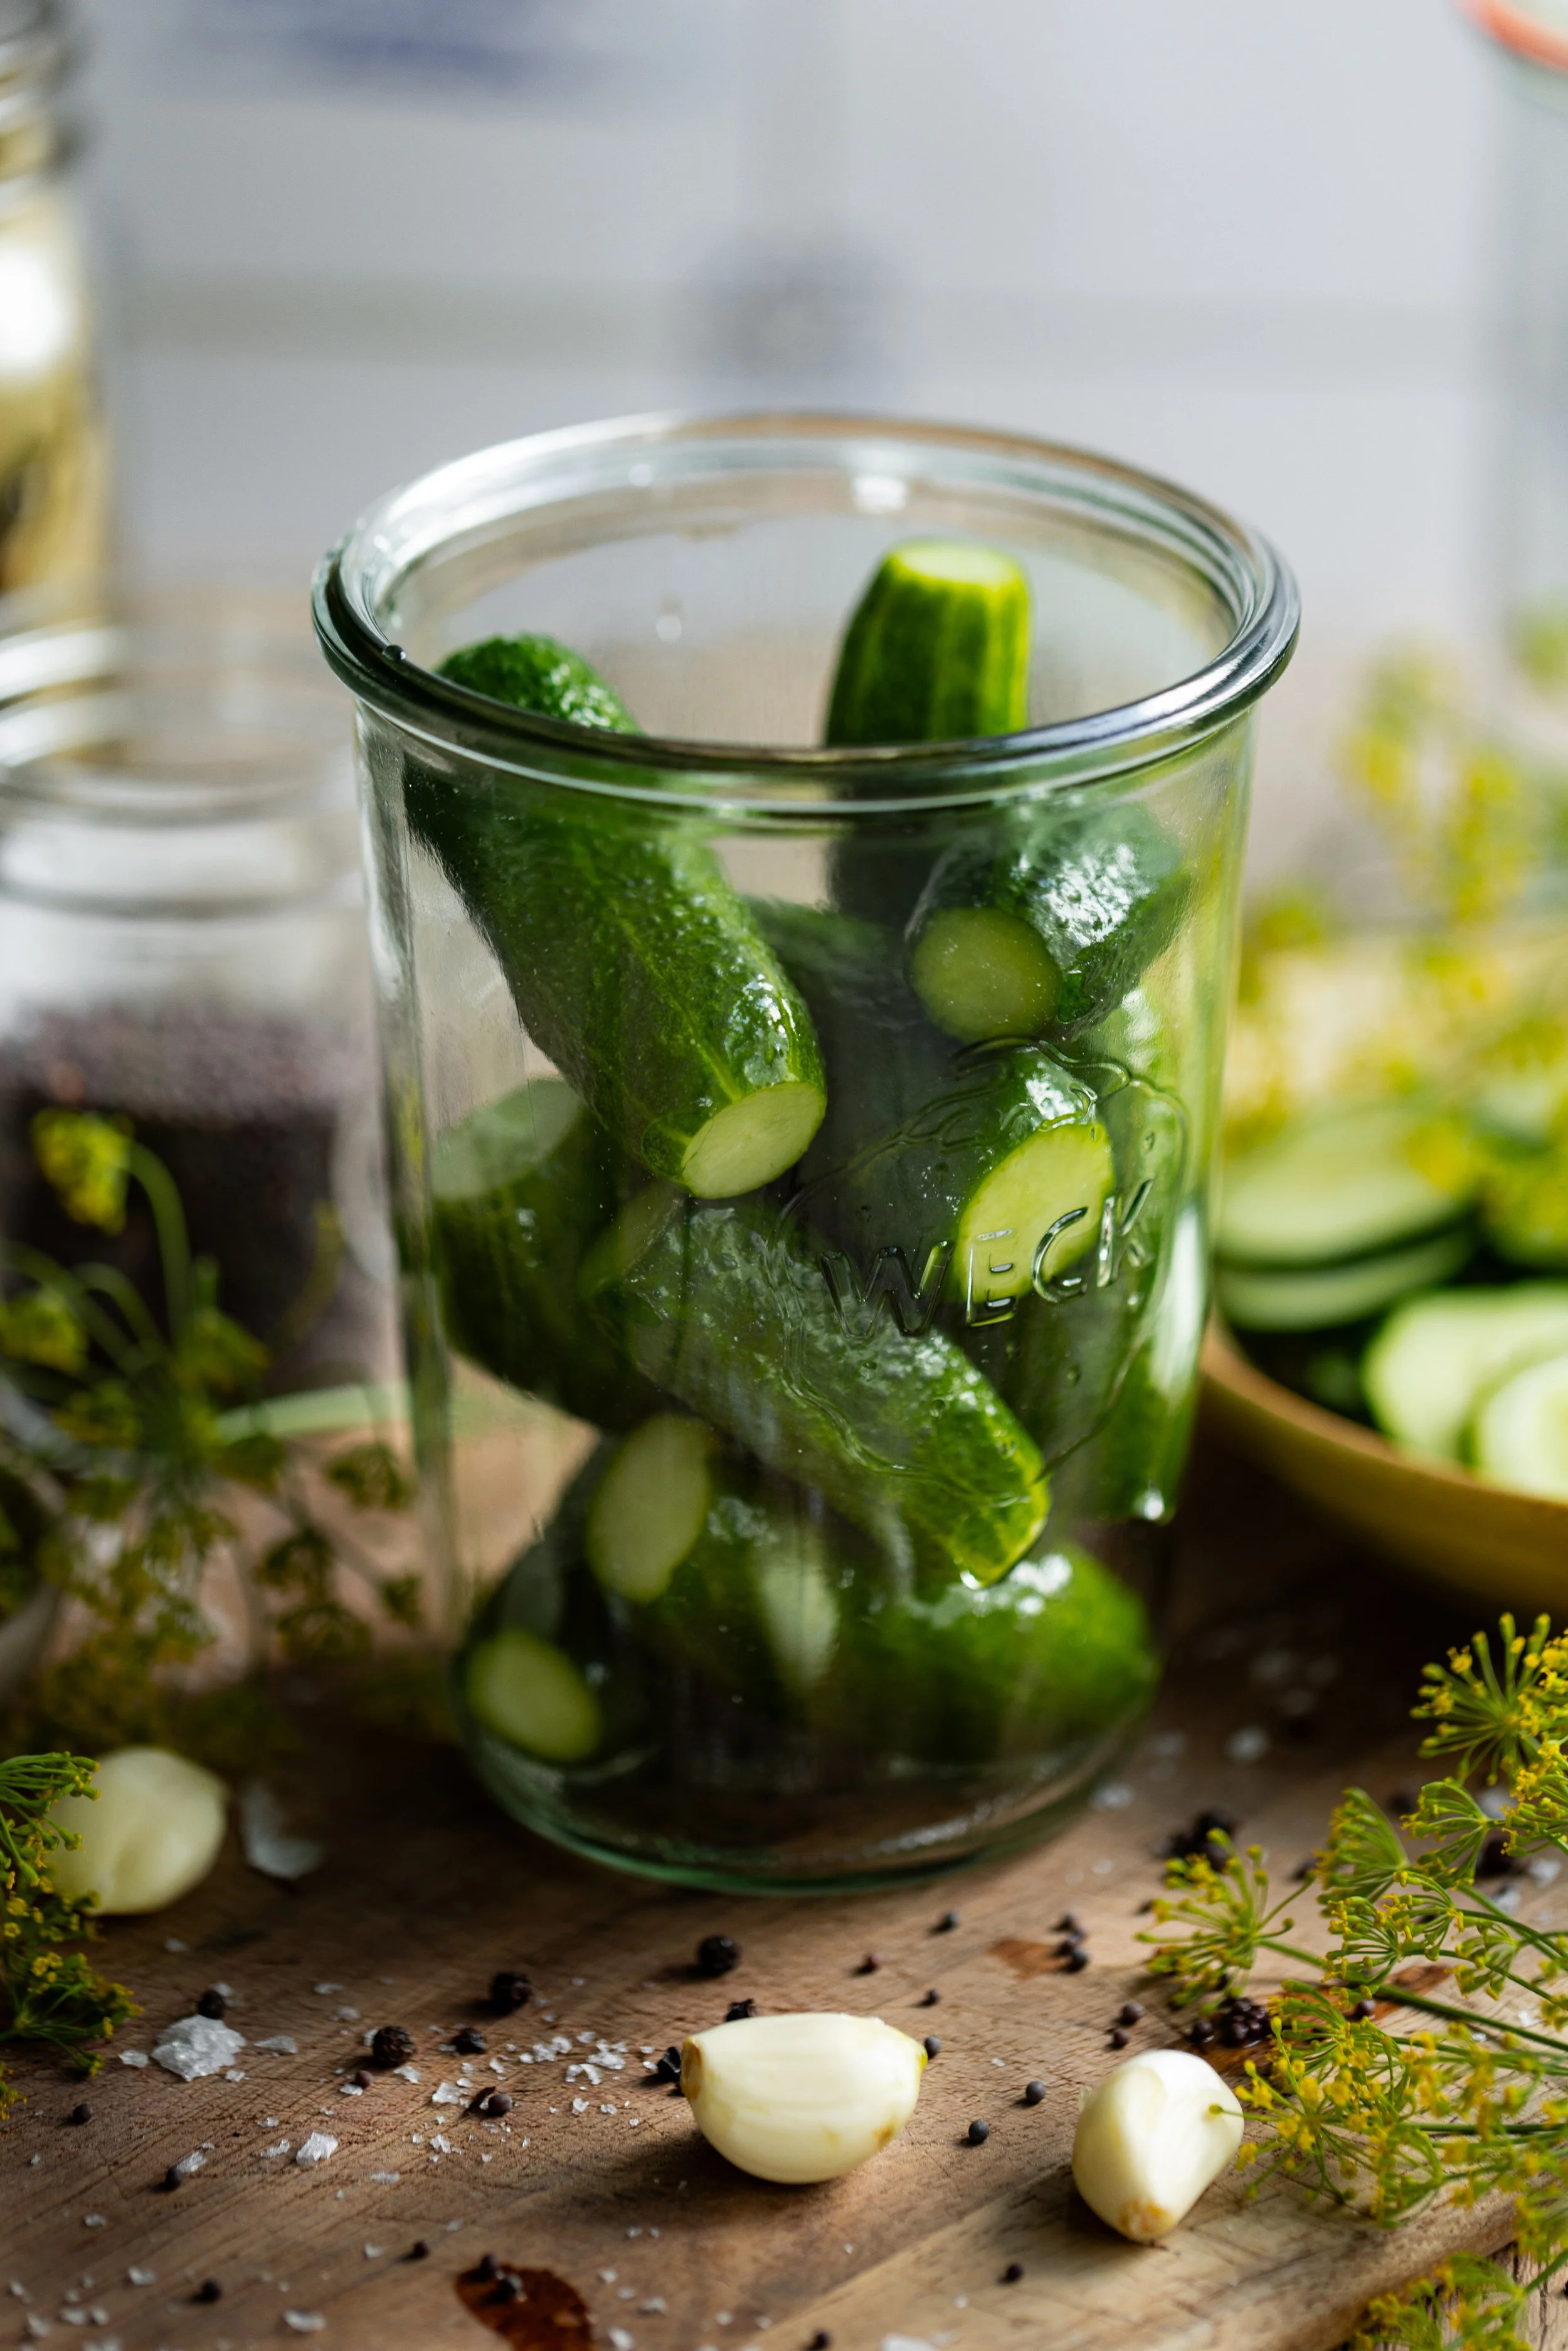
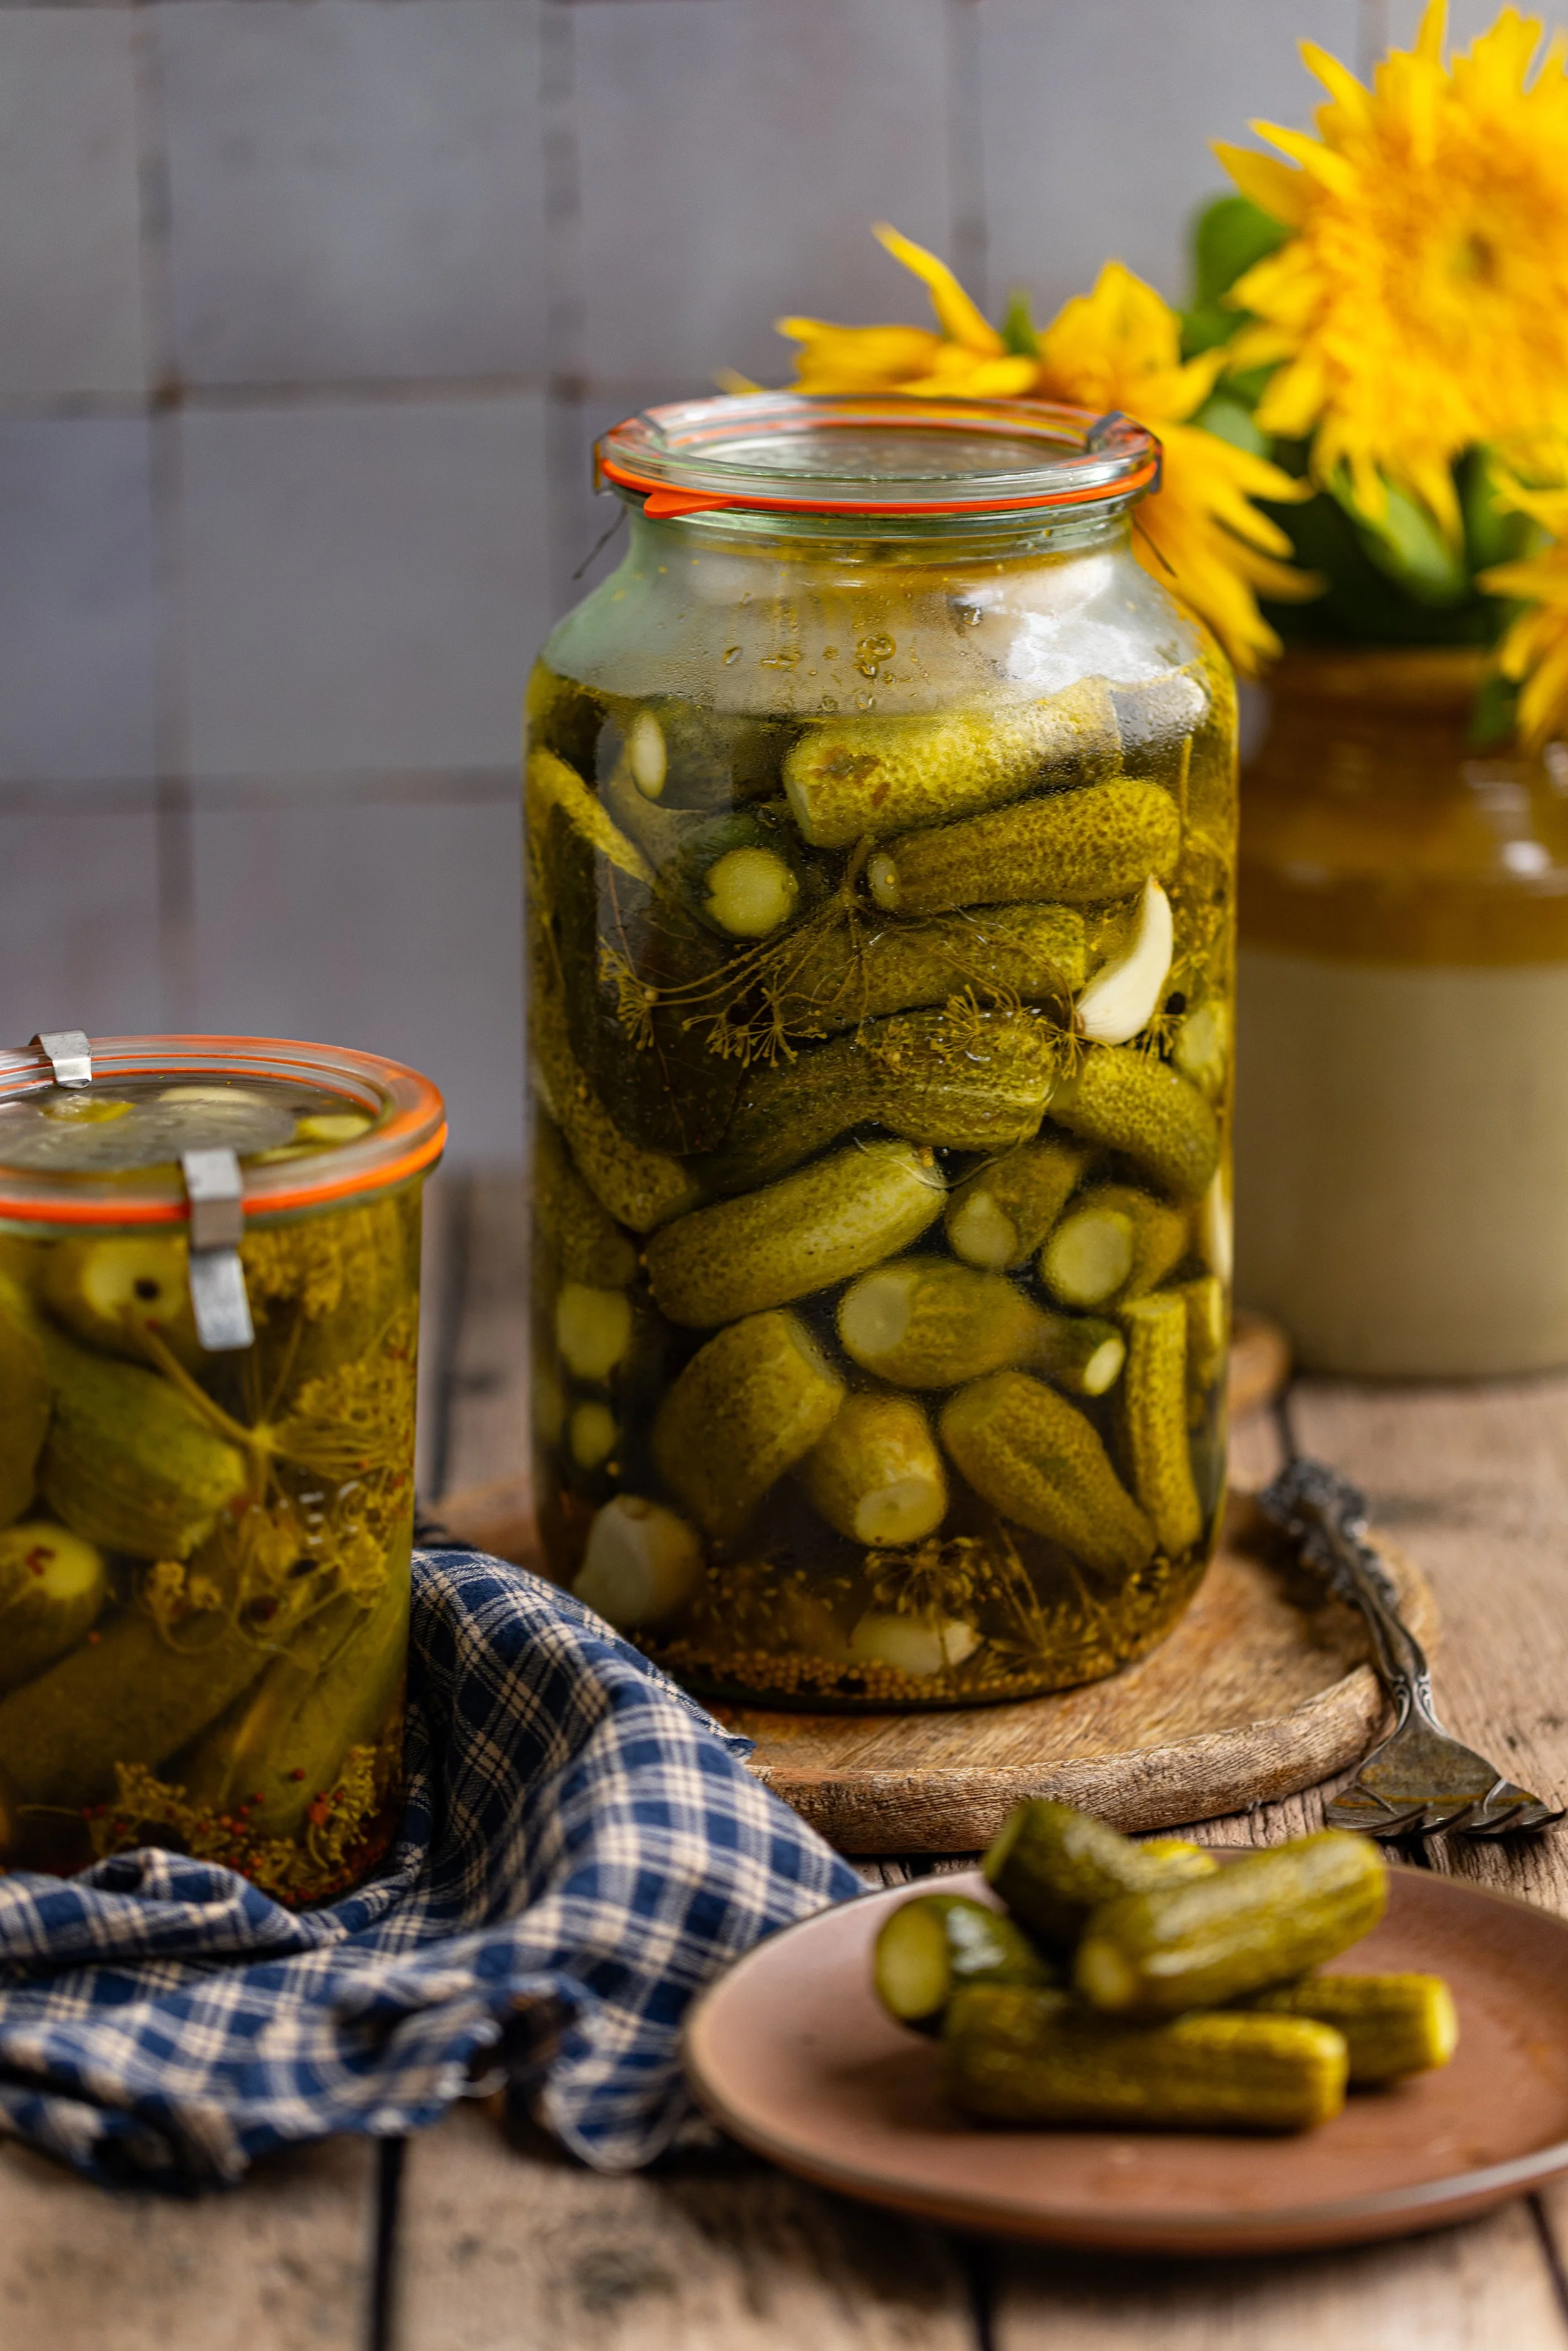
Step Six: Fill the jars with the prepared cucumbers leaving 1/2-inch headspace. Cover the cucumbers with the brine to 1/2-inch headspace, remove air bubbles with a silicone spatula or bubble popper, and add more brine to adjust headspace as necessary. Apply lids and bands to fingertip tight.
Step Seven: If you are refrigerating, let the brine cool to room temperature before placing the pickles into the fridge. Check pickles daily for flavoring. Peak flavor is usually about 1 to 2 weeks after making the pickles, and then they get softer as time goes on. The pickles can be kept in the fridge for about 3 to 4 months.
Alternate Preservation Methods
Hot Water Bath Canning Method: Rather than pickling these cucumbers in the fridge, they can be canned in a hot water bath for long term storage. Pickles are a high acid food, making them safe for hot water bath canning. Canned pickles, when done correctly, can be stored for 18 months or longer at room temperature in a cool, dark place such as a pantry cupboard. You can find instructions for canning on the recipe card below.
Fermented Dill Pickles: Alternately, you can make your pickles by fermenting them. The recipe is a bit different than this one, but the method is generally the same. You can read how to ferment pickles in this post!
Storage Instructions
Store in the refrigerator for up to 3 to 4 months.
Keep your pickles fully submerged in the brine for the best flavor. Use small fermentation weights to help keep your veggies under the brine.
Do not store at room temperature. These pickles must be refrigerated to be consumed safely.
If canned, store the pickles in the fridge for about 3 to 4 weeks after opening.
Serving Suggestions
These yummy quick pickled cucumbers are a lovely addition to summer meals and picnics! They add a tangy crunch to sandwiches, burgers, brats, and hot dogs. Try these bright and fresh recipes to enjoy alongside your crunchy dill pickles:
Recipe Variations
Add spices like turmeric or ginger for added flavor and color.
Use rice vinegar and a splash of sesame oil for an Asian-inspired version.
Toss in a few slices of jalapeño peppers for a spicy batch of hot pickles.
Final Thoughts
So far we have been loving the refrigerator pickles the most! Which do you prefer? I love that we can make both options; some to enjoy now and some to enjoy later into the winter and spring months. I have been chopping my pickles super chunky. I noticed they were being sold at a little roadside cart this way, and I thought it was just so old-fashioned and rustic looking!
In all, pickle making is really personal. The amount of garlic, dill, and other flavorings are up to you! If you are canning, the general rule of thumb is 1:1 ratio of vinegar to water for safely canning pickles at the appropriate acid levels. I would always suggest using a USDA approved canning recipe, if possible.
Have you made pickles yet this year?
xoxo Kayla

Easy Refrigerator Dill Pickles
These refrigerator dill pickles are crisp, crunchy, tangy, and are ready to eat in about 1 to 2 weeks. The perfect afternoon snack or accompaniment to your summer burgers and brats!
Ingredients
- 6 lbs (2.8 kg) pickling cucumbers, washed and blossom ends removed
- 8 cups (1.89 L) distilled white vinegar
- 6 cups (1,440 ml) water
- 1 cup (220 g) pickling salt, or non-iodized salt
- 1 cup (200 g) granulated sugar
- 32 cloves garlic, peeled
- 2 tbsp (20 g) yellow mustard seeds
- 16 bay leaves
- 32 dill flower heads
- 1 tsp calcium chloride granules (Ball® Pickle Crisp)
Instructions
- Clean and sanitize jars, lids, and bands. If canning, prepare your hot water bath canner.
- Wash and trim both ends off the cucumbers, about 1/8-inch. Place the cucumbers in an ice water bath and place in the refrigerator for at least 1 hour to help them crisp up.* I personally think 3 hours is best!
- After chilling, slice the cucumbers any way that you prefer for pickling, such as leaving them whole, slicing thickly or thinly, spears, etc.
- In a large saucepan, combine the vinegar, water, pickling salt, and sugar. Whisk until the salt and sugar are dissolved. Bring to a boil over medium-high heat and immediately remove from heat, if pickling in the refrigerator. If you are canning the pickles, keep the brine at a simmer.
- Fill each clean PINT jar with 2 garlic cloves, 1/2 tsp mustard seed, 1 bay leaf, 2 dill flower heads, a whole nutmeg, 1/4 tsp mixed peppercorns, 3 cloves, 2 slices of ginger, and 1/8 tsp Ball® pickle crisp. DOUBLE this amount if using QUART jars.
- Fill the jars with the prepared cucumbers leaving 1/2-inch headspace. Cover the cucumbers with the brine to 1/2-inch headspace, remove air bubbles with a silicone spatula or bubble popper, and add more brine to adjust headspace as necessary. Apply lids and bands to fingertip tight.
- If you are refrigerating, let the brine cool to room temperature before placing the pickles into the fridge. Check pickles daily for flavoring. Peak flavor is usually about 1 to 2 weeks after making the pickles, and then they get softer as time goes on. The pickles can be kept in the fridge for about 3 to 4 months.
- If you are canning these pickles, you should fill each jar individually to make sure the jars remain hot. Once all jars are filled, process the jars in the canner for 15 minutes. Remove the canner lid and let the jars stand in the canner for 5 minutes before removing. Check seals after 12 to 24 hours. Store in a dark space for up to 18 months.
Notes
*Placing your cucumbers in an ice bath or in the fridge for an hour is entirely optional, but it does help if your cucumbers were not picked within 24 hours of pickling!
Nutrition Facts
Calories
237