Bread and Butter Pickles: Canning Recipe & Guide
This post may contain affiliate links, please see our privacy policy for more information.
Crisp and crunchy, these Bread and Butter Pickles are an old-fashioned pantry staple. Made with thinly sliced cucumbers and onions and soaked in a sweet brine flavored with turmeric, these distinct yellow pickles are delicious to enjoy on your favorite sandwich or served on a relish plate with meats, cheeses, and crackers. In this easy canning guide, you can learn how to make and preserve a small batch of bread and butter pickles to savor all winter long.

If you have never tried bread and butter pickles, their distinct sweet-and-tangy flavor profile may be unfamiliar to you. These pickles are a staple for relish trays or charcuterie spreads, with their unique yellow appearance. These unique pickles, generally made from thinly sliced cucumbers and onions soaked in a sweet turmeric brine, are believed to have originated during the Depression era in the United States. They were so named because they were commonly eaten between two slices of bread to create a sandwich when meats and cheeses were scarce and unaffordable. Because cucumbers are cheap and generally plentiful in the summer months, these were an easy and flavorful preserve to make. Today, they are a nostalgic treat for many and have become a staple in many people’s pantries.
Best Cucumbers for Pickling
For bread and butter pickles, any type of cucumber will work, but there are some varieties that are more enjoyed than others! Here are my favorite cucumbers for making pickles:
Adam Gherkin. This is going to be a common variety to find, and they’re excellent for making whole pickles because of their small size! The fruits can be grown in a wide range of climates and have a European ‘cornichon’ style. It has a crisp texture and tiny spines.
Gershwin. These cucumbers have less spines and a dark green, thicker skin, though they’re just as delicious. When isolated from other cucumber varieties, it will remain seedless, making it an excellent choice for pickling.
Diamant. Similar to gherkins, these pickles are uniform and grow on compact vines making them great for small gardens with limited space.
tips for crunchy pickles
Soak Pickles in an Ice Bath. This is best done for several hours, but at the least 1 hour is good enough. You can let these soak on the counter and continually add new ice or leave them floating in the fridge. This keep the cucumbers cold and crisp before pickling. I like to keep them in the ice water and cut them as I can them so that they remain cold as long as possible!
24 Hours Vine to Brine. When it comes to making super crisp and crunchy pickles, the fresher the better. This can be difficult if you do not grow cucumbers yourself! There is an old saying that goes, “24 hours from vine to brine” and that really rings true here. Cucumbers should really pickled the same day that they are picked, if possible. Because cucumbers are mostly made up of water, they begin to lose their firmness as soon as they are off the vine. If you cannot get to them that quickly, then make sure to give the ice bath trick a try. I also like to use older cucumbers for bread and butter pickles since they don’t necessarily need to be super crunchy!
Cut Off Blossom Ends. The blossom end of the cucumber, or the narrower end if you did not pick them yourself, can make the pickle go limp in the brine. It’s best to cut this off. If you are unsure which end is the blossom end, then just trim off both ends about 1/8-inch.
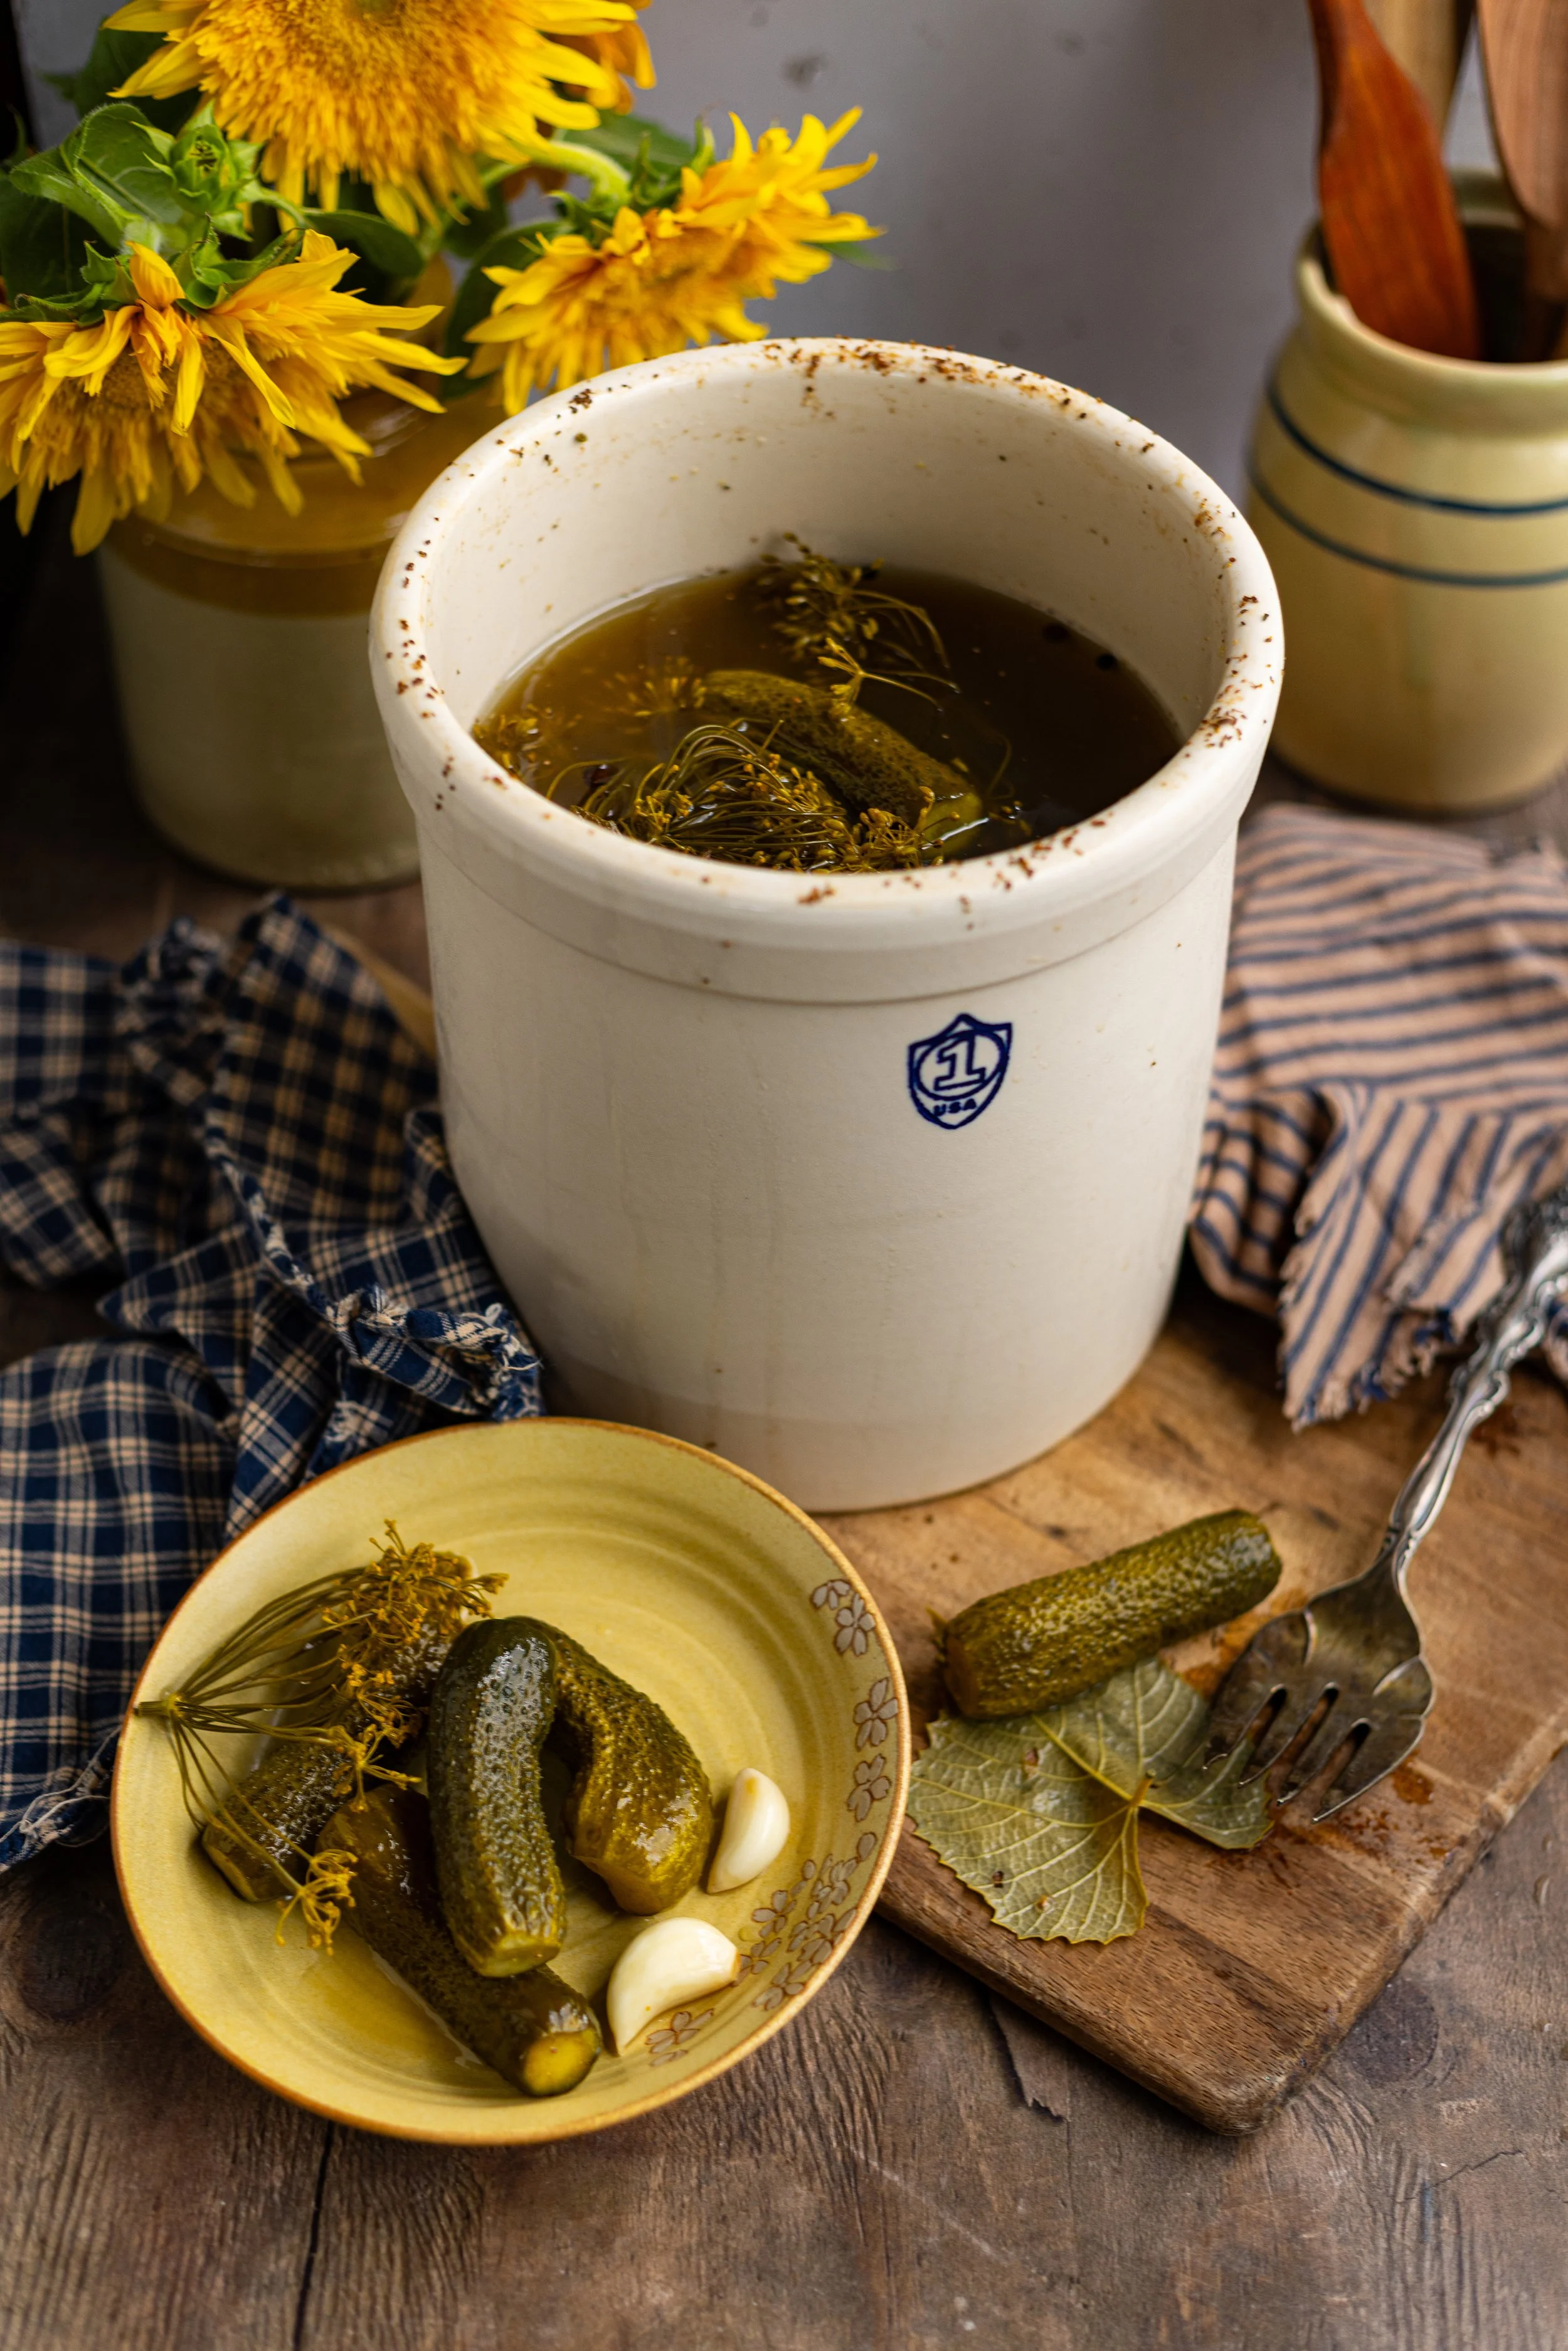
Add Grape Leaves. Grape leaves and oak leaves have tannins that help keep the cucumbers firm in the brine. Adding a couple of grape leaves to your jar will naturally improve the crispness of your pickles and give it a really good crunch! This is typically done when fermenting pickles in water.
Use Ball® Pickle Crisp. I love this stuff! It’s simply calcium chloride that helps to improve the quality and crunch of your pickles. I prefer using this over a pickling lime, which is generally not recommended for modern pickling anymore as it has the potential to be dangerous.

Canning Safety Notes
Follow tested recipes and USDA guidelines to ensure safety.
Use new lids for canning. Most canning jar companies only recommend using lids once, in case that seals become damaged after storing food in a previous season. Using old lids can result in a false seal and spoiled food.
Assembly line can rather than batch canning. This means filling one jar at a time rather than filling all of the jars at once. This ensures that the jars stay hot, keeping them from going through temperature shock when being put into the water bath canner.
Use plastic utensils to prevent cracking your jars.
Pickles are safe for water bath canning due to the added vinegar, which ensures proper acidity— HOWEVER. This is NOT a tested and approved recipe, so be cautious.
Use distilled white vinegar at 5% acidity to ensure proper pH.
Leave 1/2-inch (1-cm) headspace in jars.
Process jars in a boiling water bath for 15 minutes (adjust for altitude if needed).

Canning supplies you’ll need
Canning Jars, New Lids, and Bands. I prefer to use Ball® jars, lids, and bands. You will need new canning lids to safely can your pickles. Do not can with used lids, as the seals may be damaged. For this recipe, you will need pint or quart jars.
Fine Mesh Sieve or colander.
Large Sauce Pot. To cook your pickles in the brine. I love using enameled cast iron for cooking tomatoes like this one or this one.
Jar Lifter. You will definitely want this tool to help lift the hot jars in and out of the canner!
Canning Funnel. A funnel can be nice to have to avoid spills. Use a nonmetallic funnel to avoid breakage.
Nonmetallic Spatula. Another tool that can be helpful to avoid breakage of your jars, and it can be great for removing air bubbles.
Headspace Measurer. This tool is made to easily measure the headspace of your food, which is necessary for low-acid canning to avoid siphoning! It can also double as an air bubble popper.

Pickling Supplies You’ll Need
Pint or Quart-size Mason Jars or Weck Jars.
Mandoline Slicer or Sharp Knife, for uniform slices.
Vinegar (Distilled white at 5% acidity)
Pickling or Canning Salt. Pickling salt is a pure form of salt without additives like iodine or anti-caking agents. This makes it safe for pickling and long-term food preservation, preventing cloudiness in the brine and ensures consistent results.
Calcium Chloride (optional). You do not need this ingredient, but it can help give your pickles extra crunch! Various canning brands sell this ingredient and it can be found at most grocery stores near the preservation tools and ingredients.

How to Make Bread and Butter Pickles
Step One: Clean and sanitize jars, lids, and bands. If canning, prepare your hot water bath canner.
Step Two: Wash and trim both ends off the cucumbers, about 1/8-inch. Place the cucumbers in an ice water bath and place in the refrigerator for at least 1 hour to help them crisp up.* I personally think 3 hours is best!

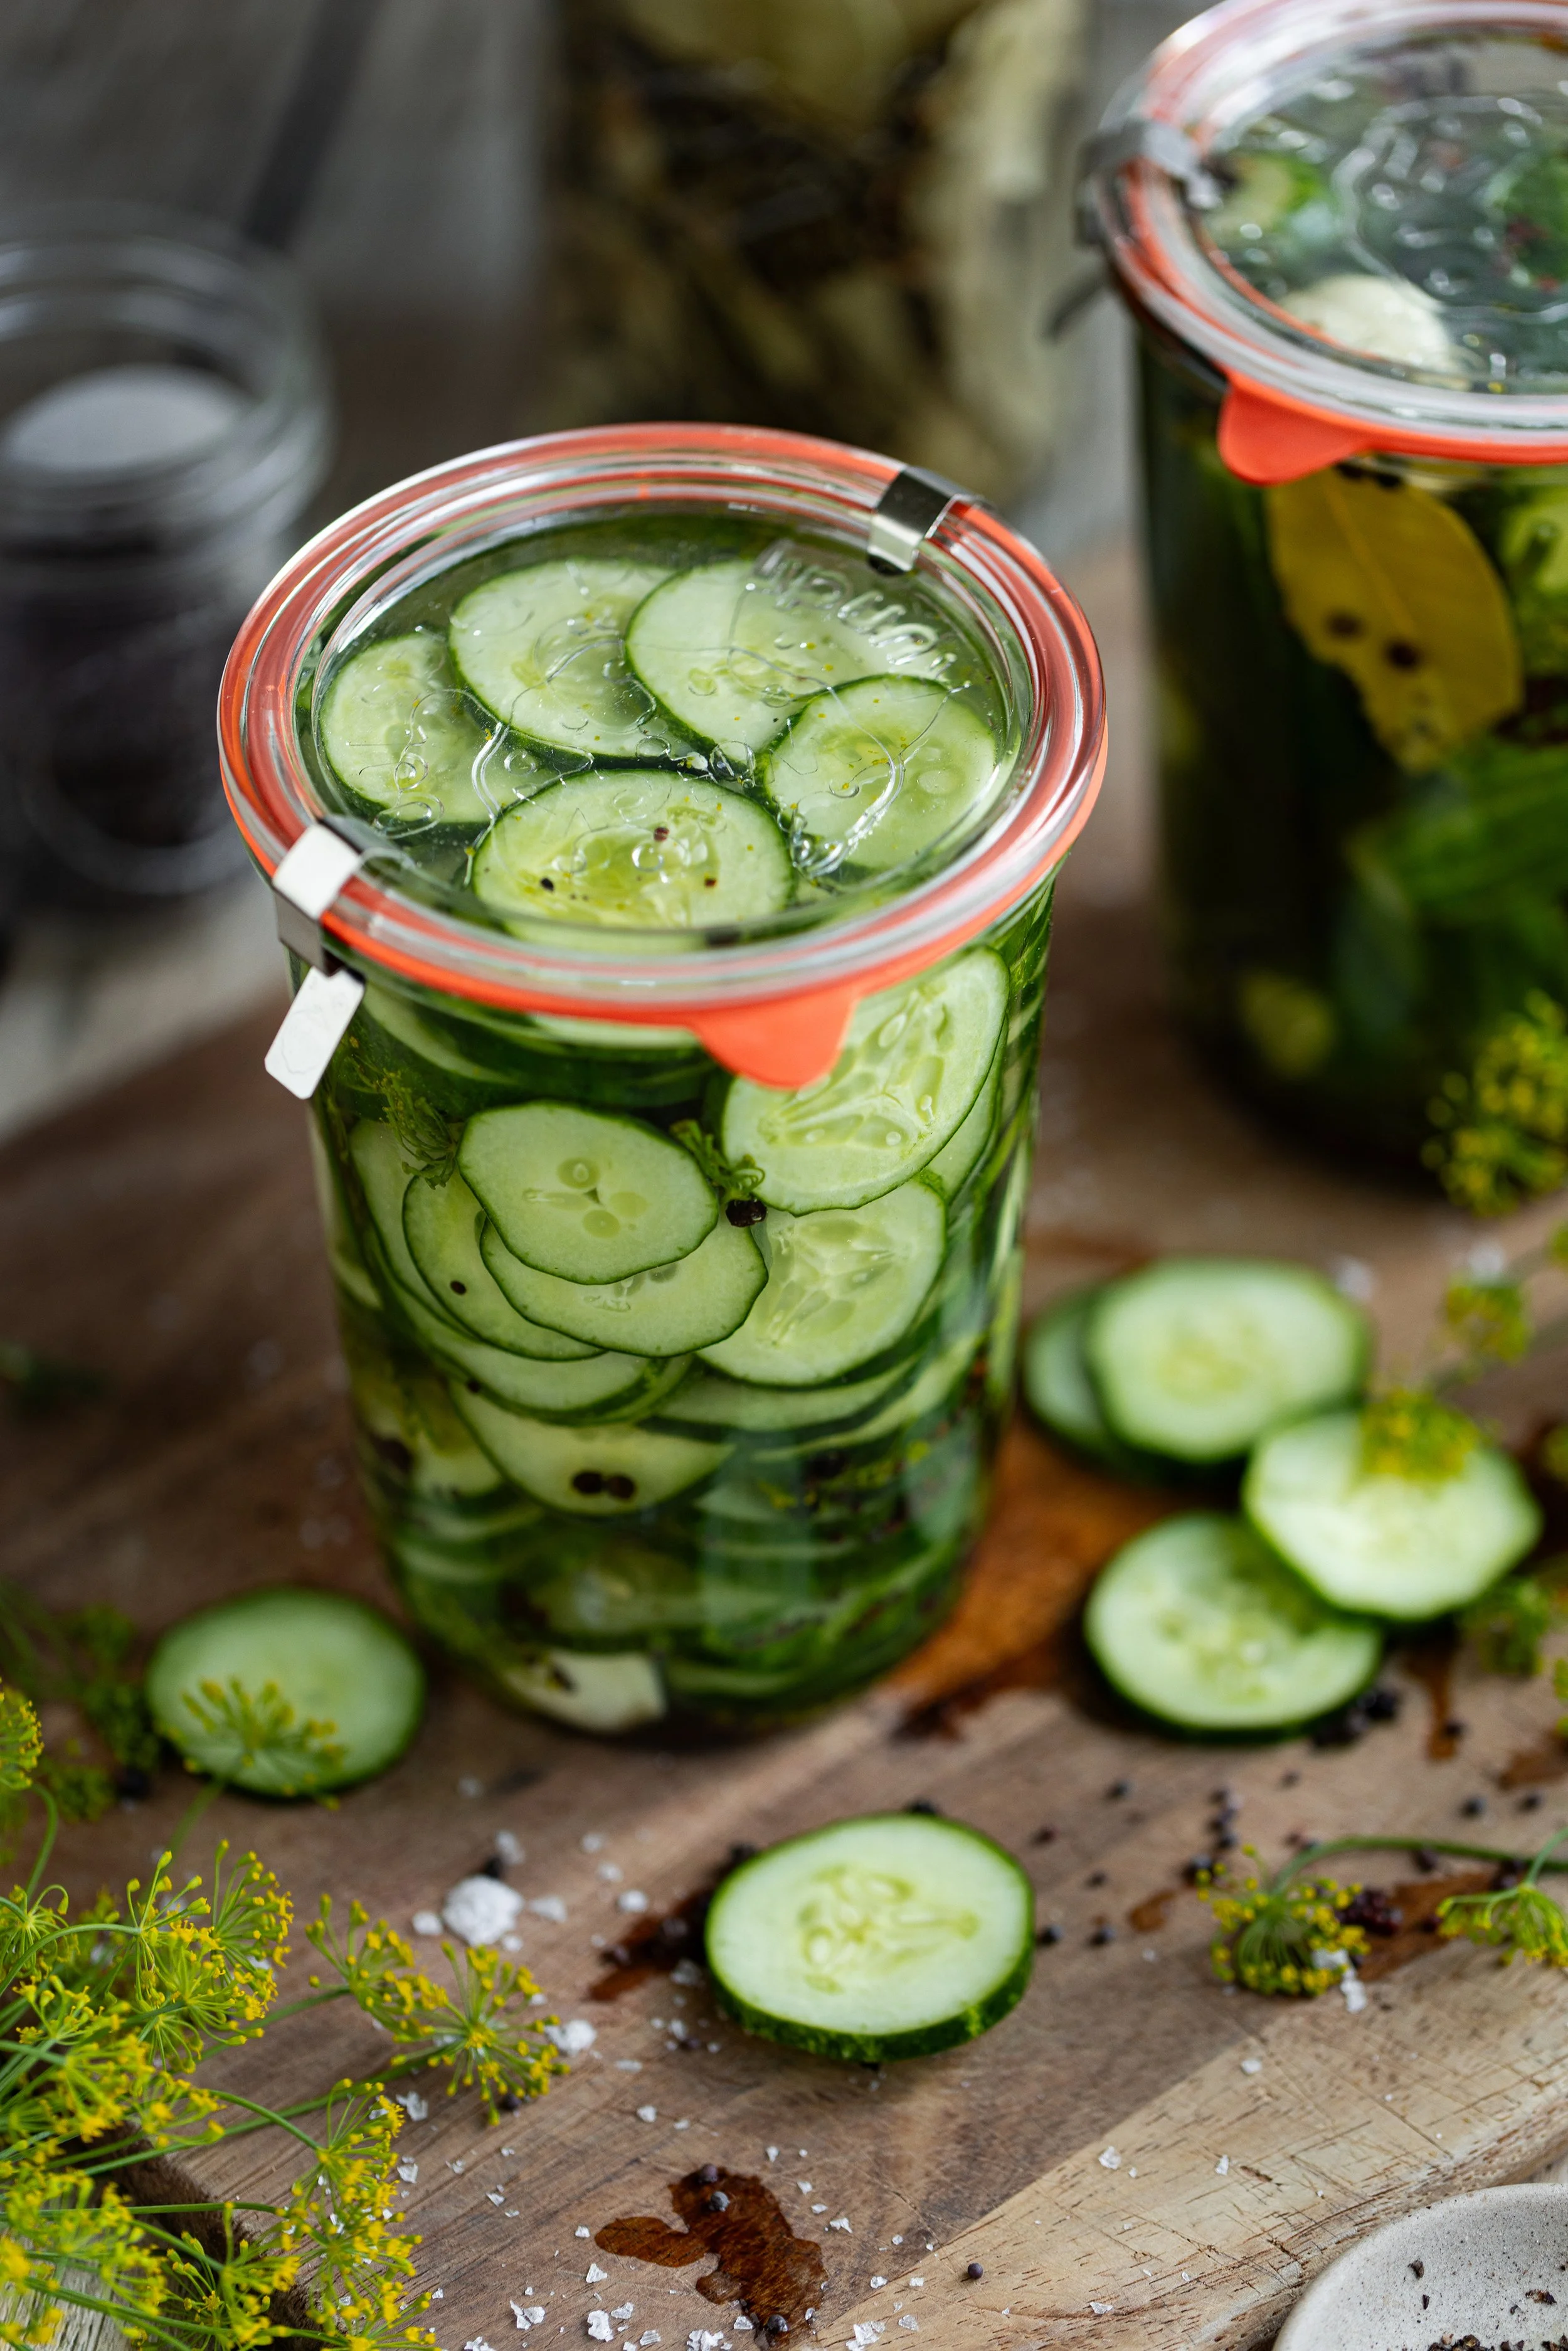
Step Three: After chilling, slice the cucumbers into thin slices using a mandolin slicer. This is the most efficient and best way to cut the cucumbers, as it creates uniform slices and saves you time. Otherwise, using a sharp knife, slice the cucumbers thinly, about 3/16th-inch slices. Slice the onions in a similar fashion.

Step Four: To a large bowl, add the cucumbers, onions, and pickling salt. Toss the vegetables with the salt to coat. Cover the vegetables with cold water. Then, cover with a clean kitchen towel or plastic wrap and leave to rest in a cool spot for about 2 hours.

Step Five: After 2 hours, drain the vegetables and rinse gently under cold water. Set this aside for now.

Step Six: In a large saucepan, combine the vinegar, sugar, mustard seed, celery seed, and turmeric. Bring the brine to a boil, stirring consistently to dissolve the sugar, boiling for 10 minutes. Add the drained cucumbers and onions to the brine. Bring the vegetable mixture back up to a boil, then remove from heat.

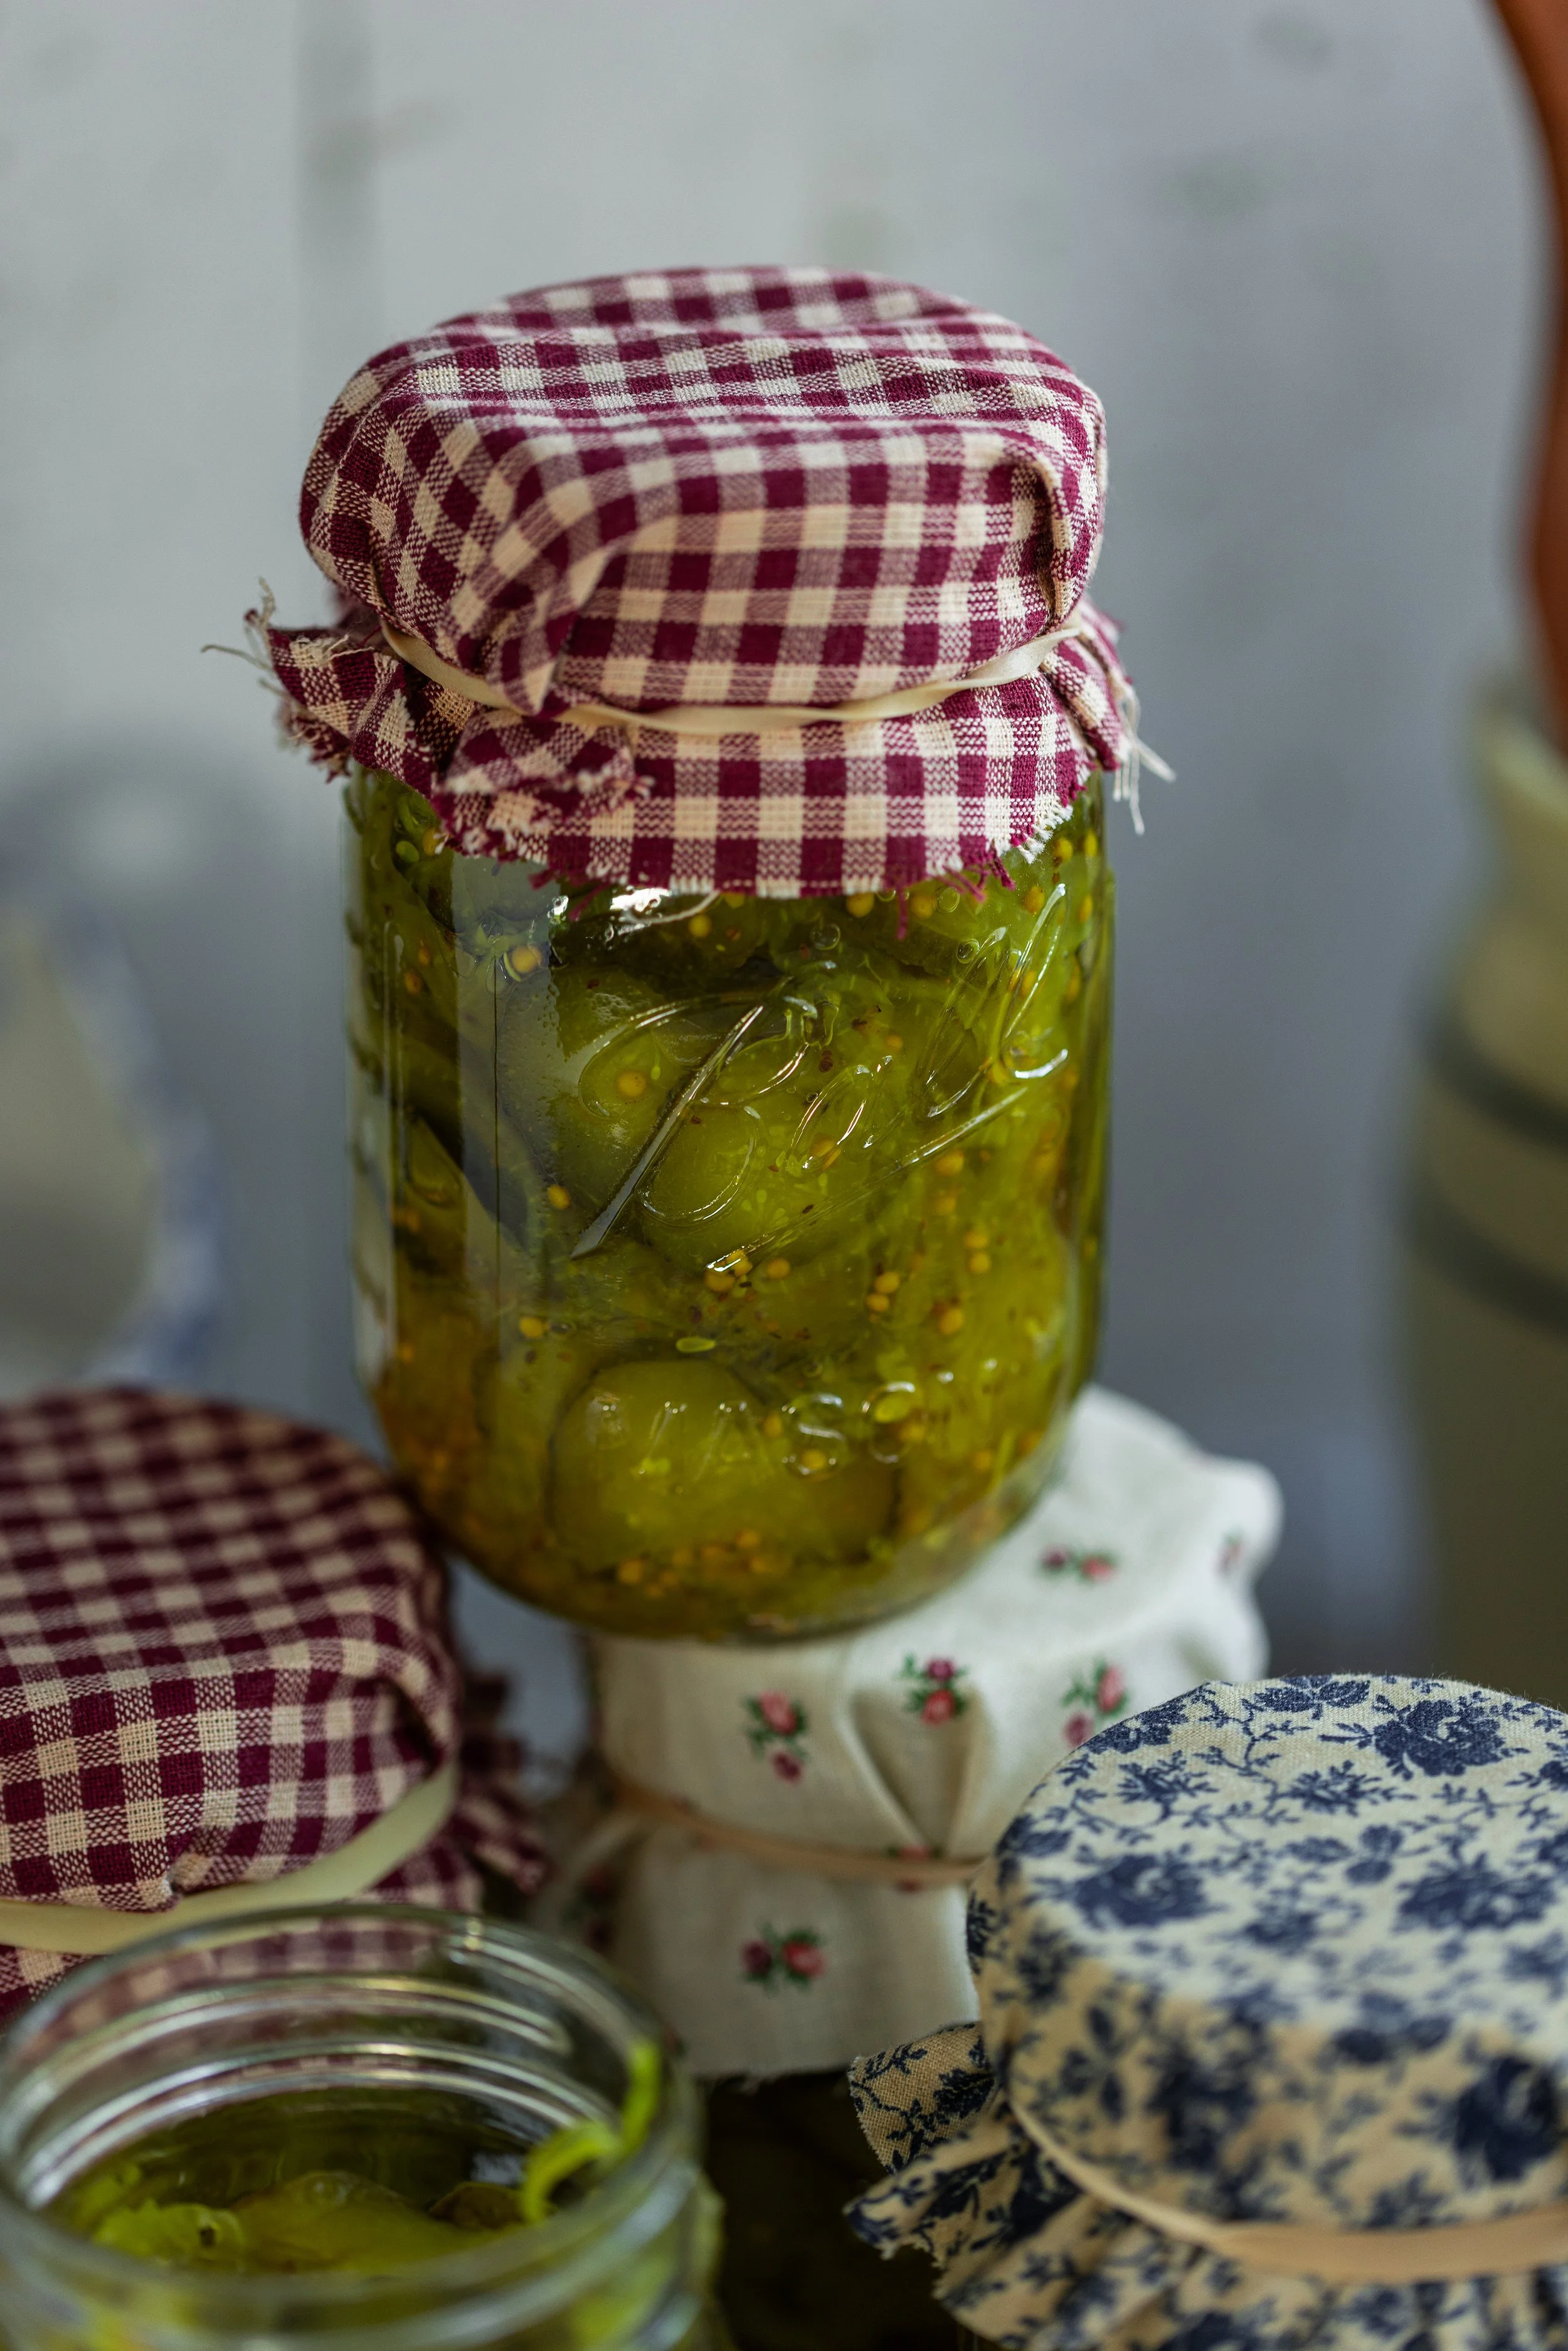
Step Seven: Pack the hot vegetables into a hot jar, with slices and cooking syrup, leaving 1/2-inch headspace. Remove air bubbles as needed with a silicone spatula or bubble popper. Then, adjust headspace if needed. Wipe the rims of the jars with a dampened, clean paper towel. Adjust lids and apply bands to fingertip tight. Place the filled jar into the canner and repeat with the remaining jars until they are all filled.

Step Eight: Close the canner lid and bring the pot up to a boil. Process the pickles for 10 minutes, adjusting for altitude. Then, turn off the heat and remove the canner lid. Leave the jars in the hot water for a further 5 minutes before moving them to the counter. Check the seals after 12 to 24 hours. Label and store the jars in a cool, dark place such as a pantry cabinet.

Alternate Preservation Methods
Refrigerator Pickles (Quick Pickling): Rather than make these pickles in a hot water bath canner, they can be made as refrigerator pickles. Follow the steps as normal, but instead of canning the pickles, simply add them to hot sterilized jars after cooking. Allow the pickles to cool to room temperature, then close the jars and store in the fridge. Check the pickles daily for flavor and crunchiness, with their peak flavor happening at about 1 to 2 weeks. The pickles can be stored in the fridge safely for about 3 to 4 months.
Variation for Firmer Pickles: Wash the cucumbers, trim, and slice the cucumbers as above. Mix 1 cup (161 g) pickling lime with 1 gallon (3.78 L) water in a 2 to 3 gallon crock or enamelware container. Soak the cucumber slices in the lime water for 12 to 24 hours, at room temperature, stirring occasionally. Remove the cucumbers from the lime water, rinse, and resoak for 1 hour in fresh cold water. Repeat the rinsing and soaking process two more times. The slices will be brittle from the lime, so handle with care. Do not lime the onions. Be cautious, as pickling lime can be dangerous if used incorrectly. Be careful to not inhale lime dust while mixing with the water.

Storage Instructions
Canned: Store sealed jars in a cool, dark pantry for up to 1 year. Refrigerate jars after opening and use within 3 months.
Refrigerated: Store closed jars in the fridge for up to 3 to 4 months.
Do not store at room temperature. These pickles must be refrigerated to be consumed safely.
Serving Suggestions
Bread and butter pickles are a lovely addition to various dishes, generally served on sandwiches, burgers, or bratwurst. Serve whole slices on hamburgers, hotdogs, and sandwiches to add a sweet crunch! Here are some delicious recipes to pair with your bread and butter pickles recipe.

Recipe Variations
To make British Bread and Butters, swap out the distilled white vinegar for apple cider vinegar and the granulated sugar for packed brown sugar. Add 1 teaspoon of ground ginger to the brine.
Replace the celery seed with 2 tablespoons prepared horseradish and 2 tablespoons grated ginger for the turmeric for a spicy twist.
Add a clove of peeled garlic to each jar before filling for garlic bread and butter pickles.
Final Thoughts
I often do not love to make canned pickles, as the crunchiness factor can be a bit unpredictable. I much prefer refrigerator pickles, however, this recipe always turns out because the pickles are cooked before canning! Bread and butter pickles are an easy, foolproof recipe that is perfect for beginner canners to learn how to make delicious pickles that can be stored all year long. You will absolutely love this sweet and tangy pickle to pair with your summer burgers and brats, or to bring along to your next potluck or summer gathering. Enjoy!
xoxo Kayla
Bread & Butter Pickles: Canning Recipe & Guide
Made with thinly sliced cucumbers and onions and soaked in a sweet brine flavored with turmeric, these distinct yellow pickles are delicious to enjoy on your favorite sandwich or served on a relish plate with meats, cheeses, and crackers. In this easy canning guide, you can learn how to make and preserve a small batch of bread and butter pickles to savor all winter long.
Ingredients
- 3.5 lbs (1,500 g) thinly sliced cucumbers
- 4 large onions (1,300 g), thinly sliced
- 1/2 cup (110 g) pickling salt
- 3 cups (720 ml) distilled white vinegar
- 2 cups (400 g) granulated sugar
- 2 tbsp (20 g) yellow mustard seed
- 1 tsp celery seed
- 1 tsp ground turmeric
Instructions
- Clean and sanitize jars, lids, and bands. If canning, prepare your hot water bath canner.
- Wash and trim both ends off the cucumbers, about 1/8-inch. Place the cucumbers in an ice water bath and place in the refrigerator for at least 1 hour to help them crisp up.* I personally think 3 hours is best!
- After chilling, slice the cucumbers into thin slices using a mandolin slicer. This is the most efficient and best way to cut the cucumbers, as it creates uniform slices and saves you time. Otherwise, using a sharp knife, slice the cucumbers thinly, about 3/16th-inch slices. Slice the onions in a similar fashion.
- To a large bowl, add the cucumbers, onions, and pickling salt. Toss the vegetables with the salt to coat. Then, cover with a clean kitchen towel or plastic wrap and leave to rest in a cool spot for about 2 hours.
- After 2 hours, drain the vegetables and rinse gently under cold water. Set this aside for now.
- In a large saucepan, combine the vinegar, sugar, mustard seed, celery seed, and turmeric. Bring the brine to a boil, stirring consistently to dissolve the sugar, boiling for 10 minutes. Add the drained cucumbers and onions to the brine. Bring the vegetable mixture back up to a boil, then remove from heat.
- Pack the hot vegetables into a hot jar, with slices and cooking syrup, leaving 1/2-inch headspace. Remove air bubbles as needed with a silicone spatula or bubble popper. Then, adjust headspace if needed. Wipe the rims of the jars with a dampened, clean paper towel. Adjust lids and apply bands to fingertip tight. Place the filled jar into the canner and repeat with the remaining jars until they are all filled.
- Close the canner lid and bring the pot up to a boil. Process the pickles for 10 minutes, adjusting for altitude. Then, turn off the heat and remove the canner lid. Leave the jars in the hot water for a further 5 minutes before moving them to the counter. Check the seals after 12 to 24 hours. Label and store the jars in a cool, dark place such as a pantry cabinet.
Notes
*Placing your cucumbers in an ice bath or in the fridge for an hour is entirely optional, but it does help if your cucumbers were not picked within 24 hours of pickling!
**This recipe can be canned in quart jars. Process the quarts for 10 minutes, the same as pints.
Nutrition Facts
Calories
467