How to Pressure Can Carrots: Beginner-Friendly Guide to Preserving Root Vegetables
This post may contain affiliate links, please see our privacy policy for more information.
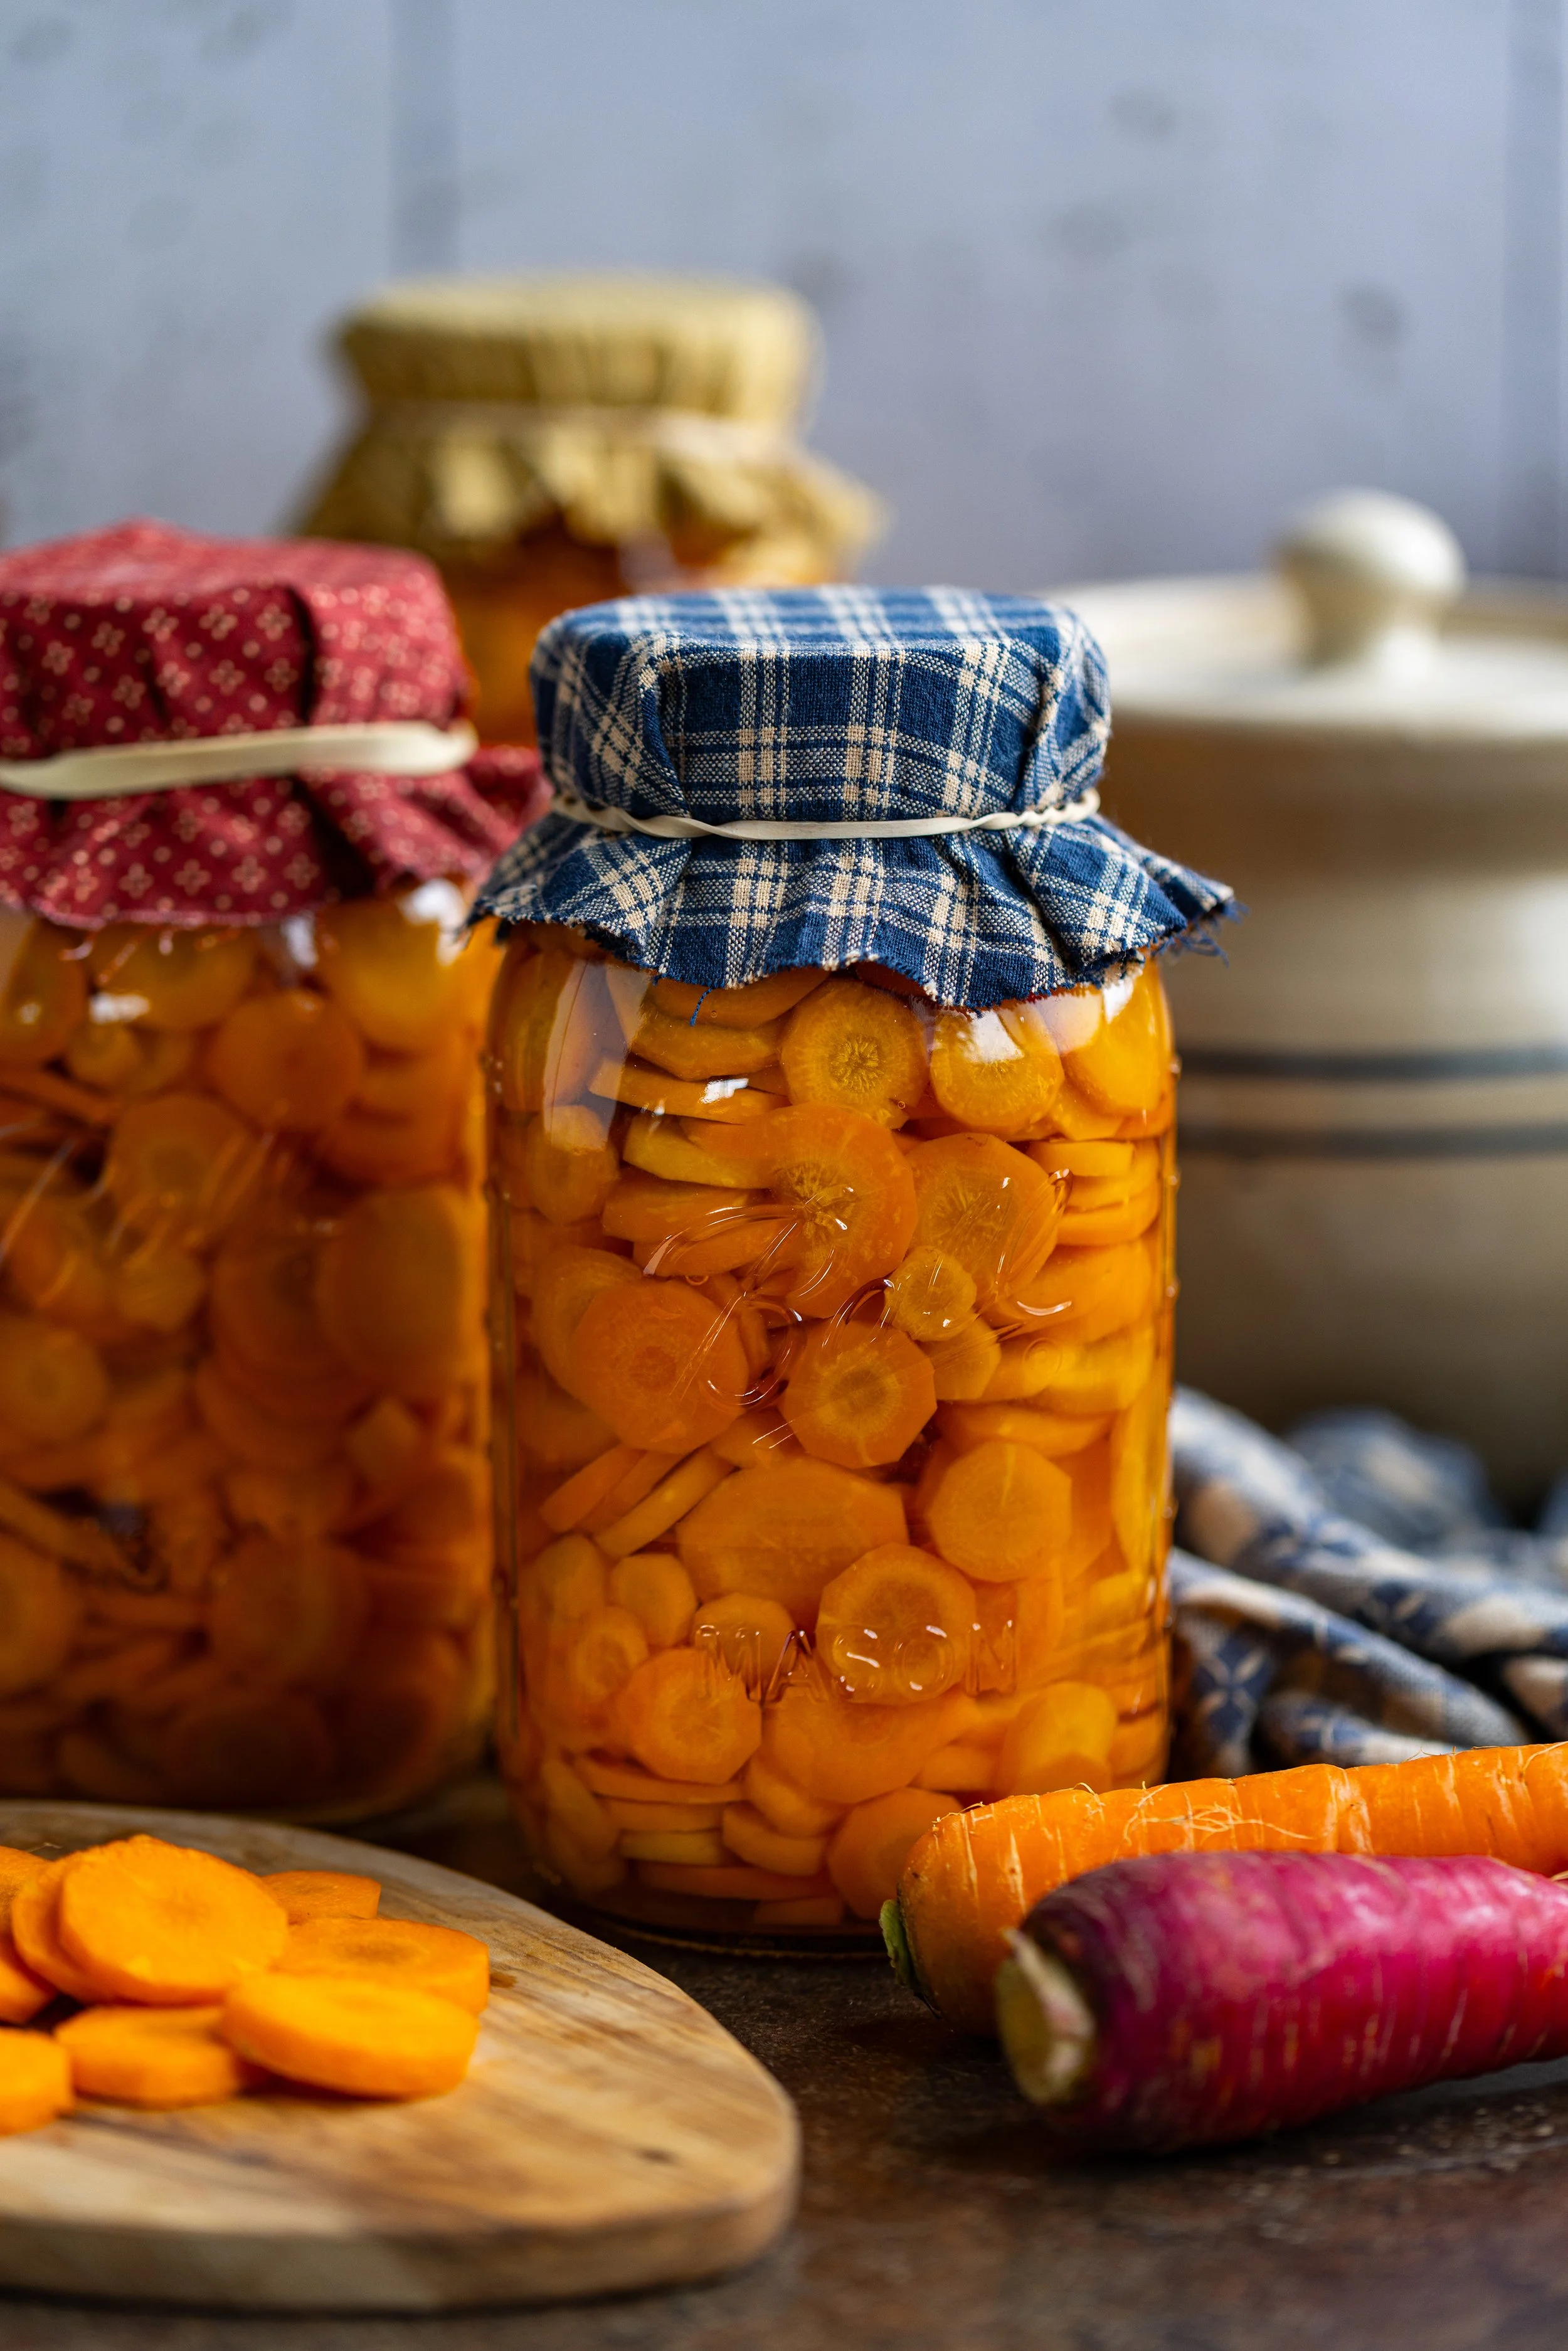
Learn how to pressure can carrots safely at home with this step-by-step guide. Includes tips for prep, peeling, cutting, and storing shelf-stable jars all year long.
The Easiest Root Vegetable to Can? Carrots.
Carrots are one of the simplest pressure-canned vegetables you can put up, making them a great place to start if you’re new to pressure canning. With their sweet, earthy flavor and year-round availability, canned carrots are a versatile pantry staple. They hold their texture well and can be used in soups, stews, roasts, or simple served straight out of the jar with a bit of butter and salt. This easy pressure canning guide walks you through everything from carrot prep to pressure canner safety— so you can preserve the harvest with confidence!

Best Types of Carrots for Pressure CAnning
Choose carrots that are:
Firm, crisp, and freshly harvested
Free of cracks, green shoulders, or rot
Small to medium-sized roots, preferably 1 to 1 1/4-inches in diameter. Larger carrots are often too fibrous.
Pro Tip: You can use garden-fresh, farmers market, or grocery store carrots. Just be sure to peel and cut them uniformly for safety and even processing.

Canning Tips for Carrots
Always peel carrots before canning. This remove bacteria that could potentially be on the skins and ensures safety before consuming.
Cut into uniform rounds, coins, sticks, or cubes for even cooking.
You can hot pack (briefly boil first) or raw pack carrots— raw pack is faster but your carrots may float more in the jars.
Use clean boiling water as the canning liquid— do not add oil or butter!
Canning Safety notes
Carrots are a low-acid vegetable, so they are not safe to can in a hot water bath. Pressure canning is required to safely preserve carrots in jars without any added acidic ingredients, such as pickling.
Follow tested recipes and USDA guidelines and PSI recommendations based on your canner type and altitude to ensure safety.
Add 1/2 teaspoon of salt per pint jar or 1 teaspoon salt per quart jar, which is entirely optional and for flavor only— salt is not required for safety.
Use new lids for canning. Most canning jar companies only recommend using lids once, in case that seals become damaged after storing food in a previous season. Using old lids can result in a false seal and spoiled food.
Assembly line can rather than batch canning. This means filling one jar at a time rather than filling all of the jars at once. This ensures that the jars stay hot, keeping them from going through temperature shock when being put into the water bath canner.
Use plastic or silicone utensils to prevent cracking your jars.
Canning supplies you’ll need
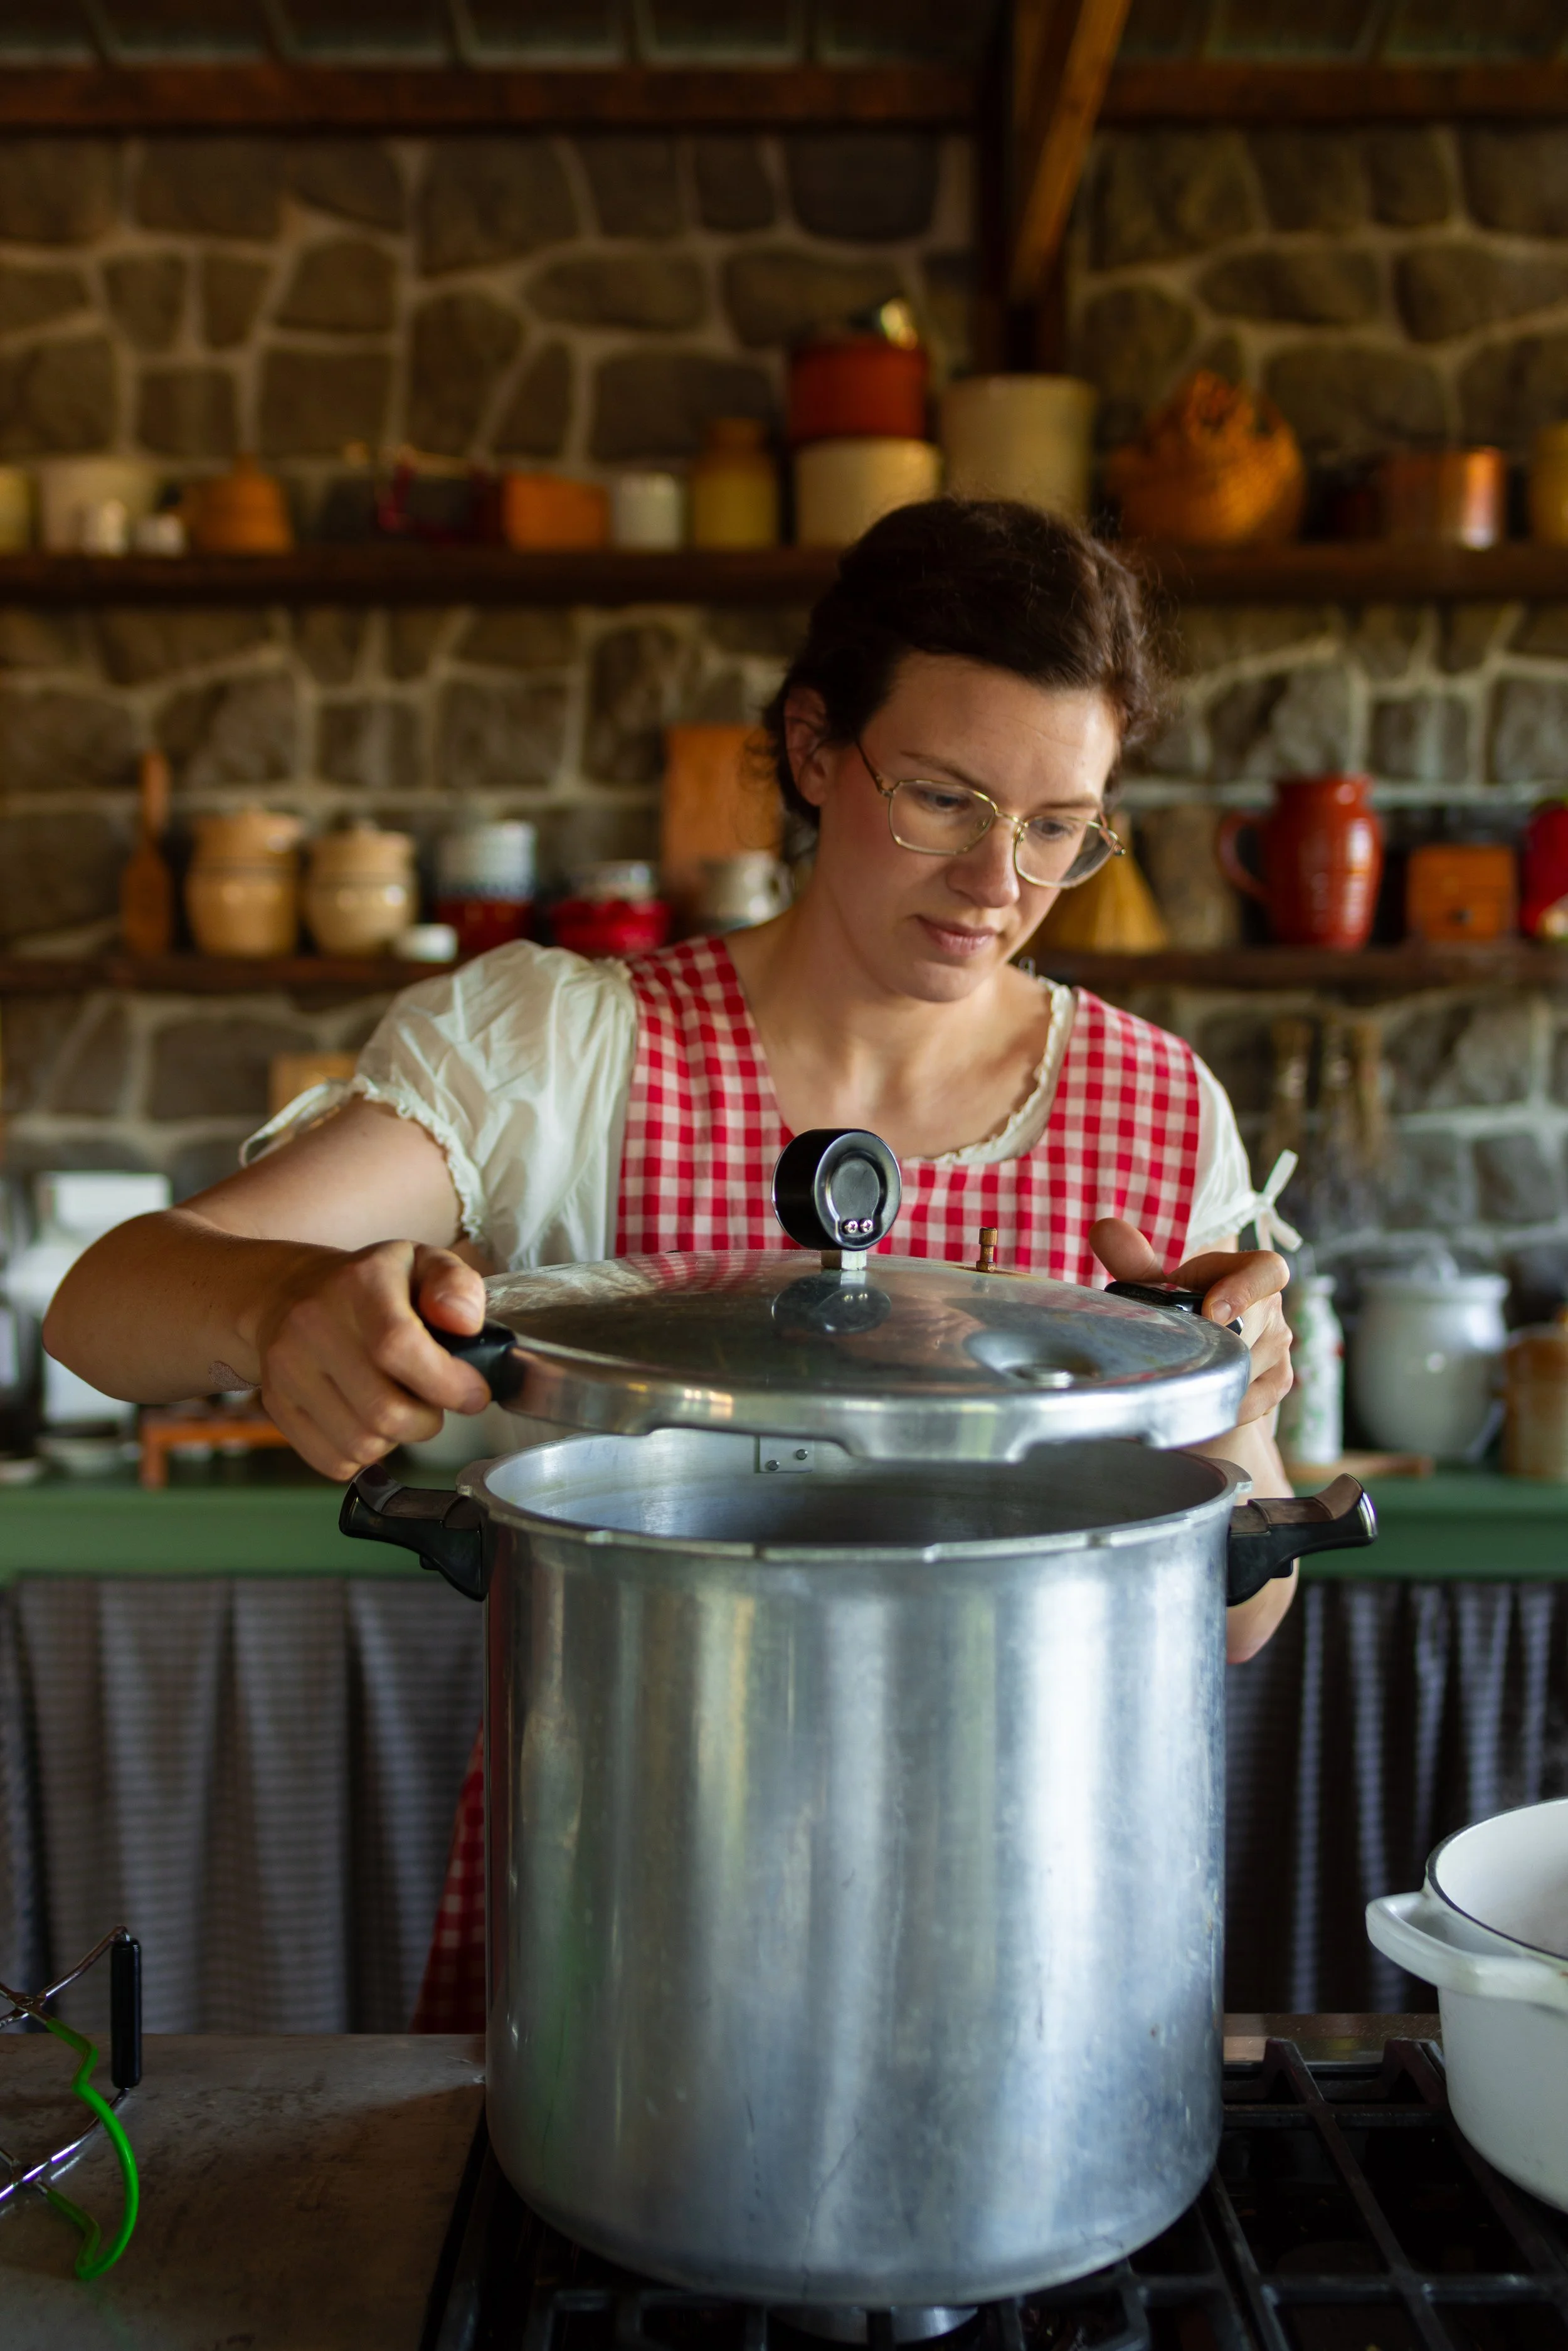
Pressure Canner. You can use a dial or weighted gauge pressure canner. I love my Presto canning pressure cooker for all of my pressure canning needs!
Canning Jars, New Lids, and Bands. I prefer to use Ball® jars, lids, and bands. You will need new canning lids to safely can your carrots. Do not can with used lids, as the seals can be damaged. For this recipe, you will need 8 oz or 16 oz jars.
Peeler and Sharp Knife.
Large Pot. This will be for boiling clean water to cook or pour over your carrots.
Jar Lifter. You will definitely want this tool to help lift the hot jars in and out of the canner!
Canning Funnel. A funnel can be nice to have to avoid spills. Use a nonmetallic funnel to avoid breakage.
Nonmetallic Spatula. Another tool that can be helpful to avoid breakage of your jars, and it can be great for removing air bubbles.
Headspace Measurer. This tool is made to easily measure the headspace of your food, which is necessary for low-acid canning to avoid siphoning! It can also double as an air bubble popper.

Ingredients
Fresh Carrots— approximately 17 1/2 lbs (8 kg) per canner load of 7 quarts, or an average of 11 lbs (5 kg) per canner load of 9 pints. You will need an average of 2 1/2 lbs (1 kg) carrots per quart.
Salt— optional for flavor; 1/2 teaspoon per pint, 1 teaspoon per quart
Boiling Water

How to Pressure Can Carrots
Step One: Begin by preparing your pressure canner, jars, lids, and bands. You will want to get the canning preparation started before begin the canning process as the cooking part is rather quick, and it always takes a long time for the canning pot to heat up. Simmer the jars for at least 10 minutes in the canner before filling to adjust the temperature of the glass— do not boil!
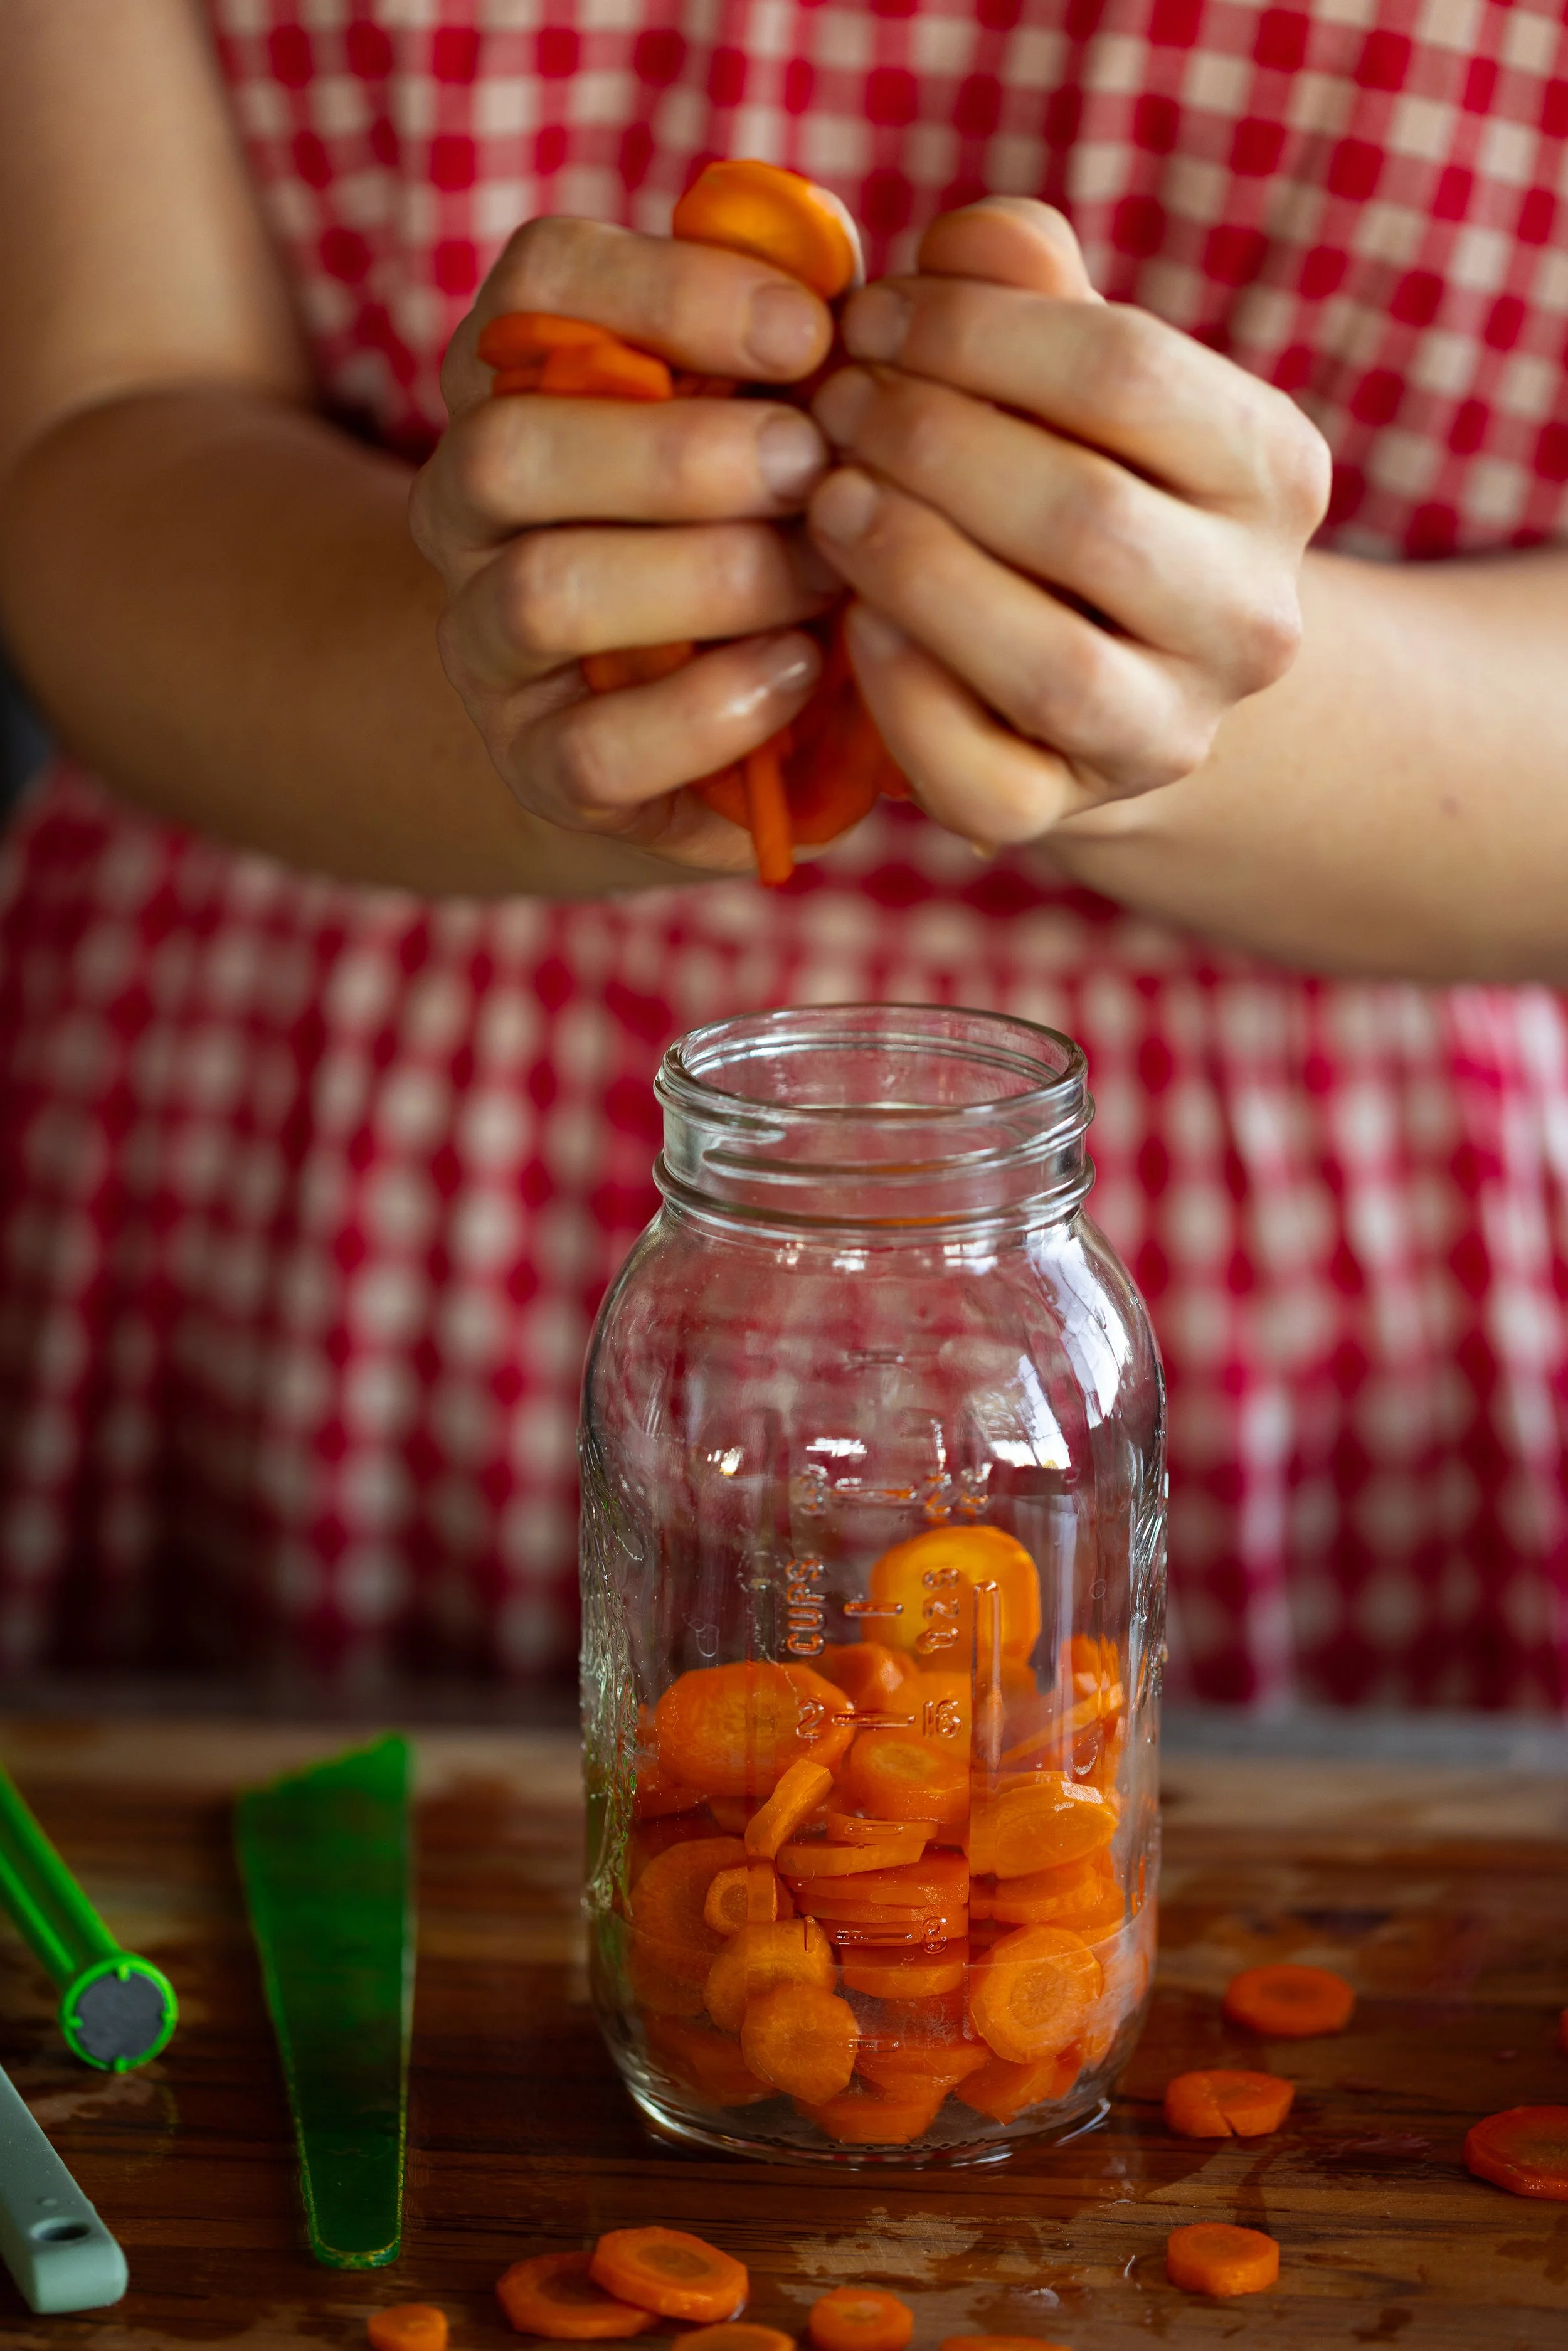
Step Two: Wash and peel the carrots. Then, wash the peeled carrots again. Slice the carrots into rounds, coins, sticks, or cubes.
Step Three: Choose your preferred method of packing the carrots:
Hot Pack: In a large pot, cover the cut carrots with boiling water. Bring the pot to a boil and simmer for 5 minutes. Fill a hot jar with hot carrots, leaving 1-inch (2.5-cm) headspace.
Raw Pack: Fill a hot jar tightly with raw carrots, leaving 1-inch (2.5-cm) of headspace.

Step Four: Add 1/2 teaspoon of salt per pint jar or 1 teaspoon of salt per quart jar, if desired. Add hot cooking liquid or clean boiling water to the jar, leaving 1-inch headspace.


Step Five: Remove air bubbles with a silicone spatula or bubble popper tool, and adjust the headspace if needed with more carrots or hot water. Wipe the rims with a dampened, clean paper towel. Apply the lids and bands to fingertip tight.

Step Six: Add the filled jar back to the canner and repeat the filling process with the remaining jars. Always fill your jars in an assembly line process rather than filling all of the jars at once to make sure that the jars remain hot. This prevents any temperature shock, which can cause the jars to crack.
Step Seven: Once all of the jars have been filled, put the lid on the pressure canner. Turn up the heat on the canner to a rolling boil and vent the steam for 10 minutes.

Step Eight: After 10 minutes, apply the pressure gauge or weighted gauge. Build pressure in the canner to 10 lbs (4.5 kg) PSI of pressure at an altitude 0-1,000 ft (0-305 m). Adjust the amount of pressure for your altitude.
Process Time:
Pints: 25 minutes
Quarts: 30 minutes
| Style of Pack | Dial Gauge Canner | Weighted Gauge Canner | Process Time |
Canner Pressure (PSI) at Altitudes of |
|---|---|---|---|---|
| Hot and Raw | Pints | Pints | 25 minutes | 11 lb at 0-2,000 ft 12 lb at 2,001-4,000 ft 13 lb at 4,001-6,000 ft 14 lb at 6,001-8,000 ft |
| Hot and Raw | Quarts | Quarts | 30 minutes | 11 lb at 0-2,000 ft 12 lb at 2,001-4,000 ft 13 lb at 4,001-6,000 ft 14 lb at 6,001-8,000 ft |
| Hot and Raw | Pints | Pints | 25 minutes | 10 lb at 0-1,000 ft 15 lb above 1,000 ft |
| Hot and Raw | Quarts | Quarts | 30 minutes | 10 lb at 0-1,000 ft 15 lb above 1,000 ft |

Step Nine: After the processing time has finished, turn off the heat. Allow the canner’s dial gauge to return to 0 PSI before doing anything else. Once the canner has reached 0 on the dial gauge, you can remove the pressure or weight gauge. Let the steam vent for 10 minutes, then remove the lid. Leave the jars in the canner for a further 10 minutes before removing them from the canning pot. Set them on the countertop and leave to seal. Check the seals after 12 to 24 hours, making sure that the centers do not flex and they are suctioned to the jars.
Read my Full Guide on How to Pressure Can for Beginners here!
Storage Instructions
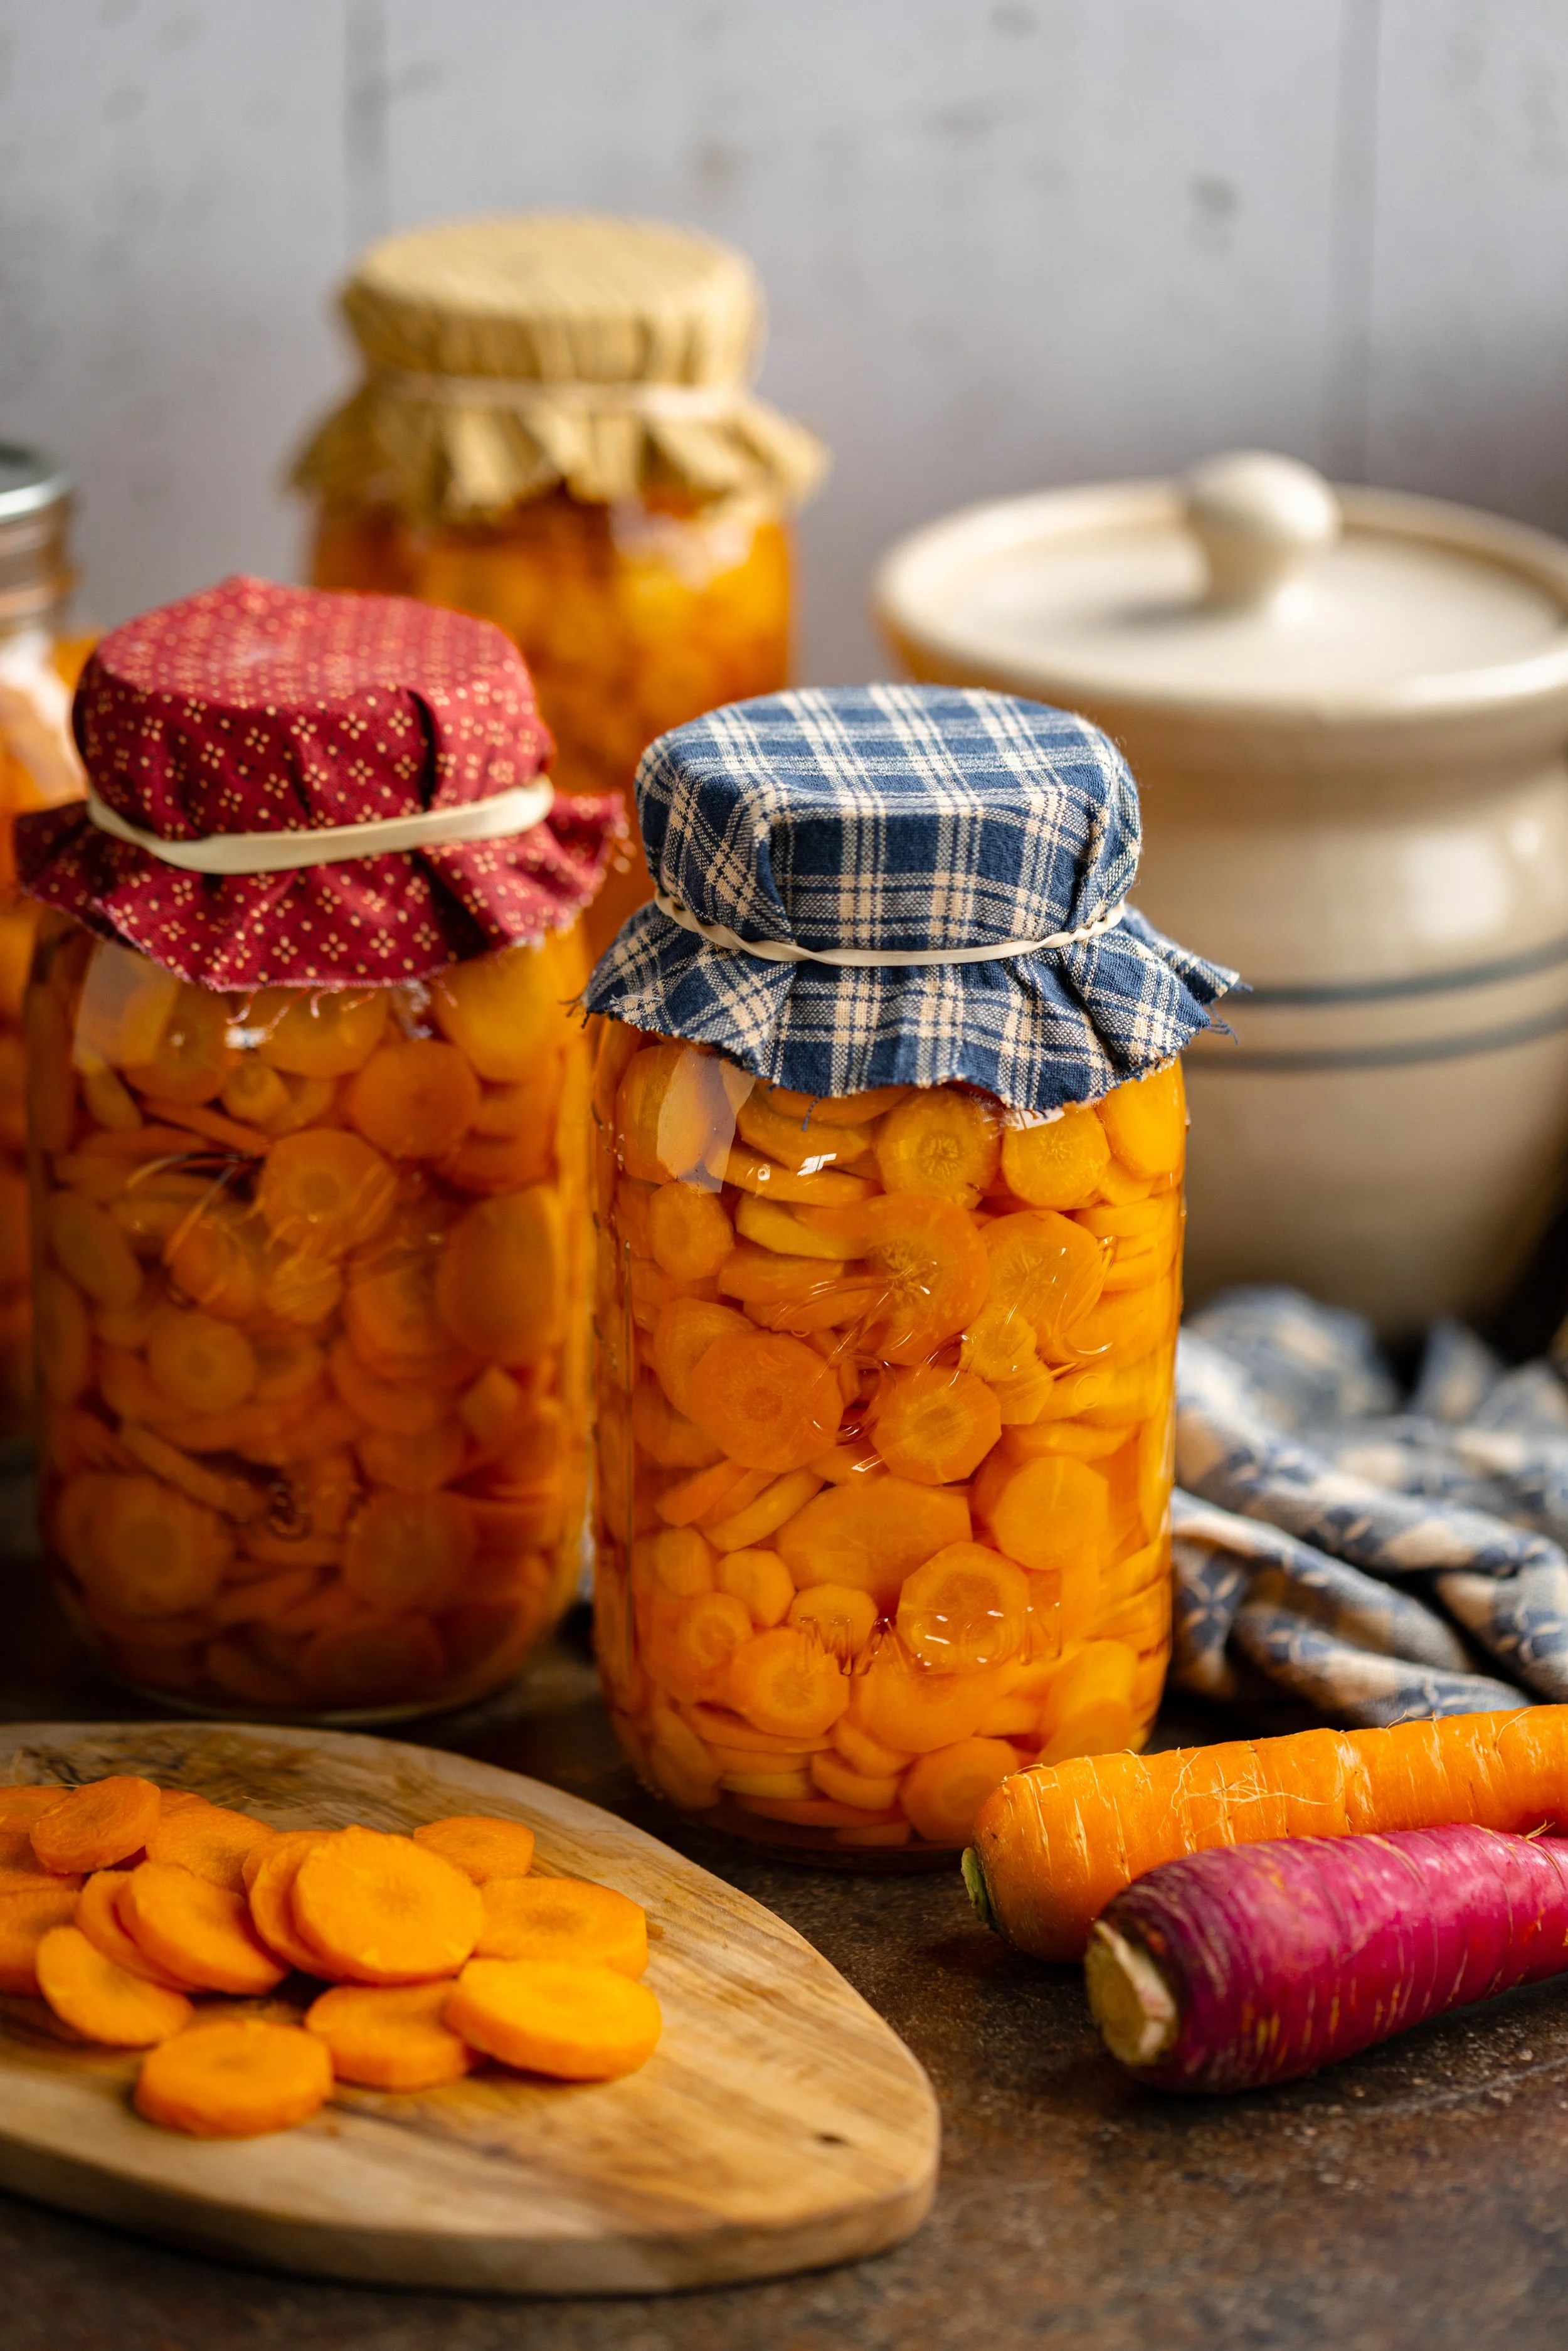
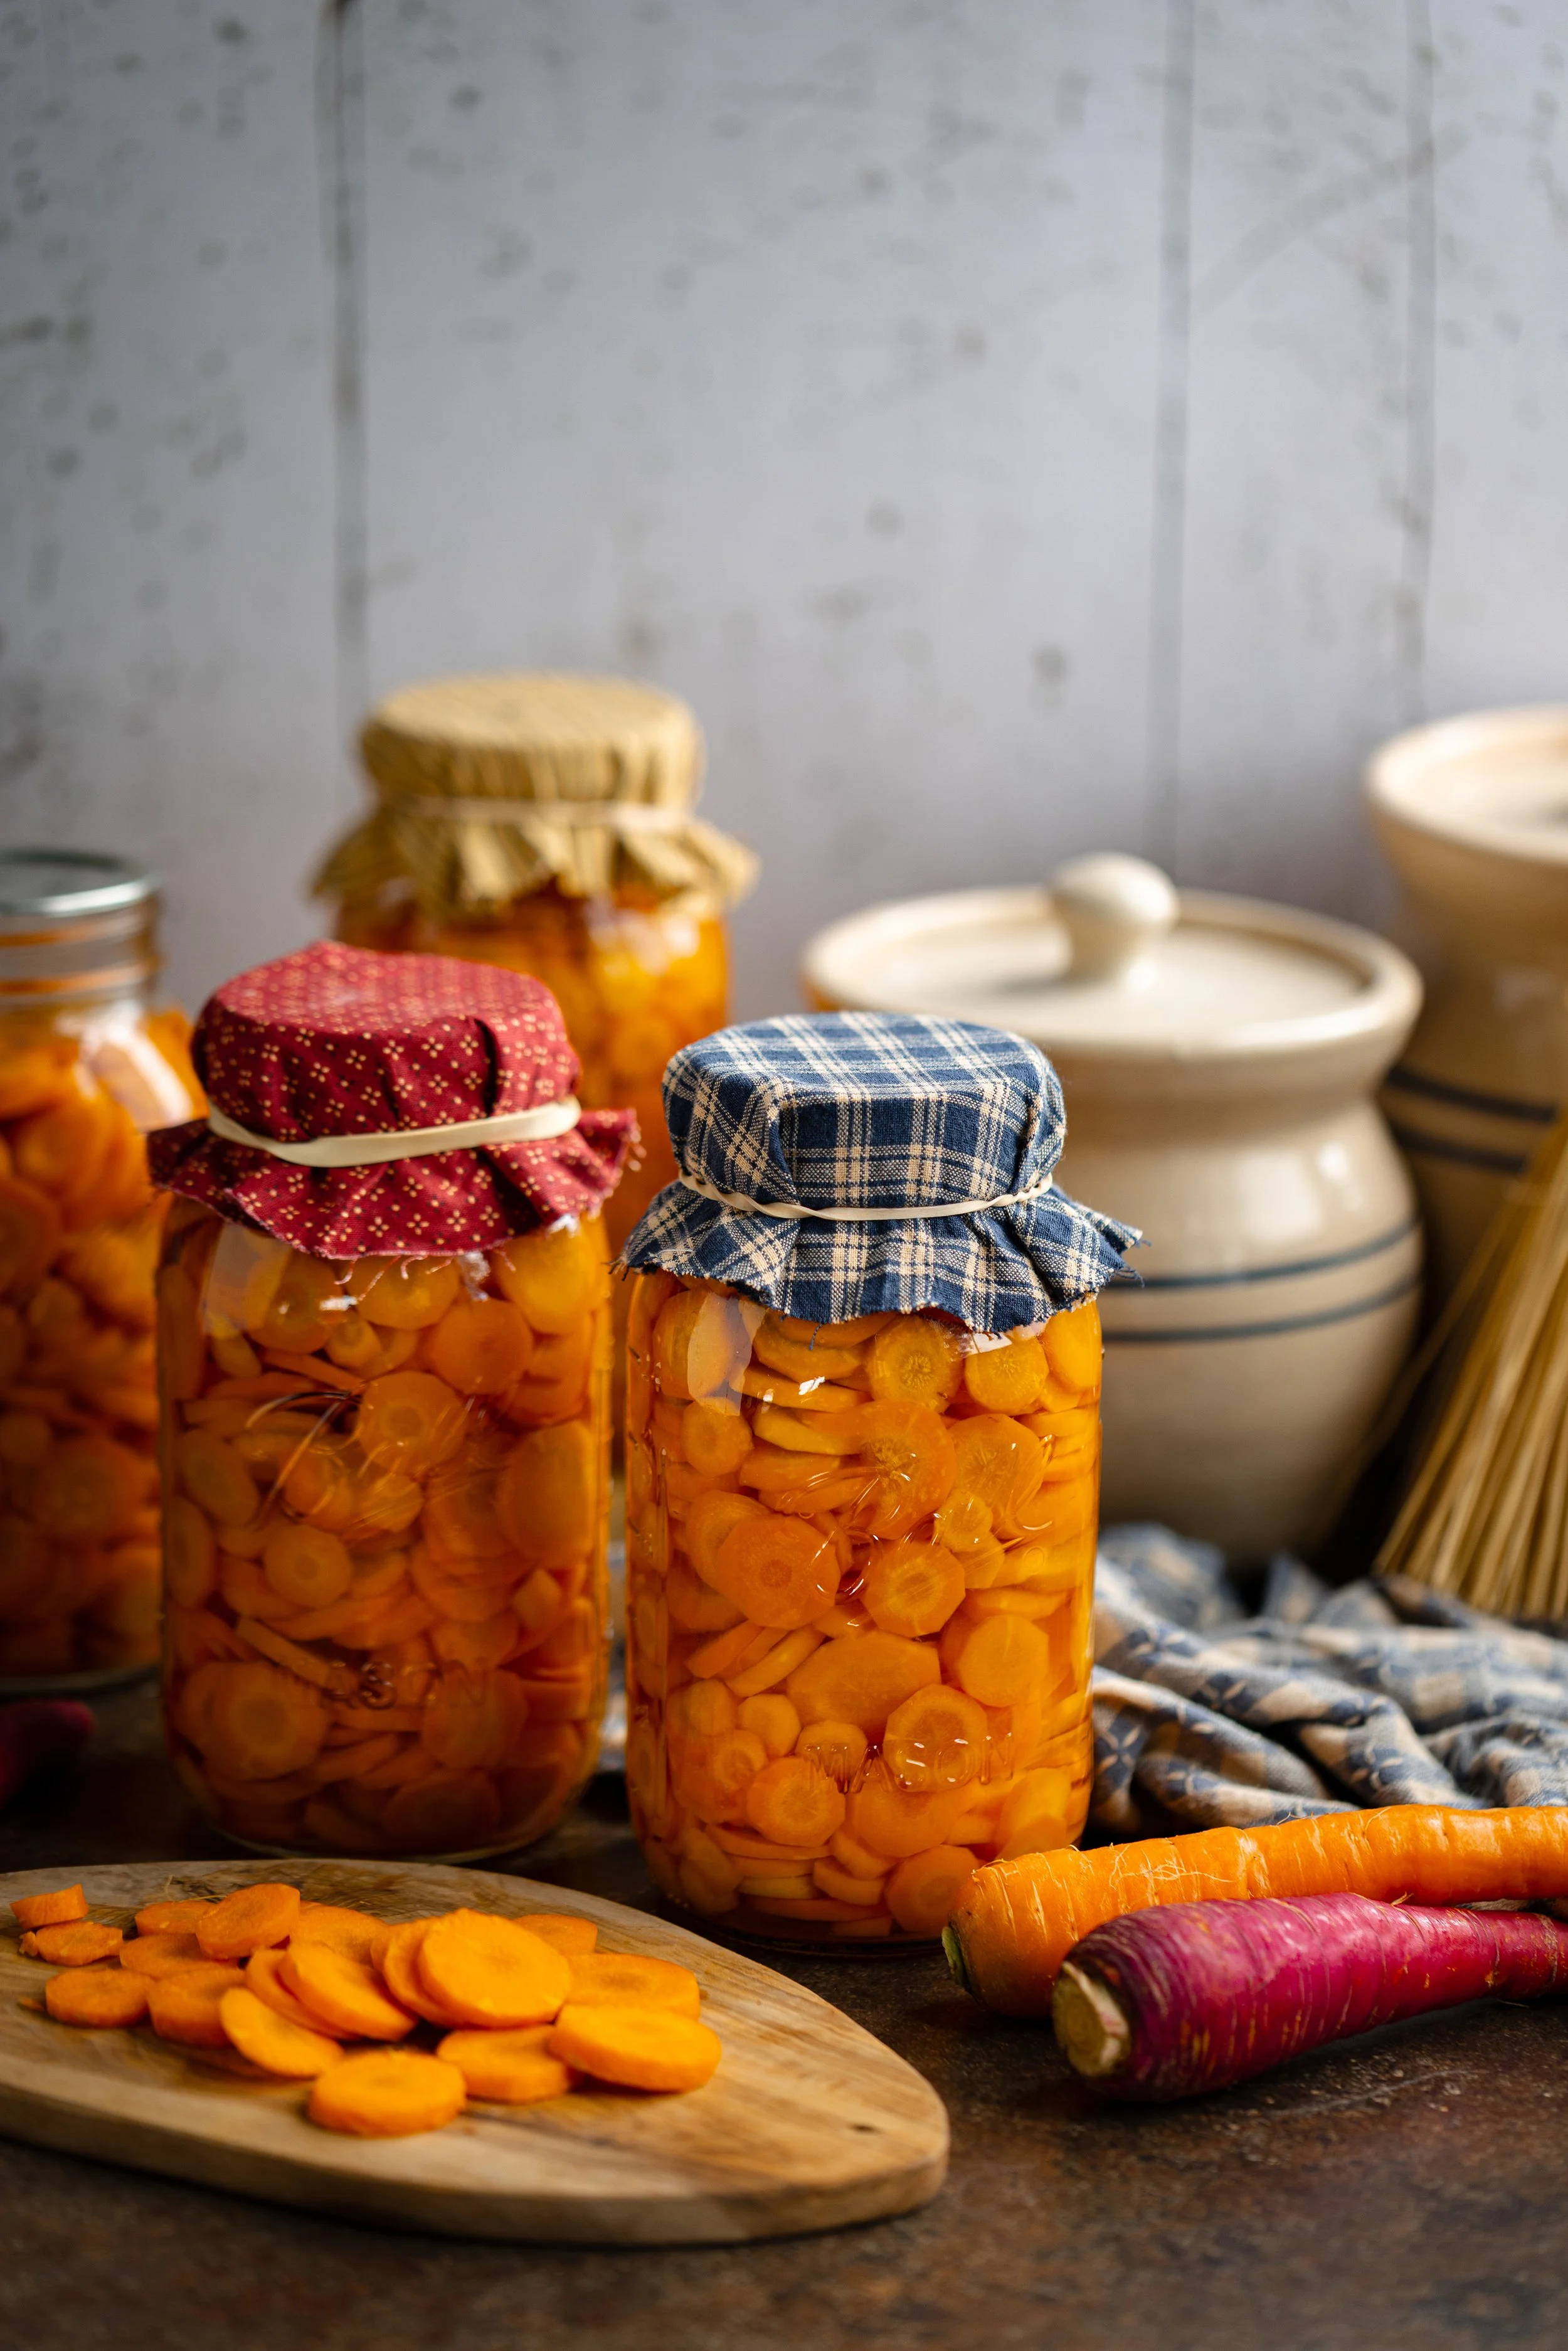
Store sealed jars in a cool, dark pantry for up to 18 months or longer.
Opened jars can be stored in the fridge and should be used within 3 to 5 days.
Do not use if the jars lose their seal, develop off-smells, or show signs of spoilage.
According to the USDA, it is okay to safely consume from jars that have siphoned, or lost, up to half of the liquid from each jar.
Serving Suggestions
Add to soups and stews
Glaze with butter and honey
Mash with potatoes or parsnips
Use in pot pies, casseroles, and roasts
Saute with garlic and herbs for a quick side dish
Variations
Add whole garlic cloves or fresh thyme sprigs to jars for flavor (only safe in small amounts).
Try using heirloom carrot varieties for a rainbow-hued pantry!
For a sweeter variation, honey-glaze your carrots after opening and reheating.

Final Thoughts
Pressure canning carrots is one the of the easiest ways to fill your pantry shelves with homegrown produce! Once you get the hang of it, learning how to can becomes part of your seasonal rhythm. There is something meditative to peeling, slicing, and tucking away jars full of delicious carrots for the colder months. Whether you are prepping for winter or building your food storage skills, I hope that this easy guide to pressure canning carrots helps you feel knowledgeable and empowered in the kitchen. If you give it a try, tag me @underatinroof so I can cheer you on!
xoxo Kayla

Canned Carrots: Pressure Canning Guide
Learn how to pressure can carrots safely at home with this step-by-step guide. Includes tips for prep, peeling, cutting, and storing shelf-stable jars all year long.
Ingredients
- Fresh carrots, peeled and cut into coins, sticks, or cubes, 11 lbs (5 kg) for pints or 17.5 lbs (8 kg) for quarts
- Kosher salt, optional
- Boiling Water
Instructions
- Begin by preparing your pressure canner, jars, lids, and bands. You will want to get the canning preparation started before begin the canning process as the cooking part is rather quick, and it always takes a long time for the canning pot to heat up. Simmer the jars for at least 10 minutes in the canner before filling to adjust the temperature of the glass— do not boil!
- Wash and peel the carrots. Then, wash the peeled carrots again. Slice the carrots into rounds, coins, sticks, or cubes.
- Choose your preferred method of packing the carrots:
- Hot Pack: In a large pot, cover the cut carrots with boiling water. Bring the pot to a boil and simmer for 5 minutes. Fill a hot jar with hot carrots, leaving 1-inch (2.5-cm) headspace.
- Raw Pack: Fill a hot jar tightly with raw carrots, leaving 1-inch (2.5-cm) of headspace.
- Add 1/2 teaspoon of salt per pint jar or 1 teaspoon of salt per quart jar, if desired. Add hot cooking liquid or clean boiling water to the jar, leaving 1-inch headspace.
- Remove air bubbles with a silicone spatula or bubble popper tool, and adjust the headspace if needed with more carrots or hot water. Wipe the rims with a dampened, clean paper towel. Apply the lids and bands to fingertip tight.
- Add the filled jar back to the canner and repeat the filling process with the remaining jars. Always fill your jars in an assembly line process rather than filling all of the jars at once to make sure that the jars remain hot. This prevents any temperature shock, which can cause the jars to crack.
- Once all of the jars have been filled, put the lid on the pressure canner. Turn up the heat on the canner to a rolling boil and vent the steam for 10 minutes.
- After 10 minutes, apply the pressure gauge or weighted gauge. Build pressure in the canner to 10 lbs (4.5 kg) PSI of pressure at an altitude 0-1,000 ft (0-305 m). Adjust the amount of pressure for your altitude. Process pints for 25 minutes and quarts for 30 minutes at 10 lbs PSI at altitudes 0-2,000 ft.
- After the processing time has finished, turn off the heat. Allow the canner’s dial gauge to return to 0 PSI before doing anything else. Once the canner has reached 0 on the dial gauge, you can remove the pressure or weight gauge. Let the steam vent for 10 minutes, then remove the lid. Leave the jars in the canner for a further 10 minutes before removing them from the canning pot. Set them on the countertop and leave to seal. Check the seals after 12 to 24 hours, making sure that the centers do not flex and they are suctioned to the jars.
Notes
- Store sealed jars in a cool, dark pantry for up to 18 months or longer.
- Opened jars can be stored in the fridge and should be used within 3 to 5 days.
- Do not use if the jars lose their seal, develop off-smells, or show signs of spoilage.
- According to the USDA, it is okay to safely consume from jars that have siphoned, or lost, up to half of the liquid from each jar.
Nutrition Facts
Calories
3Nutritional information is only an estimate. The accuracy of the nutritional information for any recipe on this site is not guaranteed.


