How to Grow Garlic: Complete Planting, Growing, and Harvesting Guide
This post may contain affiliate links, please see our privacy policy for more information.
There is nothing better than the flavor of fresh, homegrown garlic. Truly! Growing your own garlic is one of the most rewarding vegetables that you can grow in your garden. As a primary ingredient in almost every cuisine, garlic is a kitchen staple that nearly every person uses when cooking (if they are able to eat it!). Growing your own garlic is fun and simple, and makes you feel like a kitchen garden champion.
You can learn how to grow garlic easily, and by next summer, have a gorgeous crop of delicious smelling bulbs and garlic scapes to cook with. In this guide, I’ll walk you through the step-by-step process of how to grow garlic in your garden.

Why Grow Your Own Garlic?
Unmatched Flavor: There’s no denying it; homegrown garlic just tastes better. It’s strong and heavily scented. The flavor is robust and more complex. Garlic that is grown commercially is not as flavorful as heirloom varieties.
Freshness: The flavor of garlic grown in your garden is also determined by freshness. You will most likely be growing garlic to save it for future use, but it will still have a fresher flavor than the garlic from commercially grown cloves.
Bonus Harvest: If you grow hardneck garlic, you will get the additional harvest of delicious garlic scapes! The scapes are the edible stalks of the garlic that need to be removed for the garlic to form a full bulb or head of garlic. These flower stalks are delicious and have strong garlic flavor! You can use them in multiple ways in your cooking like Garlic Scape Pesto and Pickled Garlic Scapes.
Long-Term Storage: My favorite reason to grow homegrown garlic is that it’s an easy vegetable to preserve for longevity in your pantry. When properly cured, garlic will keep for several months or even for an entire year!

Garlic Types & Best Varieties
Hardneck Garlic
Hardneck garlic is the best option for growing homegrown garlic, hands down. This type of garlic features a rigid, woody central stem or “stalk” that the cloves grow around. Hardneck garlic is cold-hardy and thrives in cold winters, so if you live in Hardiness Zones 1-6, this is the garlic you will have to grow. Downsides to grow hardneck garlic are that it has a shorter storage life and has fewer but larger cloves.
Softneck Garlic
If you have purchased garlic from the grocery store, you have most likely eaten softneck garlic. This is the most common type of garlic found and grown, and it is wonderful because of its long shelf life in storage. It has a soft, pliable stem that can be braided (pretty!) and it stores well for several months longer than hardneck garlic— usually more than a year! Softneck garlic is best grown in USDA Hardiness Zones 5-9.
Elephant Garlic
What is elephant garlic? You might have never heard of this type of garlic, but you have probably seen it before. Elephant garlic is a cultivar of the leek family, and it is technically not garlic. It grows similarly to hardneck varieties, but it is much larger— up to 1 lb each! It grows large cloves, but only about 4 to 7 cloves per bulb. It is mild and sweet, with the flavor being more related to an onion or shallot than true garlic.
| Type | USDA Hardiness Zones | Benefits | Drawbacks | Popular Garden Cultivars |
|---|---|---|---|---|
| Hardneck | 1-6 | Bolder flavor, garlic scapes, overwinters well, easier to peel | Smaller bulbs and cloves, shorter shelf life, hard to grow in warmer climates, cannot be braided | 'Music' 'Chesnok Red' 'Spanish Roja' |
| Softneck | 5-10 | Longer storage life (1 year+), braiding potential, more cloves per bulb, does not need a cold period | Cannot grow in colder climates, milder flavor, harder to peel and smaller cloves, susceptible to rot | 'California Early' 'Silverskin' 'Inchelium Red' |
| Elephant Garlic | 3-9 | Large size (1 lb bulbs!), mild and versatile flavor, easy to grow, few pests and diseases, long storage life | Large space requirement, long growing season (8 months), needs cold to form cloves (<40°F), heavy feeder | There is only one - 'Allium ampeloprasum' |
Can you plant store-bought garlic?
I would, personally, not recommend this. Most garlic from the grocery store comes from a large-scale, commercial farming practice with mild climates, usually grown in Southern parts of the world. The garlic will most likely not be suitable for your growing conditions, and it may carry traits that do not thrive well in a home garden. If you are more strict about your growing style (organic, permaculture, etc), it’s good to know that this garlic has, generally, been treated and might go against your standards. It also just doesn’t taste as good, but that’s a personal preference!
Pro Tip: If you purchase locally grown garlic from your farmer’s market or local shops, replant it! It’s one of the best ways to guarantee that your garlic will grow because you know it grows well in your climate.
When and Where to Plant Garlic
Garlic does have specific growing conditions, though it’s fairly easy to grow. You will find that like other alliums or allium-like plants, it prefers full sunlight and is a heavy feeder, meaning that it needs added nutrients from fertilizers that are mixed into the soil.
Timing Tips:
Cold Winter Zones (1-6): Plant in late fall, about 1 to 2 weeks after the first killing frost. This is generally in early to mid October.
Mild-Winter Zones (7-18): Plant in late fall, generally around late October to November.
Warm Zones (9-10): Plant in November to early December.
Zones 10+: Prepare cloves by putting them in your freezer for 10 weeks before planting.
Dormancy Period:
Garlic requires a period of dormancy, or being inactive during a period of cold weather. This needs to be at least 40°F (4°C) or colder. This is why garlic is planted in the fall, as it will naturally go through a cold period underground during the winter. This period needs to last about 4 to 8 weeks, depending on the cultivar. In early spring, the bulbs’ dormancy period will end, and they will begin to grow once activated by the changing warmer temperatures and amounts of water and sunlight.
Best Growing Conditions:
Sun: 6 to 8 hours per day
Soil: Garlic prefers soil that has been amended well with compost or aged manure. Adding organic amendments like bonemeal or a high-potassium fertilizer helps with growing large, filled out bulbs. The soil should also be well-draining— garlic hates sitting in wet soil! This can cause the bulbs to rot. If you have heavy clay soil that does not drain well, try planting your garlic in raised beds instead that have been heavily mulched.
Spacing: 4 to 8-inches (10 to 20-cm) between cloves; 6 to 12-inches (15 to 30-cm) between rows.
Tools & Supplies You Will Need
Seed Garlic— If you are looking for garlic to plant, most local nurseries, garden centers, or greenhouses sell seed garlic. These are simply heads of garlic that have been selected for the best qualities to grow into new bulbs. You can also purchase these online, and I love using Johnny’s Select Seeds. Select large, plump cloves that do not show signs of rot or disease.
Compost— Garlic needs a bed that has been amended with compost or well-rotted manure in the top few inches of soil before planting.
Fertilizer— Garlic is a heavy feeder. It will need to be fertilized at different growing stages. Use a 5-10-10 complete fertilizer, bonemeal, or fish meal.
Straw Mulch— Garlic needs mulch! Mulch your beds heavily with straw, dry leaves, grass, or newspaper in the fall after planting.
How to Plant Garlic Step-by-Step
Prepare your bed by gently loosening soil and removing weeds. Work in 2-inches (5-cm) of compost or well-rotted manure. If your soil is heavy and compact, consider planting in containers or raised beds. Mix in a 5-10-10 complete fertilizer, bonemeal, or fish meal.
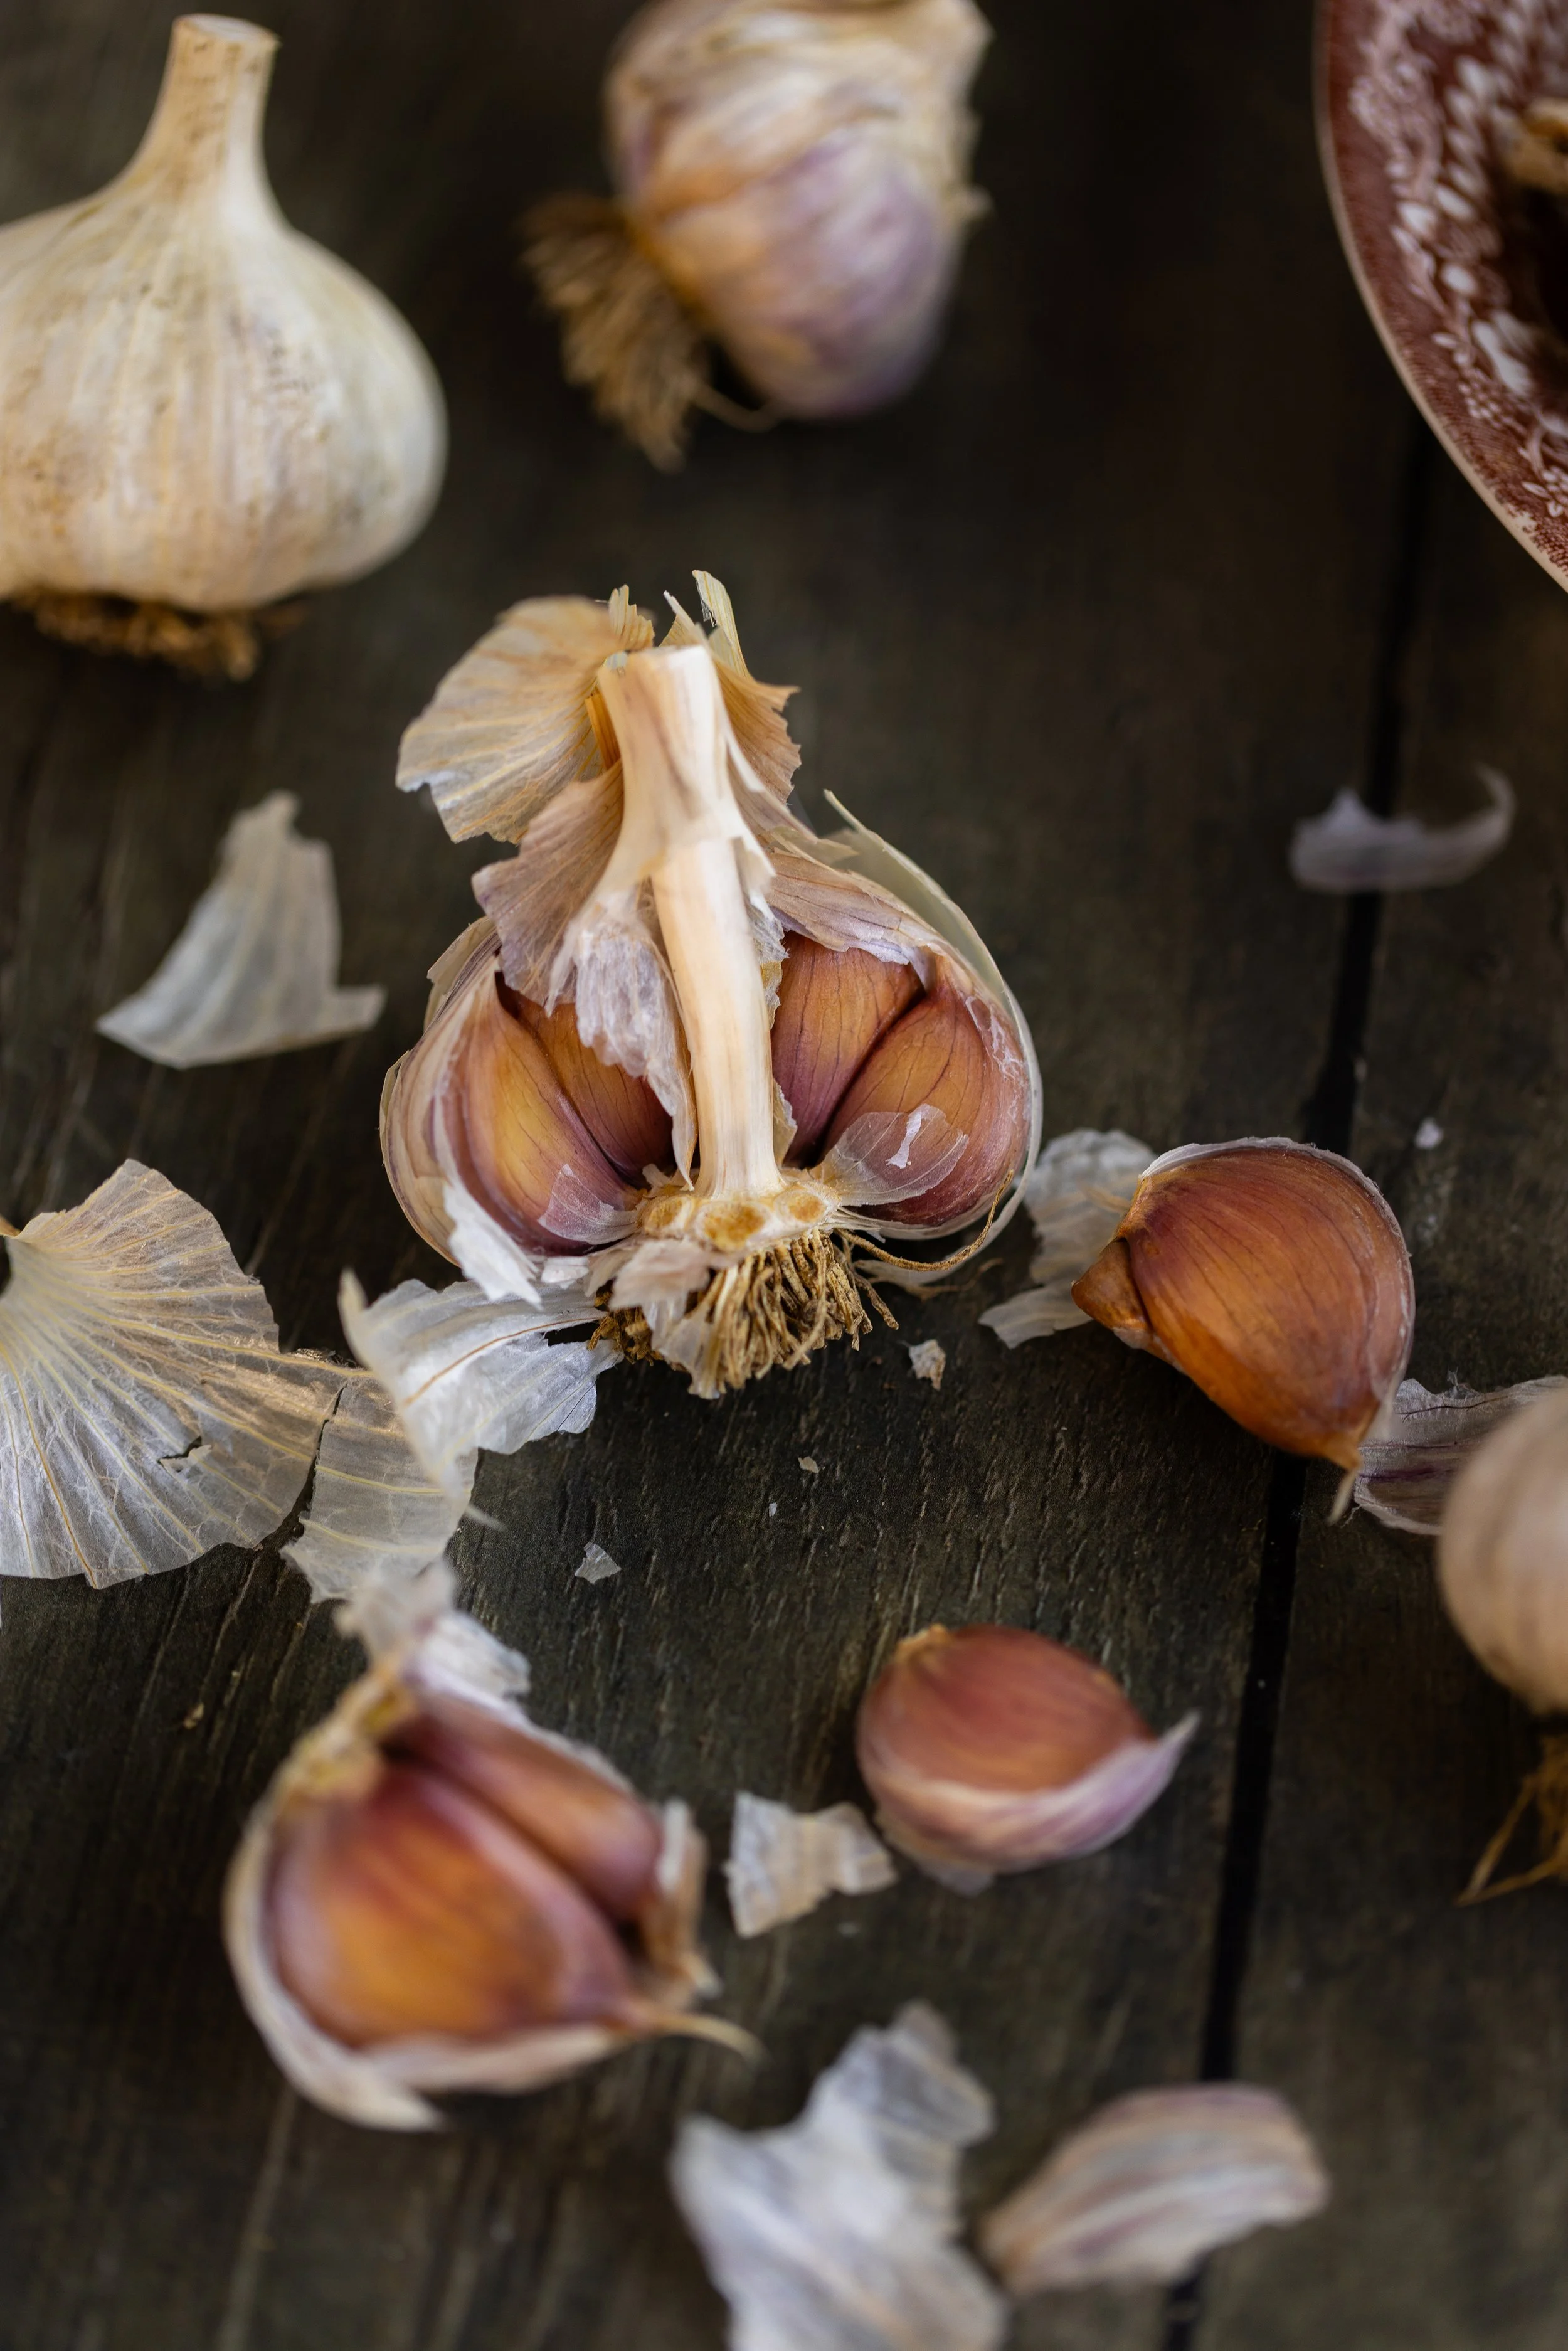
Use large, healthy cloves that are not wrinkled, rotting, or diseased. Bigger cloves will result in a larger, healthier bulb. Do not break apart the bulbs until the day you plant, if possible.
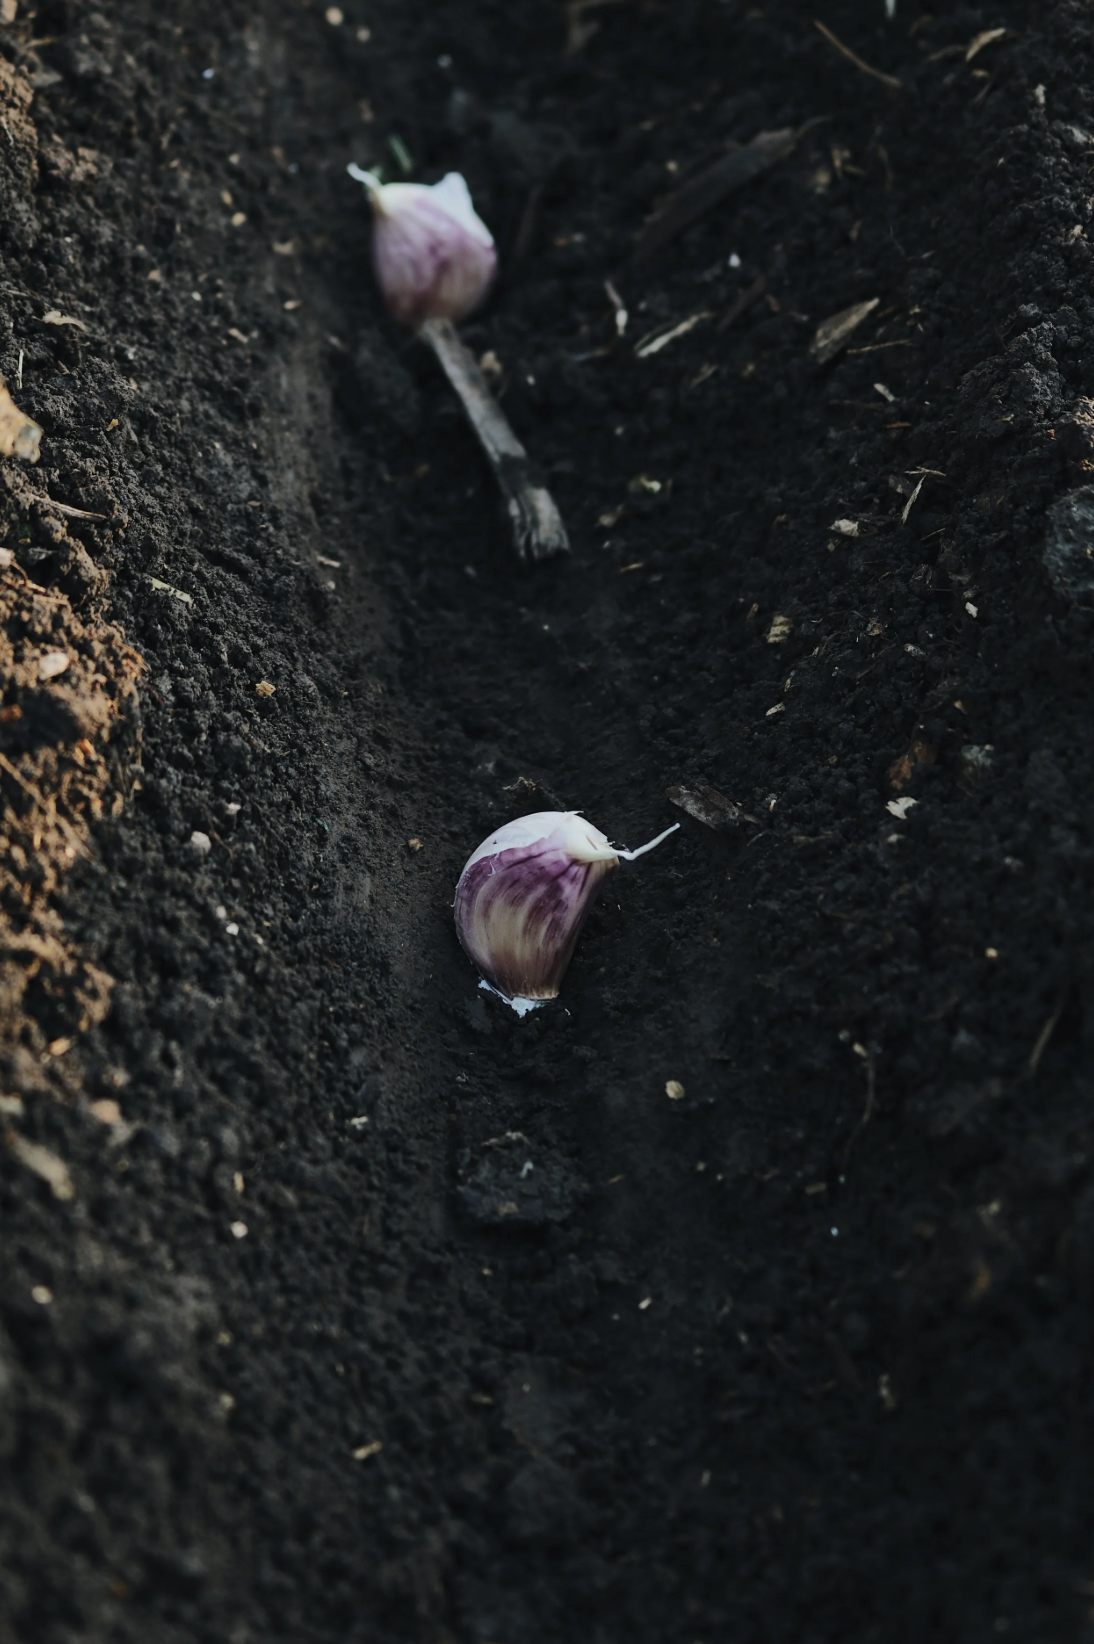
Dig furrows in the soil about 2-inches (5-cm) deep. Make the rows 6 to 12-inches (15 to 30-cm) apart.
Space cloves 4 to 8-inches (10 to 20-cm) apart in the furrows. Place the cloves upright, with the pointy end facing up to the sky. The wide, flat end should face down into the soil. Cover the cloves with soil.
Mulch immediately with 2-inches (5-cm) of straw or shredded leaves to suppress weeds and keep your bulbs well insulated. This will ensure proper overwintering.
Care tips for Garlic
Watering: Garlic does not need much water at first, at least not from the gardener. The rain should be enough to suffice, unless of course you are in a drought. In that case, you may want to water it once or twice in the fall before overwintering. In the spring, during active bulbing (usually mid-May through June), water every 3 to 5 days. If the weather is very dry, you may want to water a bit more. Generally, this is a wet and rainy season so you may not have to water at all. Stop watering in mid-June until harvest.
Fertilizing: Garlic, as stated above, is a heavy feeder. Fertilize your garlic again in early spring, as soon as you see shoots emerging from the soil, by side-dressing with blood meal. Then, fertilize for a third time in May, which is when the bulbs will begin to swell. You can also use pelleted chicken manure, or a high nitrogen fertilizer. Blood meal is best!
Weed Control: Garlic does not like competition from weeds, so do your best to keep the site well-weeded. It can really be much easier to accomplish this when mulch is utilized, and helps if you plant your garlic in raised beds.
Remove Mulch: The mulch can be removed in late spring, after the threat of frost has passed, usually around when you would plant your summer vegetables. Young garlic shoots will die in temperatures below 20°F (-6°C), so do not remove mulch before then. Removing the mulch will help the garlic to not be sitting in overly moist soil, which it does not like.
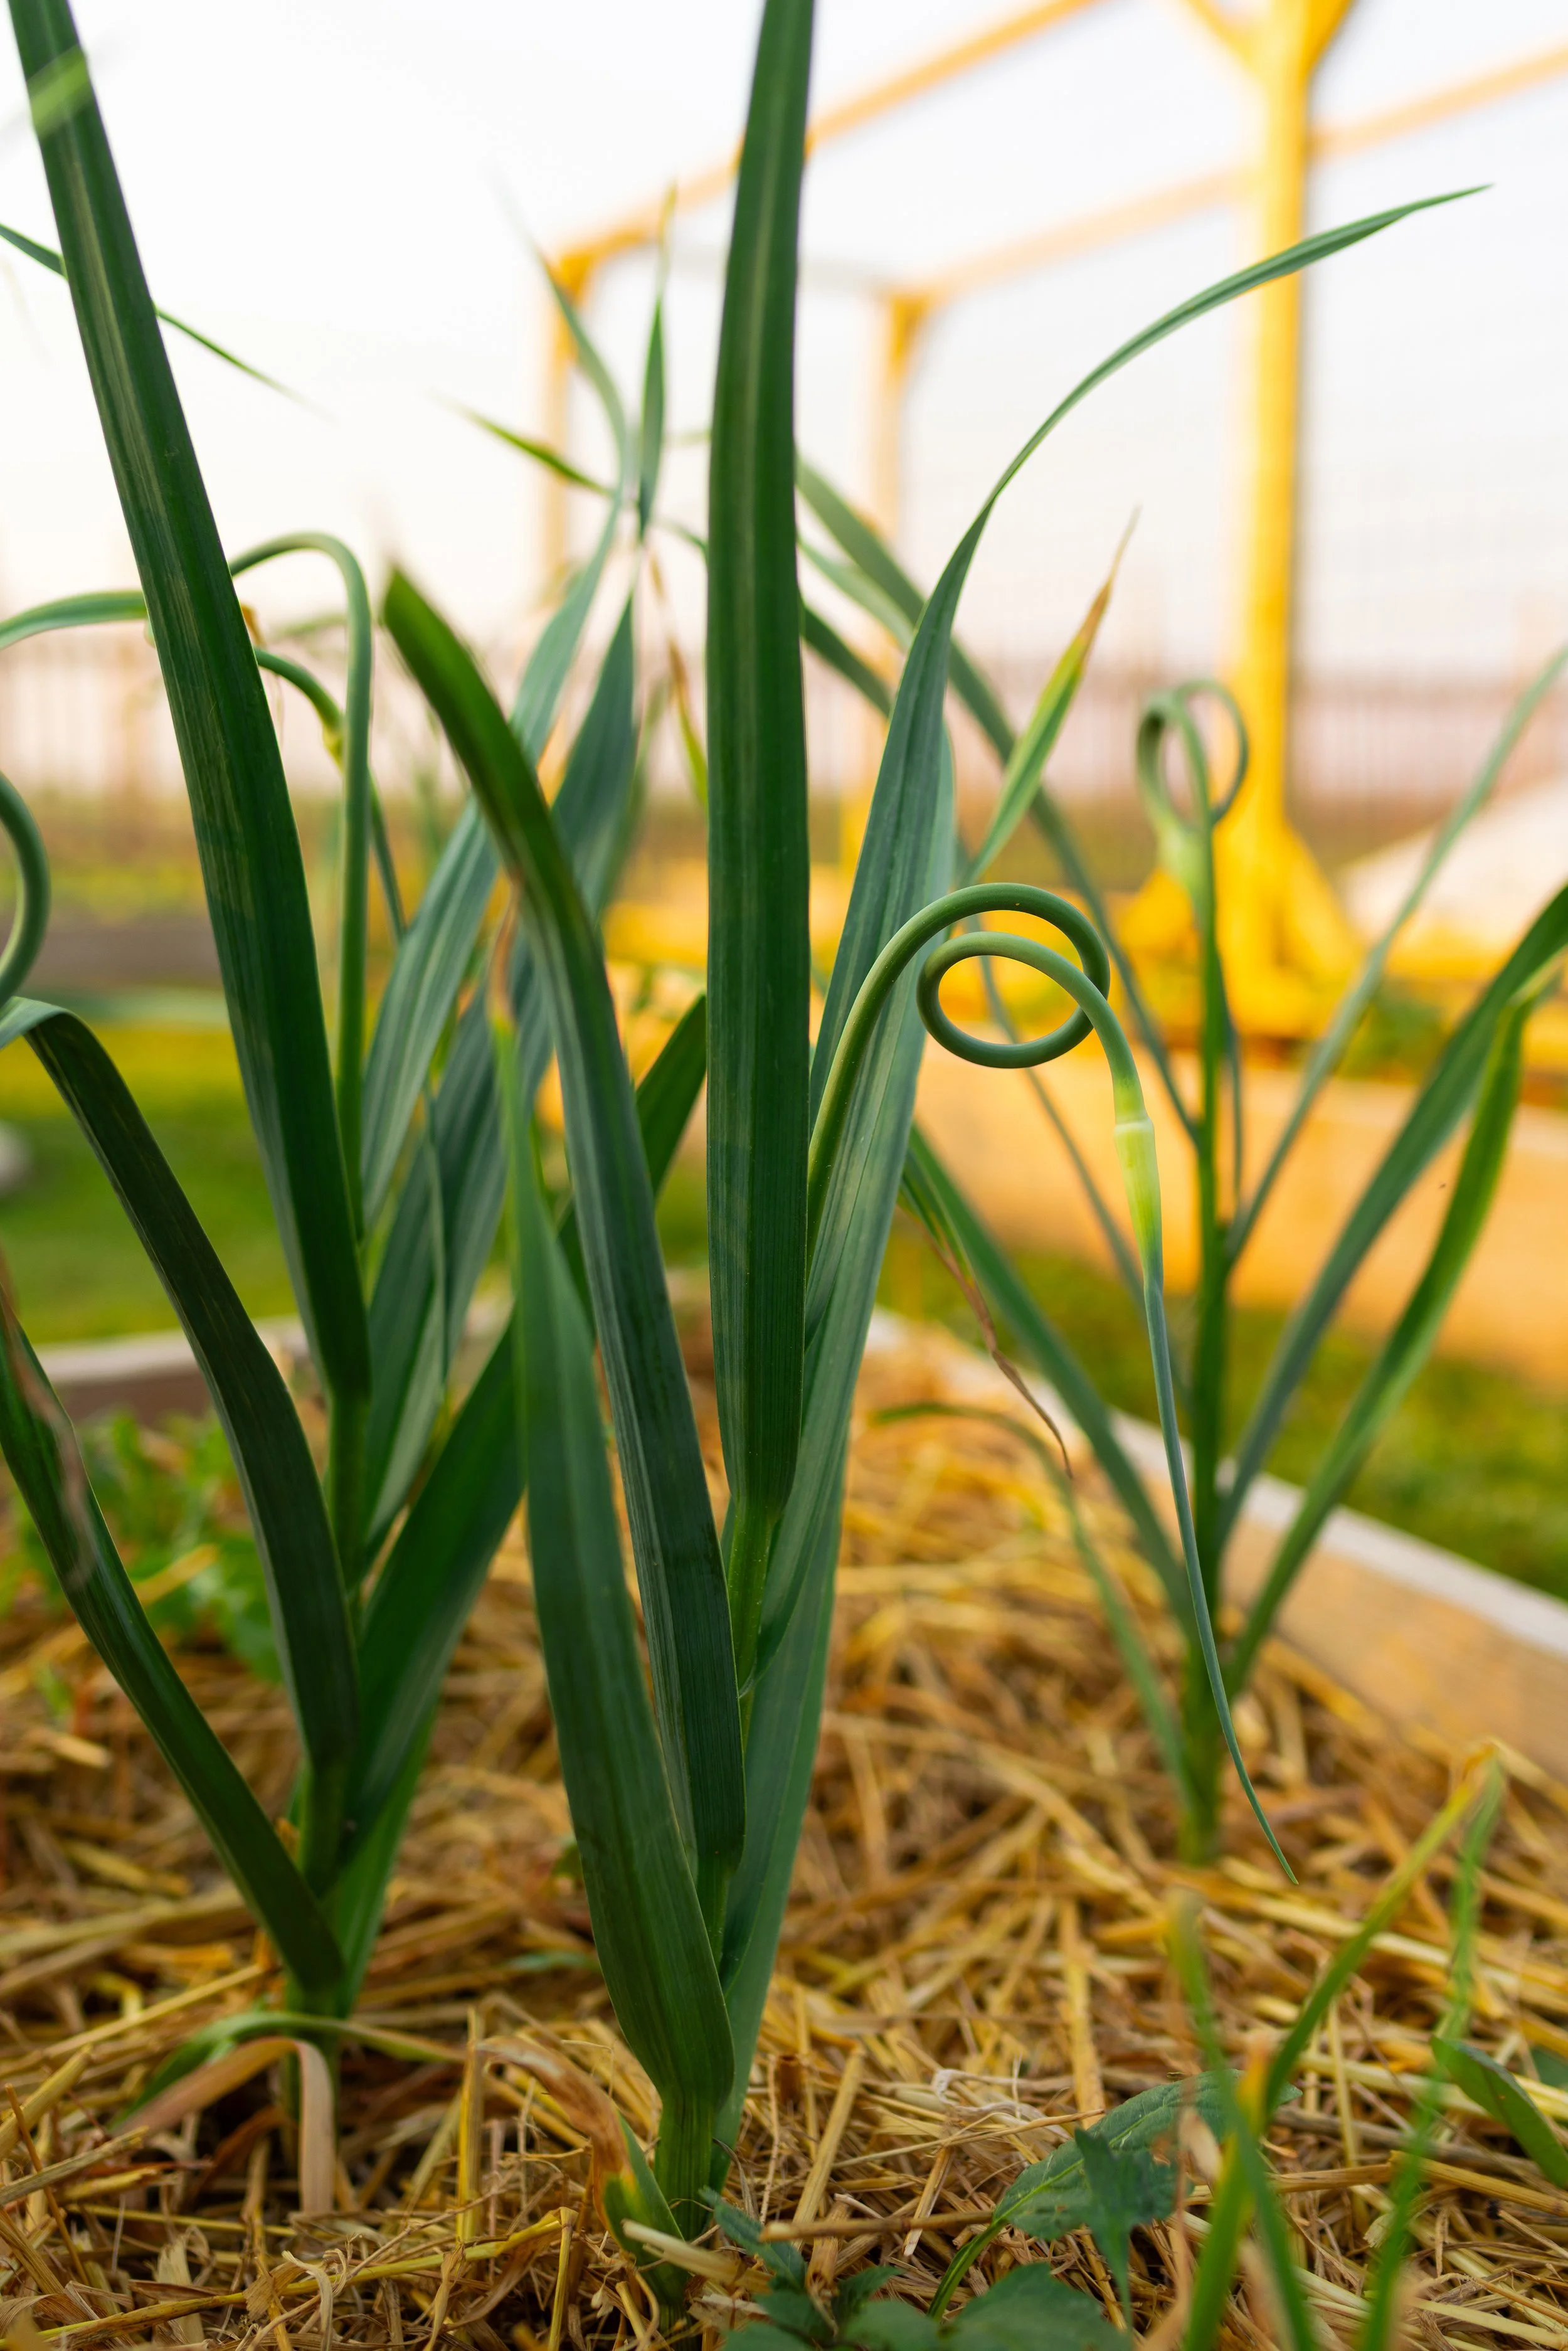
Garlic Scape Management: By late spring to early summer, if you are growing hardneck garlic, it will begin to grow scapes. The scapes are entirely edible, and they need to be removed. Leaving the scapes, which will eventually produce a flower and go to seed, can cause your bulbs to be small.
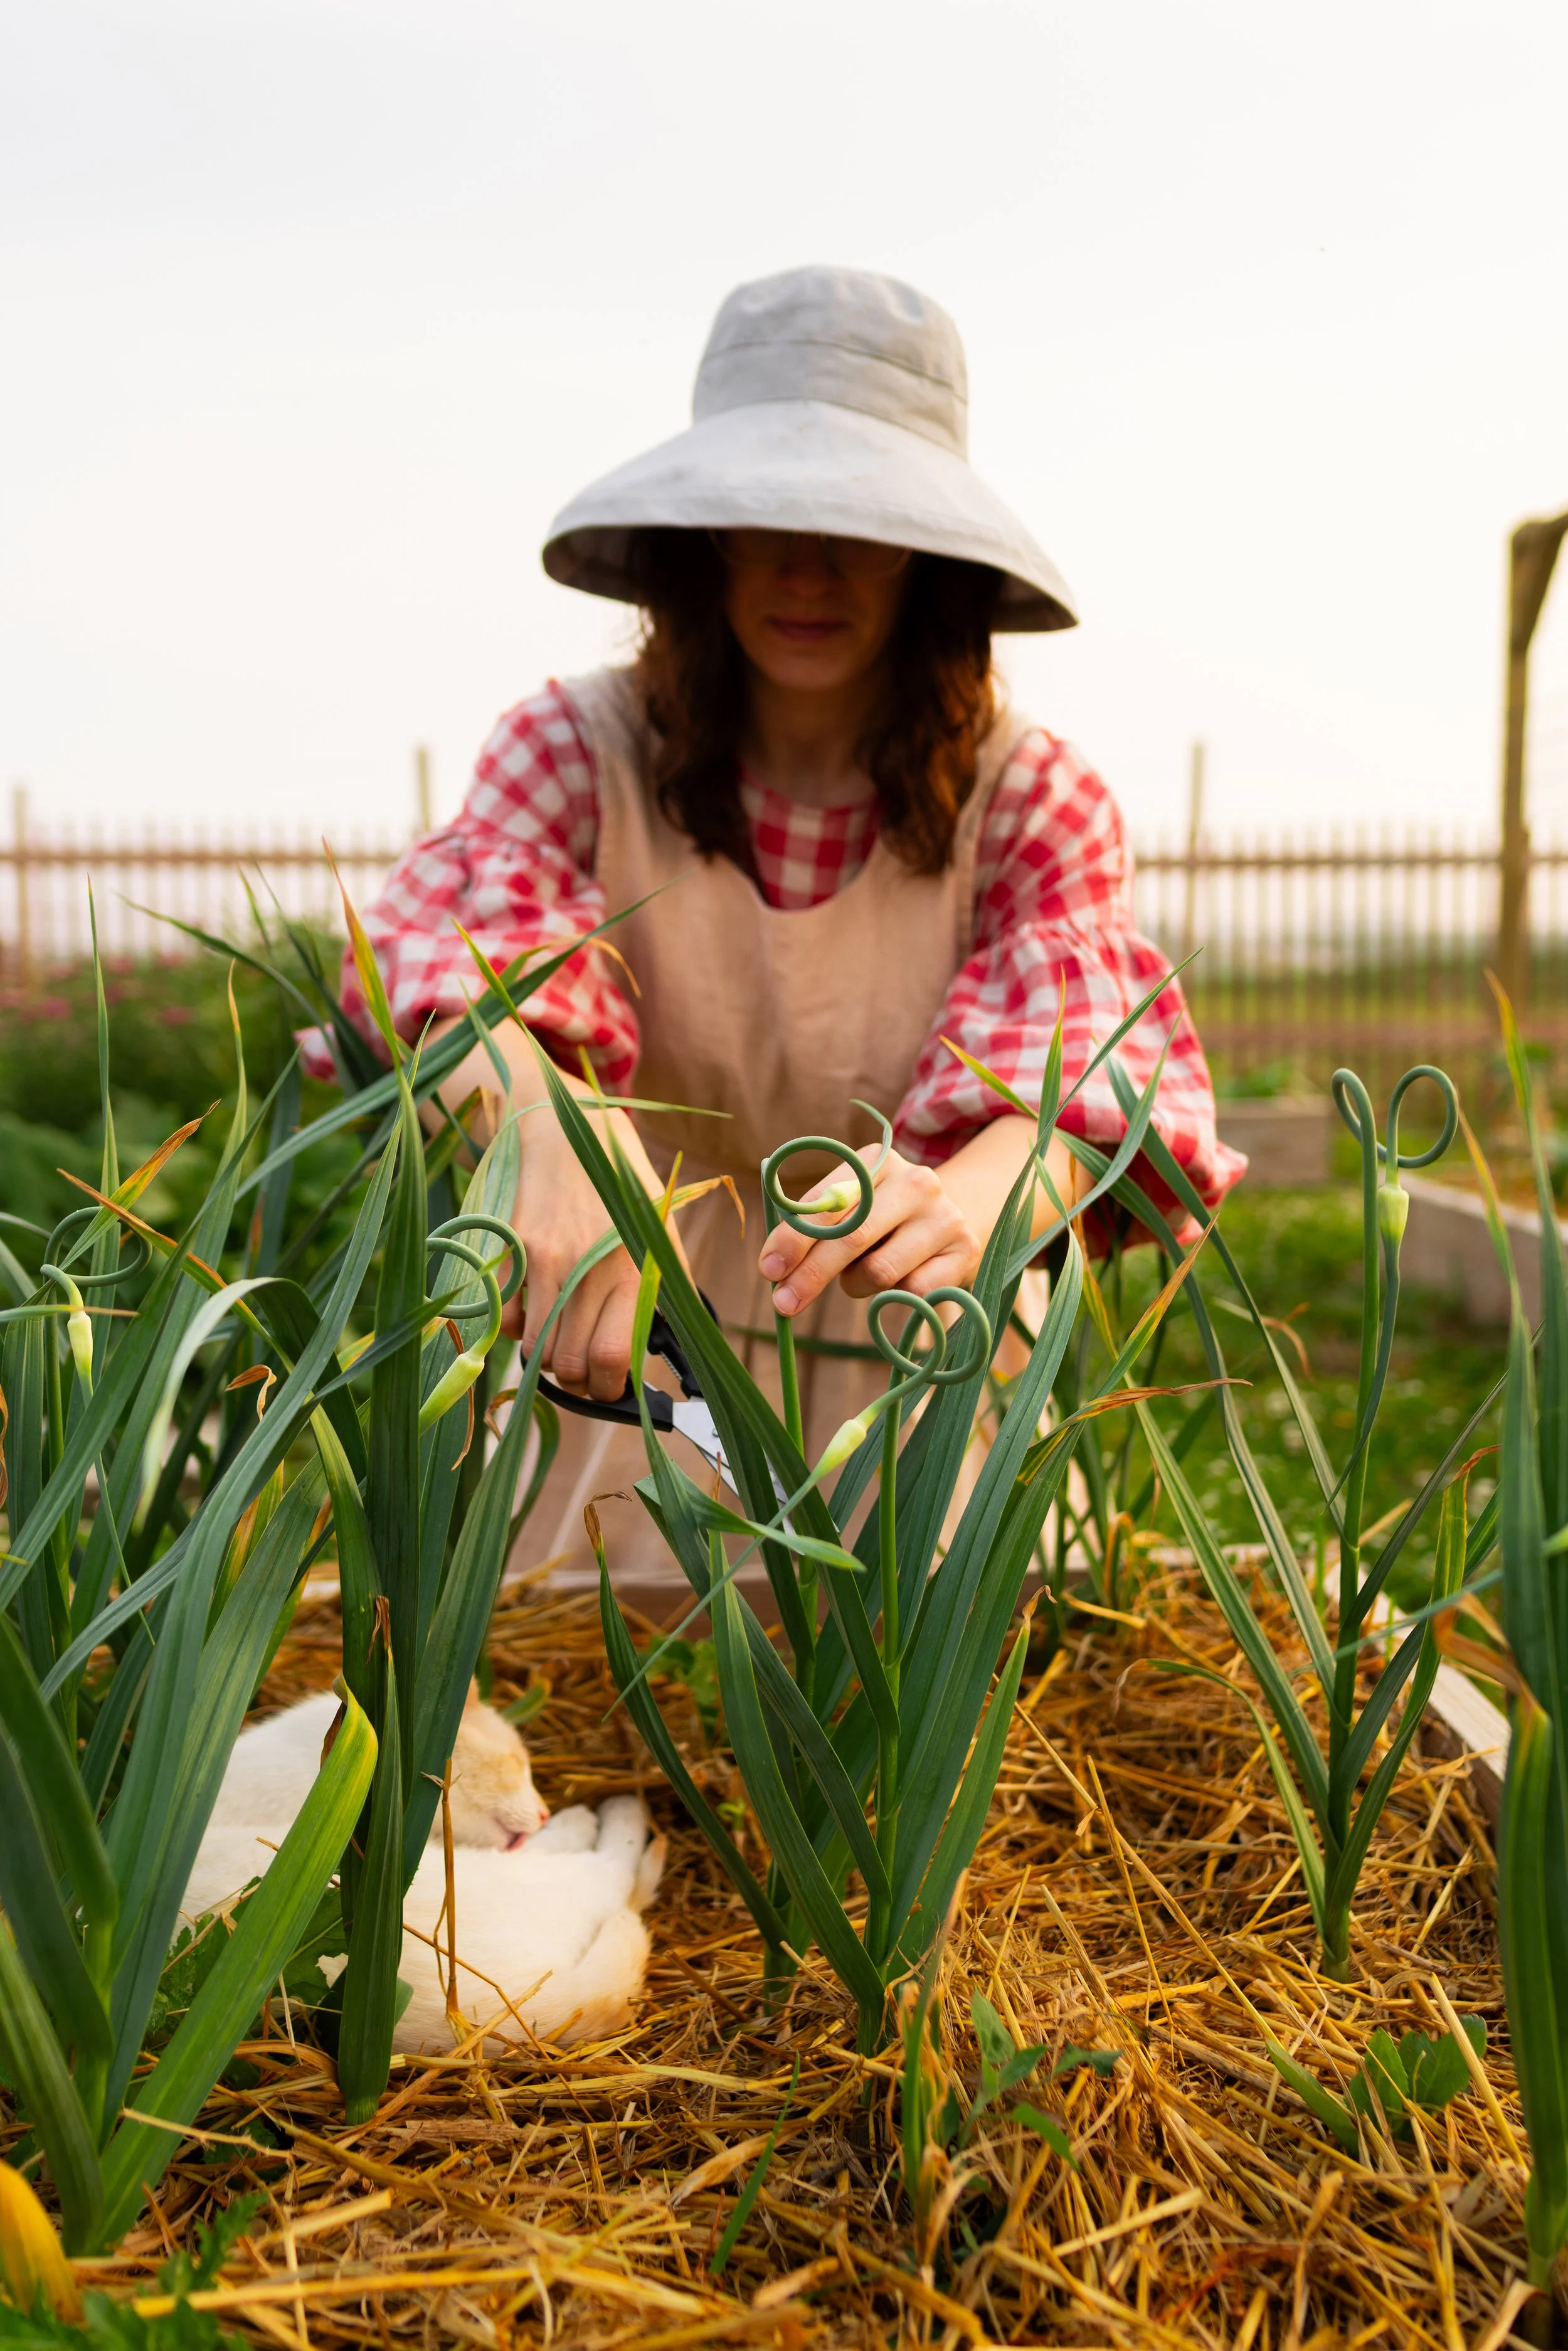
Harvesting Garlic Scapes
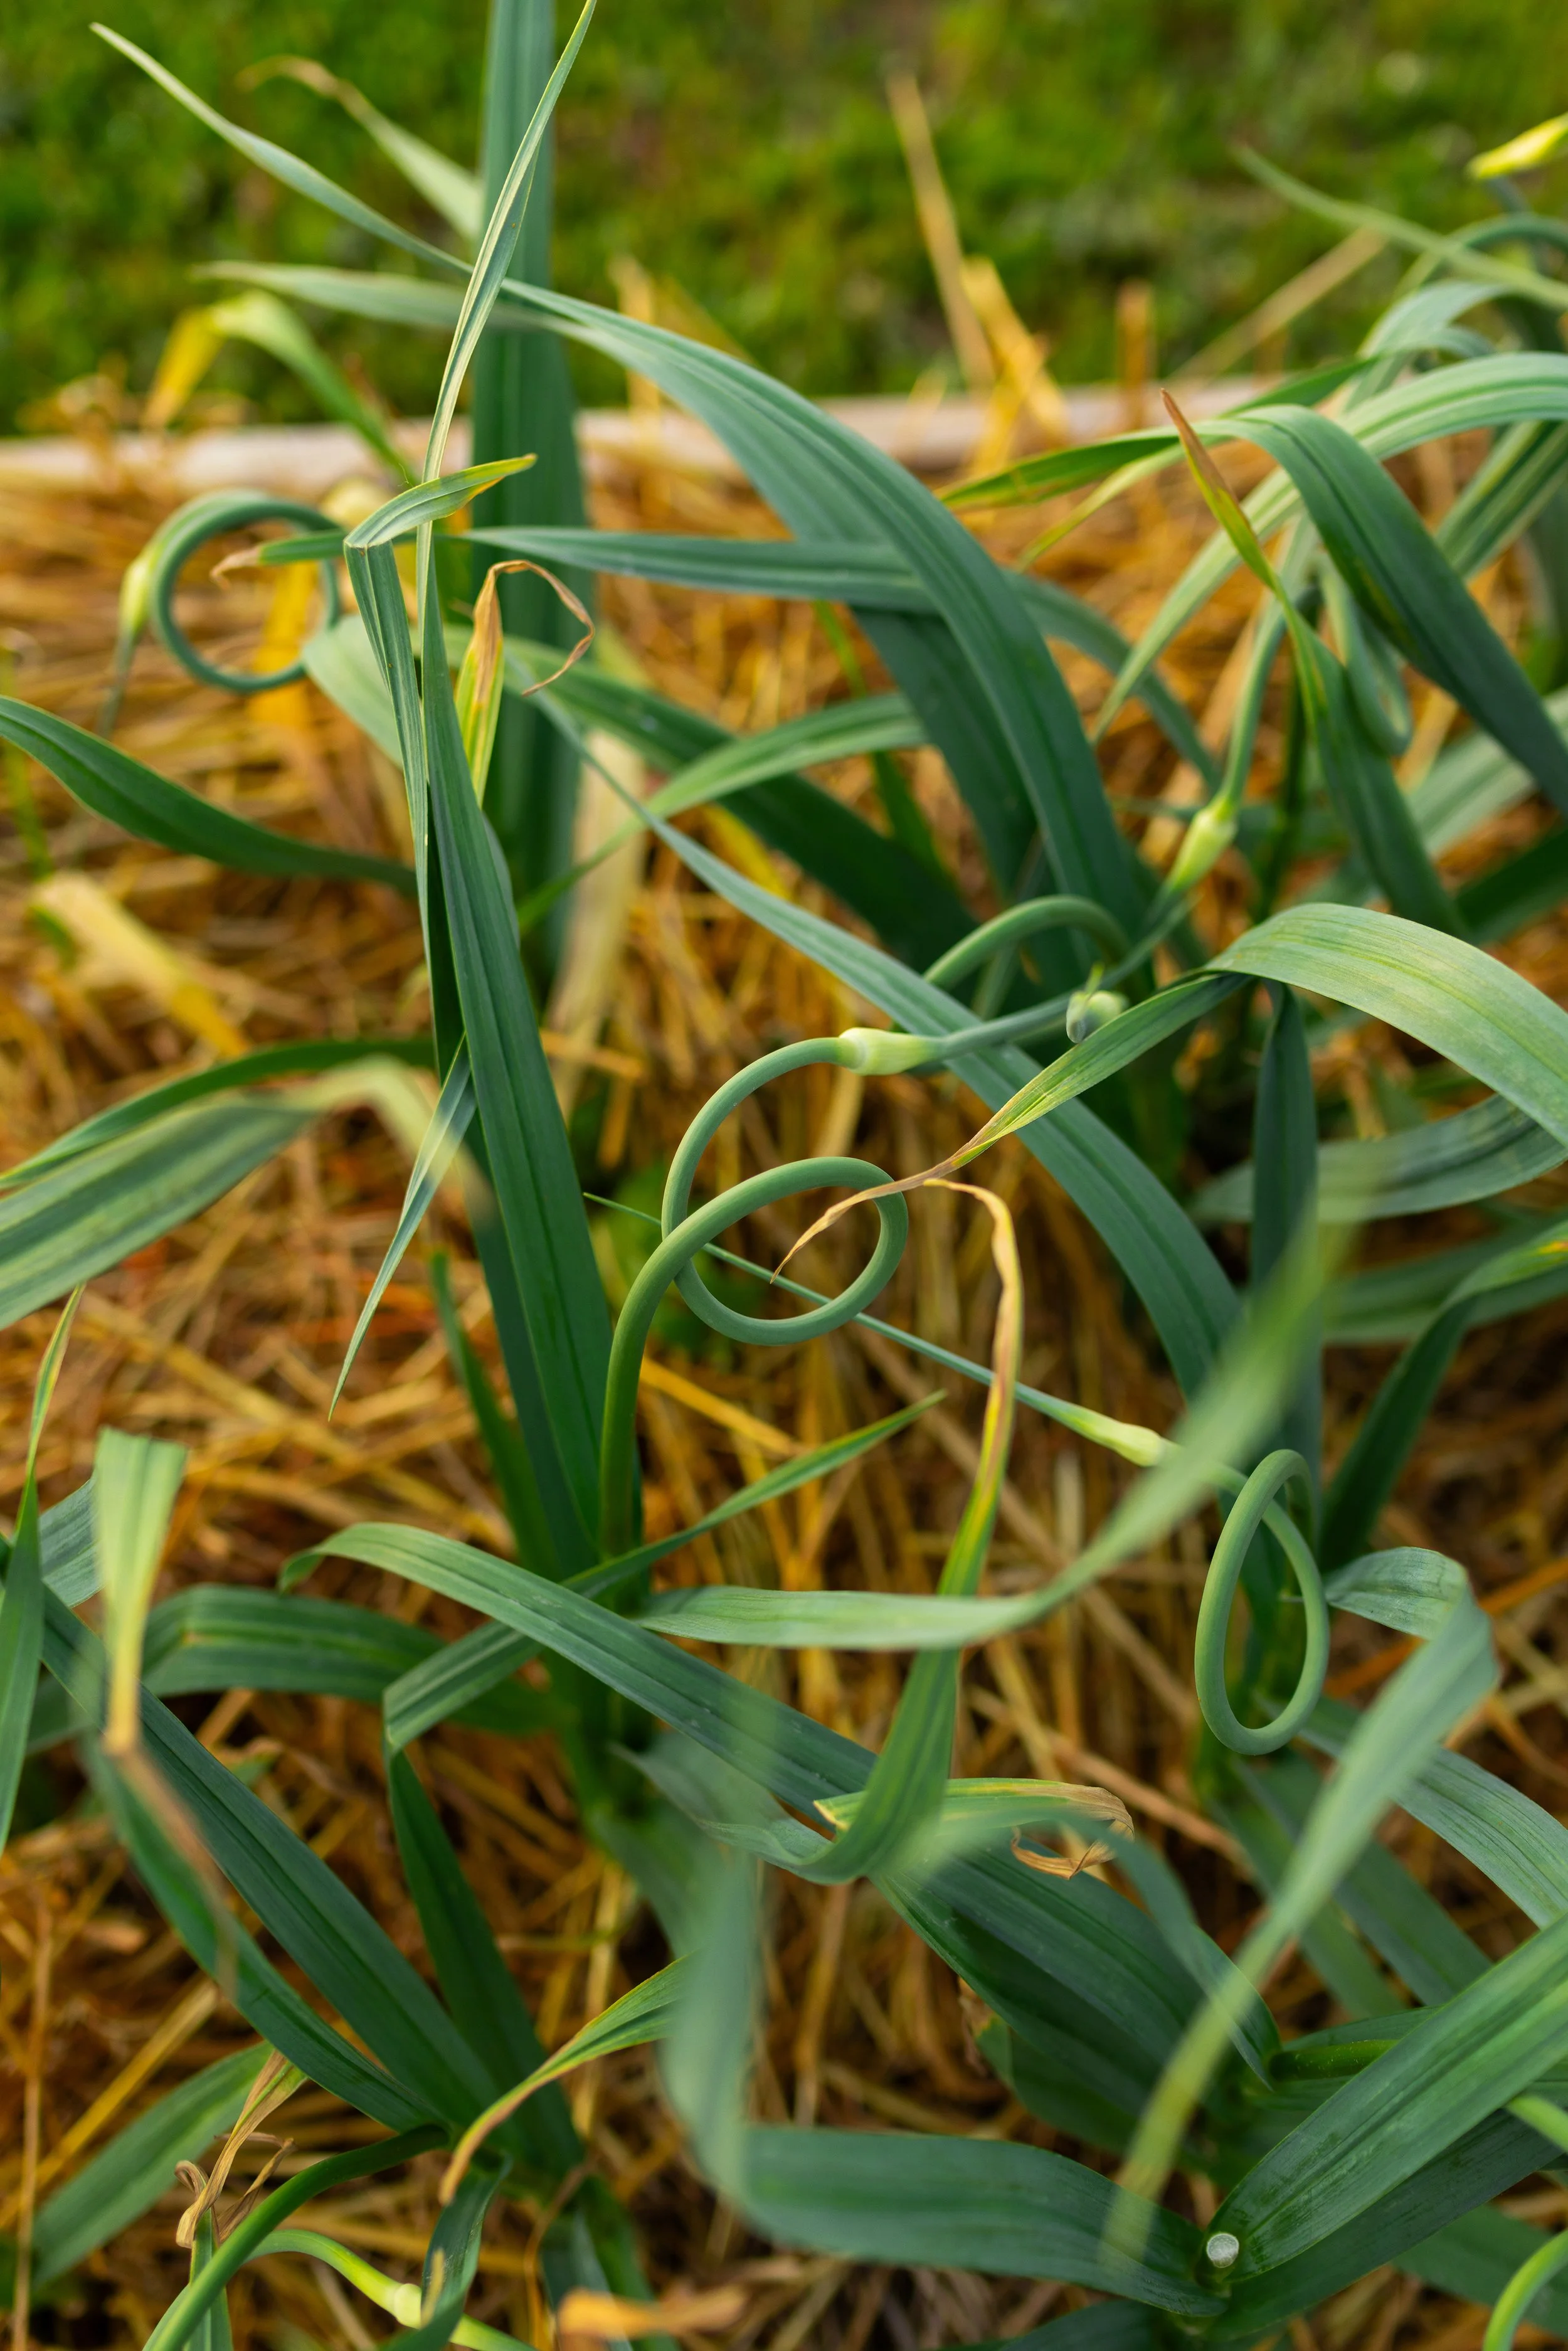
If you decide to grow hardneck garlic, you will be rewarded in the early summer months with a crop of garlic scapes! The scapes are the flower stalks that grow from hardneck garlic. If left to grow, these flowers will bloom and eventually dry and become garlic seeds. While you could certainly allow that to happen, doing so will sacrifice the garlic bulb (the part that you want to eat)! Leaving the scapes on the garlic, this causes the bulbs to be stunted or small.
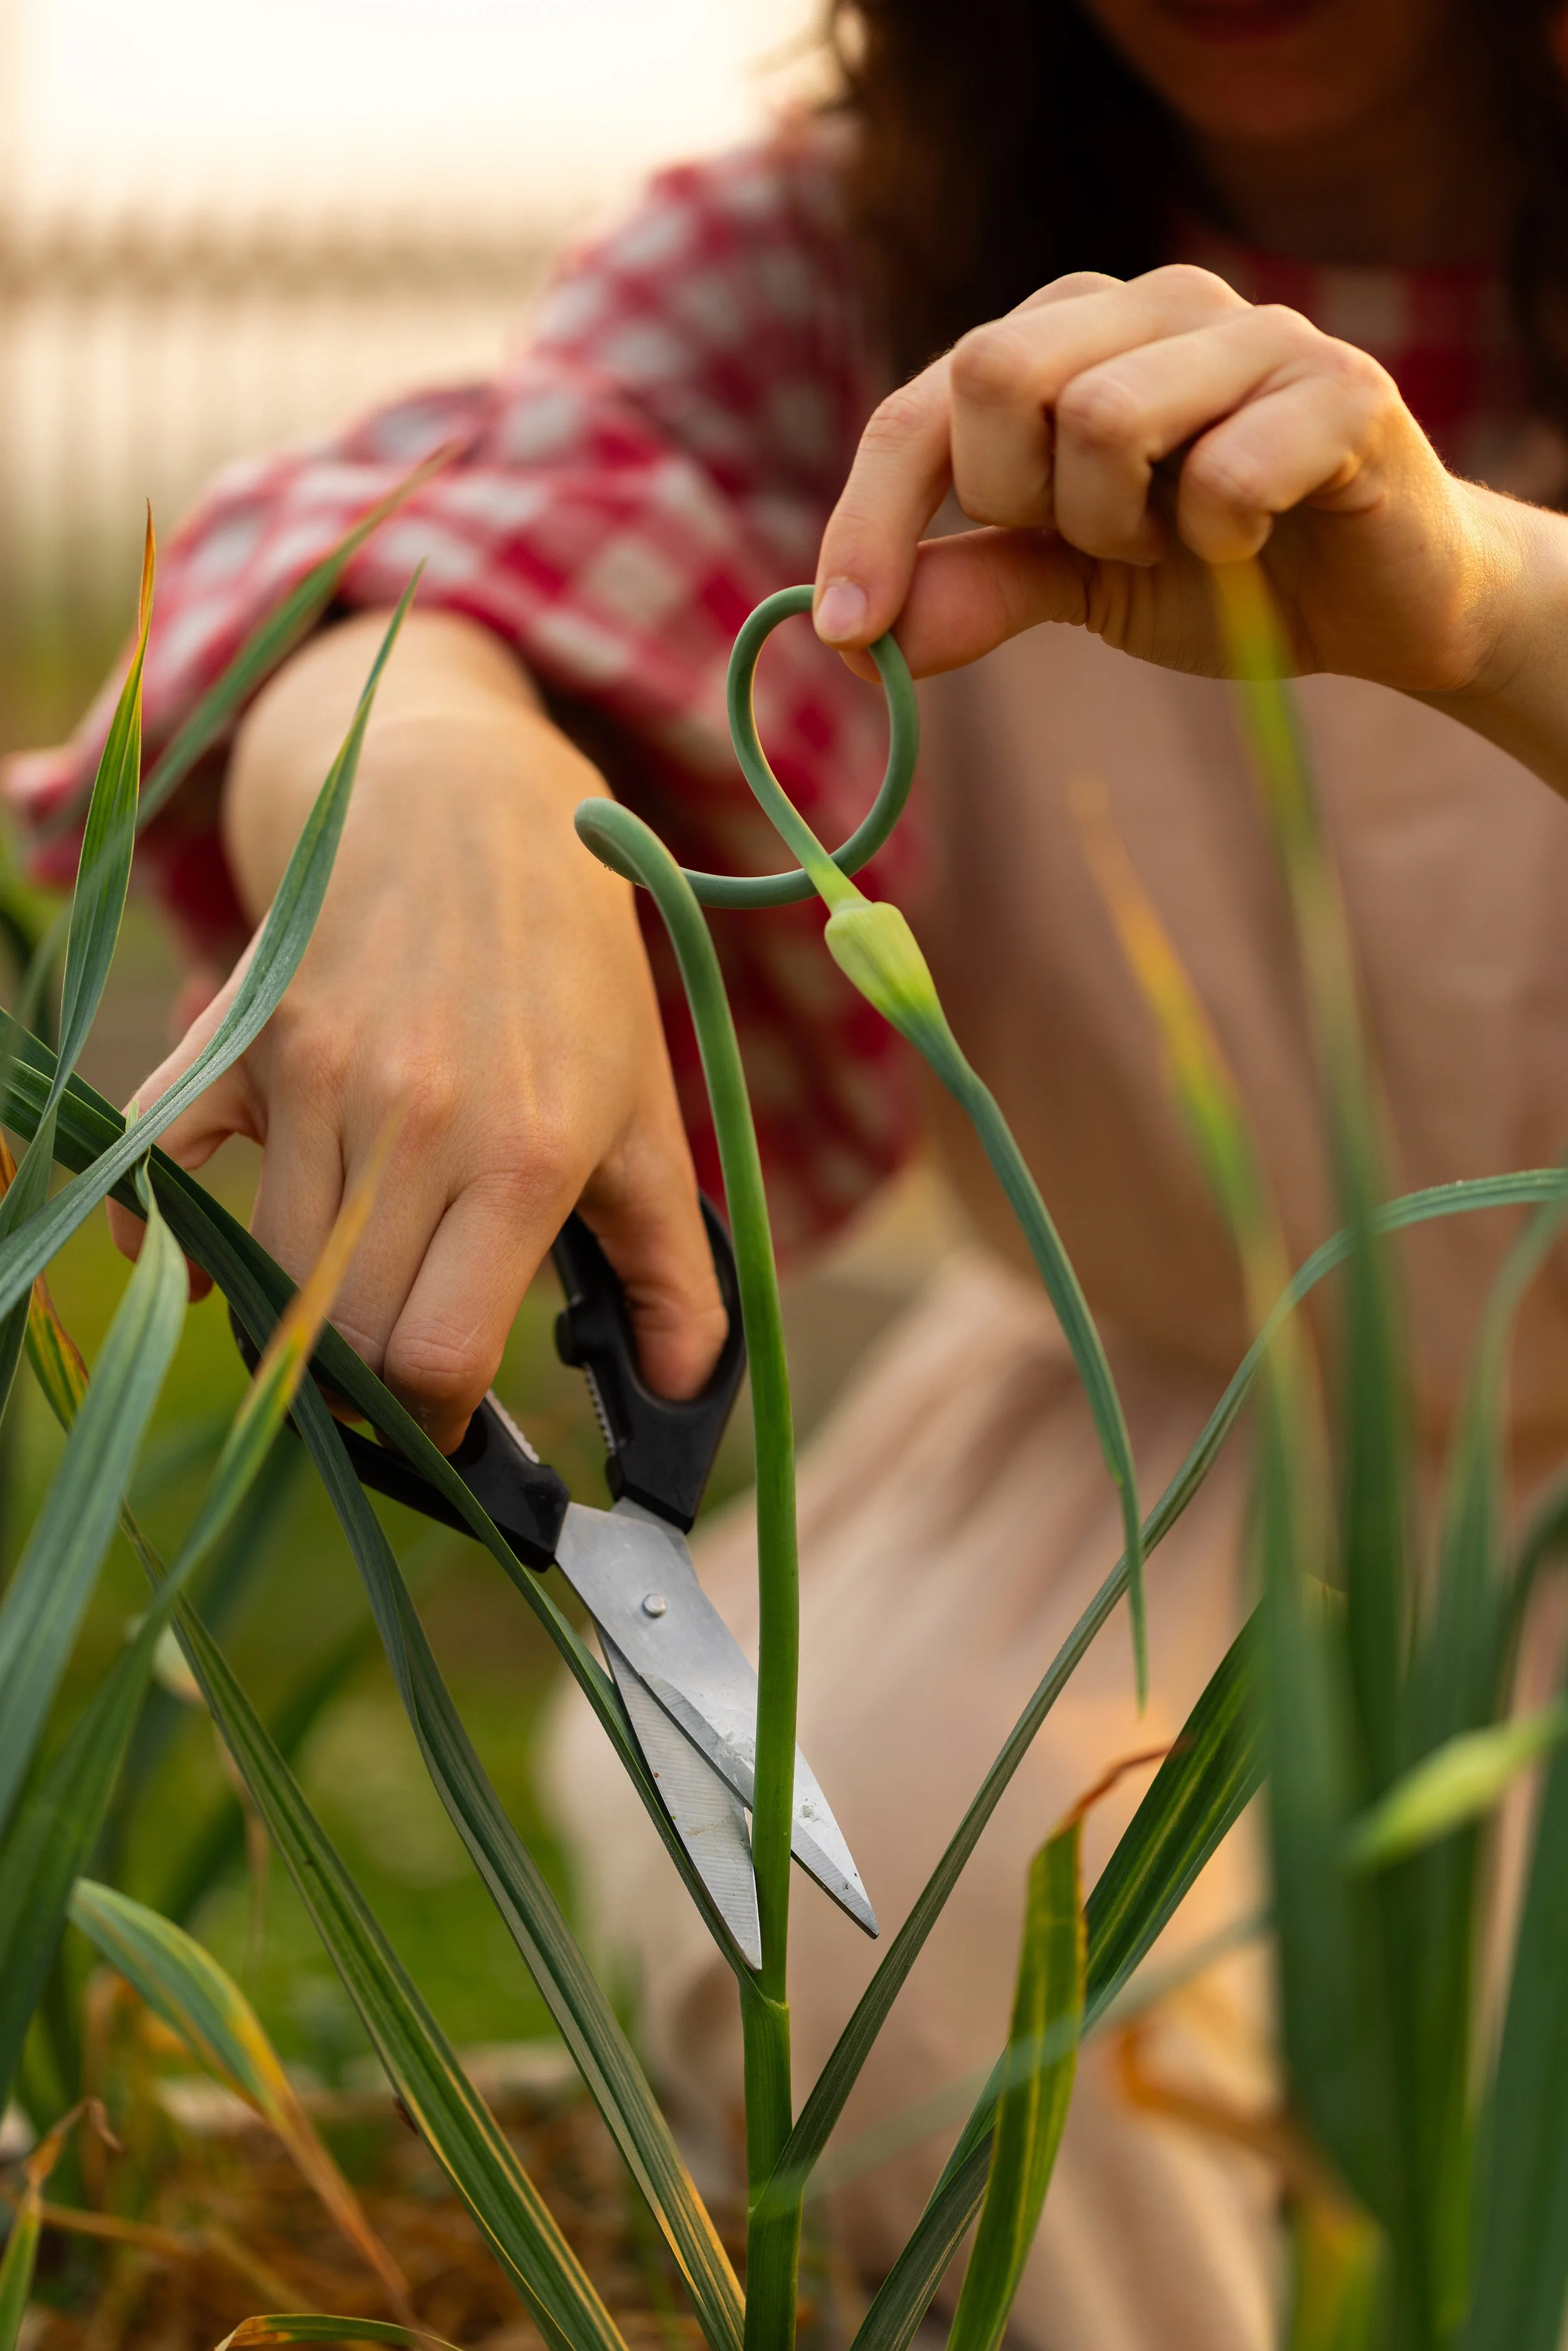
To remove the garlic scapes, you simply need a pair of garden scissors or snips.
Curling: Wait until you notice when the scapes begin to curl, or form a 270-degree turn. They will make a sort of loop-de-loop. This is when you can cut the scapes at the base.
Cut or Snap: With garden snips, or simply your hands, cut or snip the scape at the base, as close to the leaves as possible. Be careful not to damage the leaves of the plant. I would suggest cutting, as snapping can cause you to accidentally uproot the garlic bulb.
Storage Instructions:
Once harvested, store the garlic scapes in the fridge. They do best in some sort of crisper like a vegetable crisper drawer, crisper box, or even in a plastic bag or plastic wrap. They will keep in the refrigerator for about 1 month— they are quite hardy!
You can preserve garlic scapes by making recipes like Garlic Scape Pesto and Pickled Garlic Scapes.
Harvesting Garlic
It can be difficult to tell when garlic is ready to harvest, but hopefully these tips will help you discover the best time to pull your bulbs out of the ground.
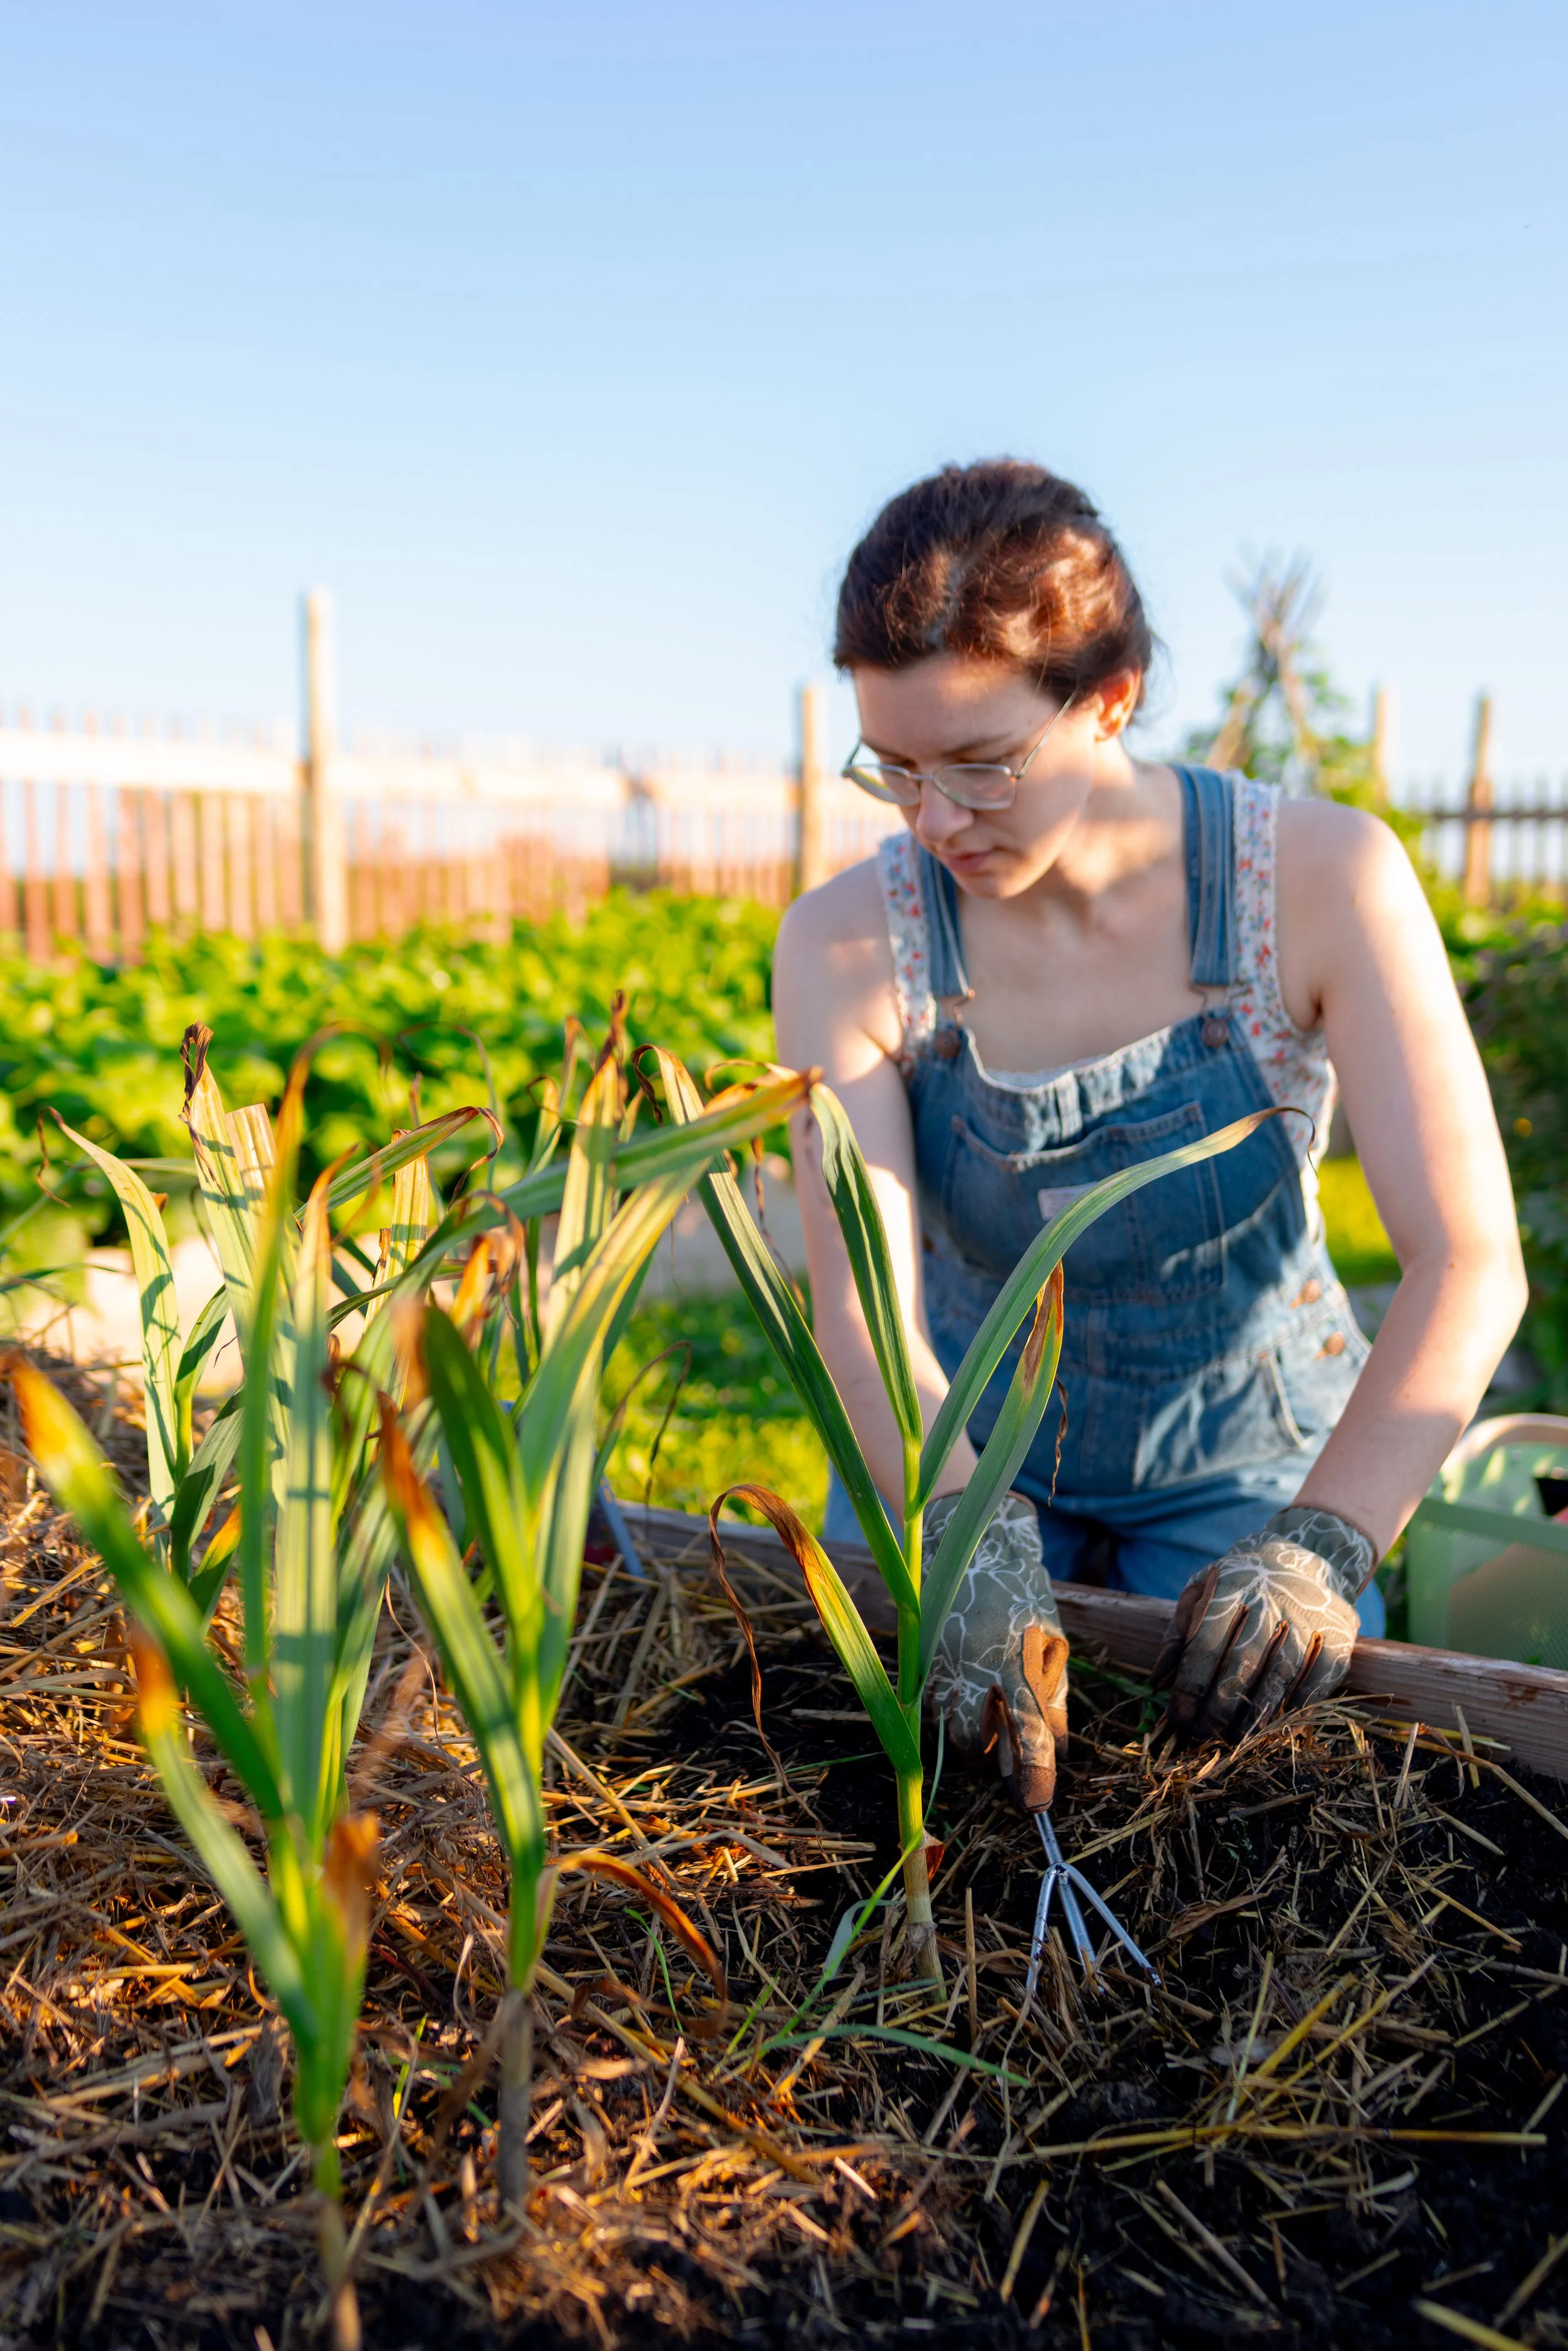
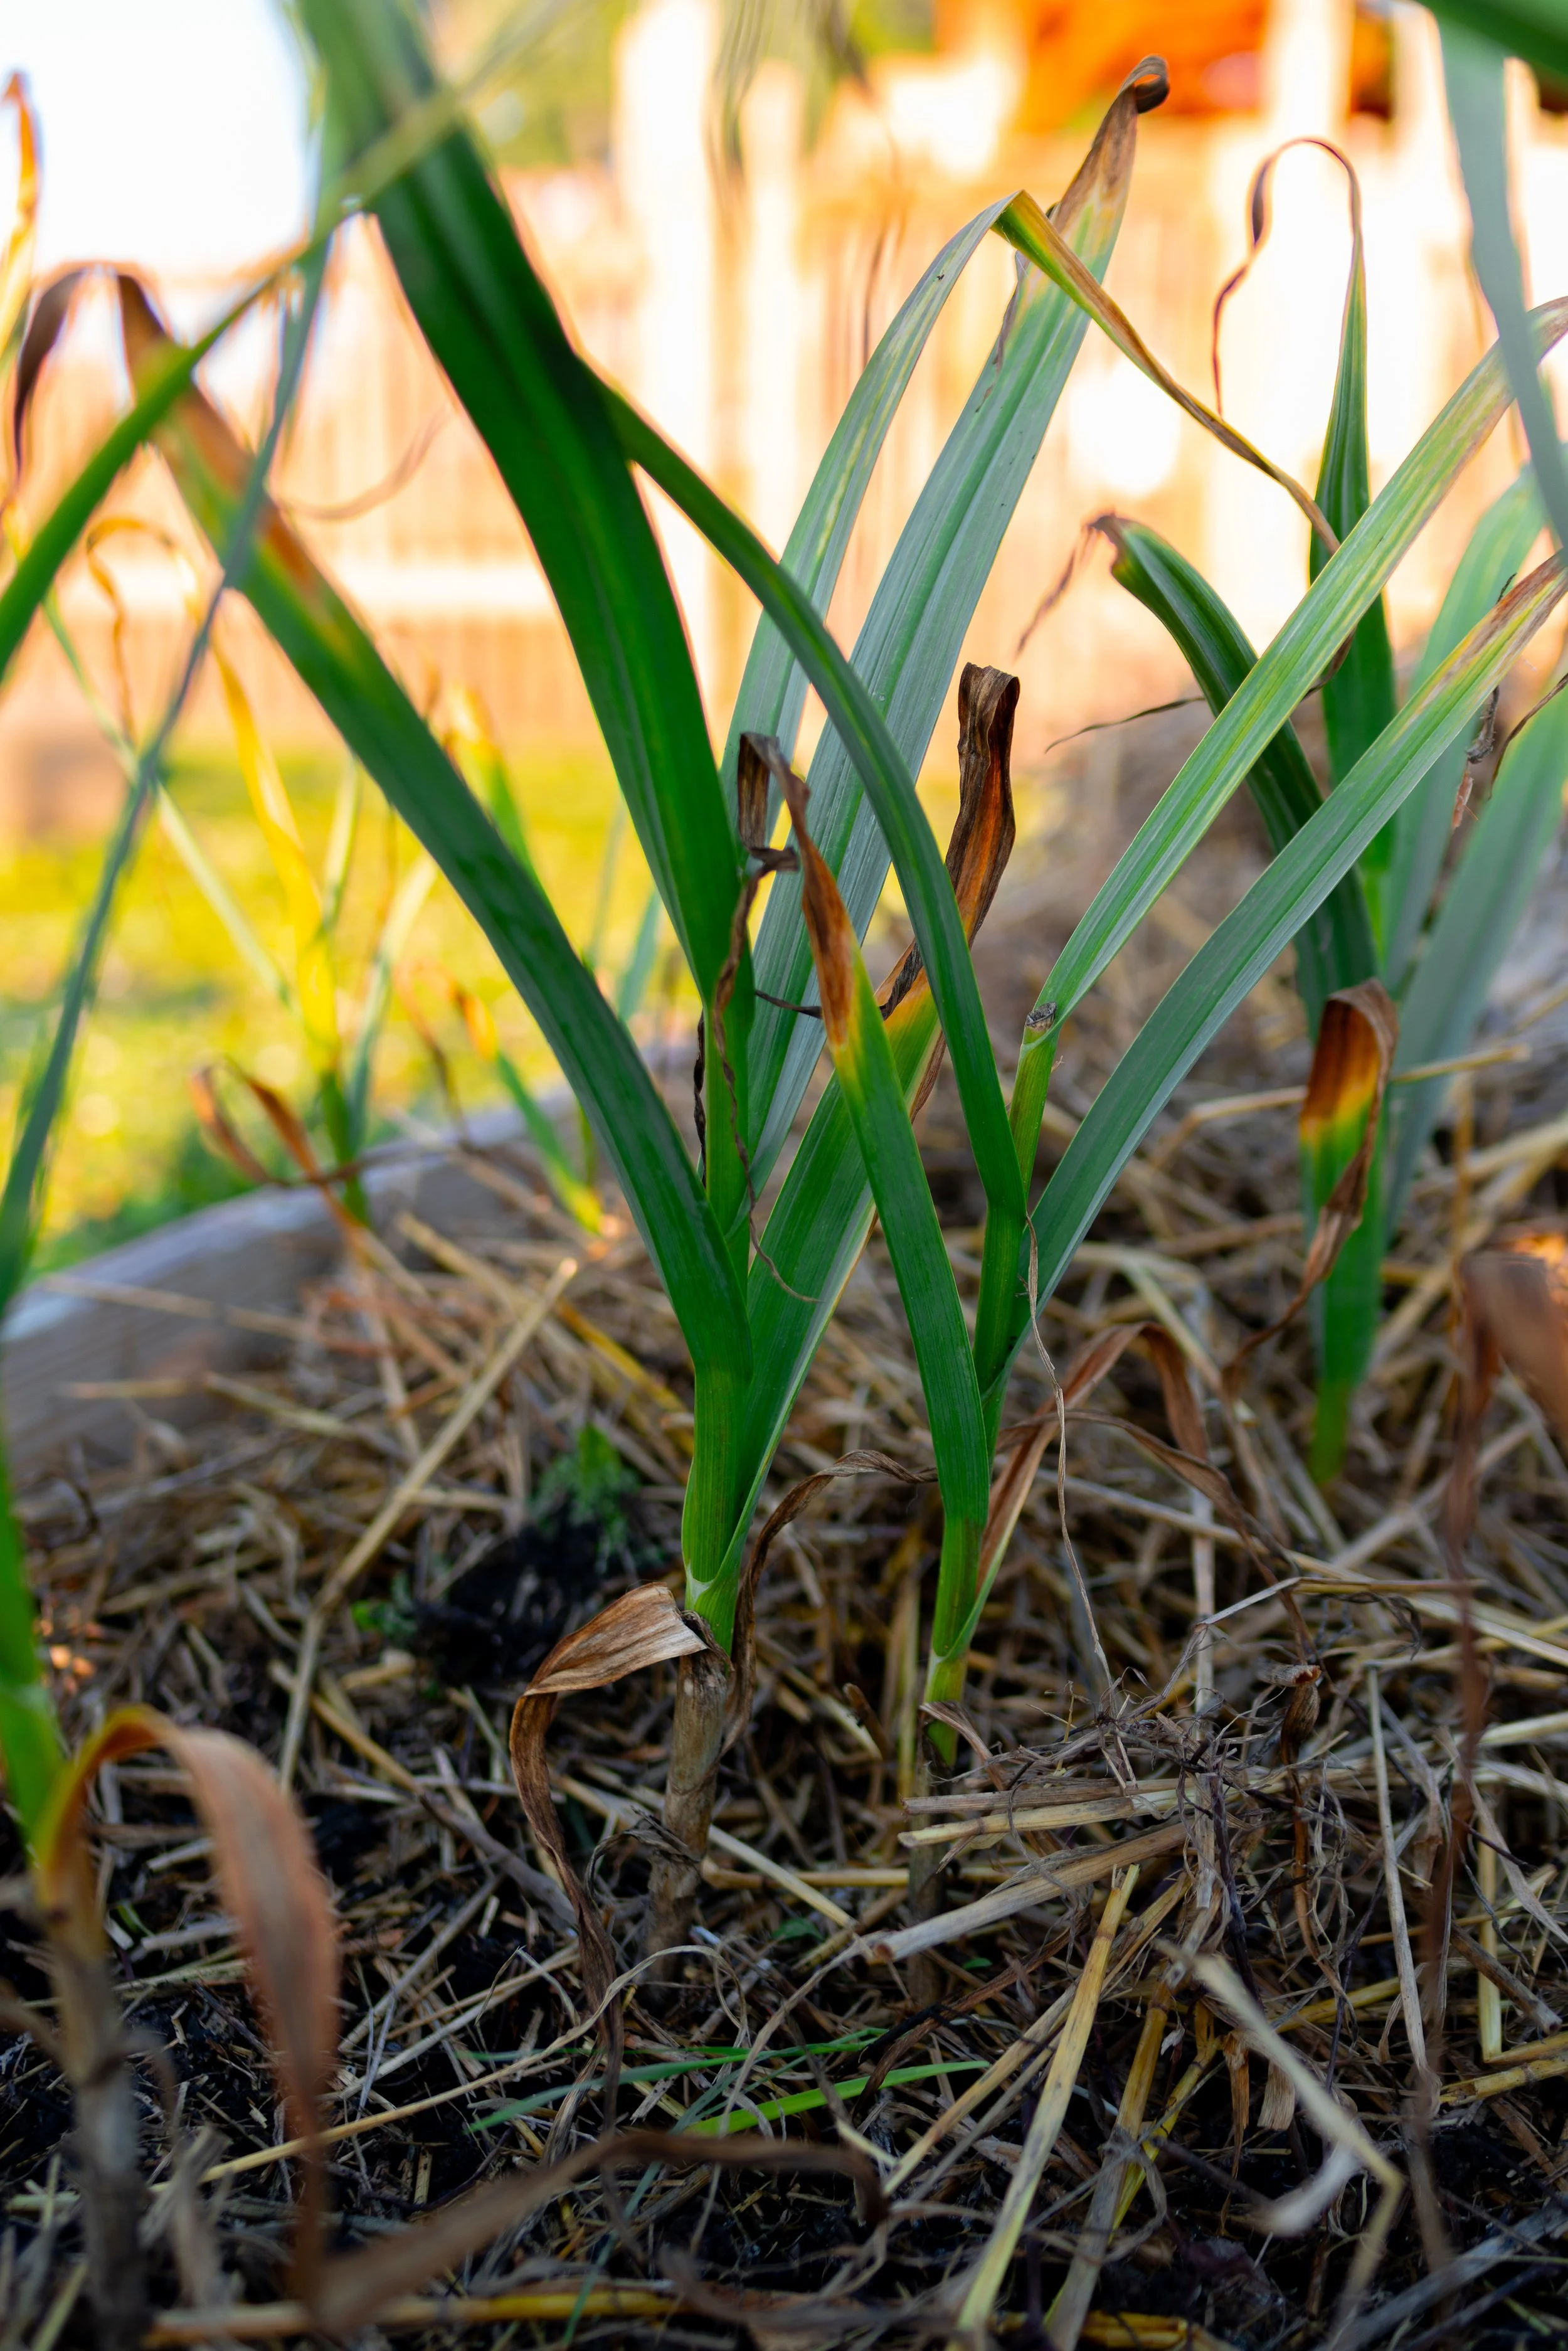
Stop Watering: About 1 to 2 weeks before harvesting, stop watering your plants. This, of course, can be difficult to time. I typically stop watering the plants in mid to late June, or when I first notice that the leaves are beginning to turn yellow and die back.
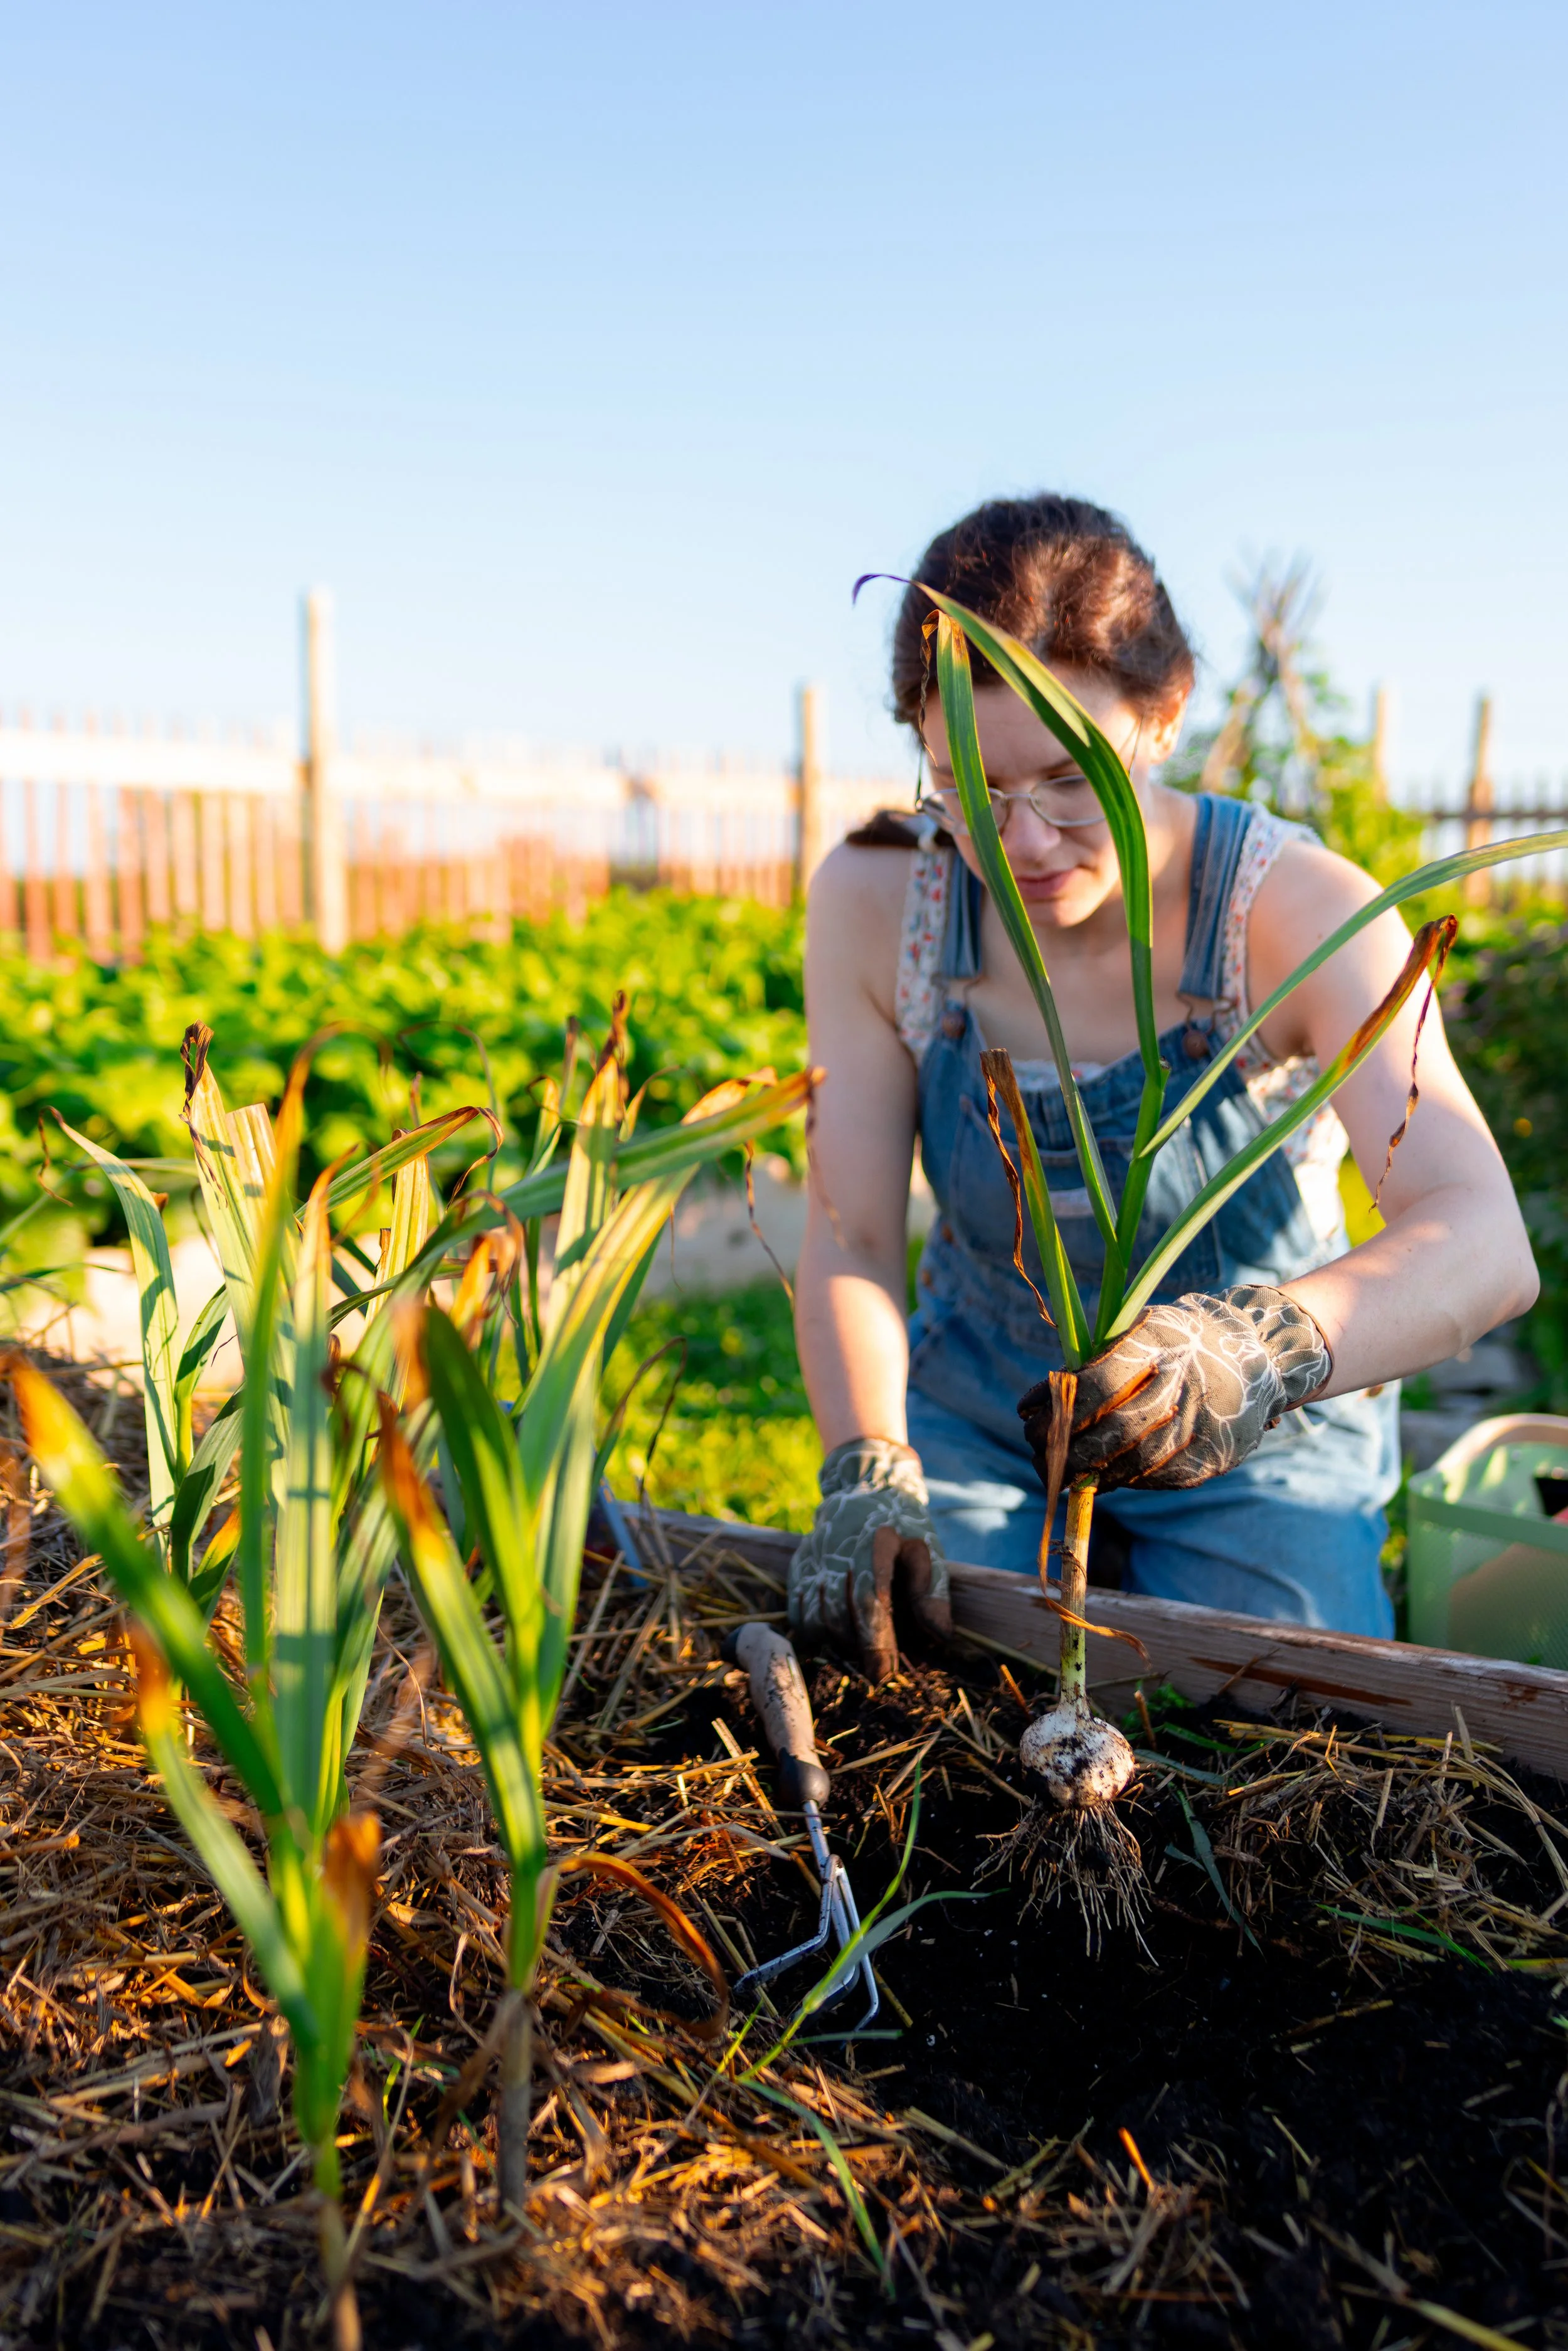
Yellowing Leaves: In general, most garlic is ready to harvest when the lower half or two-thirds of the leaves have turned yellow or brown but before they are completely dry. However, not all garlic is ready to harvest based on the state of its leaves alone.
Dig up a Test Bulb: If you are unsure, it’s best to dig up a test bulb. You can do this every week until they are ready! It’s hard, but it will be worth it to understand what you are looking for. Check for signs that the bulbs are ready to harvest.
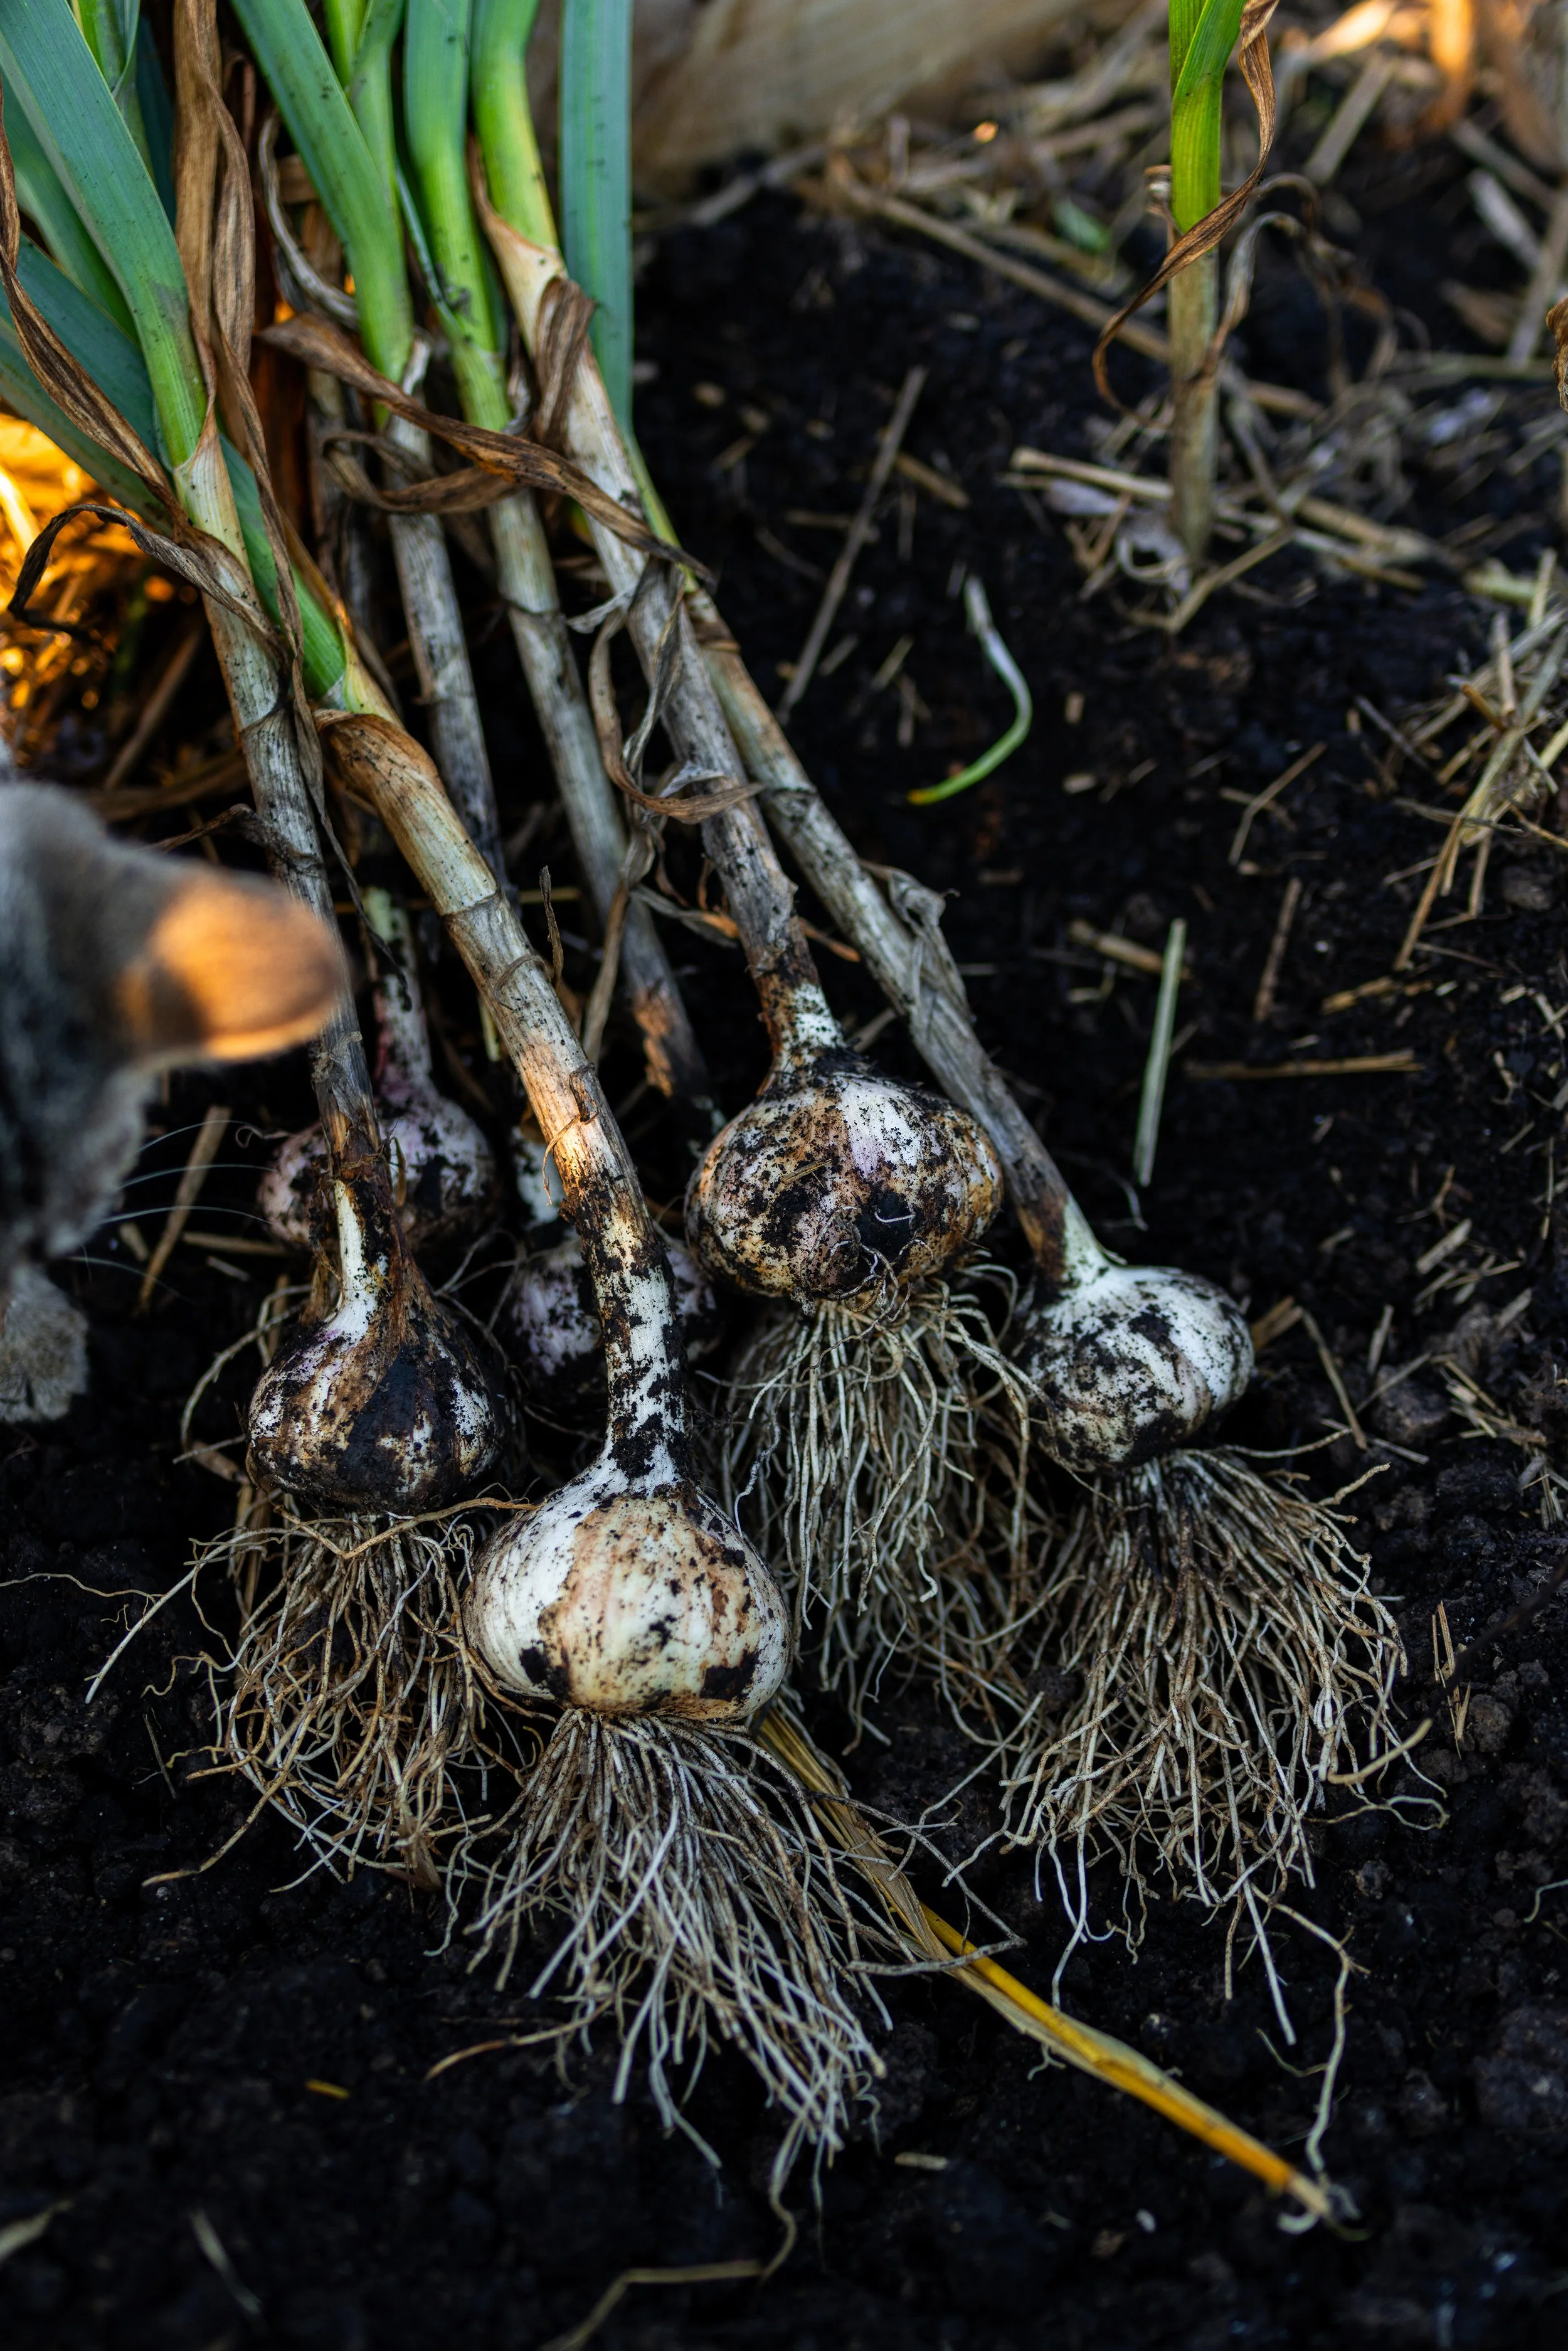
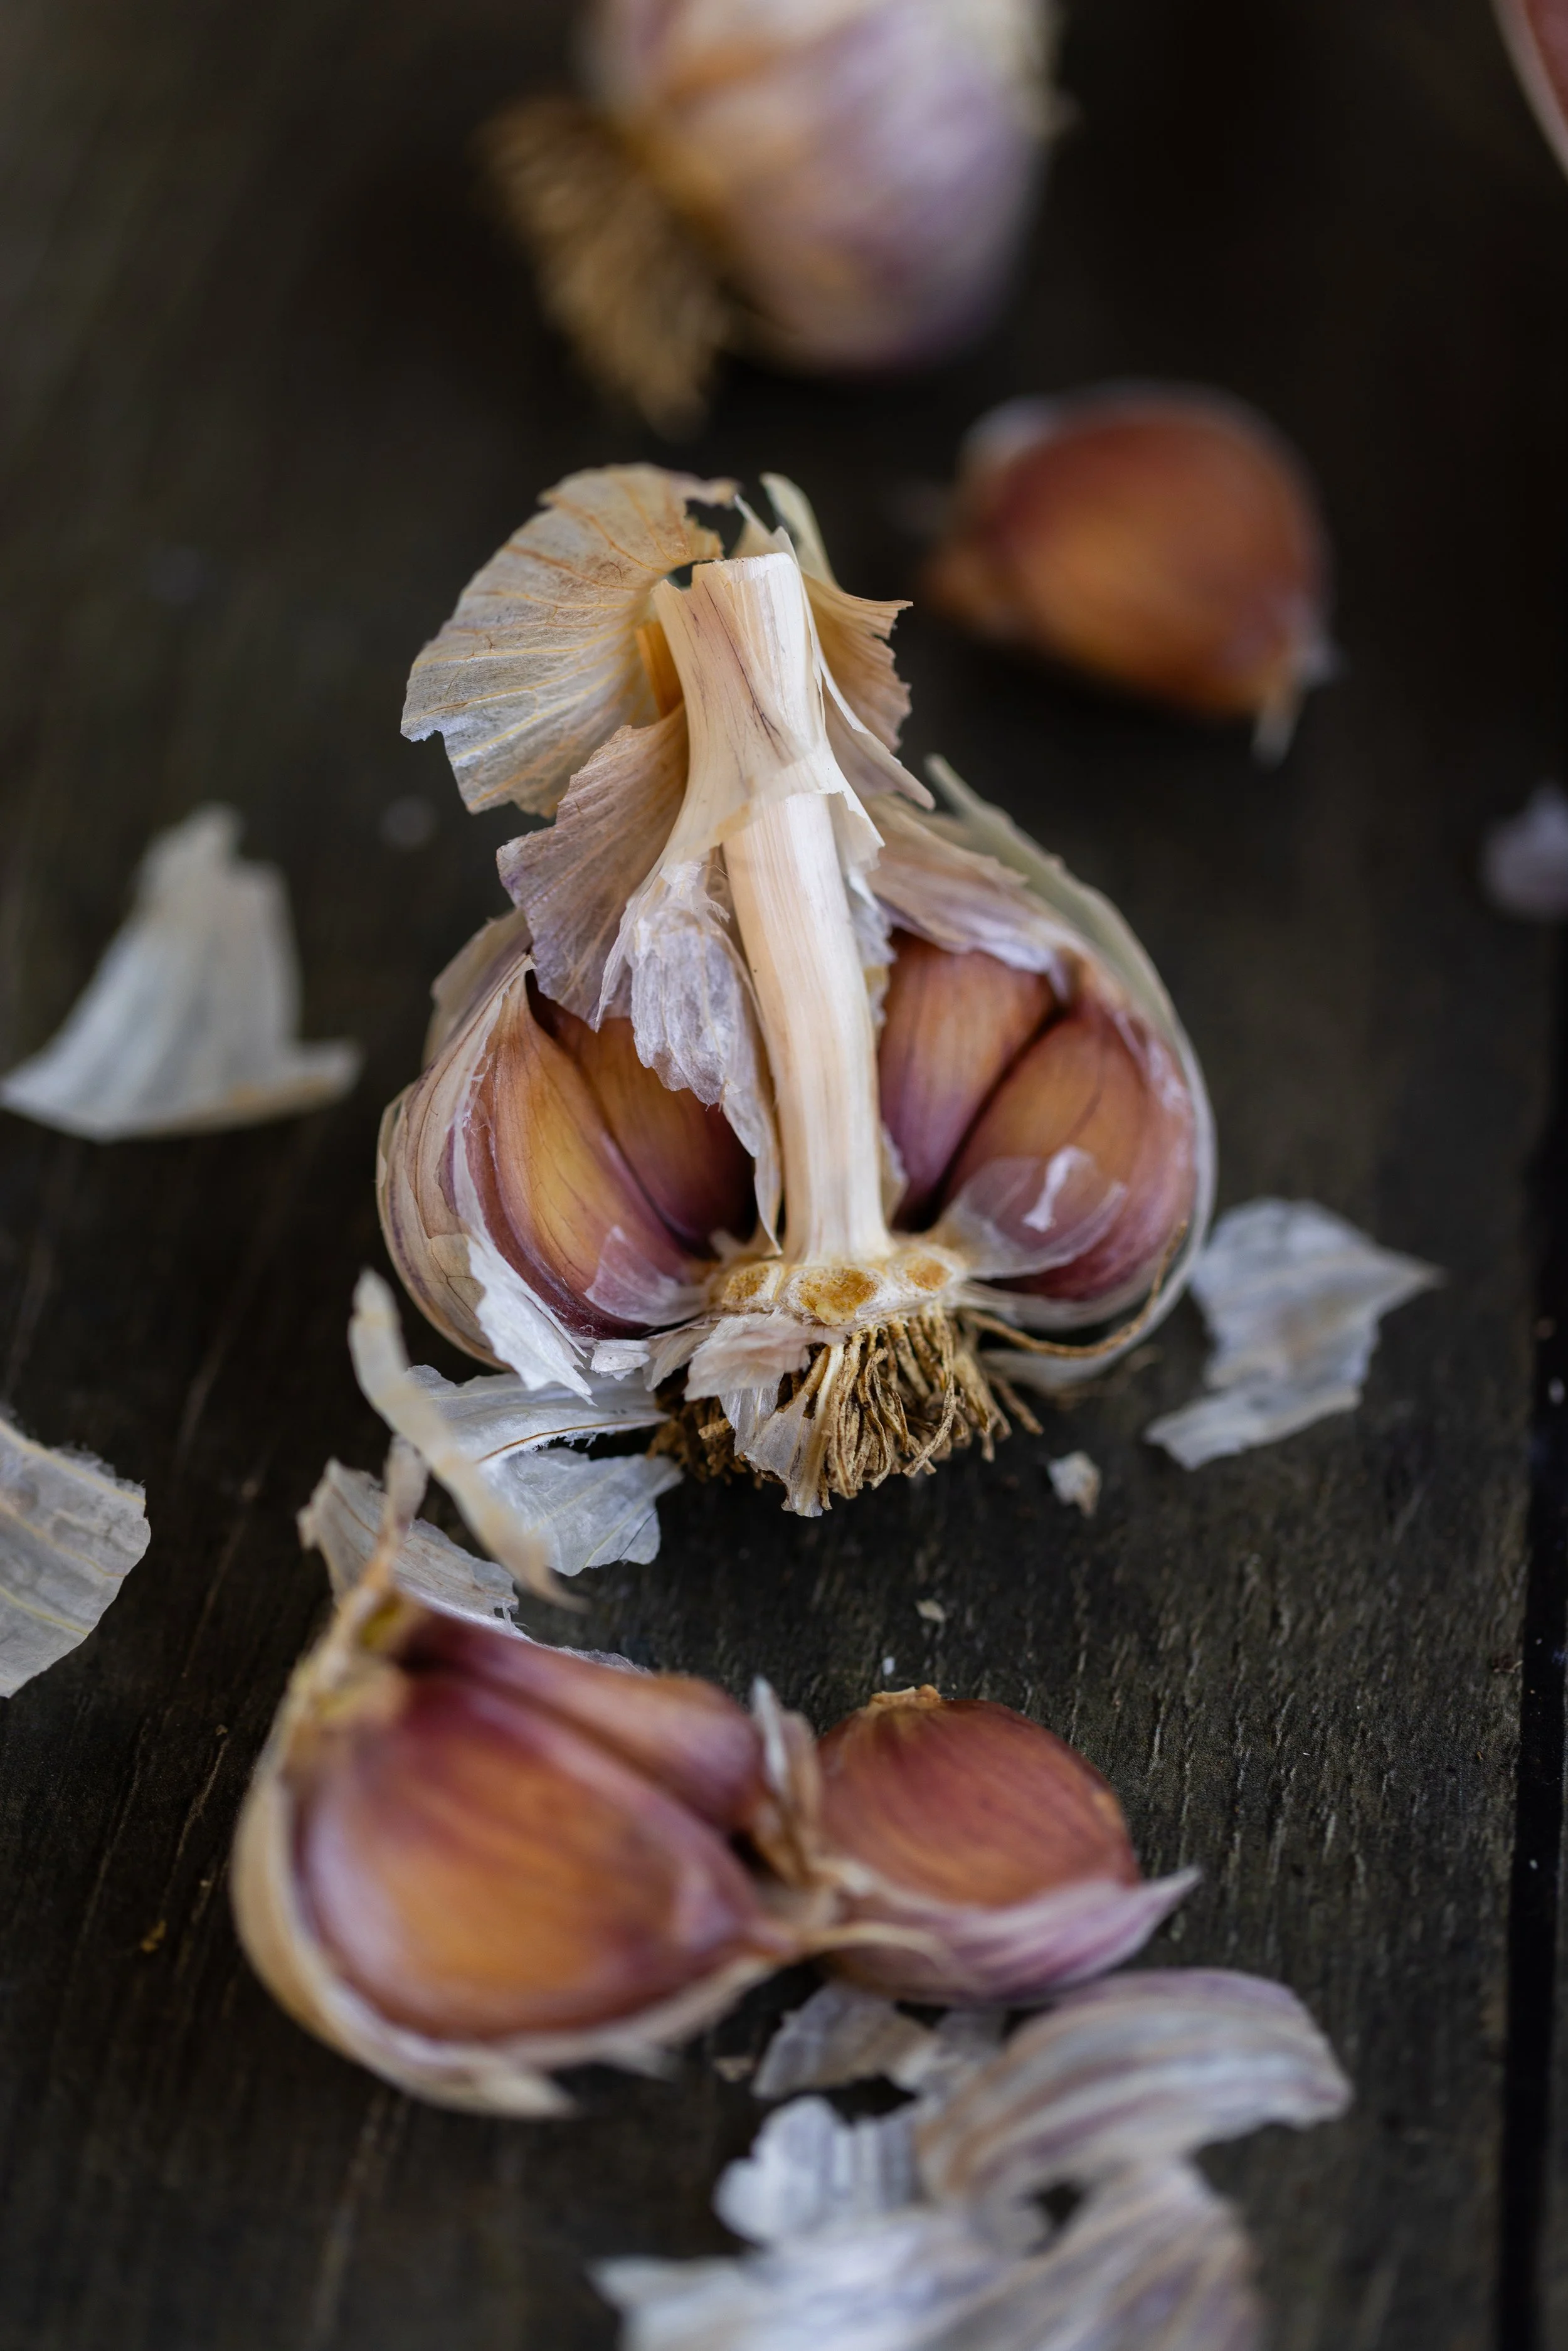
Signs to Look For: You will know the garlic is ready to harvest when the bulbs are divided into plump, hard cloves. The skin covering the outside of the bulbs will be thick and papery. It has been described as dry, but this is hard to determine if your soil is moist! It shouldn’t be wet and shiny in any case.
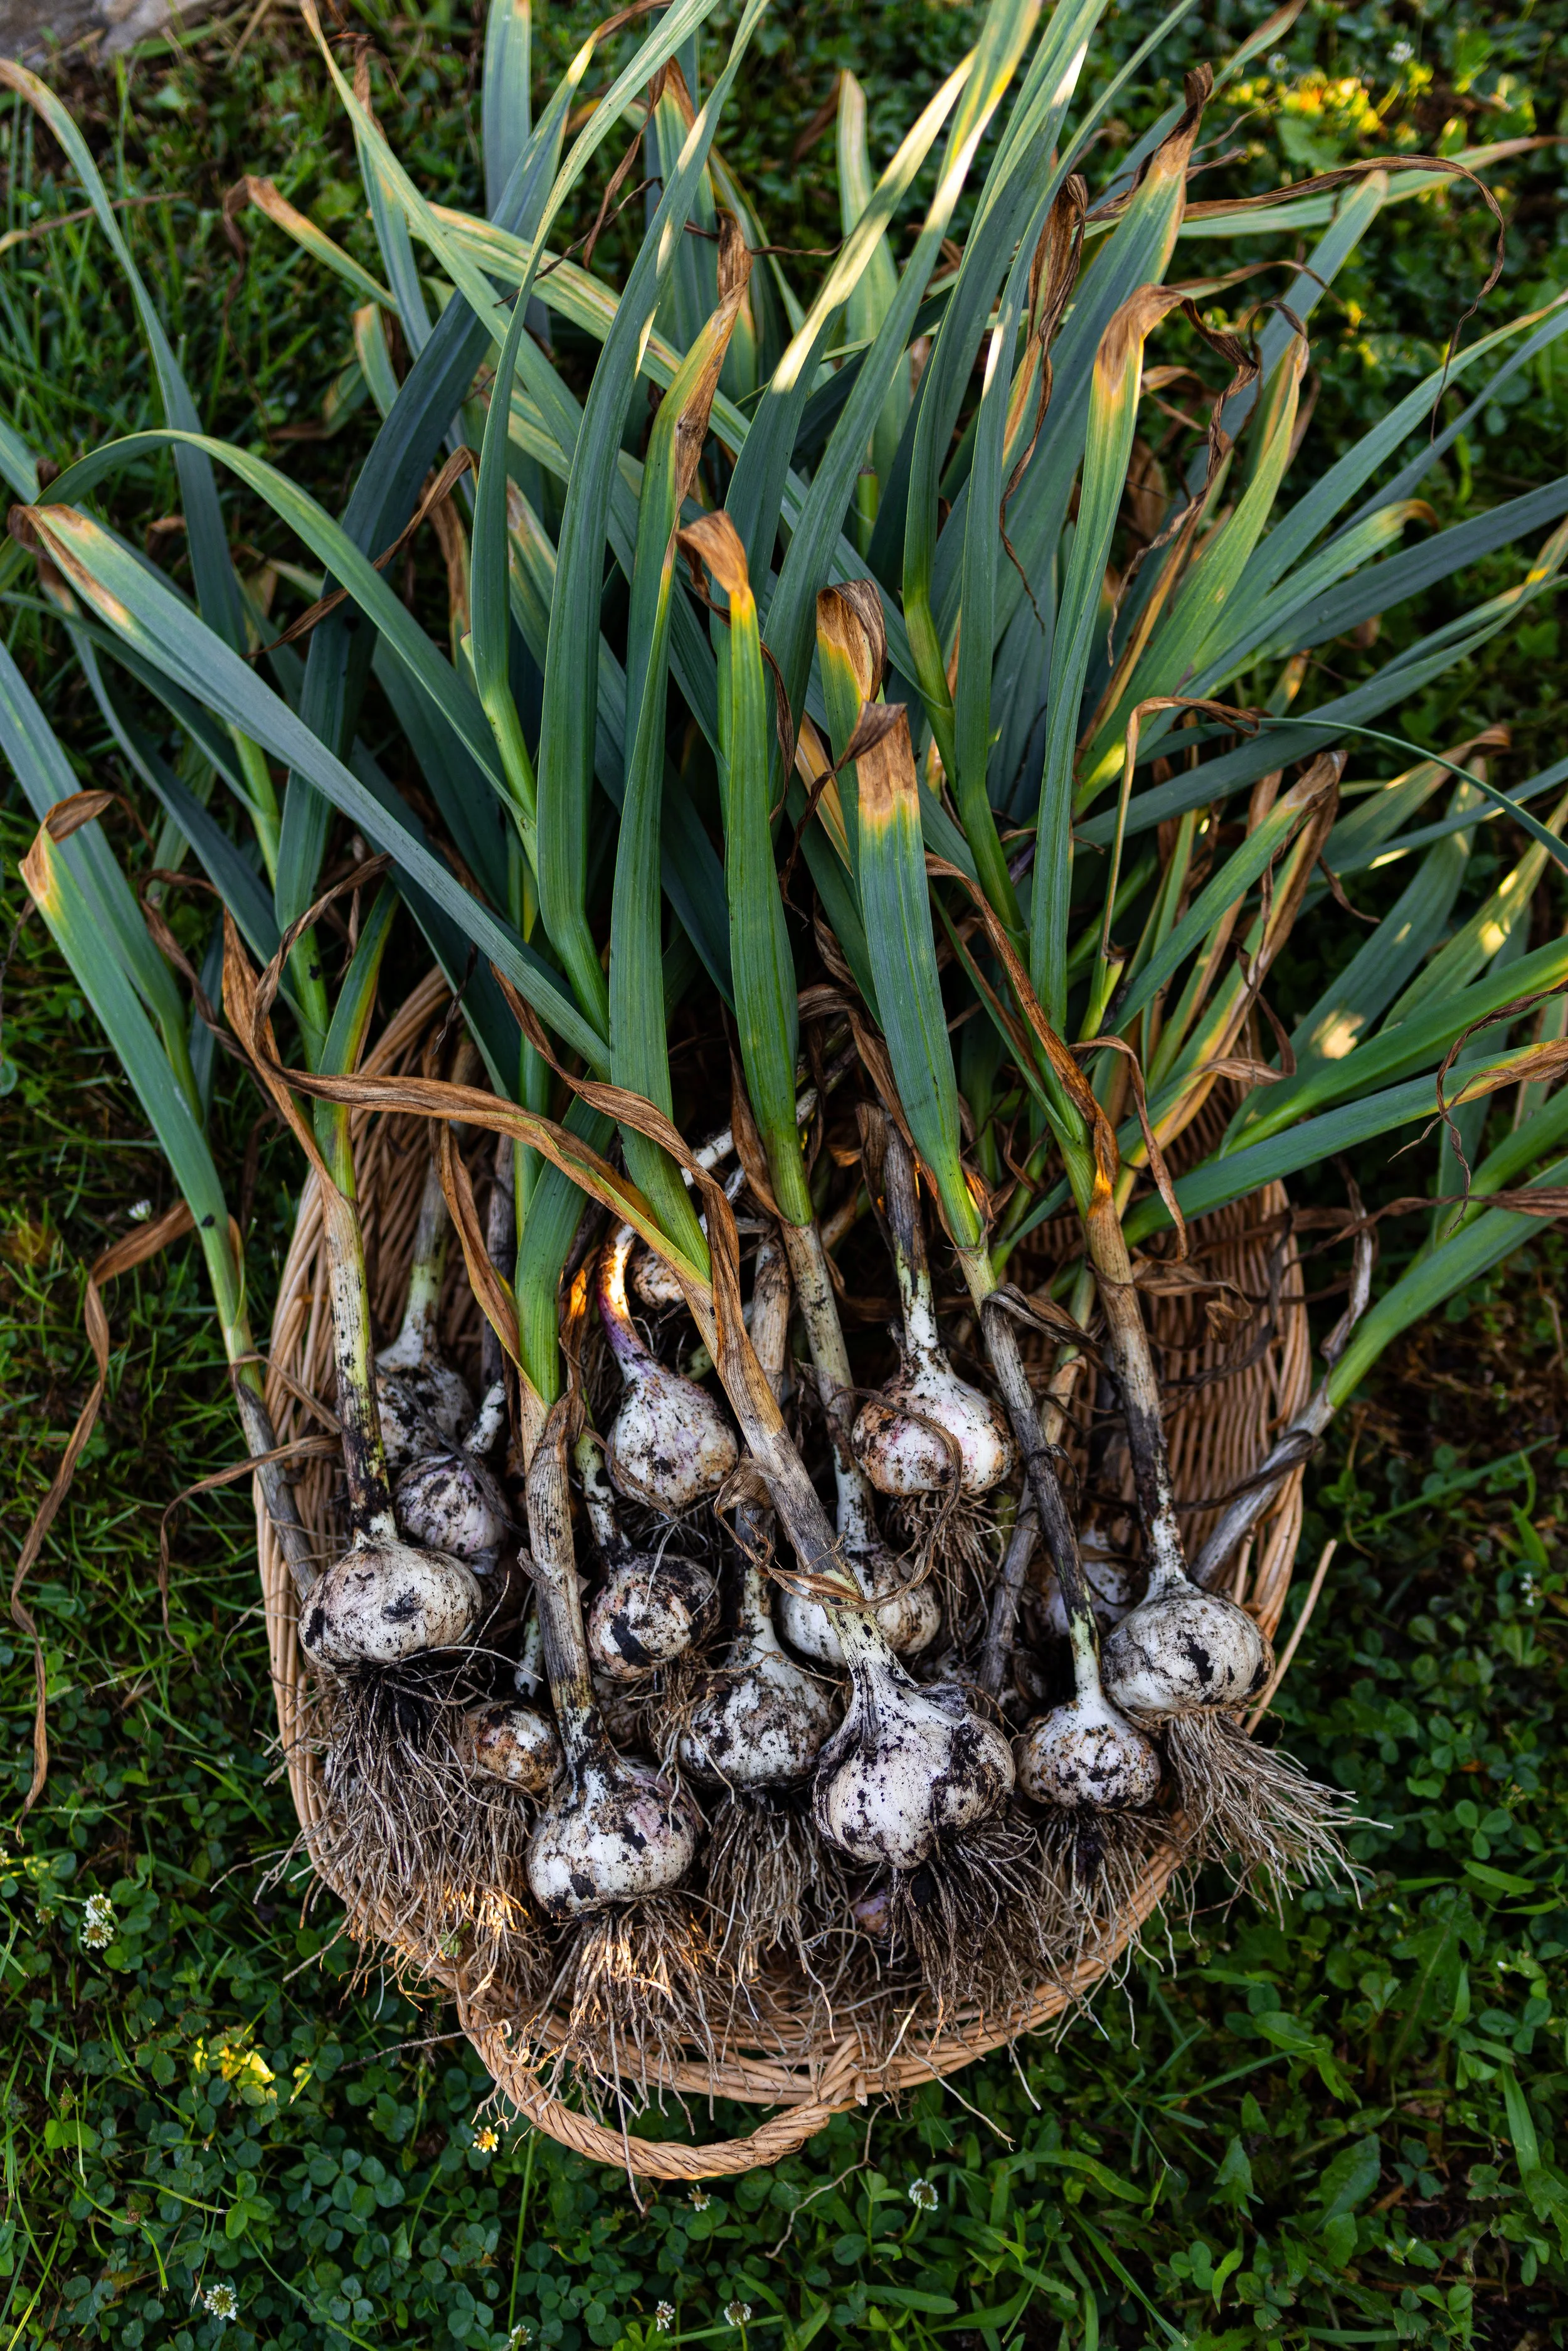
Dig Up Bulbs: If your garlic looks ready, use a garden fork or handheld cultivator to gently dig around the outside of the bulb. Be careful not to penetrate the bulb! Do not pull out the stems to avoid damaging the roots. When you see the bulb, gently dig around it and loosen the roots from the soil. Carefully brush off any larger clumps of dirt. Do not remove the foliage at this point.
Timing Your Garlic Harvest is Important!
Do Not Harvest Too Early: If you harvest your garlic too early, the skin encasing the bulbs will be too thin. This can mean that it will disintegrate and expose the cloves, causing them to rot and not store well.
Do Not Harvest Too Late: On the other hand, if you harvest your bulbs too late, you can also have storage issues. The bulbs can be begin to separate, splitting apart and splitting the skin, exposing the cloves. This can open the bulbs up to disease and rot.
Folk Wisdom:
Some folk or farm wisdom says to harvest garlic when there are 5 green leaves left on your plants. You can also use the method of the garlic witch! This is when you leave 1 to 2 scapes (of each different variety you planted) on the bulbs— don’t cut them off. When they uncurl and stand up straight, the garlic is ready to harvest. Pretty clever, huh?
Curing Garlic
Curing garlic is the process of drying it for long-term storage. There are not many other options for storing garlic, unless you plan to pickle it, so curing is essential to the process of growing your own garlic at home.
Do Not Wash: Leave the dirt on your bulbs! When you pull the bulbs from the ground, you can gently brush off any large clumps of soil. But leave the rest. Any leftover soil can be brushed or rubbed off later, once fully cured.
Tie Bundles: Some people like to immediately tie their garlic harvest into bundles, which is helpful if you are harvesting a lot of garlic, don’t have a lot of space to cure them, or hope to sell the bulbs. With some kitchen or garden twine, tie the garlic into bundles of 5 to 10 bulbs, around the foliage and near the base of the plant. *If you have had a particularly wet spring and summer, you may want to lay the bulbs out on wire racks or in place that is well ventilated, protected from the elements, and has good air circulation.
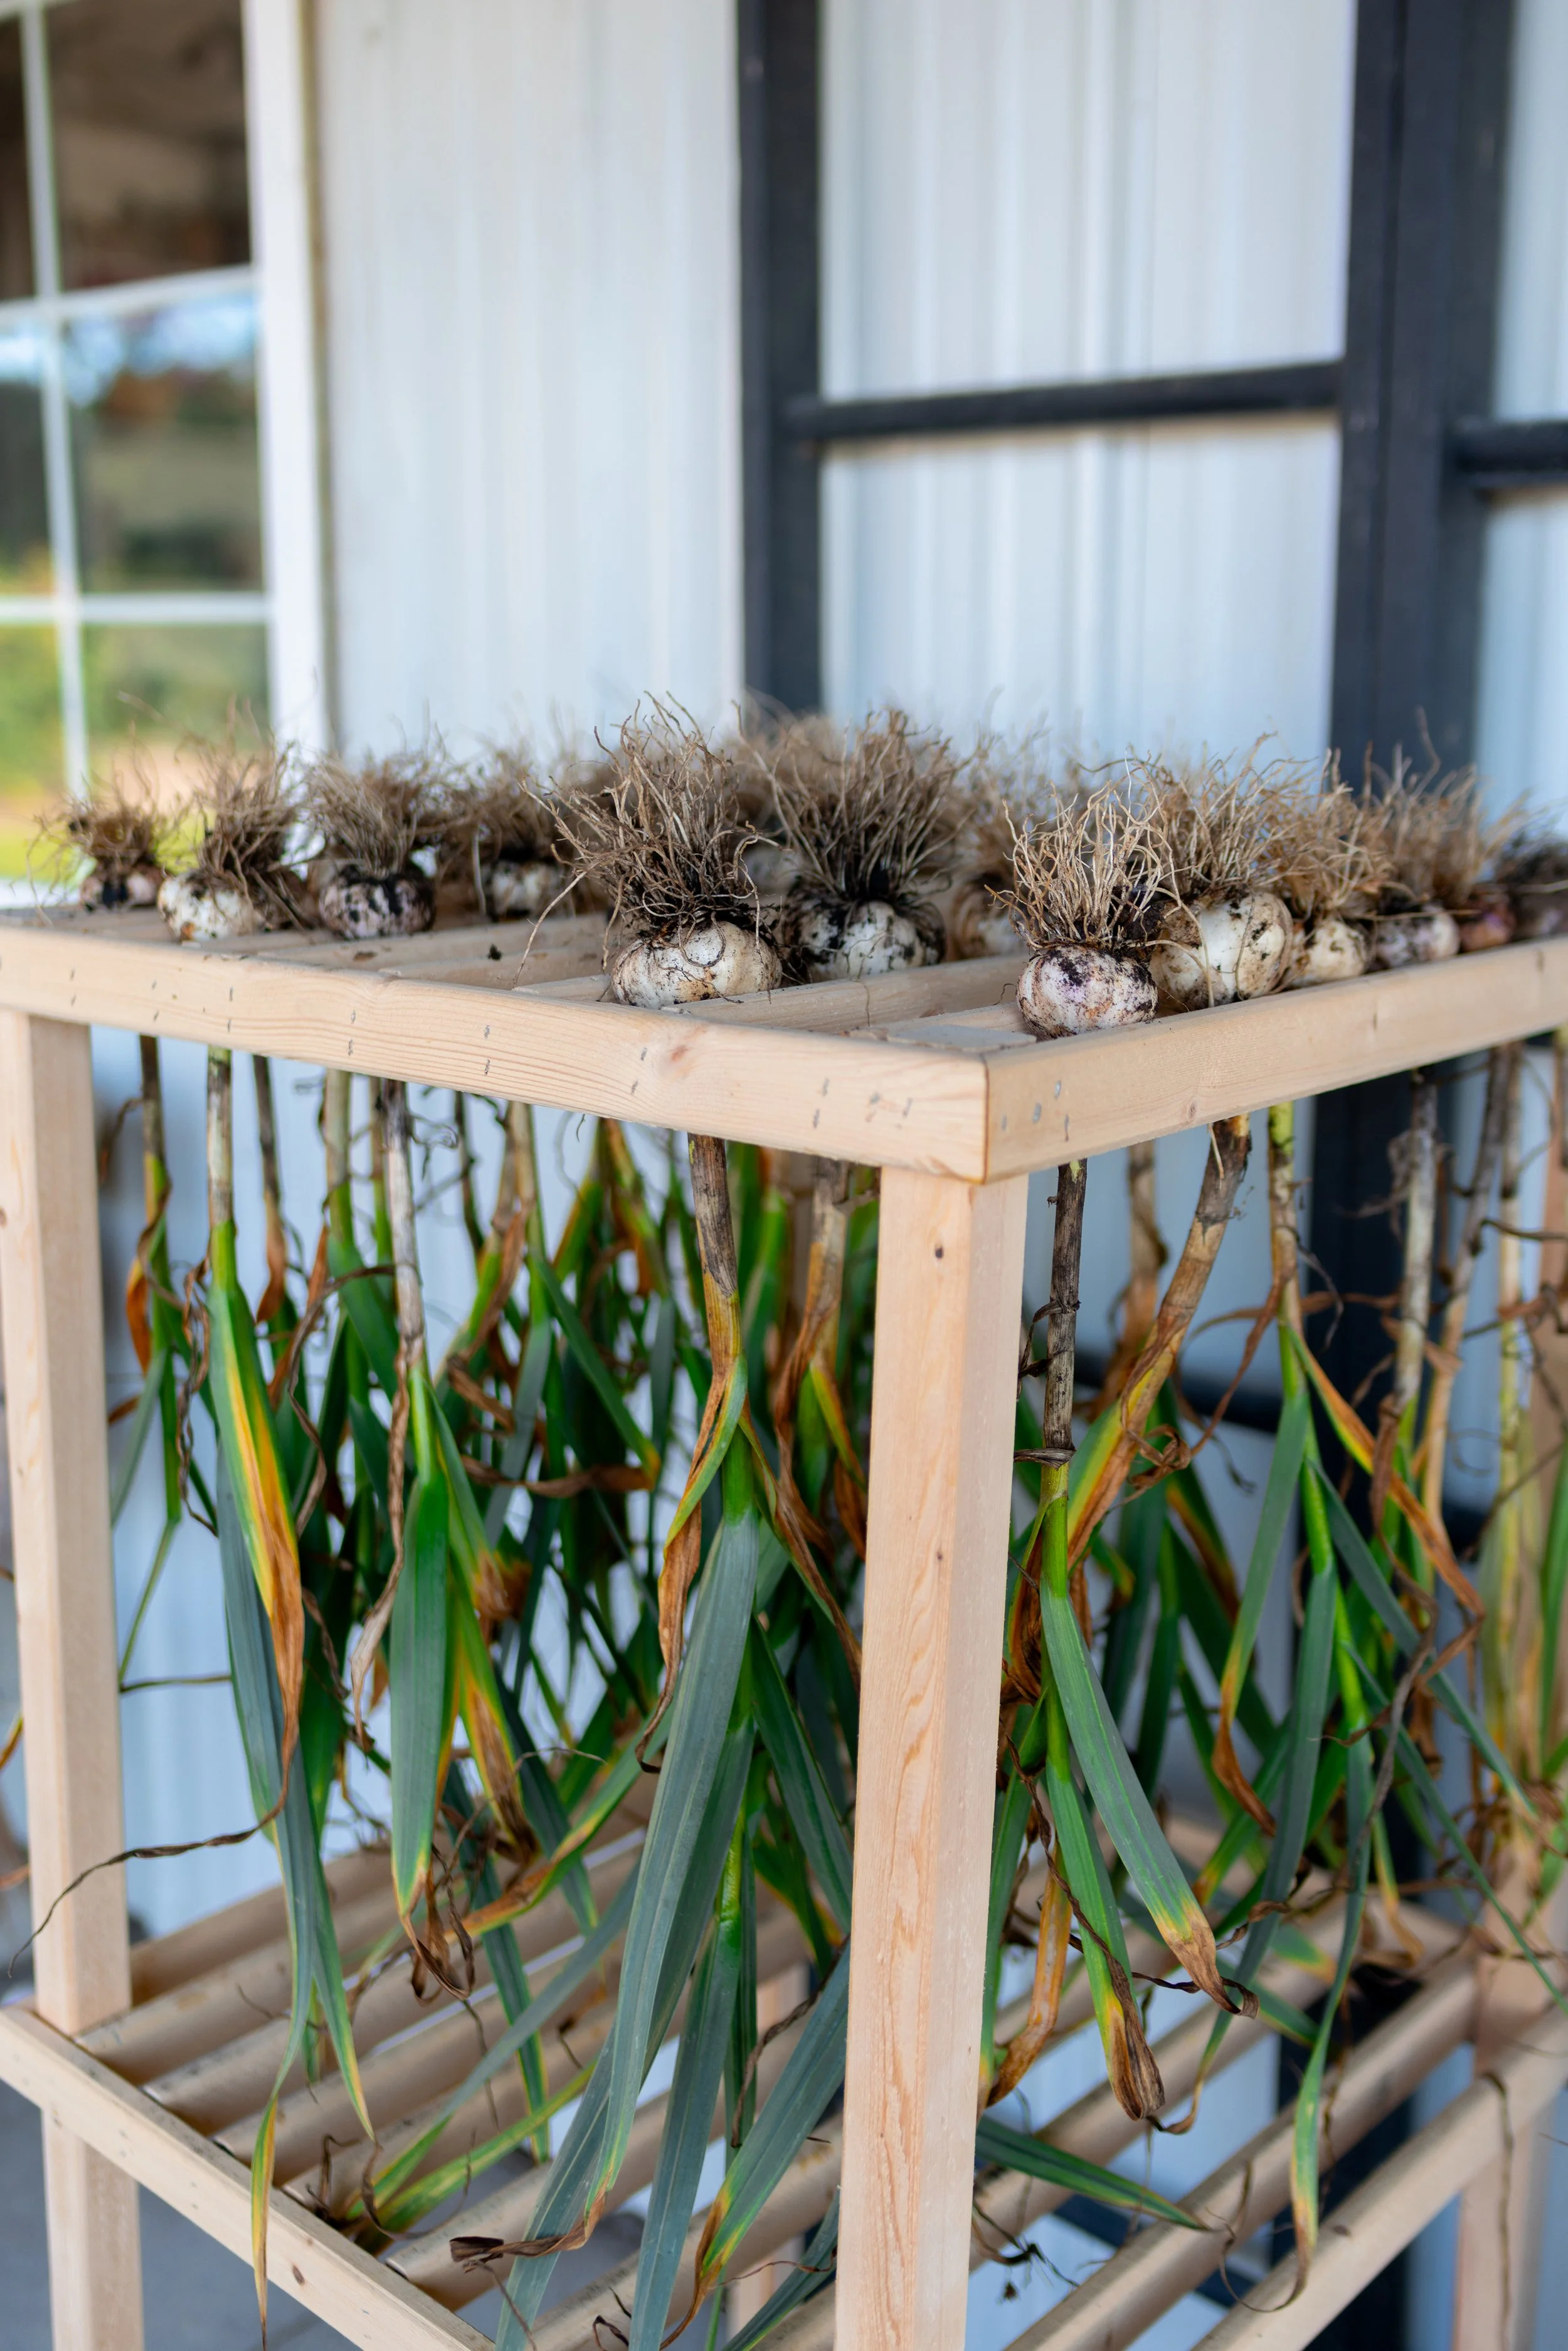
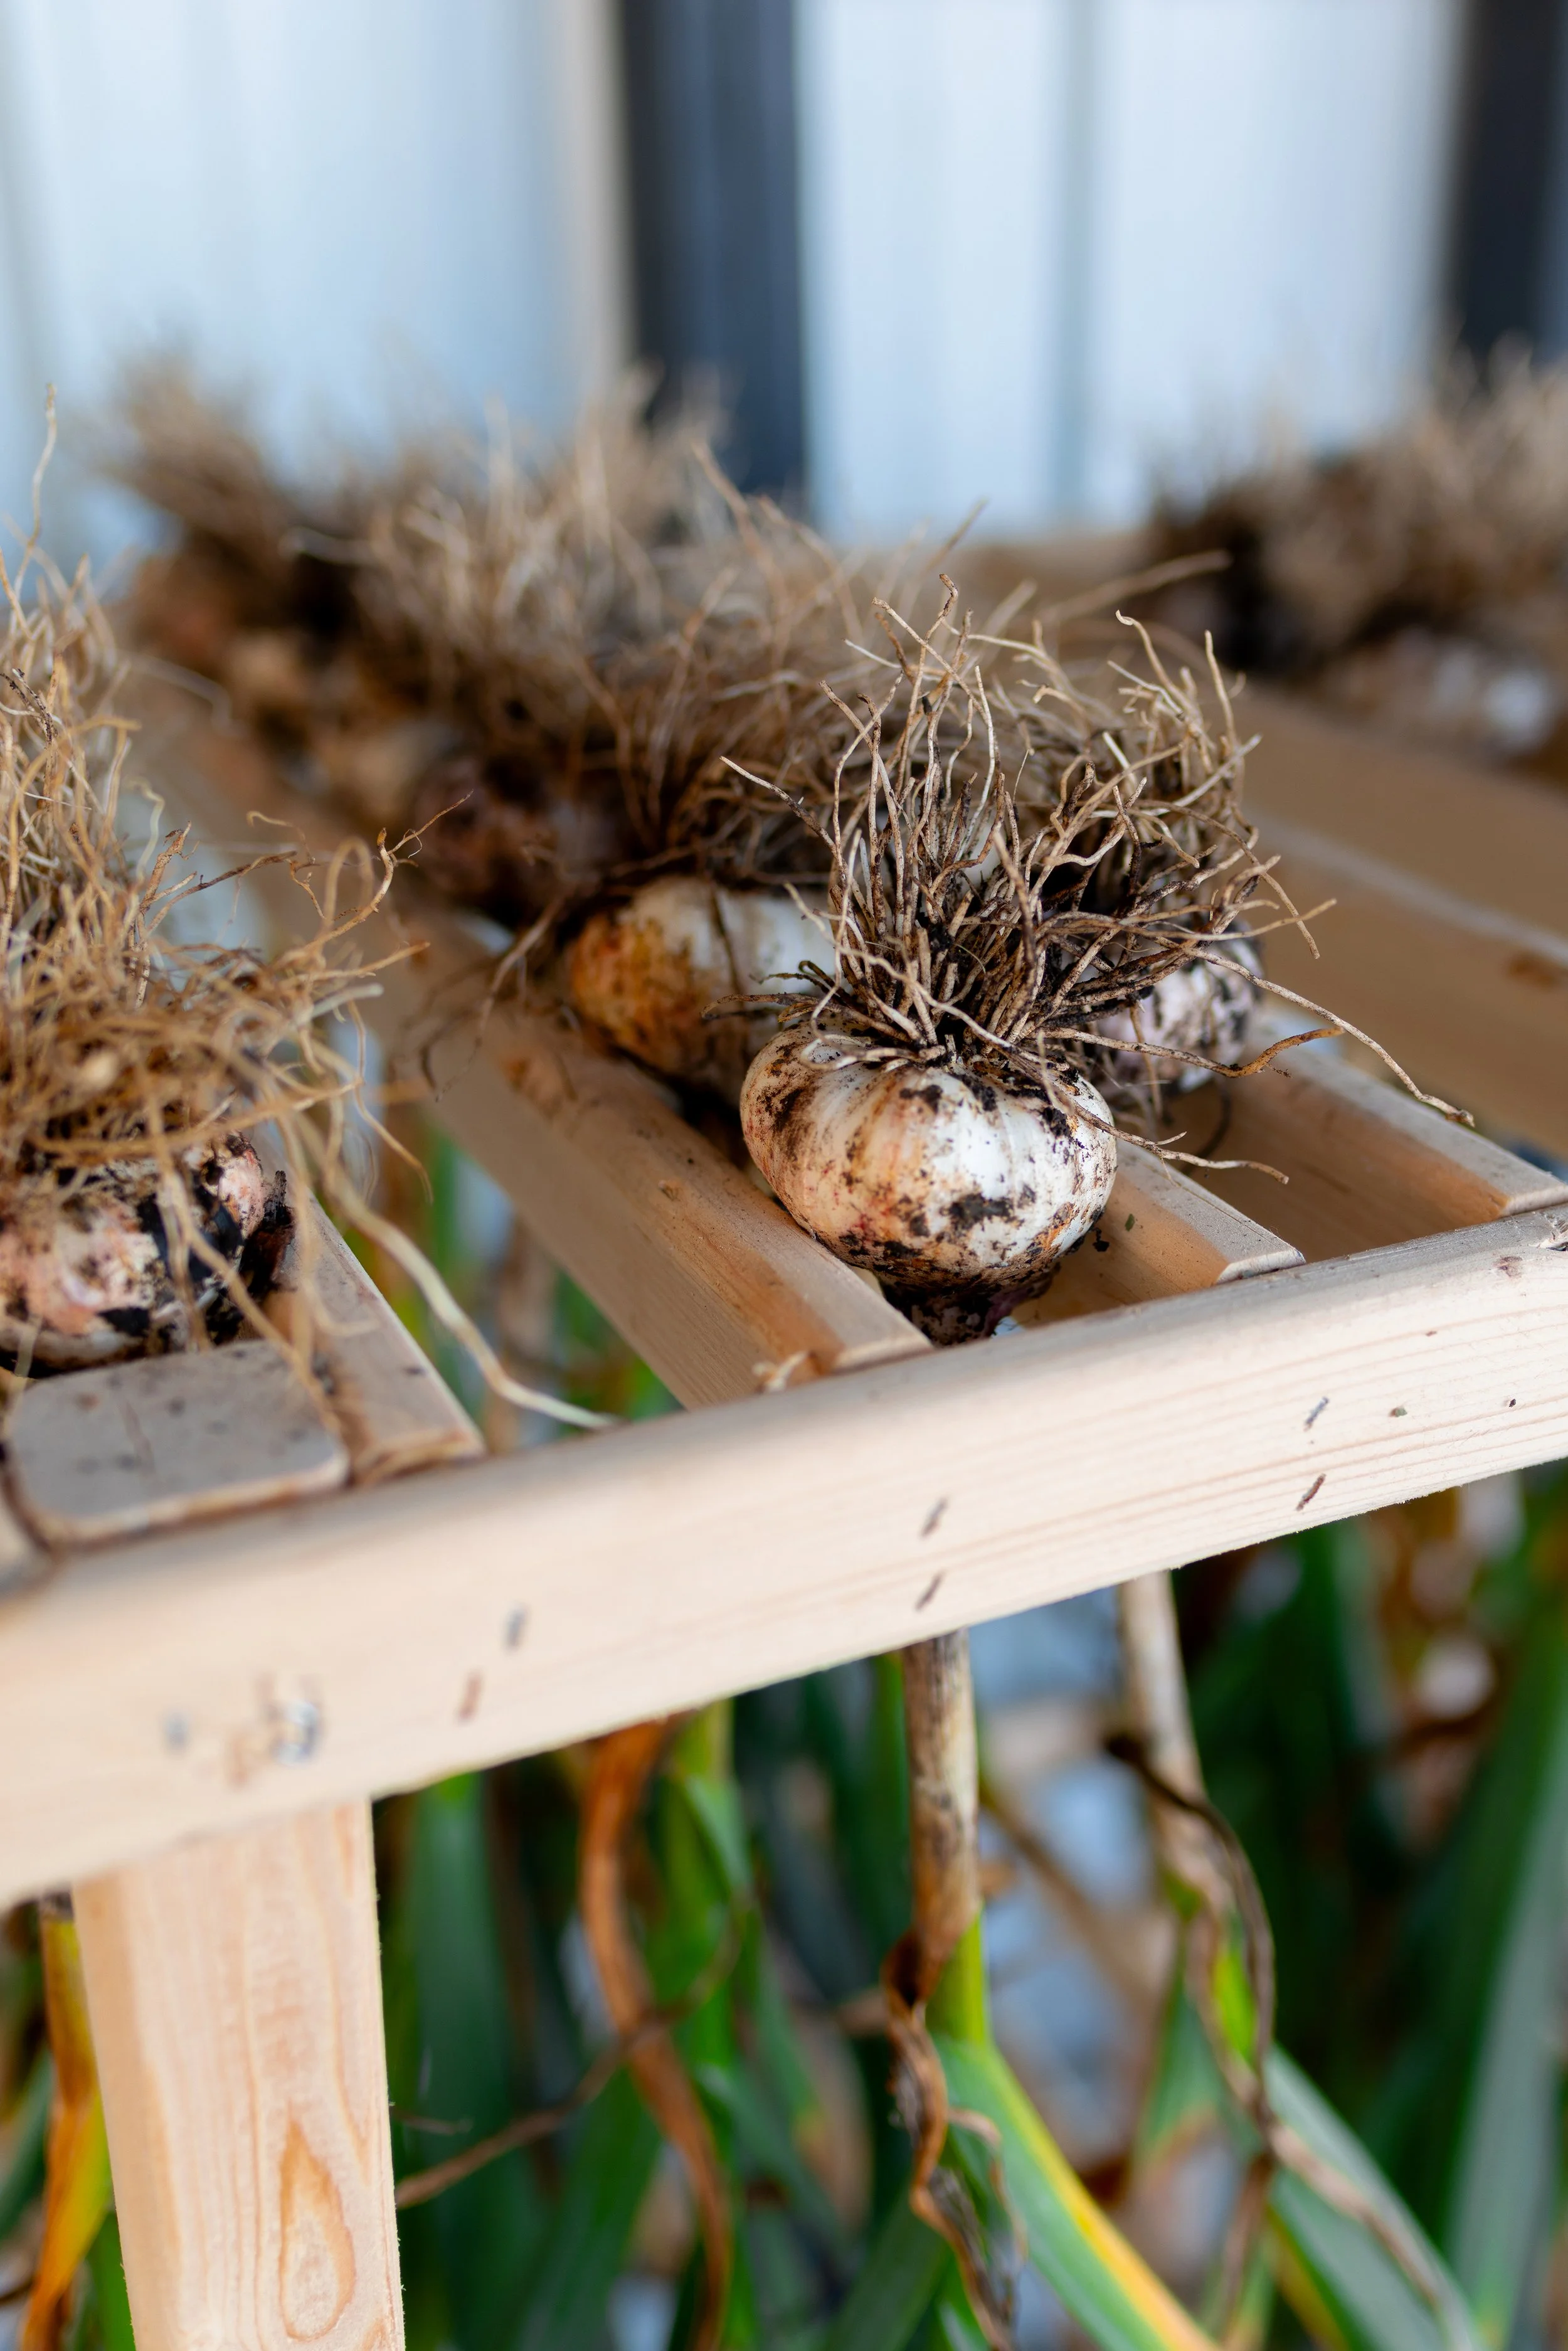
Hang to Dry: Whether in bundles or alone, hang the garlic to dry. The garlic should be dried in a well-ventilated, dry, and covered place that is out of direct sunlight. You can try making a homemade drying rack like the one in my photos! We made this one ourselves based on historical designs.
Check Weekly: The garlic will be finished curing after about 3 to 4 weeks. The bulbs are fully cured when the skins are completely dry, papery, and the roots are fully dried out. The cloves should be hard and easy to crack apart.
Trim the Foliage & Roots: When the garlic is finished curing, the foliage and roots can be trimmed back. Trim roots to 1/4-inch and cut tops to 1 to 2-inches (2.5 to 5-cm).
How to Store Garlic Bulbs
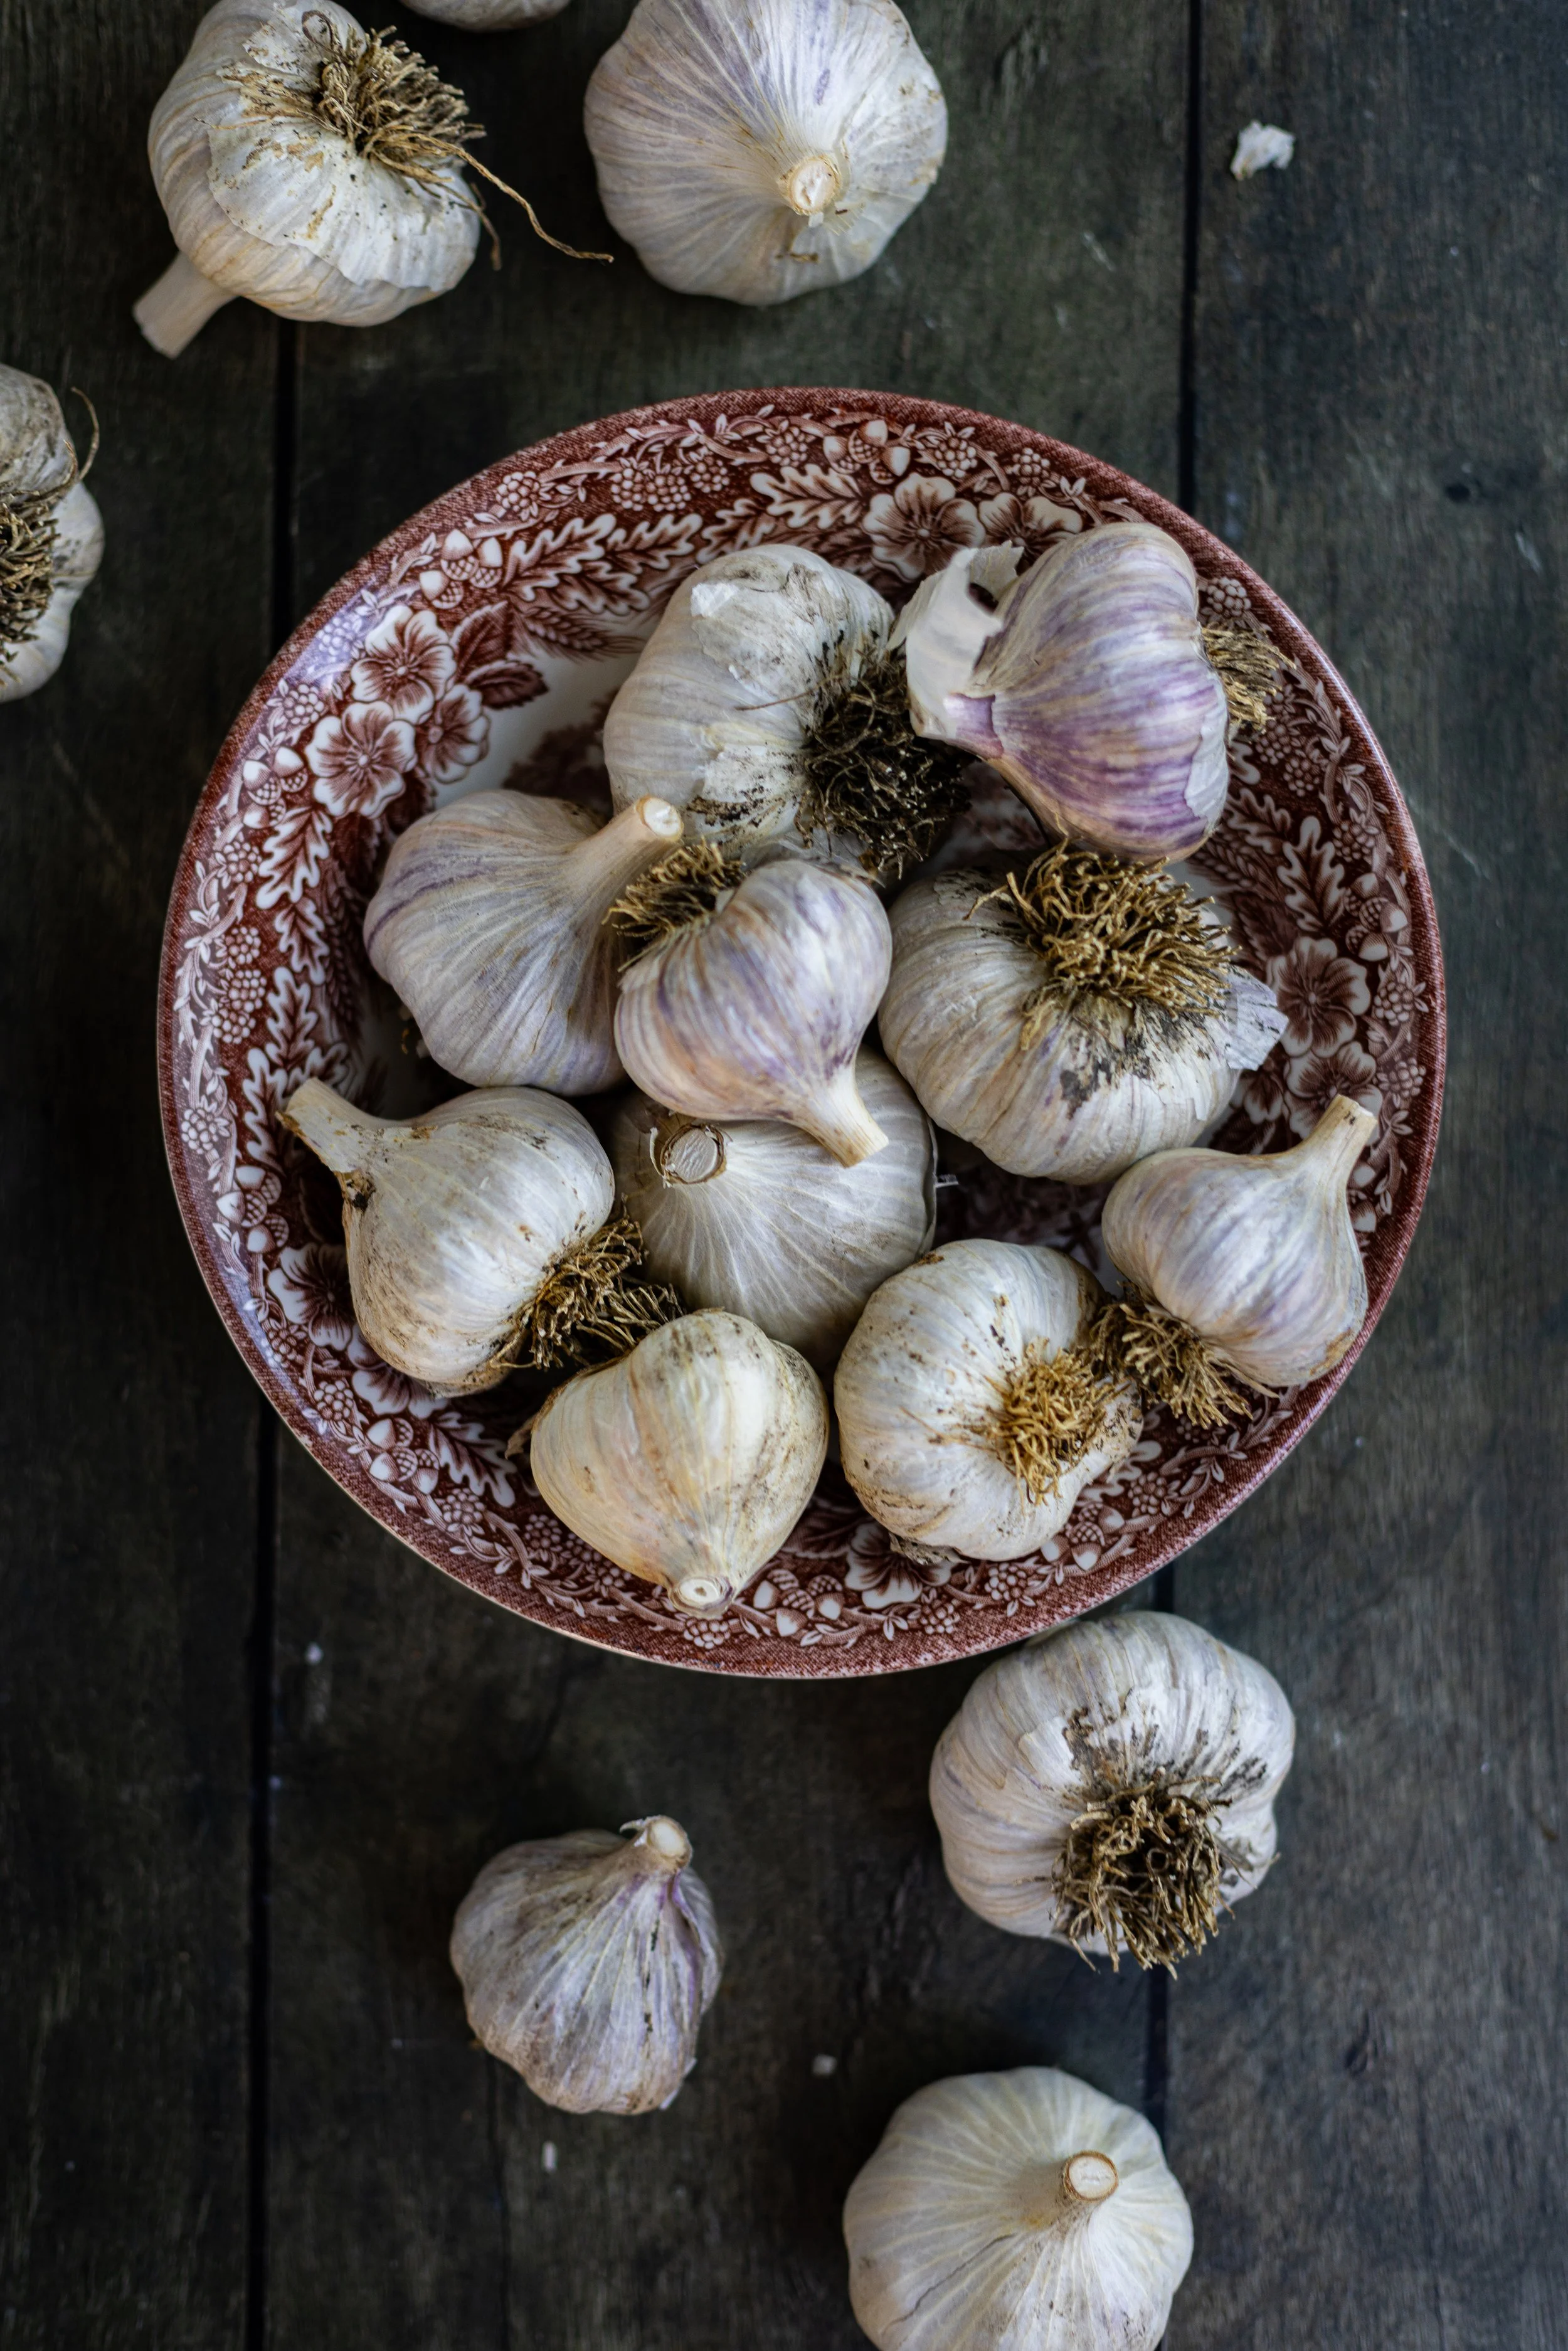
Like most vegetables, garlic stores best in a cool, dark, and dry place. It will keep for several months if properly cured and stored in the right conditions. Some garlic even lasts for more than a year!
Ideally, your garlic will store best in an open pantry, dry basement, dry cellar, or heated garage. Often, a ventilated woven basket on your kitchen counter is great! I like these root storage baskets — they’re beautiful and work well.
Temperature: The ideal temperature to store garlic is 55 to 65°F (13 to 18°C).
Humidity: Ideal humidity levels for storing garlic generally falls between 45% to 65% relative humidity. A root cellar is typically too humid for storing garlic, though it can work. It likes an environment that is a bit on the dry side. Don’t store your garlic in the basement if it’s humid!
Light Exposure: Sunlight can cause your garlic bulbs to sprout. This reduces their shelf life and alters their flavor. Store your garlic in a dark place,
Air Flow: You want good air flow and ventilation to store your garlic for longer. Don’t store your garlic in an airtight container as this can lead to mold and mildew. You want the garlic to stay as dry as possible.
Refrigeration: Garlic does not store well in the fridge. The high moisture levels and cold temperatures will encourage them to start growing.
Pro Tip: Keep your biggest, best-looking bulbs to plant again in the fall for another crop of garlic the following summer!
Alternate Storage Methods for Garlic
Freezing:
Garlic cloves can be frozen. You can place peeled or unpeeled cloves on a baking sheet, spaced apart evenly. Place the baking sheet into the freezer. Once the cloves are fully hardened, store them together in an airtight freezer-safe container or freezer bag. You can also freeze pureed or minced garlic!
Dehydrating:
Dehydrated garlic lasts even longer than whole, cured garlic cloves. This is how you make things like garlic salt and garlic powder!
Dehydrator: Slice peeled cloves thinly and place them on dehydrator trays. Dry at 125°F (52°C) until crisp and brittle.
Oven: Arrange sliced garlic on a parchment-lined baking sheet. Dry in the oven at the lowest temperature setting (150 to 200°F or 65-93°C). You may want to leave the oven door slightly open to allow some air circulation. Rotate the trays occasionally.
Garlic Powder: Grind fully dried garlic cloves in a coffee grinder or spice grinder into flakes or a fine powder.
Pickling:
Another great way to preserve your garlic is by turning it into pickles! Pickled garlic is absolutely delicious in various dishes. To pickle garlic, it is stored in an acidic brine made from vinegar. This mellows the raw garlic flavor and makes the gloves tangy and bright. To store pickled garlic, it can be water bath canned or stored in the refrigerator for several months.
Common Pests & Diseases
Learn about these common pests and diseases that can affect your garlic plants. While these are all generally rare to happen, they can happen, and it can be good to know how to fix the problem or prevent it in the future. In any case, I believe that the best method for dealing with plant pests and diseases is to put preventative methods at play before planting. This lowers your risk of issues from the beginning!
| Symptoms | Cause | Prevention/ Solution |
|---|---|---|
| Sudden wilting; yellowing foliage; tunnels in bulbs from larvae; plant collapse | Onion Maggots (pest) | Apply floating row cover; remove and cull damaged bulbs; avoid raw compost or manure |
| Premature yellowing or plant collapse; white fluffy mycelium at base; black poppy-seed sclerotia on roots | White Rot (disease) | Do not replant alliums in infested beds; sanitize beds; plant clean, disease-free bulbs; improve soil drainage |
| Orange to ruse-colored pustules on leaves; reduced plant vigor | Garlic Rust (disease) | Increase spacing/airflow between plants; remove infected leaves; avoid overhead watering and improve soil drainage; use copper or bio-fungicide at first sign |
| Stunted plants; soft bulbs; brown or corky patches at roots | Dry Bulb Mites (pest) | Plant disease-free cloves, avoid planting into fresh manure or raw compost; extend rotations between crops; solarize infested beds |
| Silvery streaks and speckling on bulbs; curled/twisted leaves; reduced bulb size | Onion Thrips (pest) | Overhead rinse to knock down insects in heat waves; insecticidal soap; mulch; reduce weeds |
| Swollen, spongy cloves; distorted, split bulbs; poor growing stalks | Stem & Bulb Nematodes (pest) | Use nematode-free cloves; hot-water clove treatment; 4-5 year rotation of alliums in bed; solarize beds |
| Pale streaks; purple/brown lesions; fuzzy growth in humid periods | Purple Blotch/Powdery Mildew (disease) | Wider spacing; water in morning only; remove debris; use copper or bio-fungicide during prolonged humidity |
| Mottled, streaked leaves; stunting; yield loss over time | Viral Diseases | Renew seed stock from certified virus-tested suppliers; control thrips; remove weak plants |
Final Thoughts
There’s a lot to learn when it comes to growing an incredible crop of garlic! This information is important, but I do not believe that growing garlic should be difficult. This is a fairly easy vegetable to grow, even though there are several things to remember. The most important thing is to know the signs and stages of garlic’s growing cycle.
Above all, I hope that you feel you can refer to this guide when you need help troubleshooting how to grow garlic! Get out there and plant your cloves before winter comes so you can enjoy a bountiful harvest of garlic bulbs next summer.
xoxo Kayla
You Might Also Like


Learn how to grow big beautiful onions easily in this beginner planting guide.