How to Grow Onions: Complete Planting, Growing, and Harvesting Guide
This post may contain affiliate links, please see our privacy policy for more information.
Onions are one of the most commonly found foods in the kitchen. They add incredible flavor to dishes like soups, stews, roasts, pizza, pasta, and more. You can learn how to grow your own onions in this easy how-to gardening guide!
Onions are an excellent crop for beginner and experienced gardeners alike. They don’t take up much room, are generally resistant to pests and diseases, and they store for several months when cured properly. Learn how to plant, grow, harvest, and store onions in this onion planting guide!
Why Grow onions?
Unmatched Flavor: Homegrown onions have bolder, sweeter flavor than varieties that are sold at the grocery store. You can eat them fresh or cure them for long-term storage, though they taste incredible when enjoyed fresh!
Unique Varieties: When you grow your own onions, you open the door to planting more diverse varieties. There are many different types of onions out there, and you may find a new favorite!
Space-Saving: Onions can be grow fairly close together— about 3 to 4-inches apart. This makes them a great crop for smaller gardens where you can get a lot out of a little!
Long-Term Storage: My favorite reason to grow homegrown onions is its long shelf life. Depending on the variety, properly cured onions can last all winter when stored in the right conditions.
Onion Types & Best Varieties
There are three different types of onions: “short-day,” “day-neutral,” and “long-day” varieties. They are so-named due to how they respond to the length of day. Onions are triggered by the number of daylight hours, which signals them to form bulbs. This makes onion plants photoperiodic.
Short-Day Onions
These bulbs need 10 to 12 hours daylight. Short-day onions grow best in Southern regions, or USDA Plant Hardiness Zones 7 to 9, sometimes even warmer zones such as 10 and 11. These onions are usually grown in the southern United States during the winter. While they appear to grow more quickly, they are not good for growing in Northern regions because they start developing bulbs too early, which will result in small bulbs overall.
Short-Day Onion Varieties:
Yellow Granax
White Castle
Madalyn
Red Rock
Day-Neutral, or Intermediate Onions
These bulbs need 12 to 14 hours daylight. Day-neutral onions are best suited to USDA Plant Hardiness Zones 5 to 6, or the mid-regions of the U.S. They are a more versatile choice, and often include sweet onion varieties that are mild in flavor. These varieties generally grow in about 100 days.
Day-Neutral Onion Varieties:
Candy
Super Star
Purplette
Red Stockton
Long-Day Onions
These bulbs need 14 or more hours of daylight. These onions are more suited for colder regions, such as USDA Plant Hardiness Zones 3 to 6. They have long summer days, which have enough daylight hours to form bulbs. Plant will not het enough daylight hours in Southern regions, which may lead to poor yields.
Long-Day Onion Varieties:
Walla Walla
Yellow Sweet Spanish
White Sweet Spanish
Onion Seeds vs. Onion Sets
Should you plant your onions from seed or from sets? It really depends on where you live, and what you hope to get from your onion crop. Onions are biennials, or plants that need two growing seasons to grow to their full maturity. In the first season, the onion grows a bulb and foliage. In their second season, they will spend their energy growing a flower stalk and setting seed to produce more onions.
Planting onions from small bulbs or “sets” is how most people grow their onions. However, these bulbs have already grown from seed for their first season. That means the bulbs will not focus their energy on growing large bulbs— they’re trying to go to seed! This makes them a great option for spring onions, or green onions, but not for large bulbs or storage.
Growing onions from seed or transplants is the best way to grow large onion bulbs that can be cured and saved in storage over winter. Transplants are sold in small bundles that look like a clump of grass.
If you are a beginner gardener, onion sets are far superior for your first try at growing onions! Seeds take a long time to grow, and they can be difficult to get started. My personal recommendation would be to order onion transplants online! This gives you the best of both worlds.
When and Where to Plant Onions
Timing Tips:
Onion Sets: Plant sets or “dormant bulbs” directly into the soil in early spring, or as soon as the soil can be worked and the danger of hard freezes have passed. About 2 to 4 weeks before the last spring frost date.
Onion Seeds: Begin onion seeds indoors about 8 to 10 weeks before the last spring frost date, usually in late winter. They need soil temperatures of at least 50°F to germinate.
Transplant Seedlings: If you started seeds indoors or purchased plant starts, plant them outside around the same time as onion sets (2 to 4 weeks before the last spring frost date).
Fall Onions: You can plant onions in warmer regions that will become dormant over winter and grow again in the spring. They need at least 4 to 6 weeks of warm temperatures, so plant accordingly depending on where you live.
Best Growing Conditions:
Sun: Full sun, at least 10 to 14 hours per day, depending on the onion type. The more sun they get, the bigger the bulbs will grow!
Soil: Onions prefer well-draining, loose soil. A sandy-loam or silt-loam is best. Avoid planting into soils that are compact or heavy with clay. To amend your soil and improve texture, add well-rotted manure or compost in the fall or early spring. Onions prefer a more basic soil of a pH around 6.9 to 6.8.
Spacing: 2 to 6-inches apart in rows that are 12 to 18-inches apart.
Tools & Supplies You Will Need
Spade or Trowel— Use a spade to dig trenches and turn the soil, or a trowel or dig individual holes for planting bulbs or transplants.
Hoe or Hand Cultivator— For removing weeds between the rows of onion bulbs, use a hoe or hand cultivator.
Compost— Onion needs a bed that has been amended with compost or well-rotted manure in the top few inches of soil before planting.
Fertilizer— Fertilize your onions every few weeks with a nitrogen fertilizer. This will help to grow larger bulbs! Stop fertilizing your onions when the bulbs begin to push away the soil, or when the bulbing process has begun.
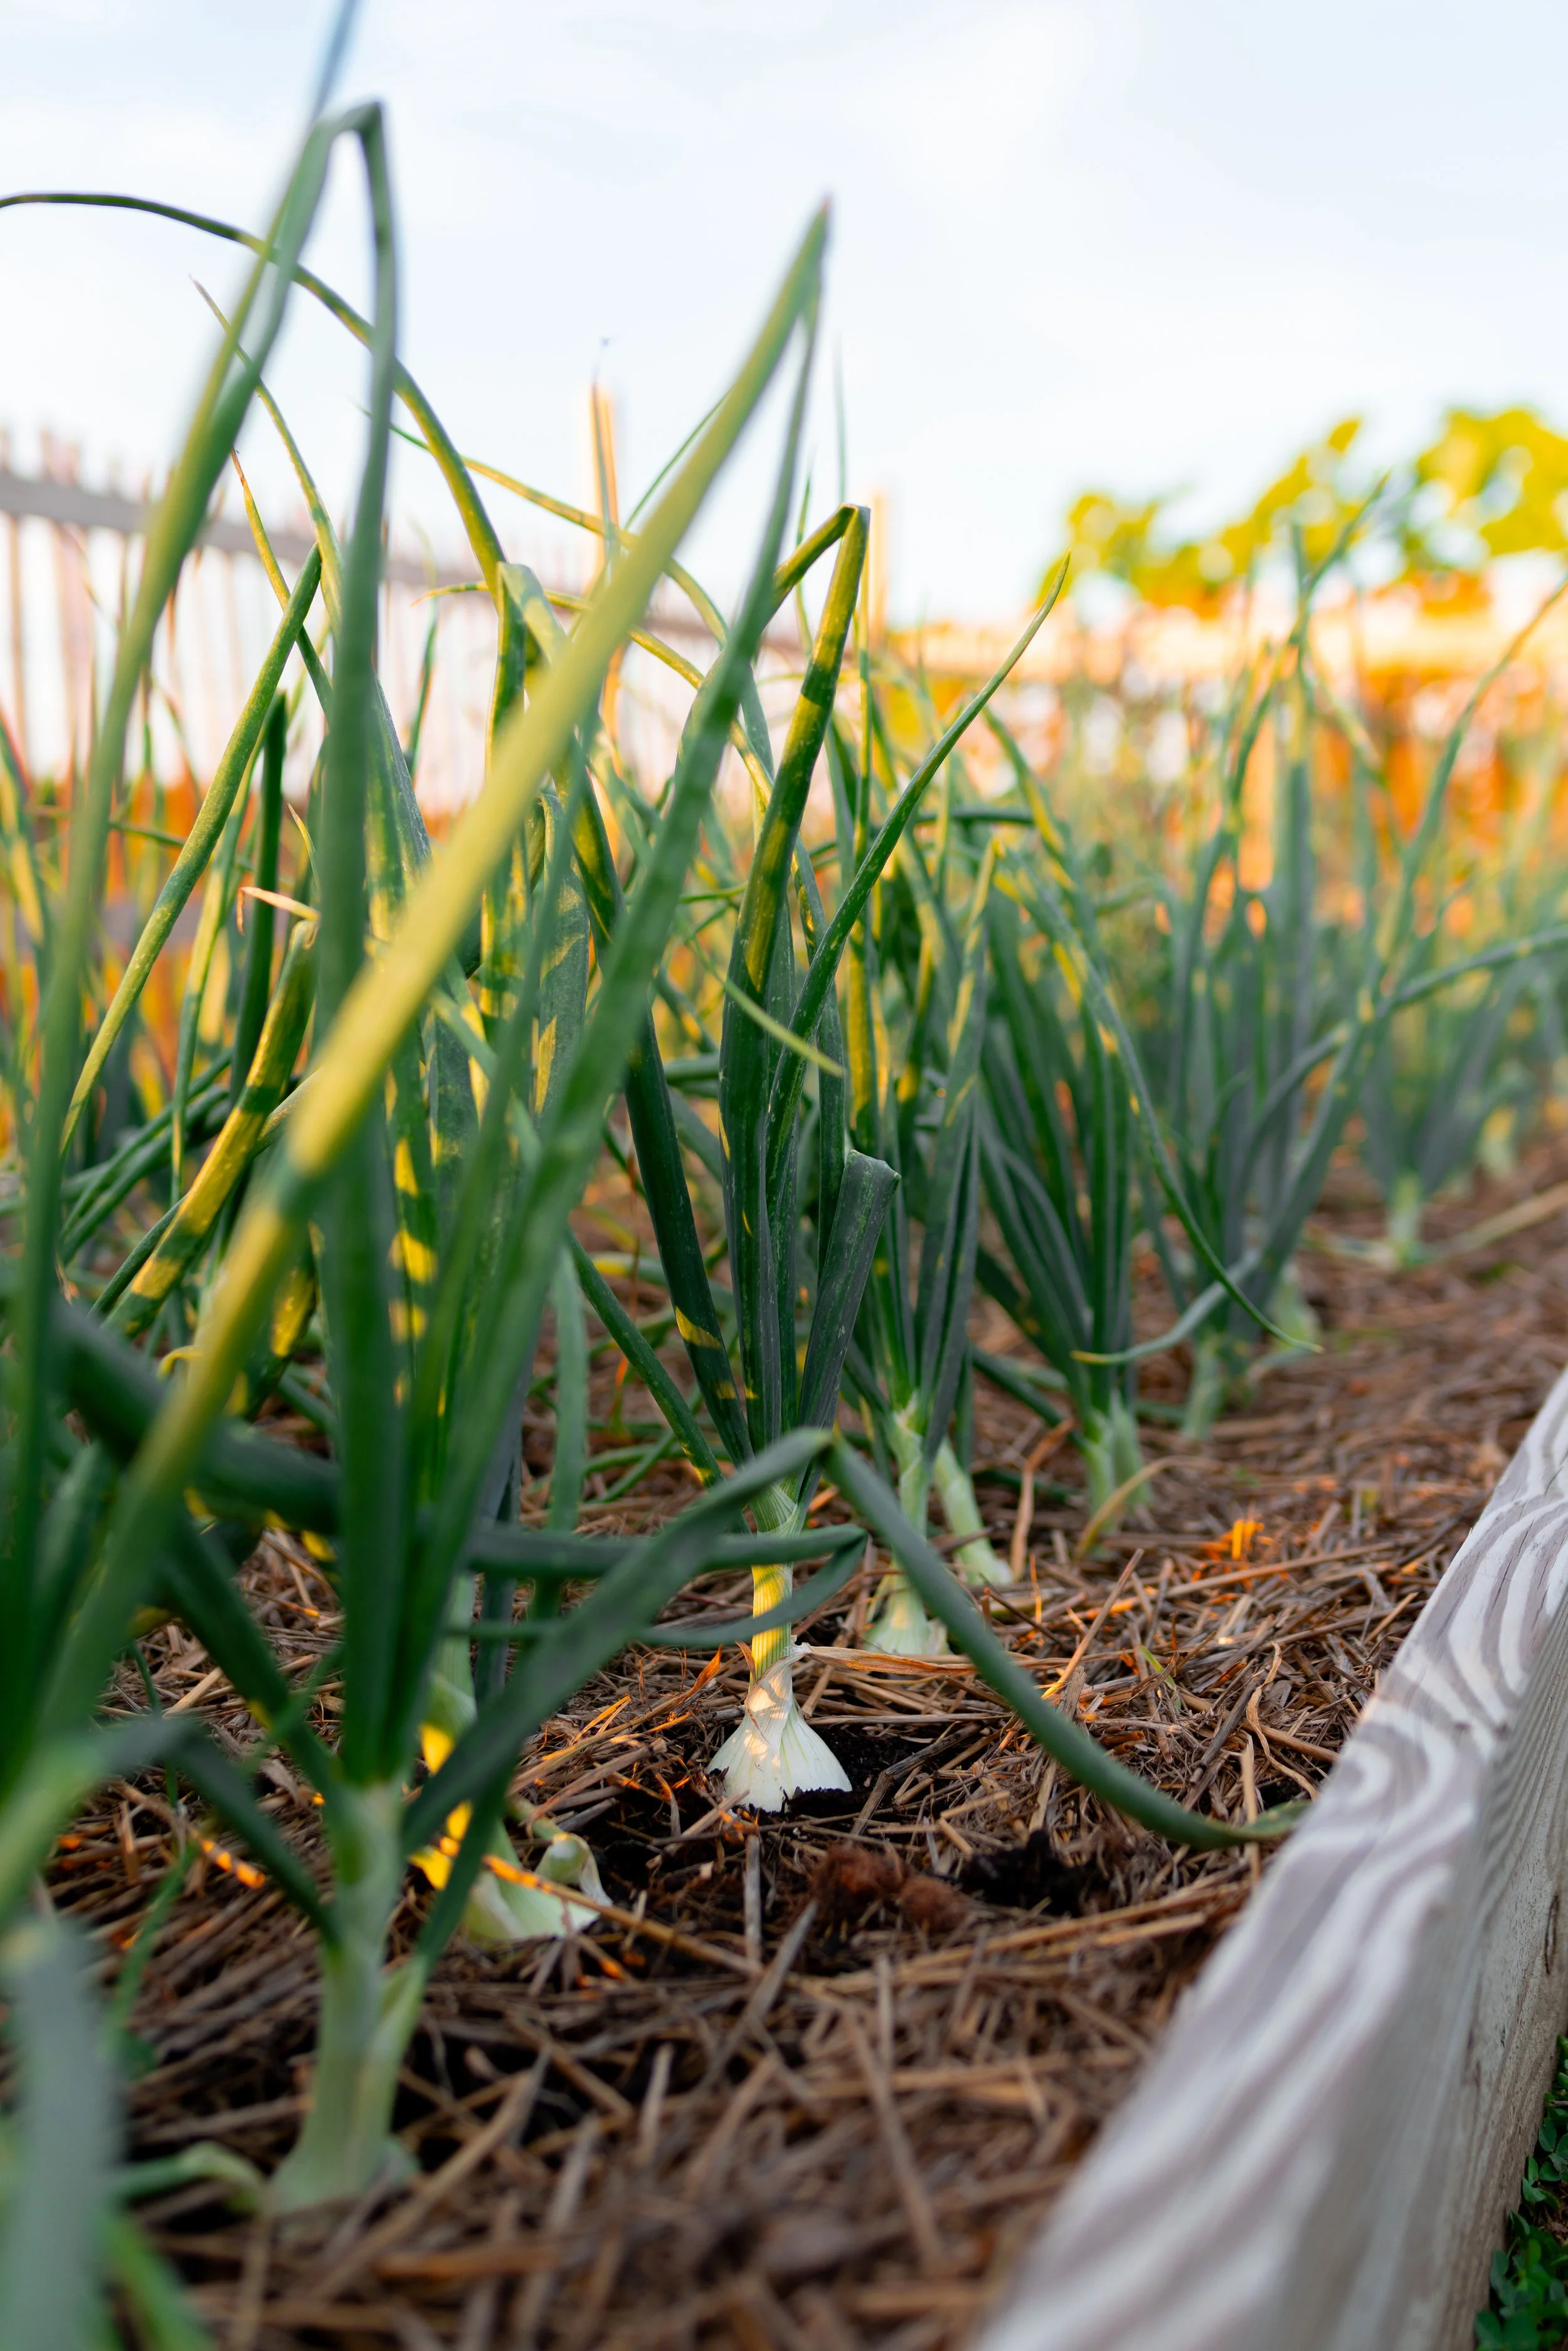
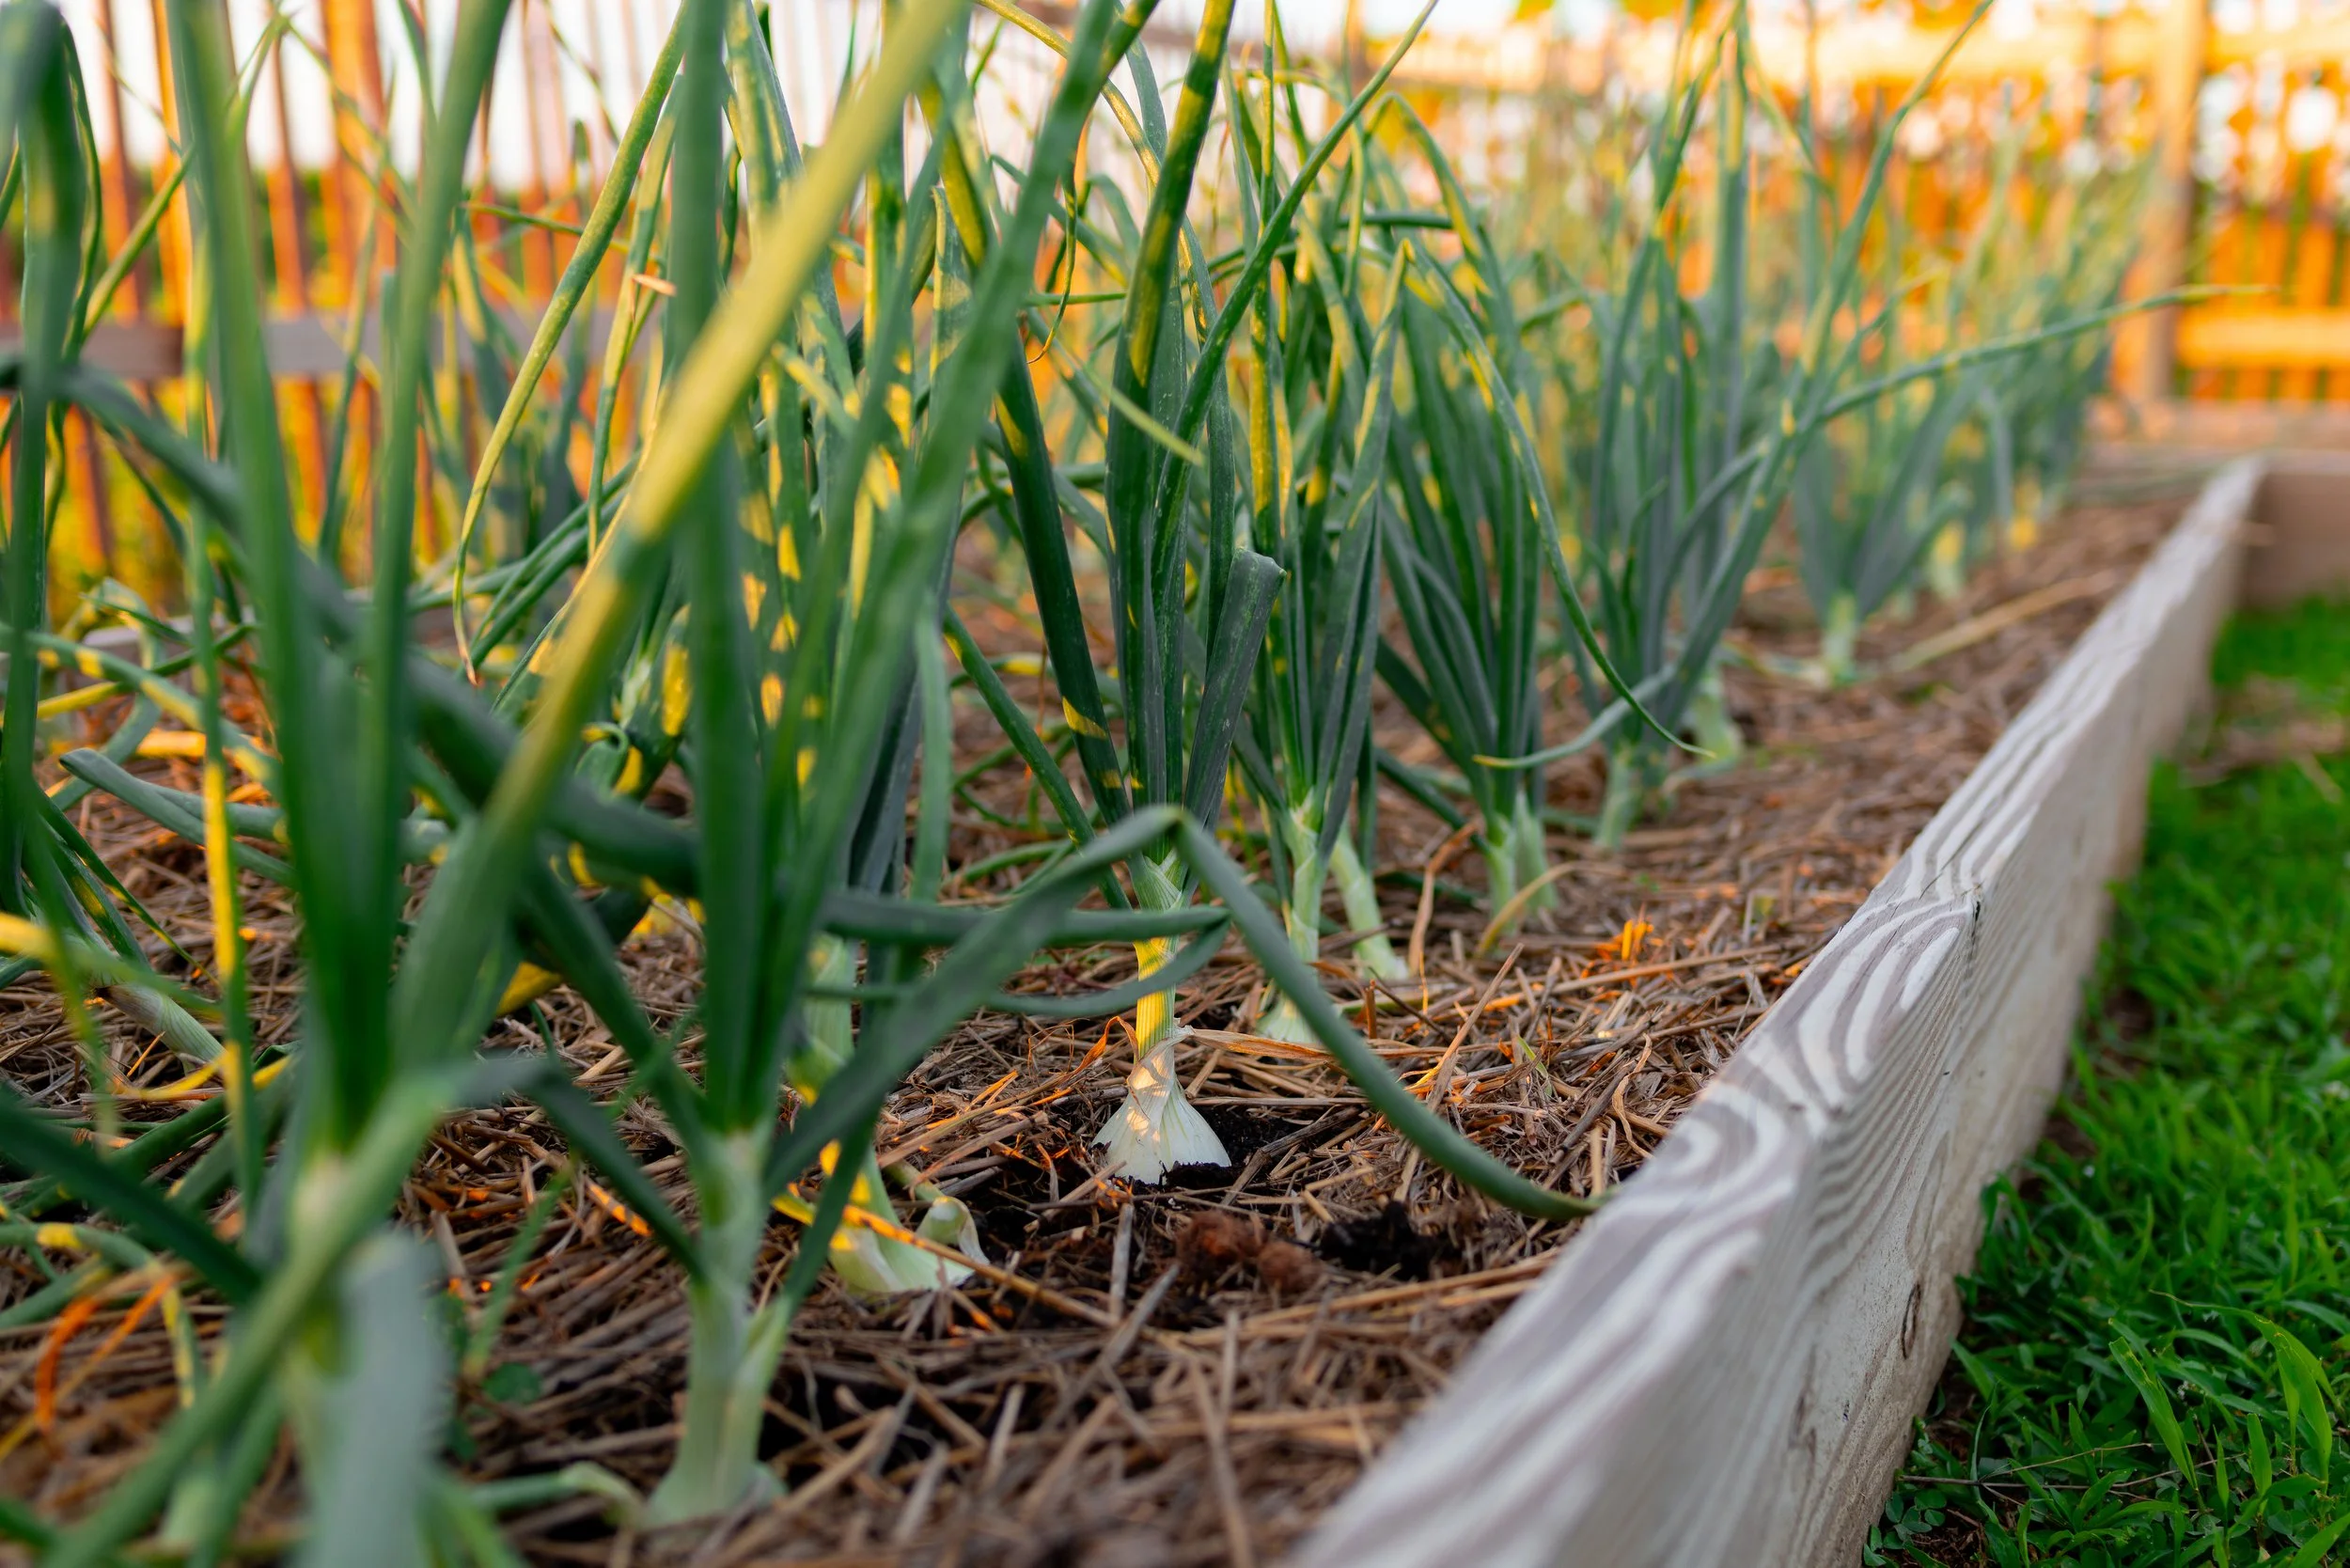
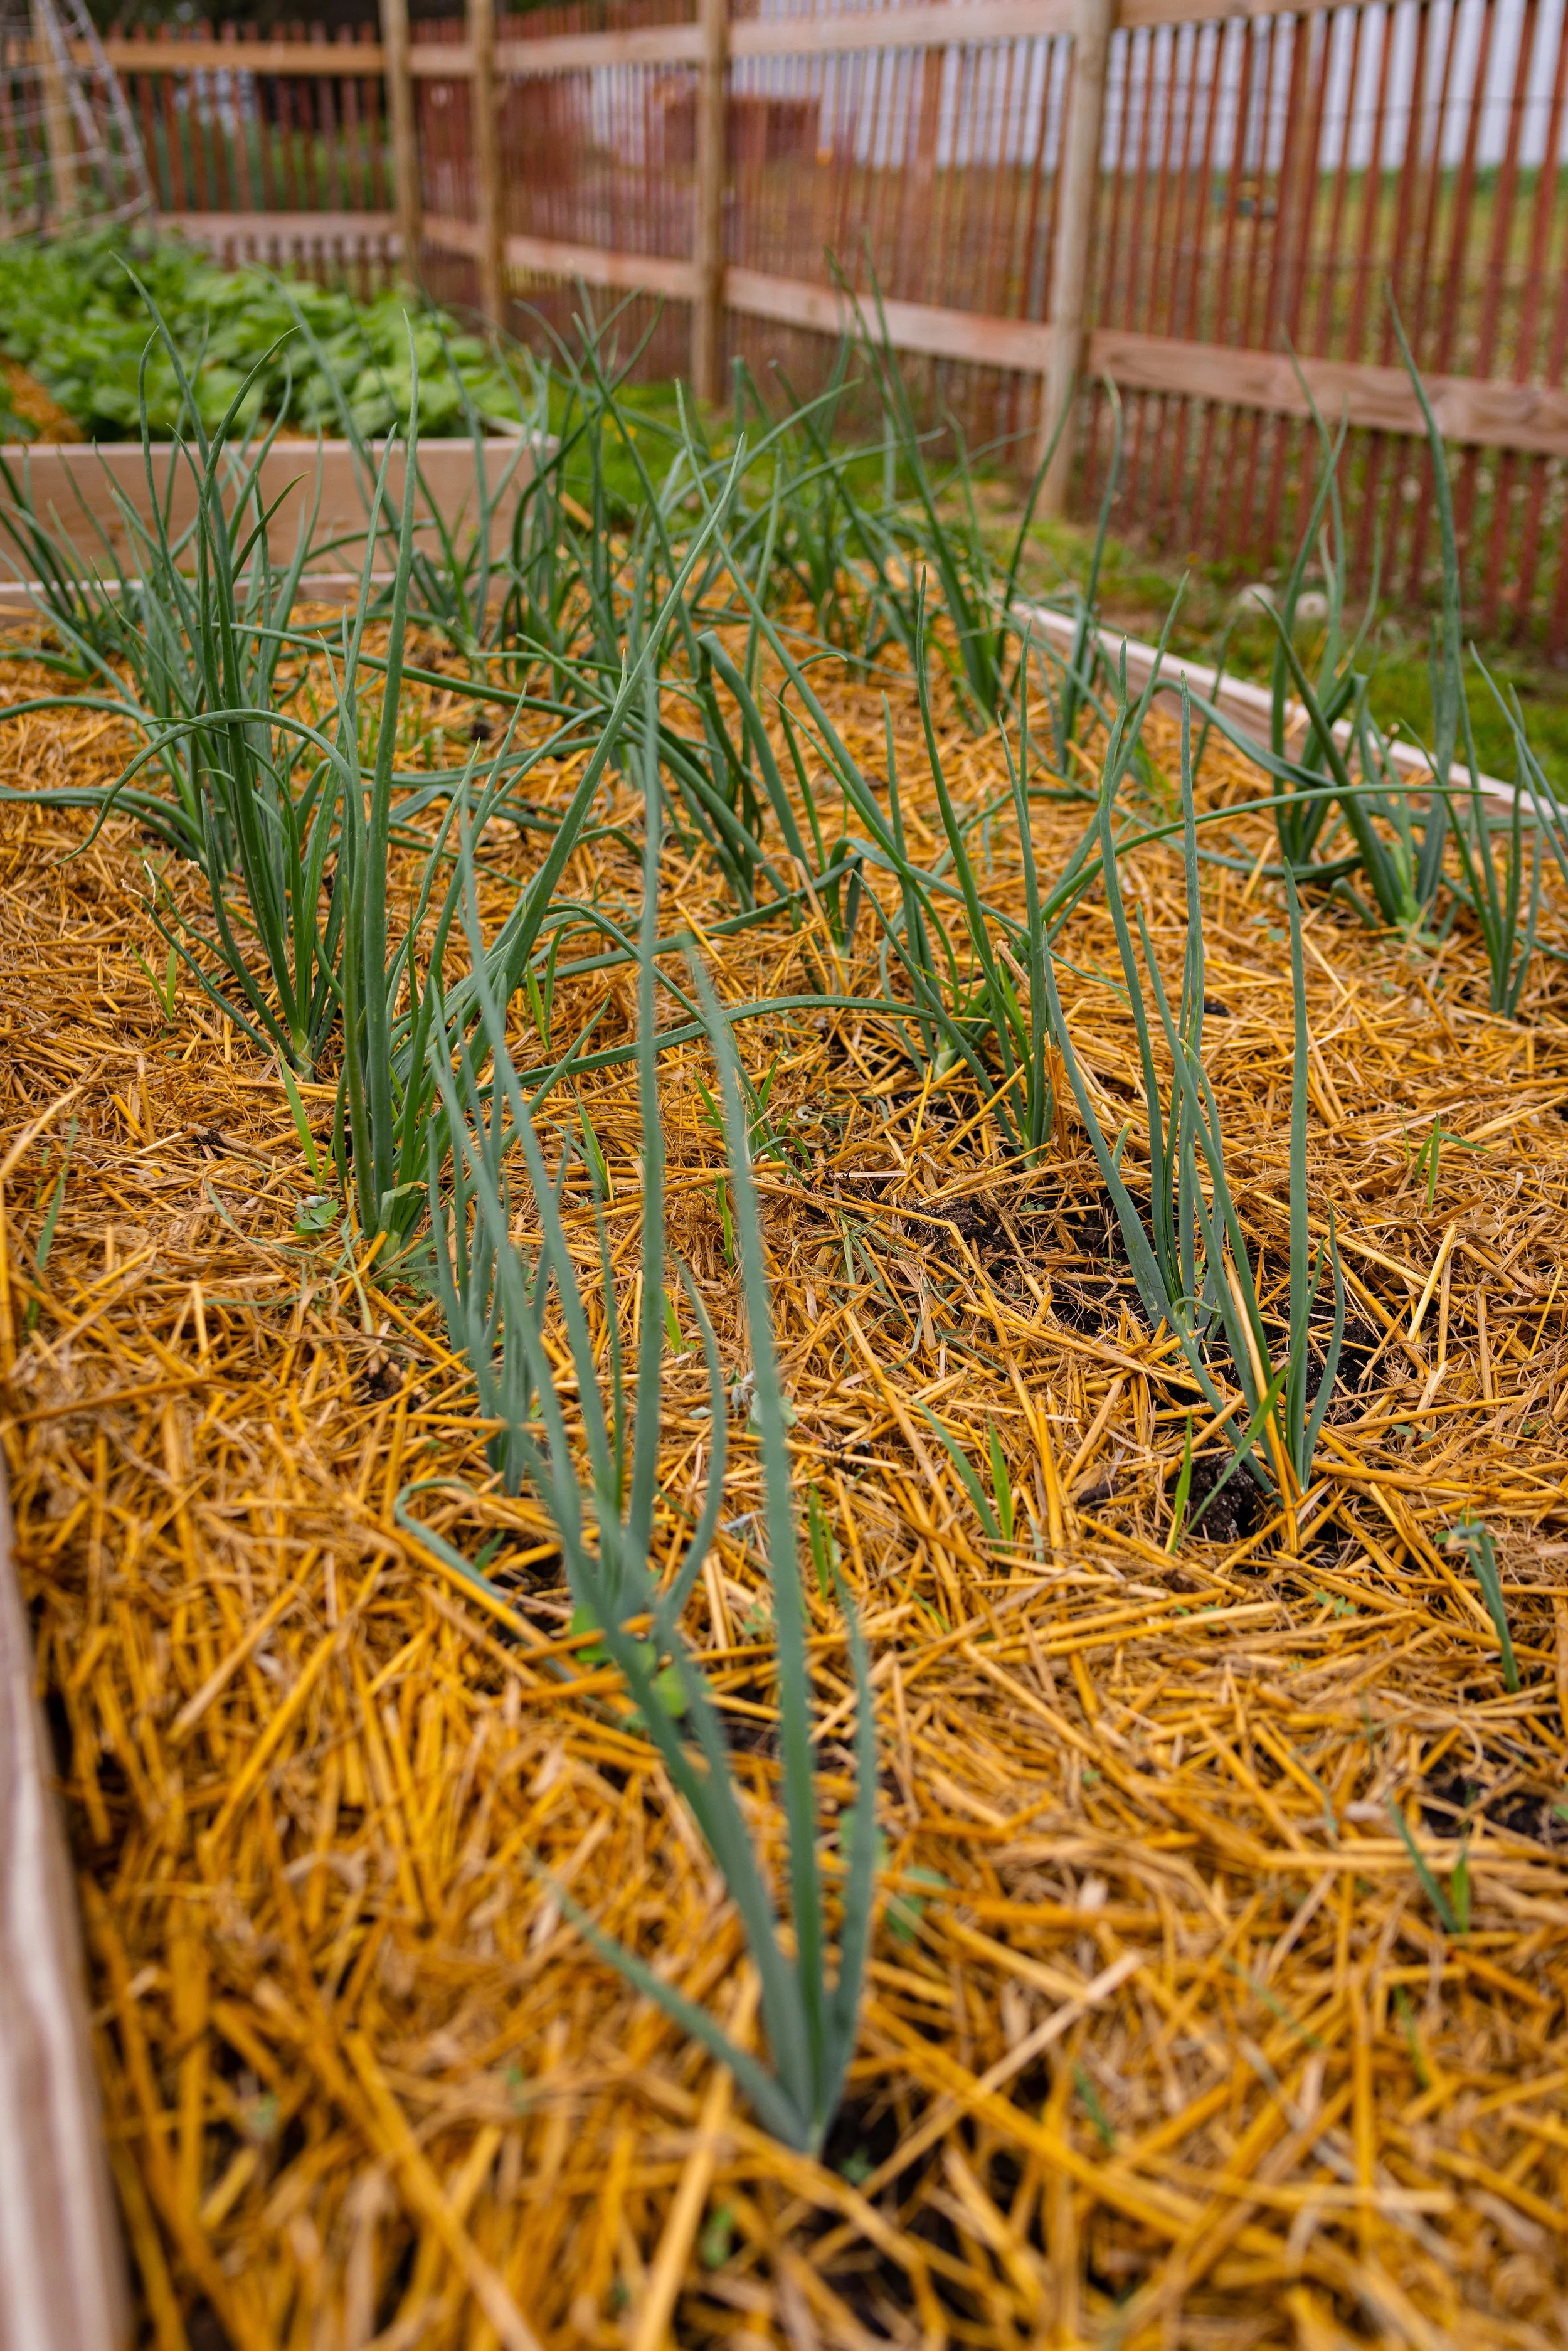
Straw Mulch— Onions need a light mulch, such as from straw or grass clippings. This helps protect them, suppress weed, retain moisture, and allow for air circulation. You should not cover the bulbs, so using a heavier mulch or plant fabric is not a good option.
How to Plant Onions Step-by-Step
Prepare your bed by gently loosening soil and removing weeds. Work in 2-inches (5-cm) of compost or well-rotted manure. If your soil is heavy and compact, consider planting in containers or raised beds. Mix in a nitrogen fertilizer before planting.
Dig furrows in the soil about 1 to 2-inches (5-cm) deep. Make the rows 12 to 18-inches apart.
Space bulbs and transplants 2 to 6-inches apart in the furrows. Place the bulbs upright, with the pointy end facing up to the sky. The wide, flat end (with the roots) should face down into the soil. Cover the bulbs with soil.
If planting seeds, sow the seeds about 1/4 to 1/2-inch deep once the soil is workable. Once the onions begin to grow and have sprouted to about 1-inch tall, thin them to 3 to 4-inches apart.
Mulch when growth begins with 2-inches (5-cm) of straw or grass clippings to suppress weeds and retain moisture.
Care tips for Onions
Watering: Onions do not need to be watered consistently, especially when mulch is being used. In general, it’s always a good idea to keep the soil moist and prevent your garden beds from drying out. If you are having hot weather, water your onions to help deter bolting. Onions that receive more water will also, generally, be sweeter flavored!
Fertilizing: Continue to fertilize your onions every few weeks with nitrogen fertilizer. Once the onions begin to form bulbs, or push the soil away from themselves, stop fertilizing.
Weed Control: Be sure to remove weeds as your onions grow. They do not like competition! Using a thin mulch can help to suppress weeds. Use a hoe or hand cultivator to remove weeds easily.
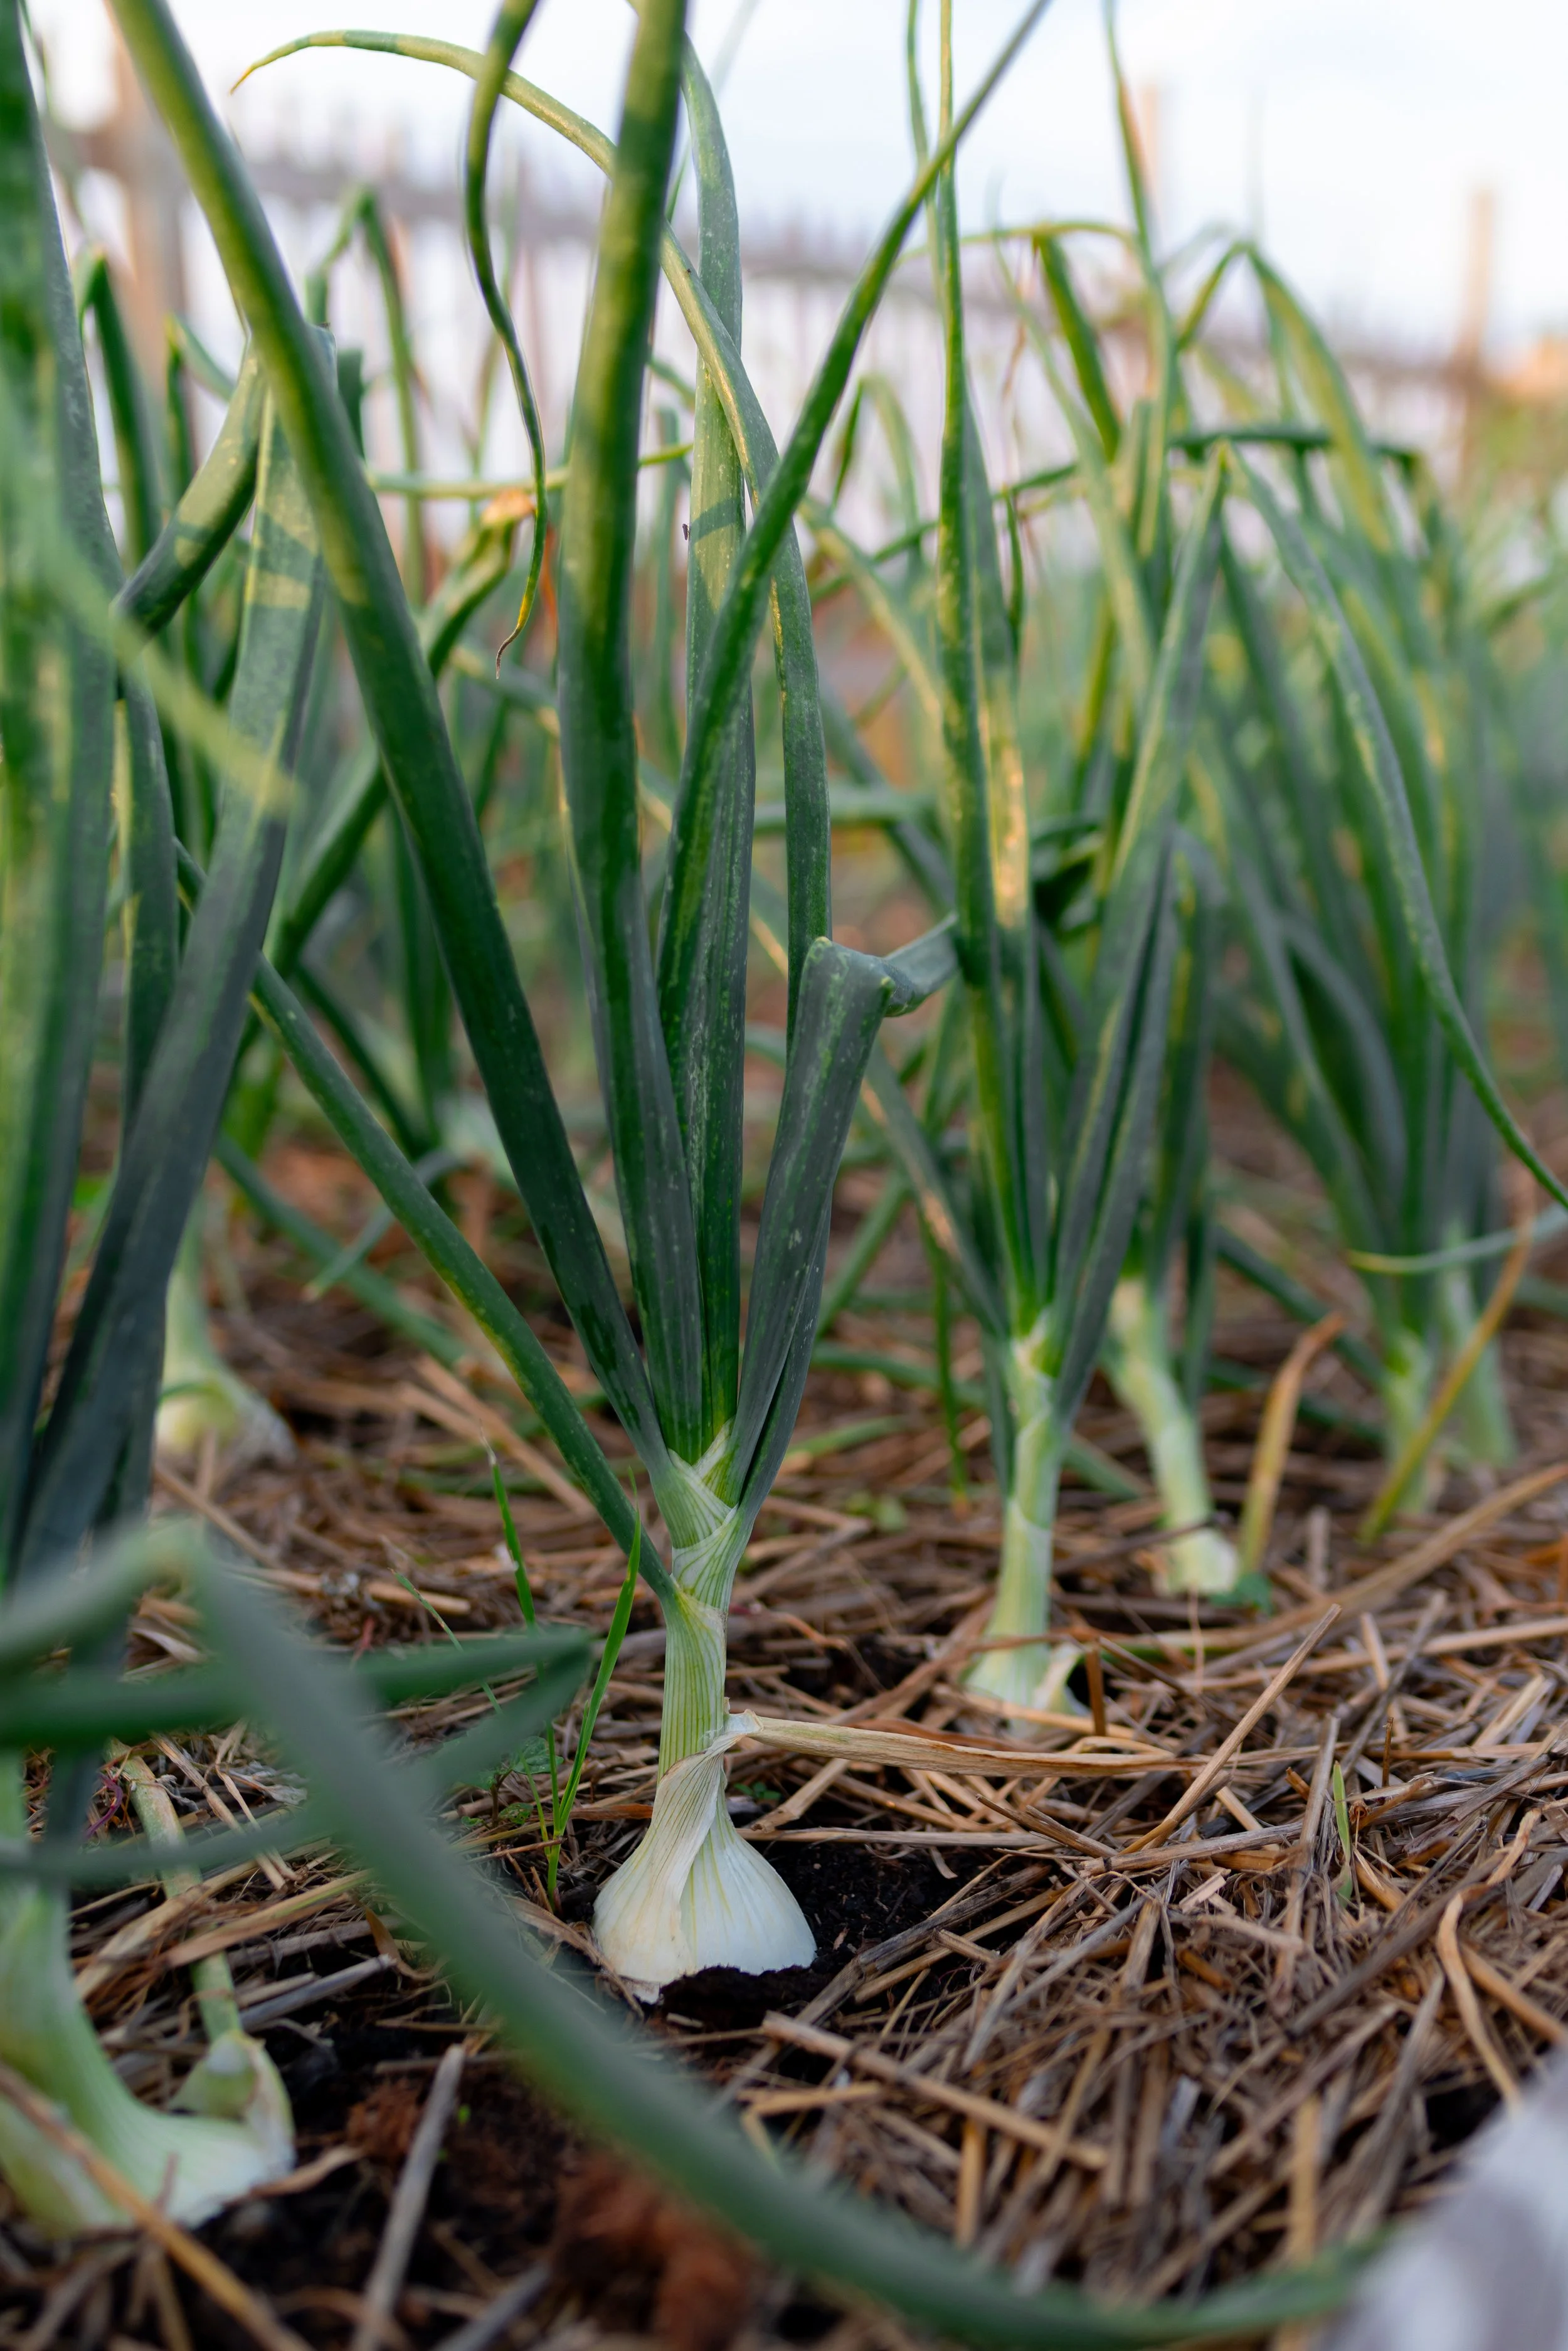
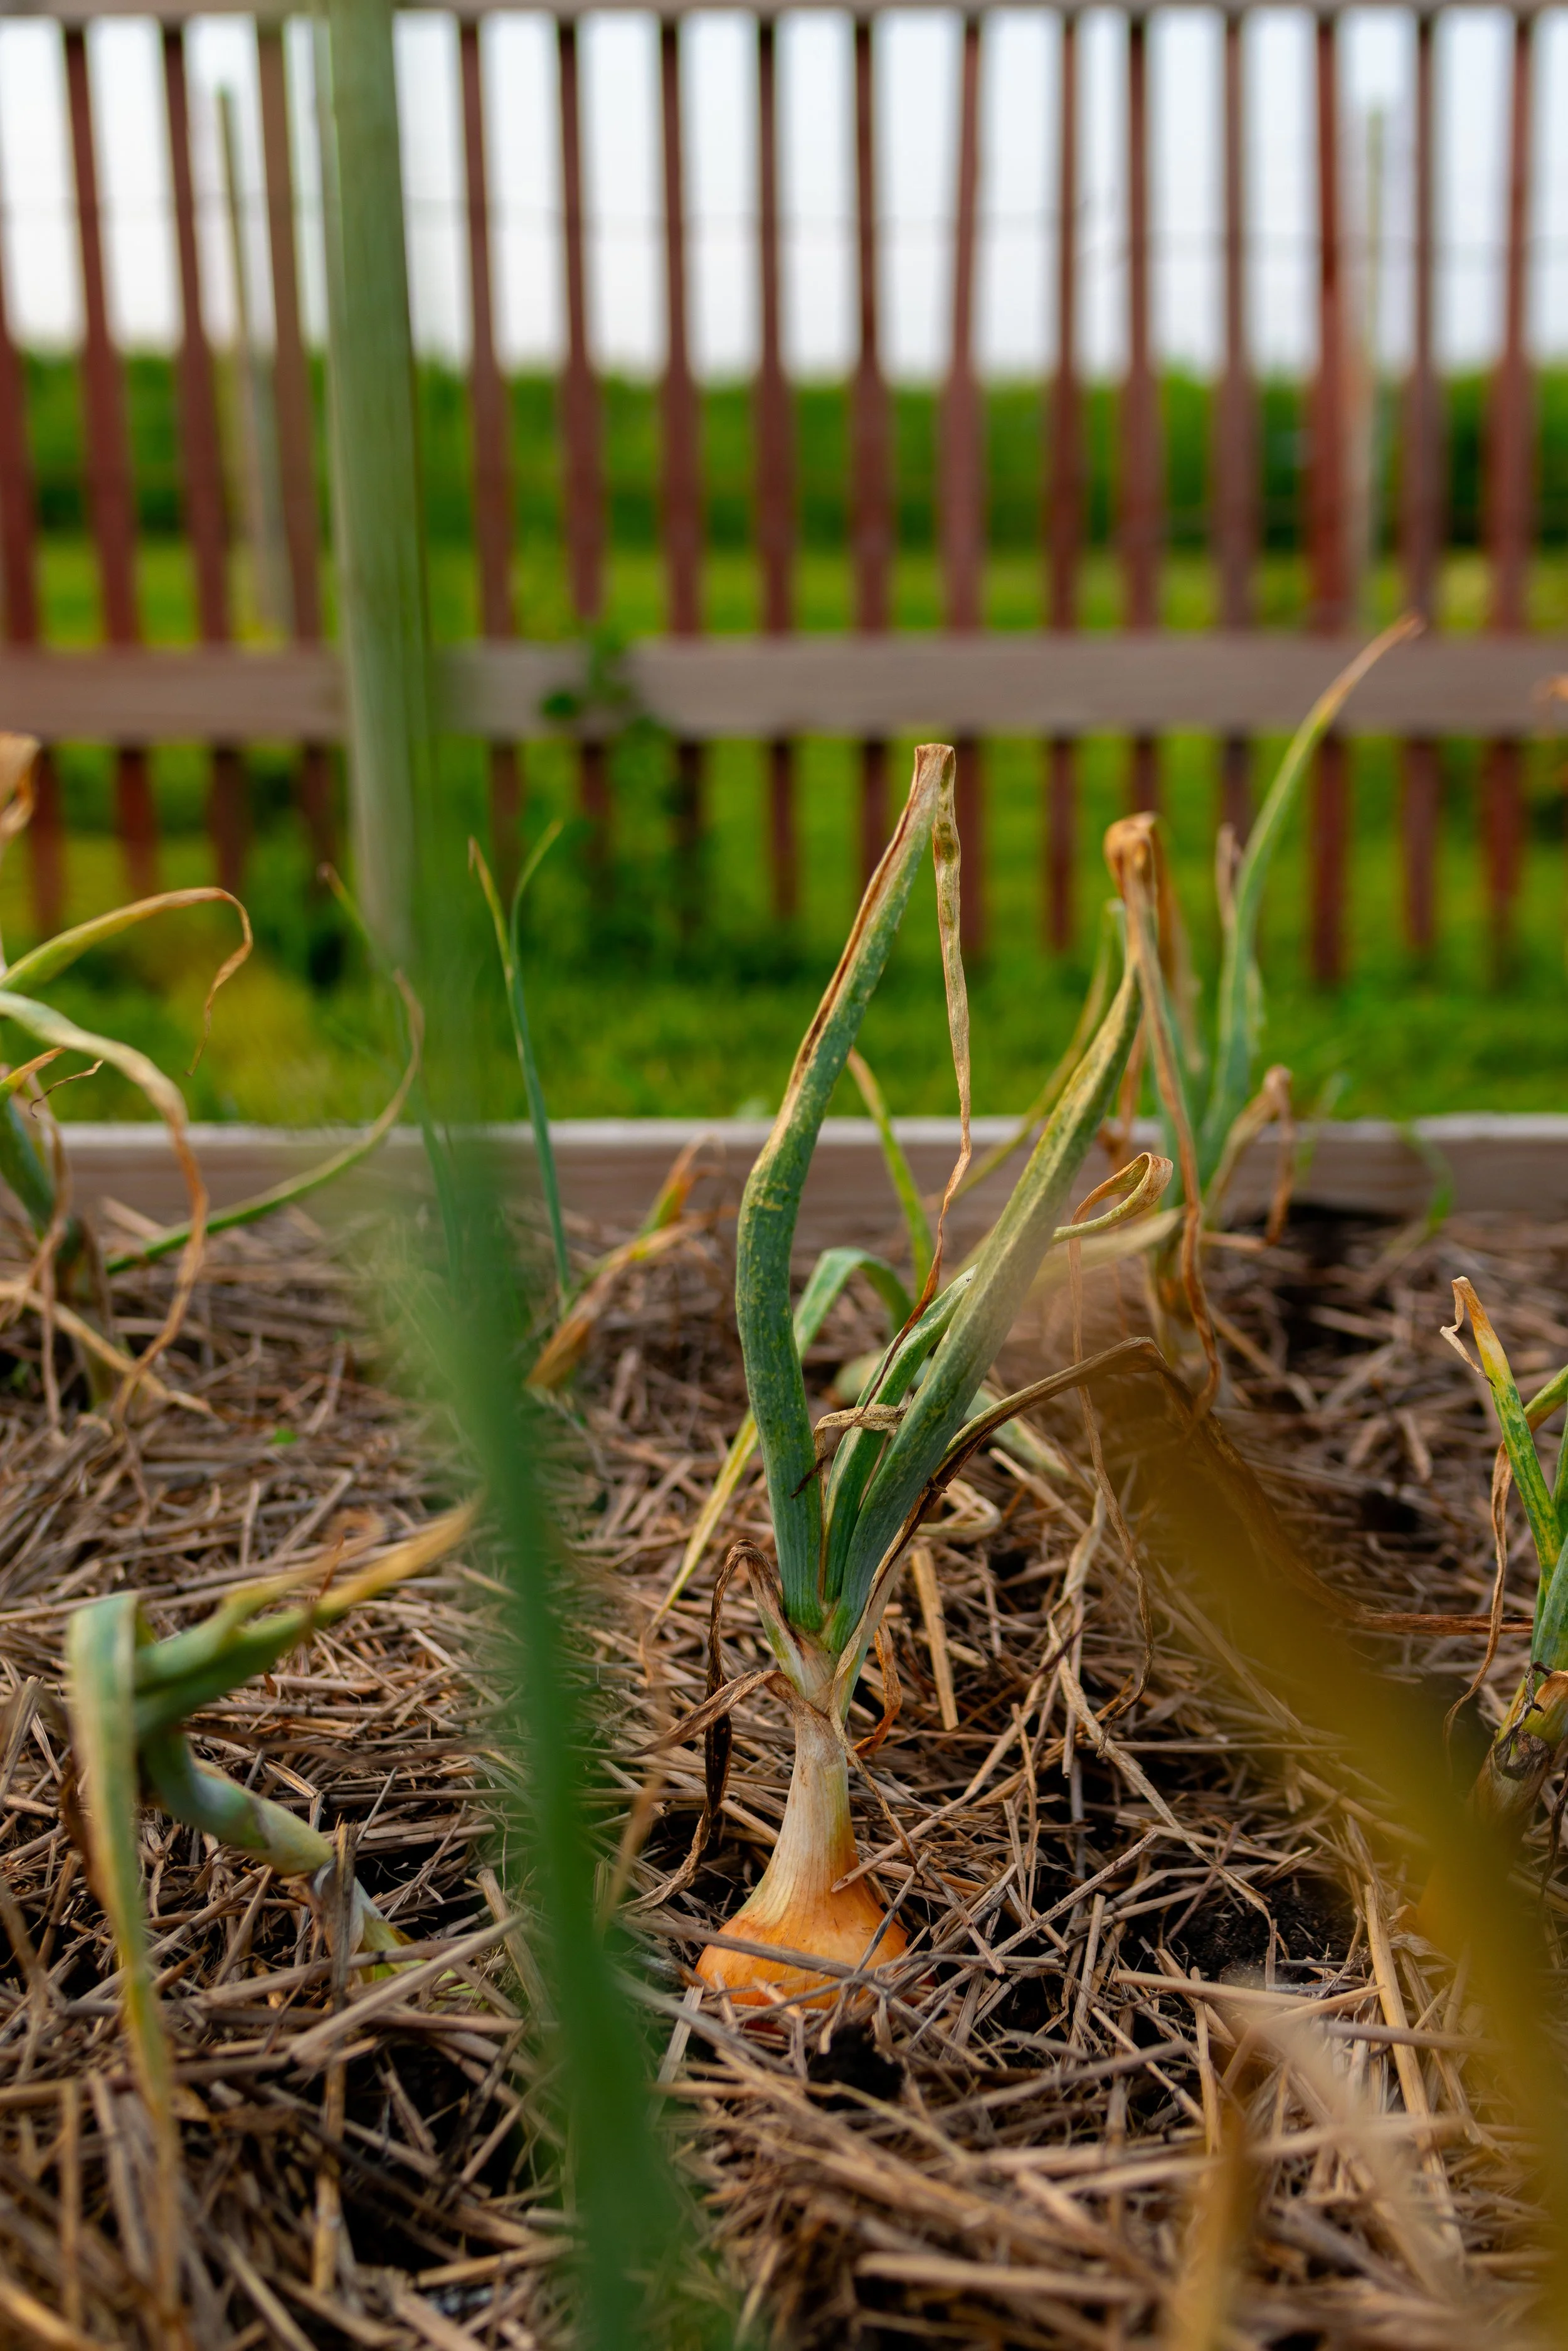
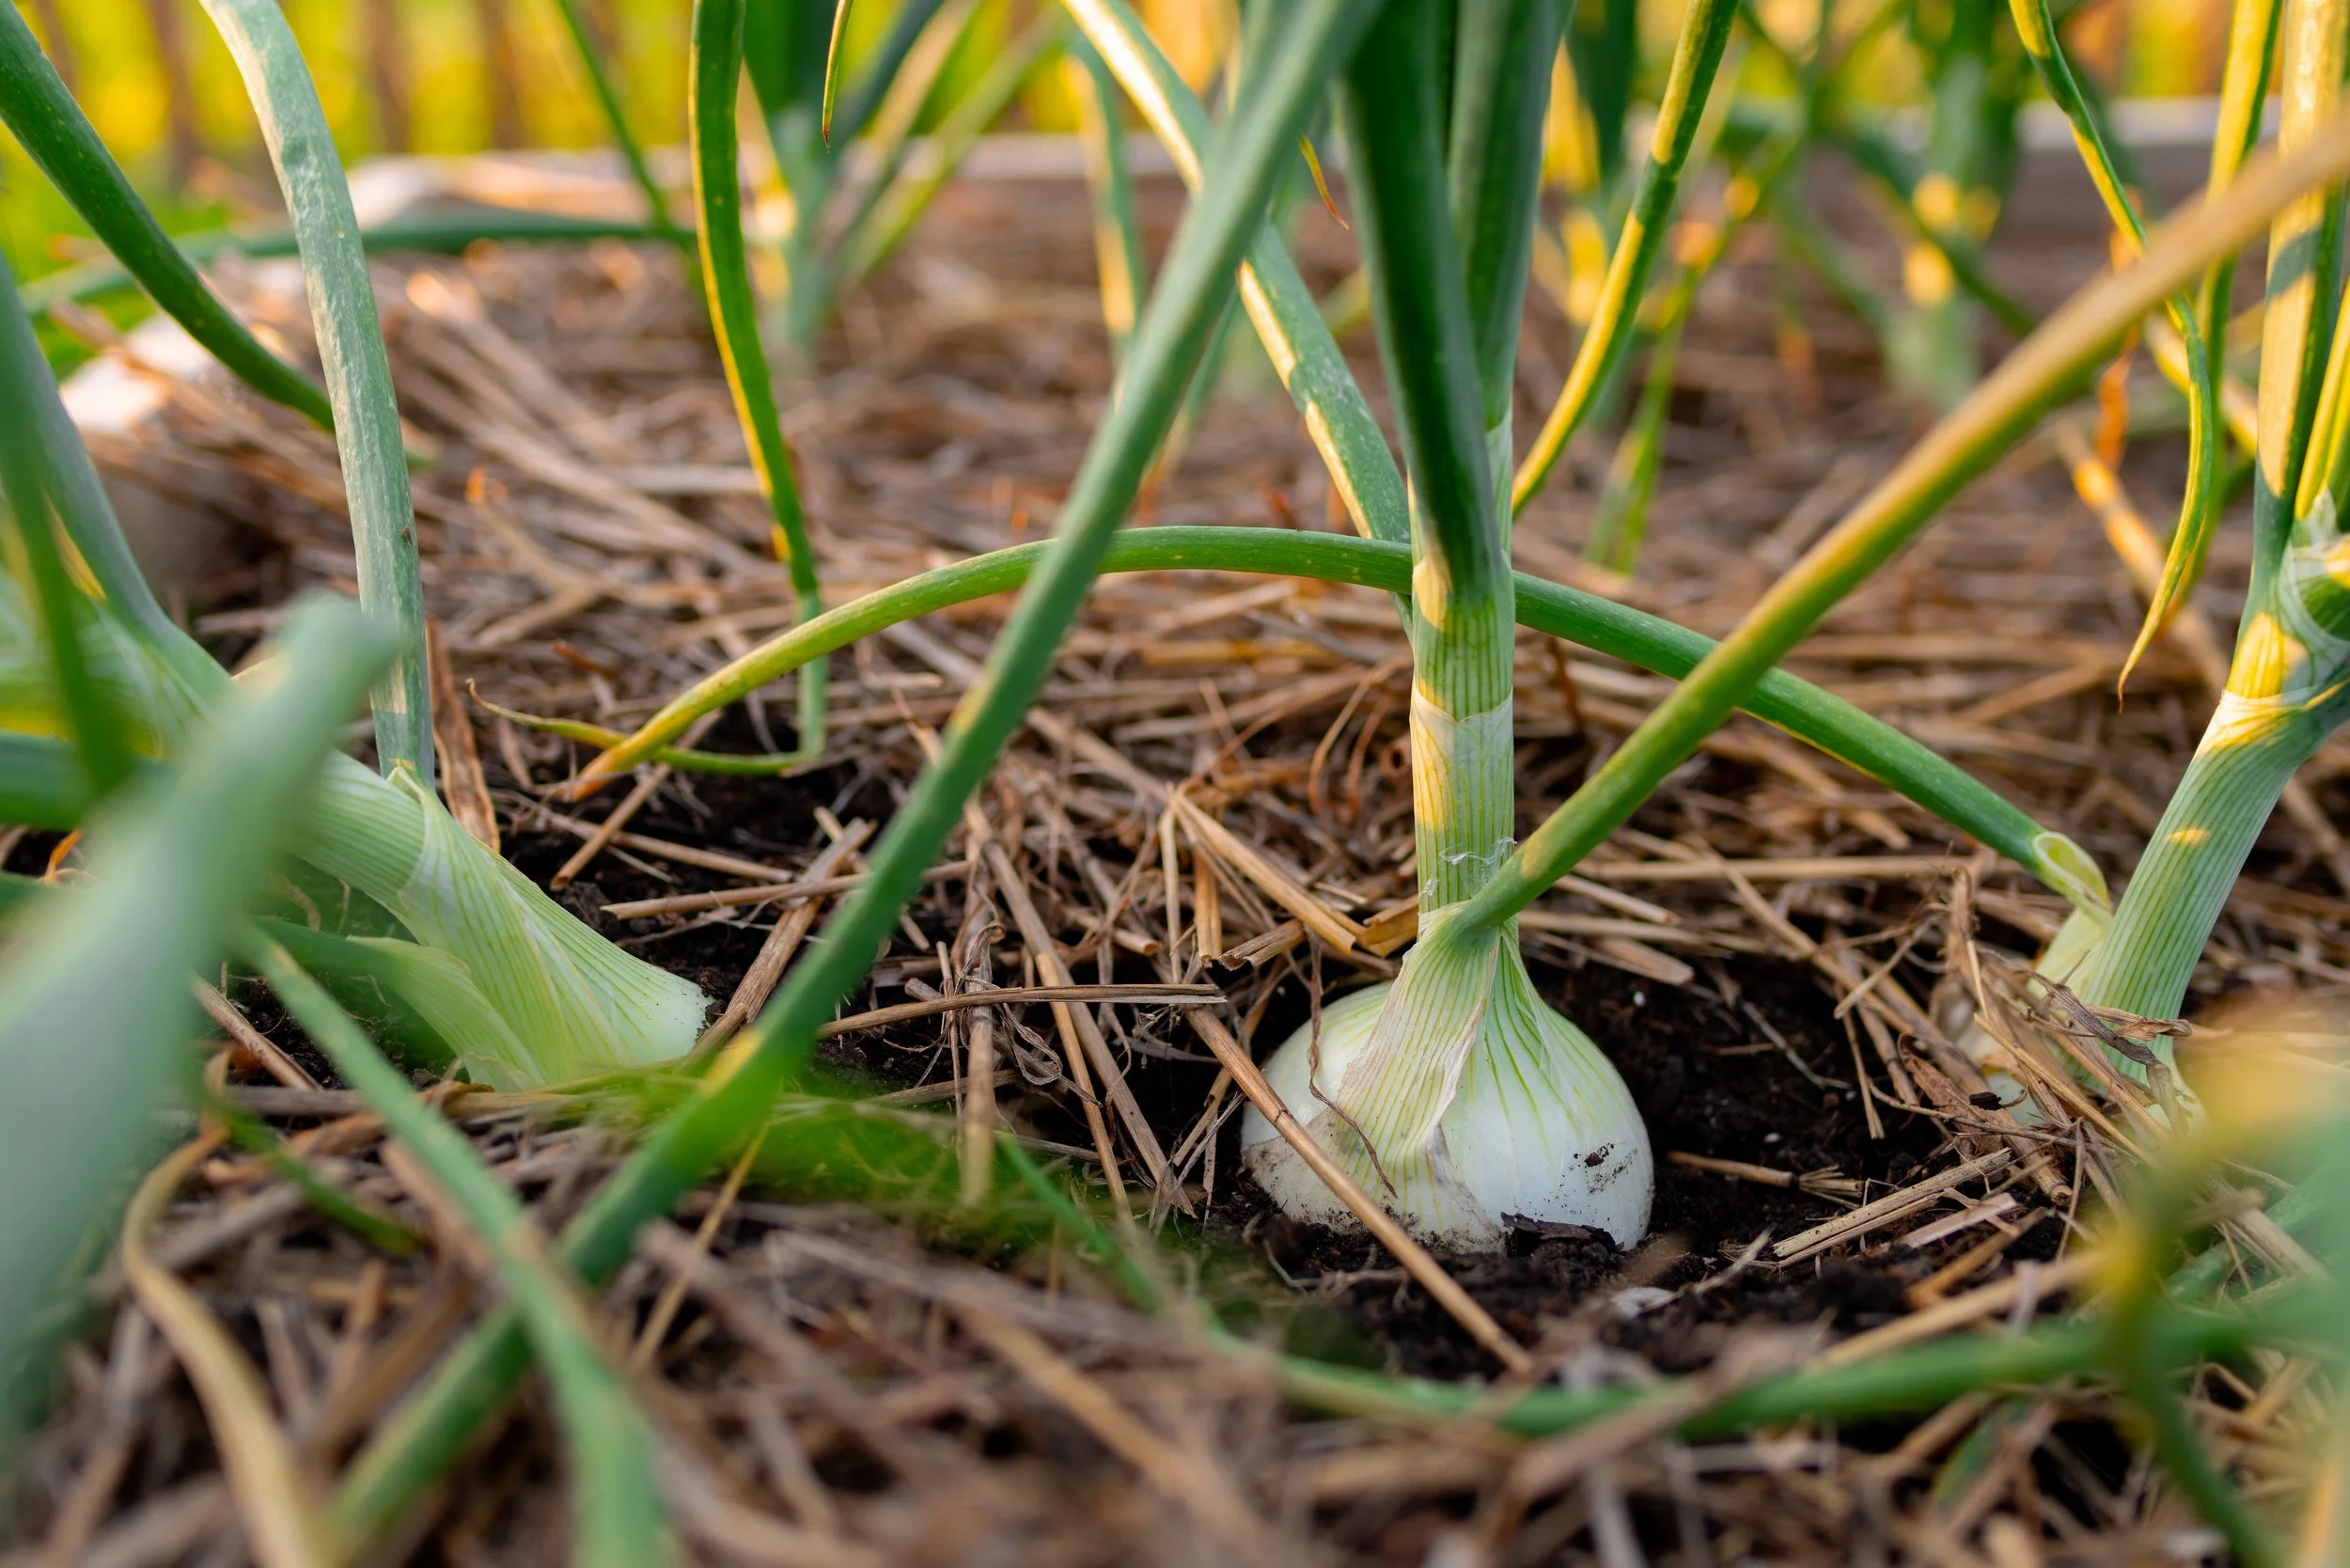
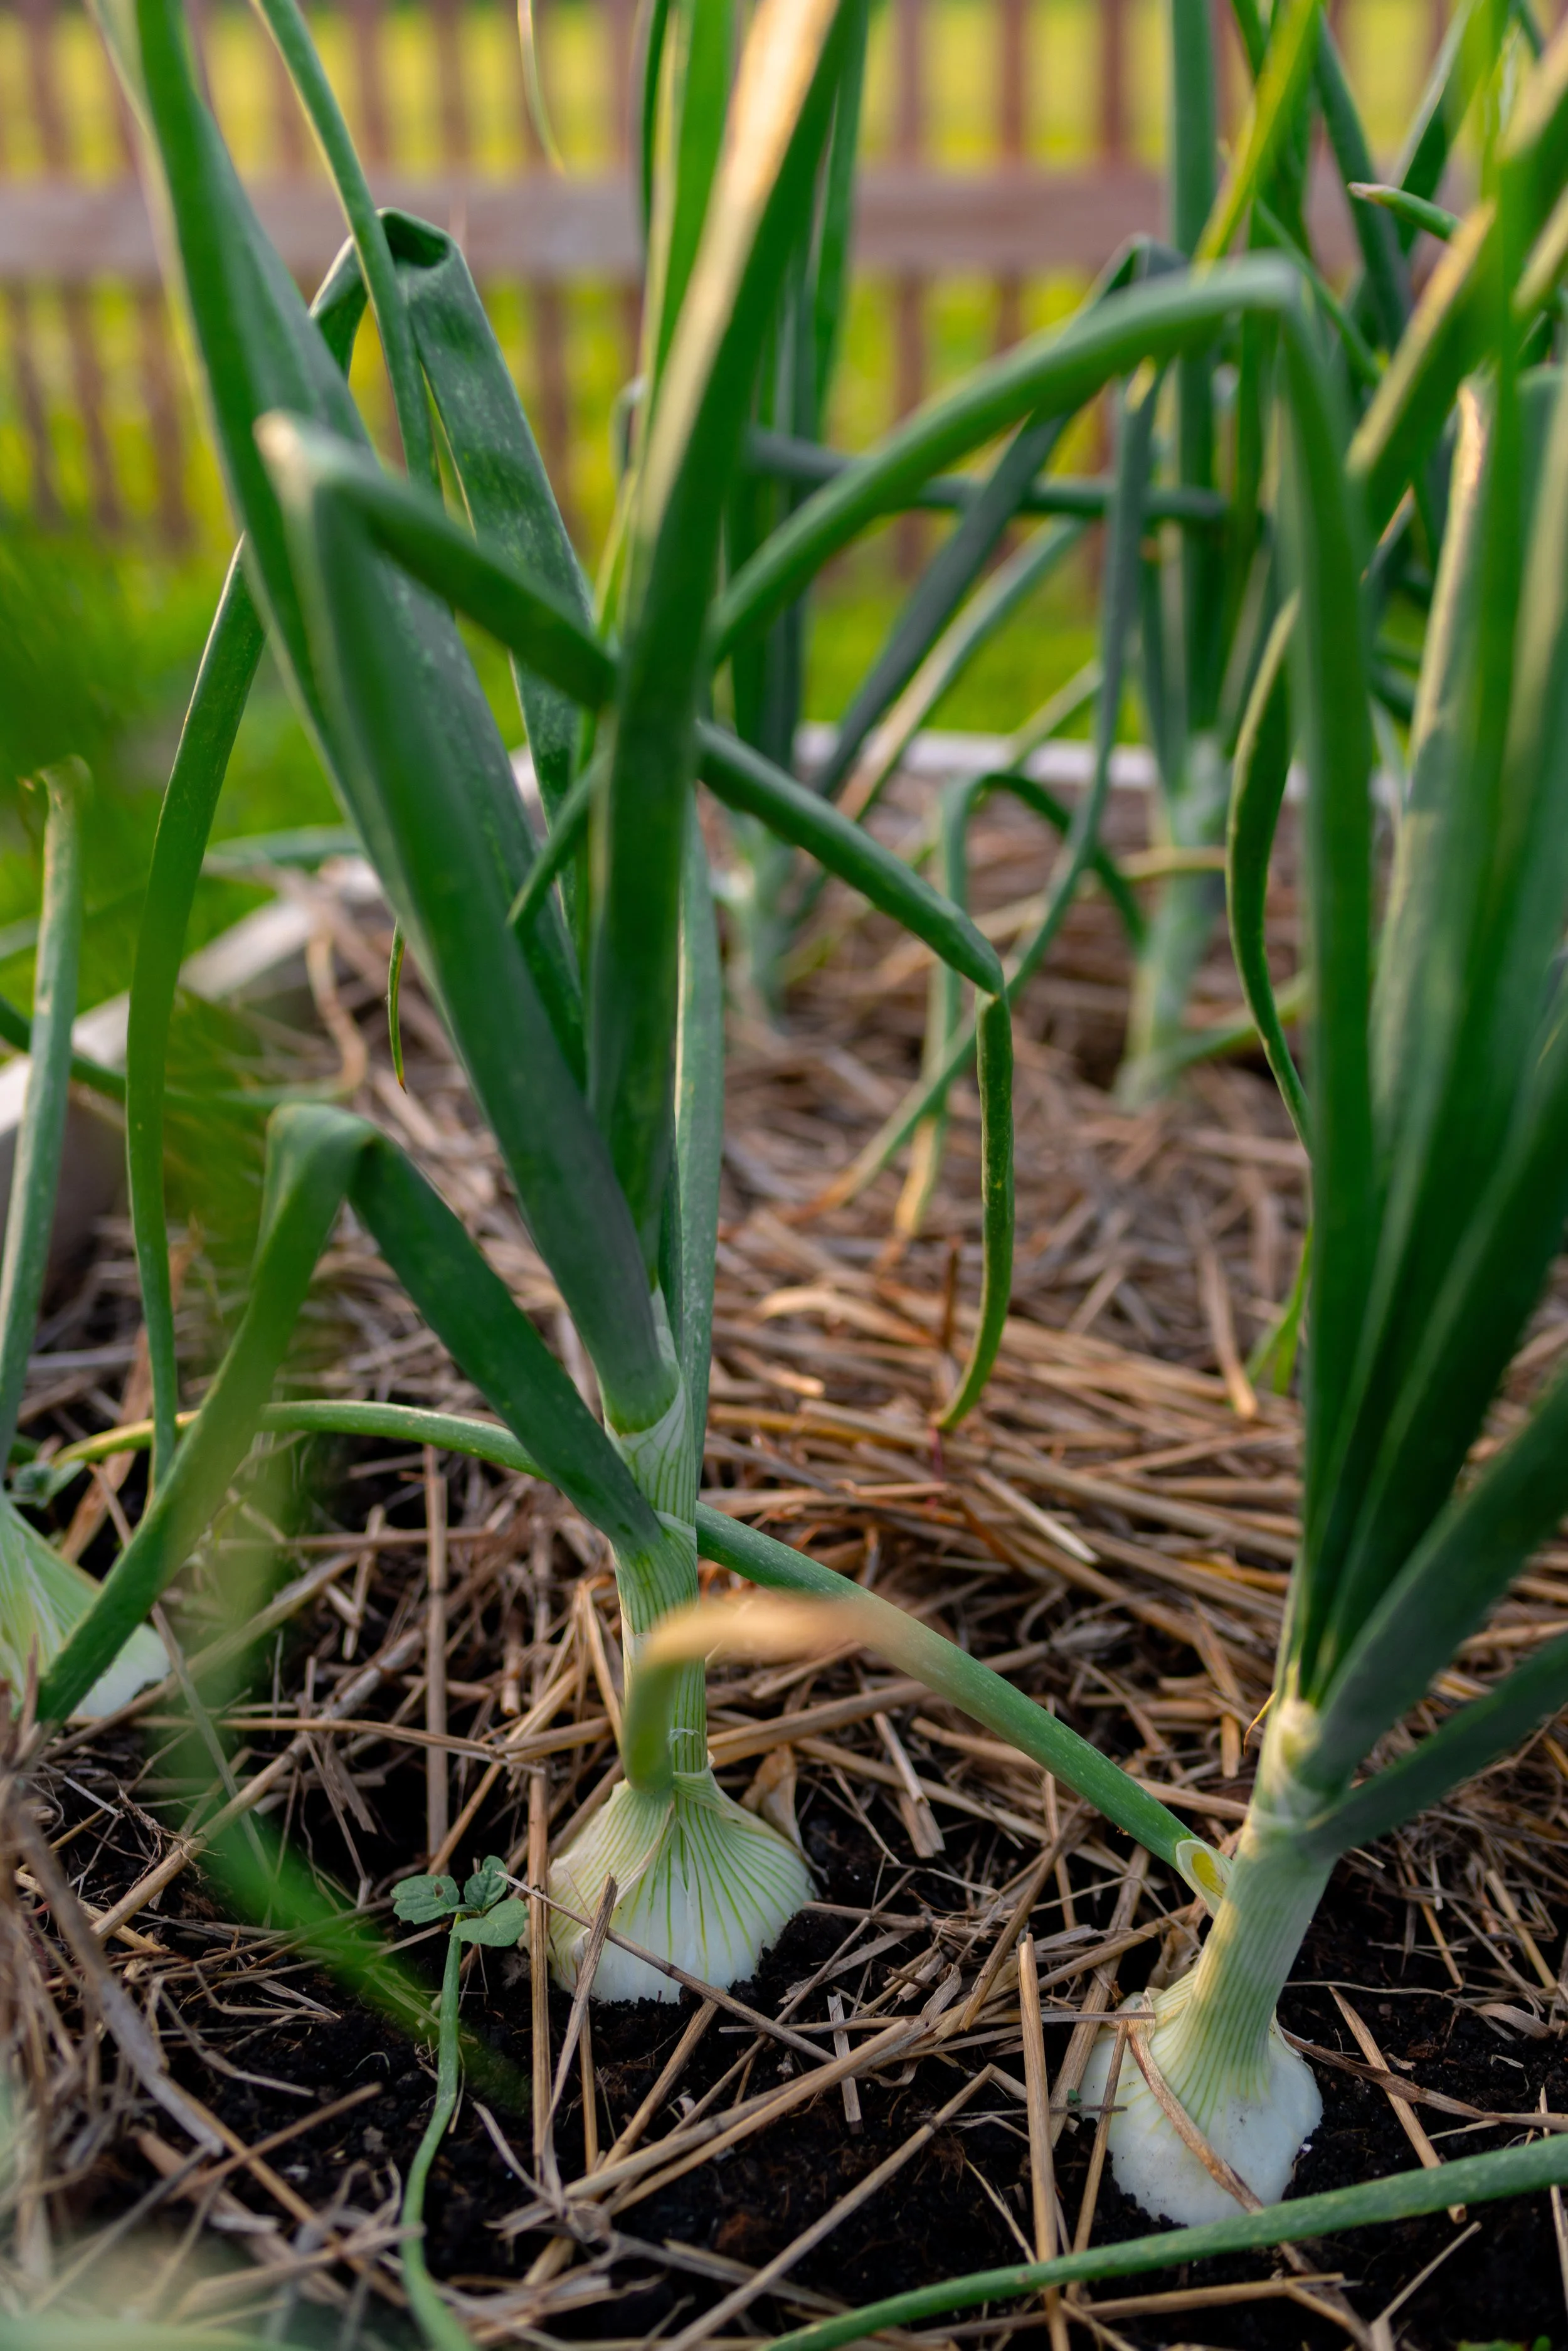
Don’t Cover Onions. When your onions begin to form bulbs, do not cover them with soil or mulch. You want the tops of the bulbs to emerge from the soil and show off their top halves. Hilling up soil around the bulbs can cause stem rot.
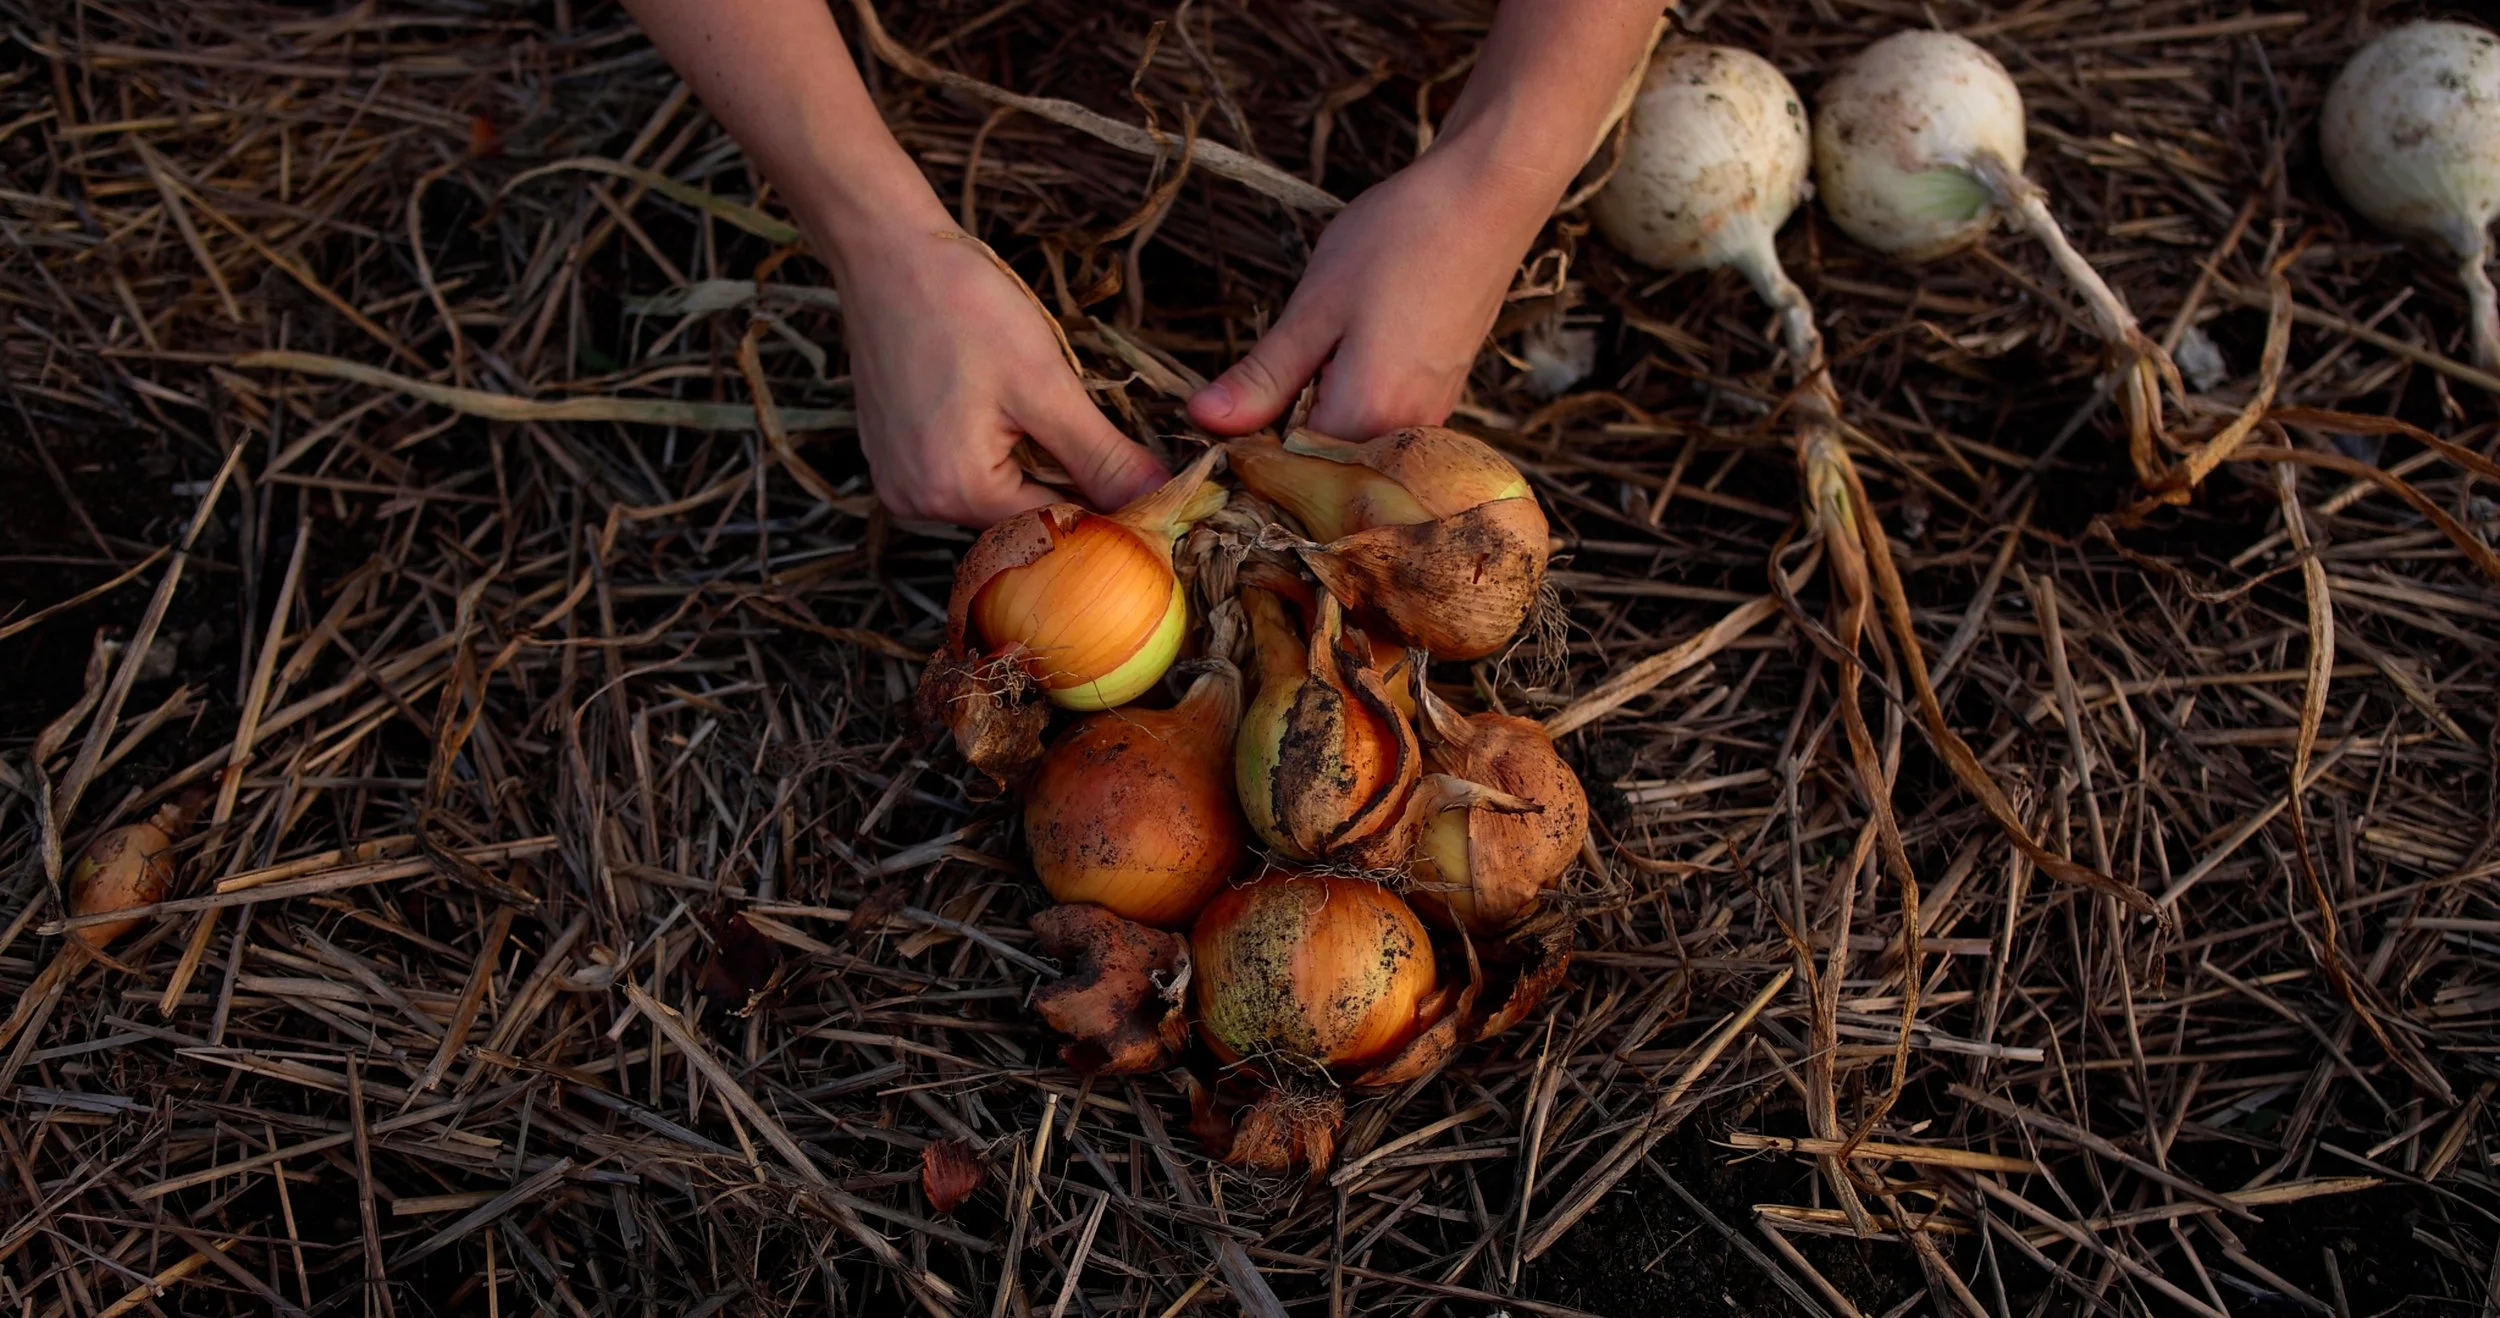
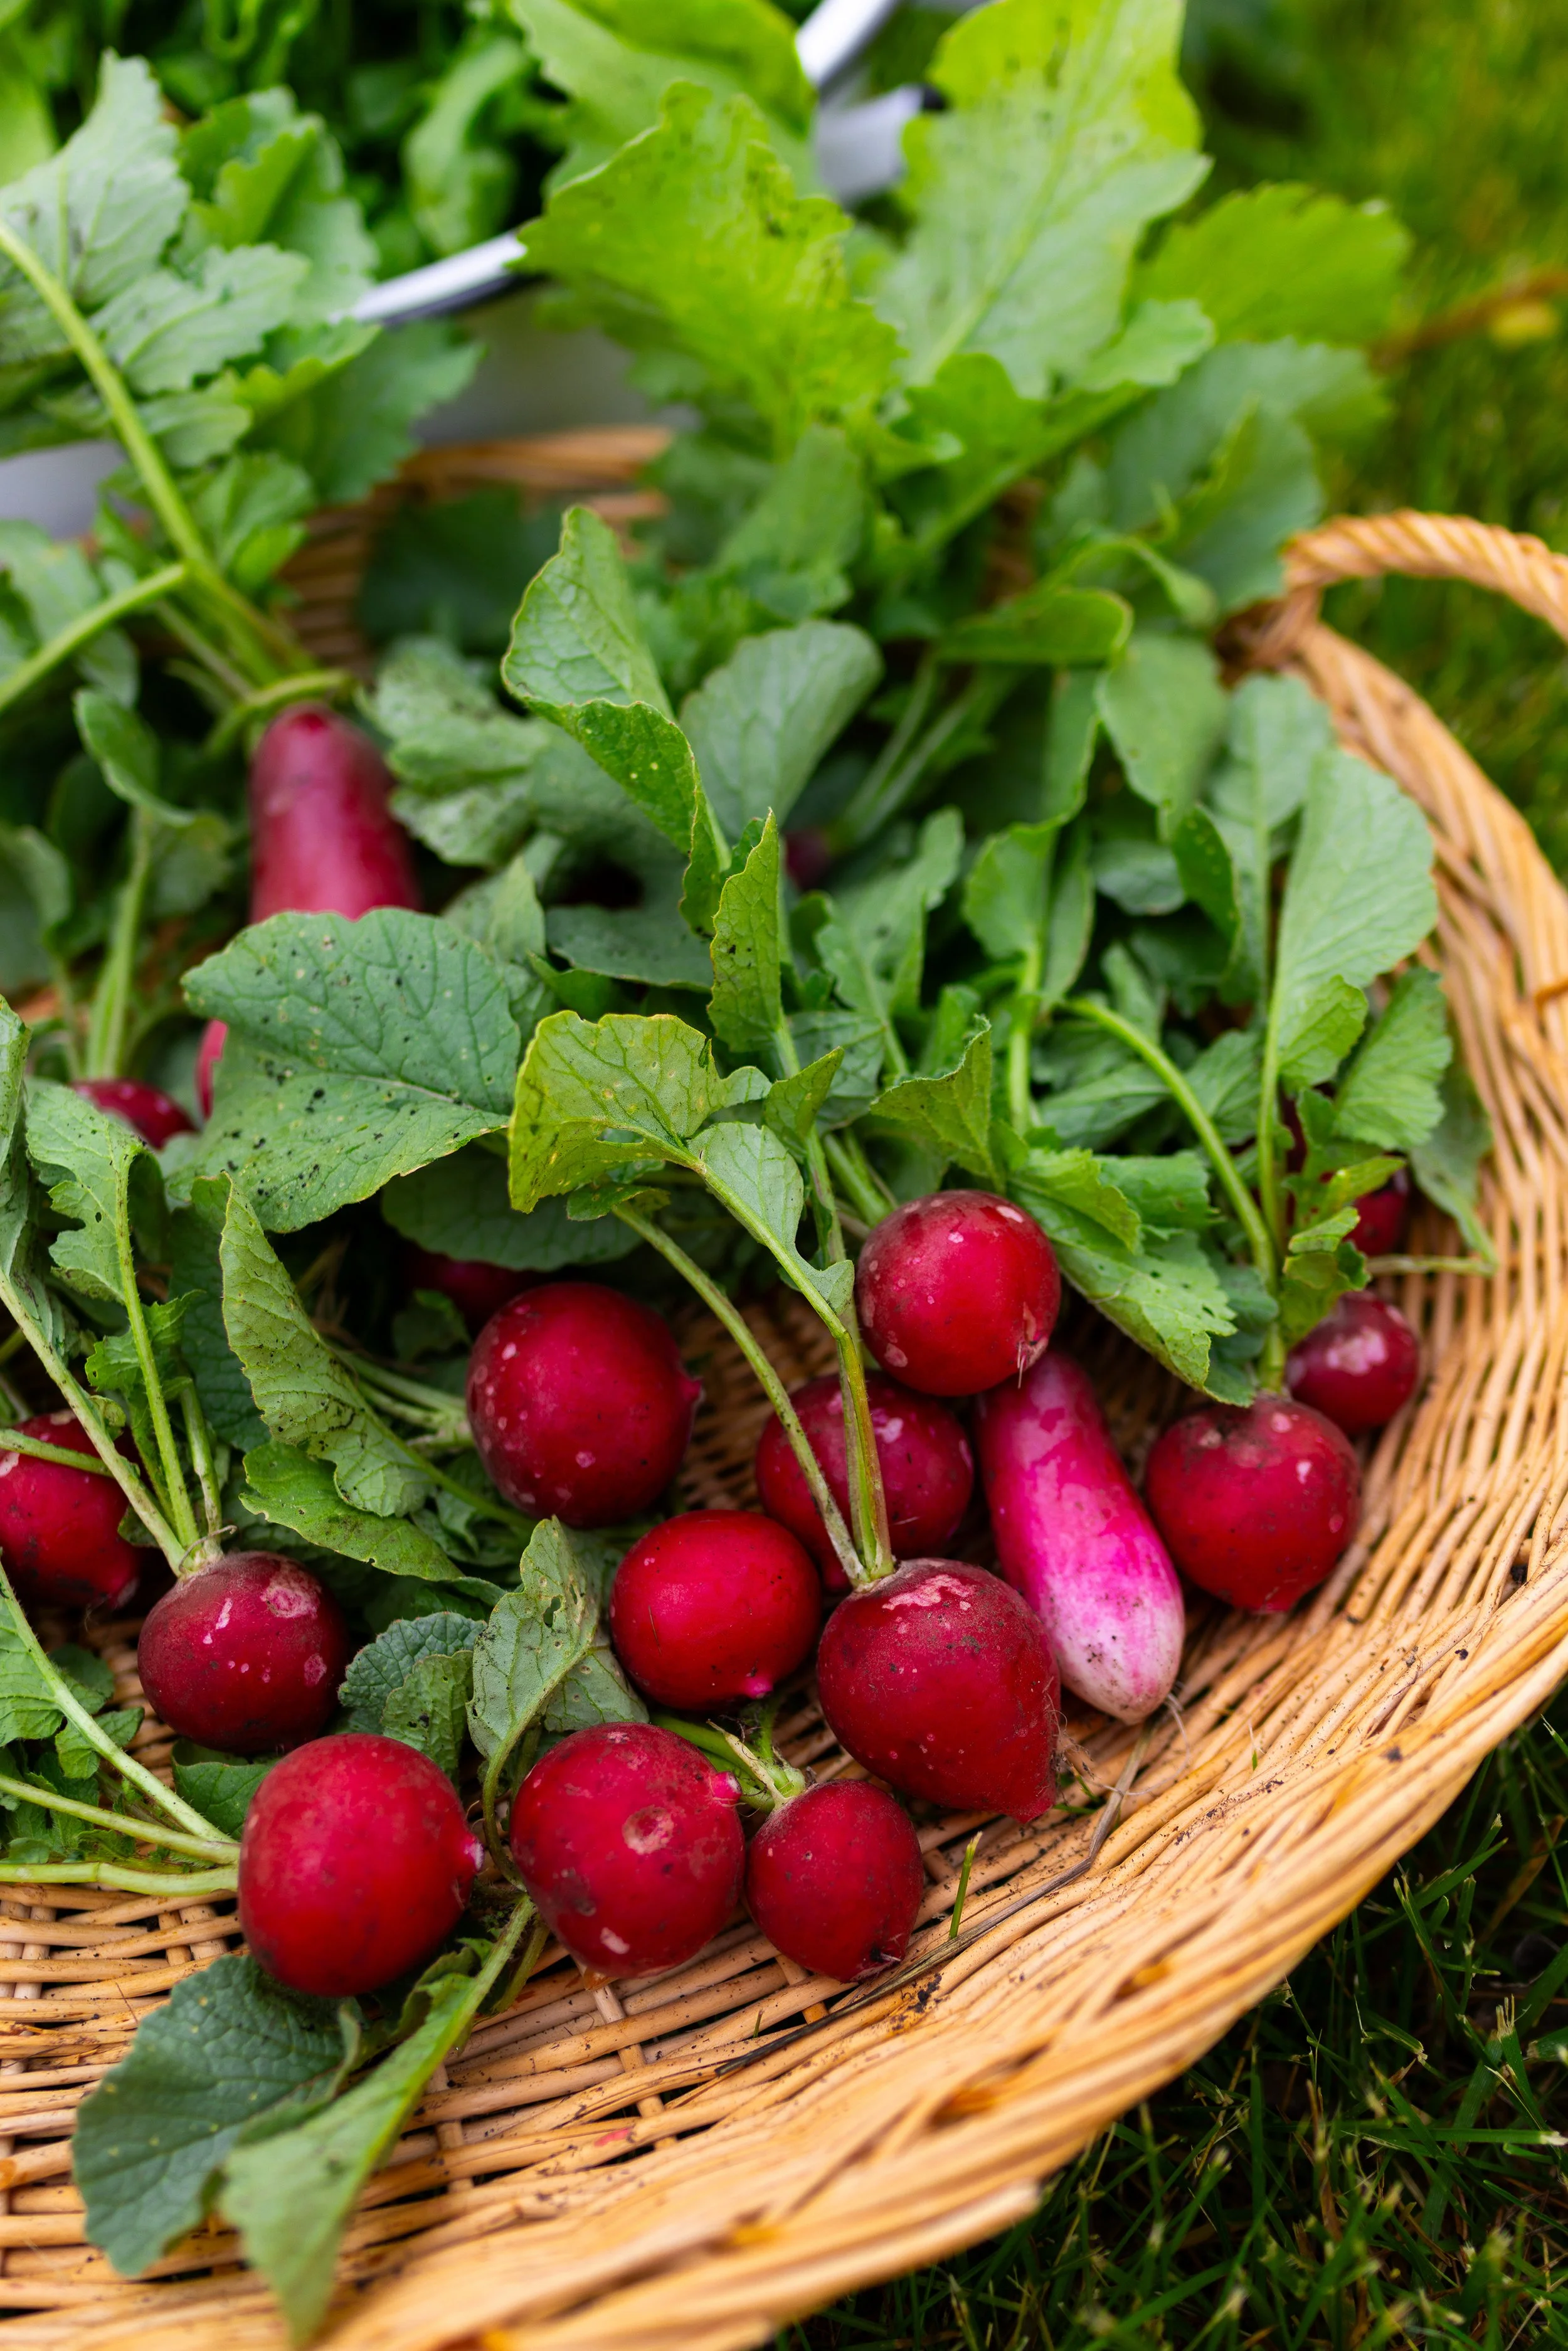
Harvesting Onions
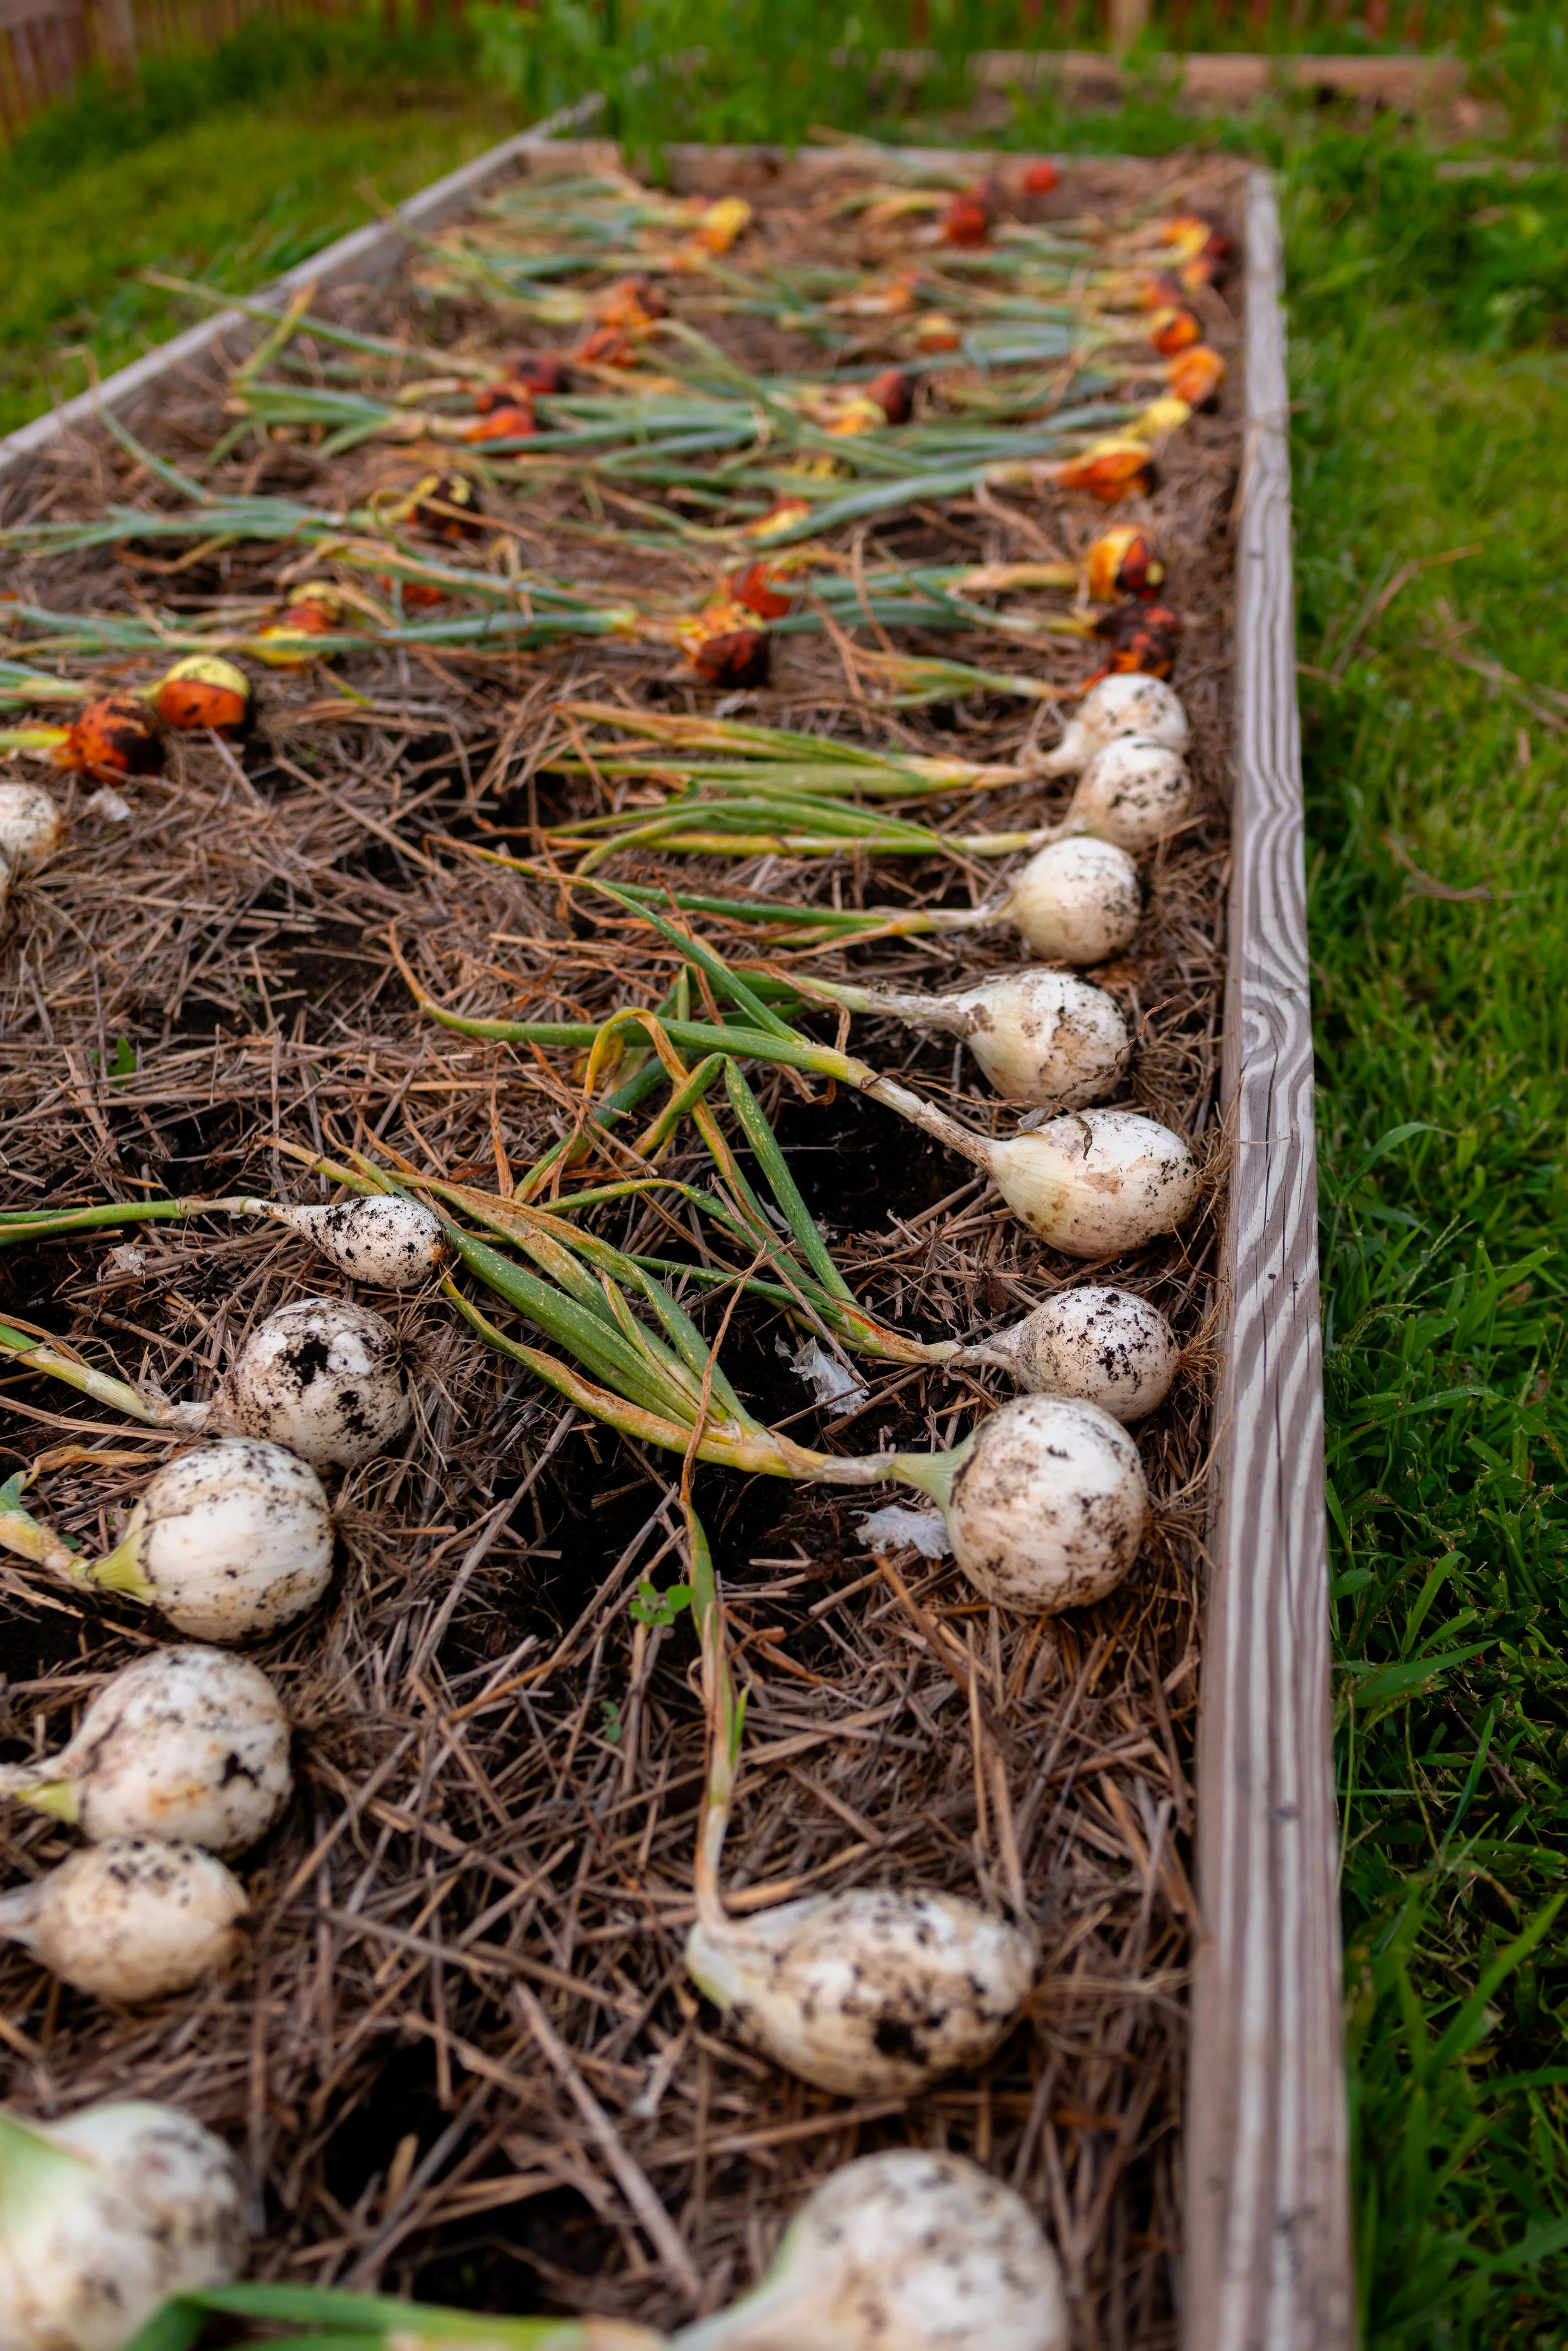
Onions are ready to harvest when the top foliage begins to the turn yellow and fall over. This is, generally, in mid-summer to early autumn for most types and regions.
Bend or crush tops— To encourage the final ripening process of your onions, you can bend the tops down and/or stomp on them once they turn almost fully yellow.
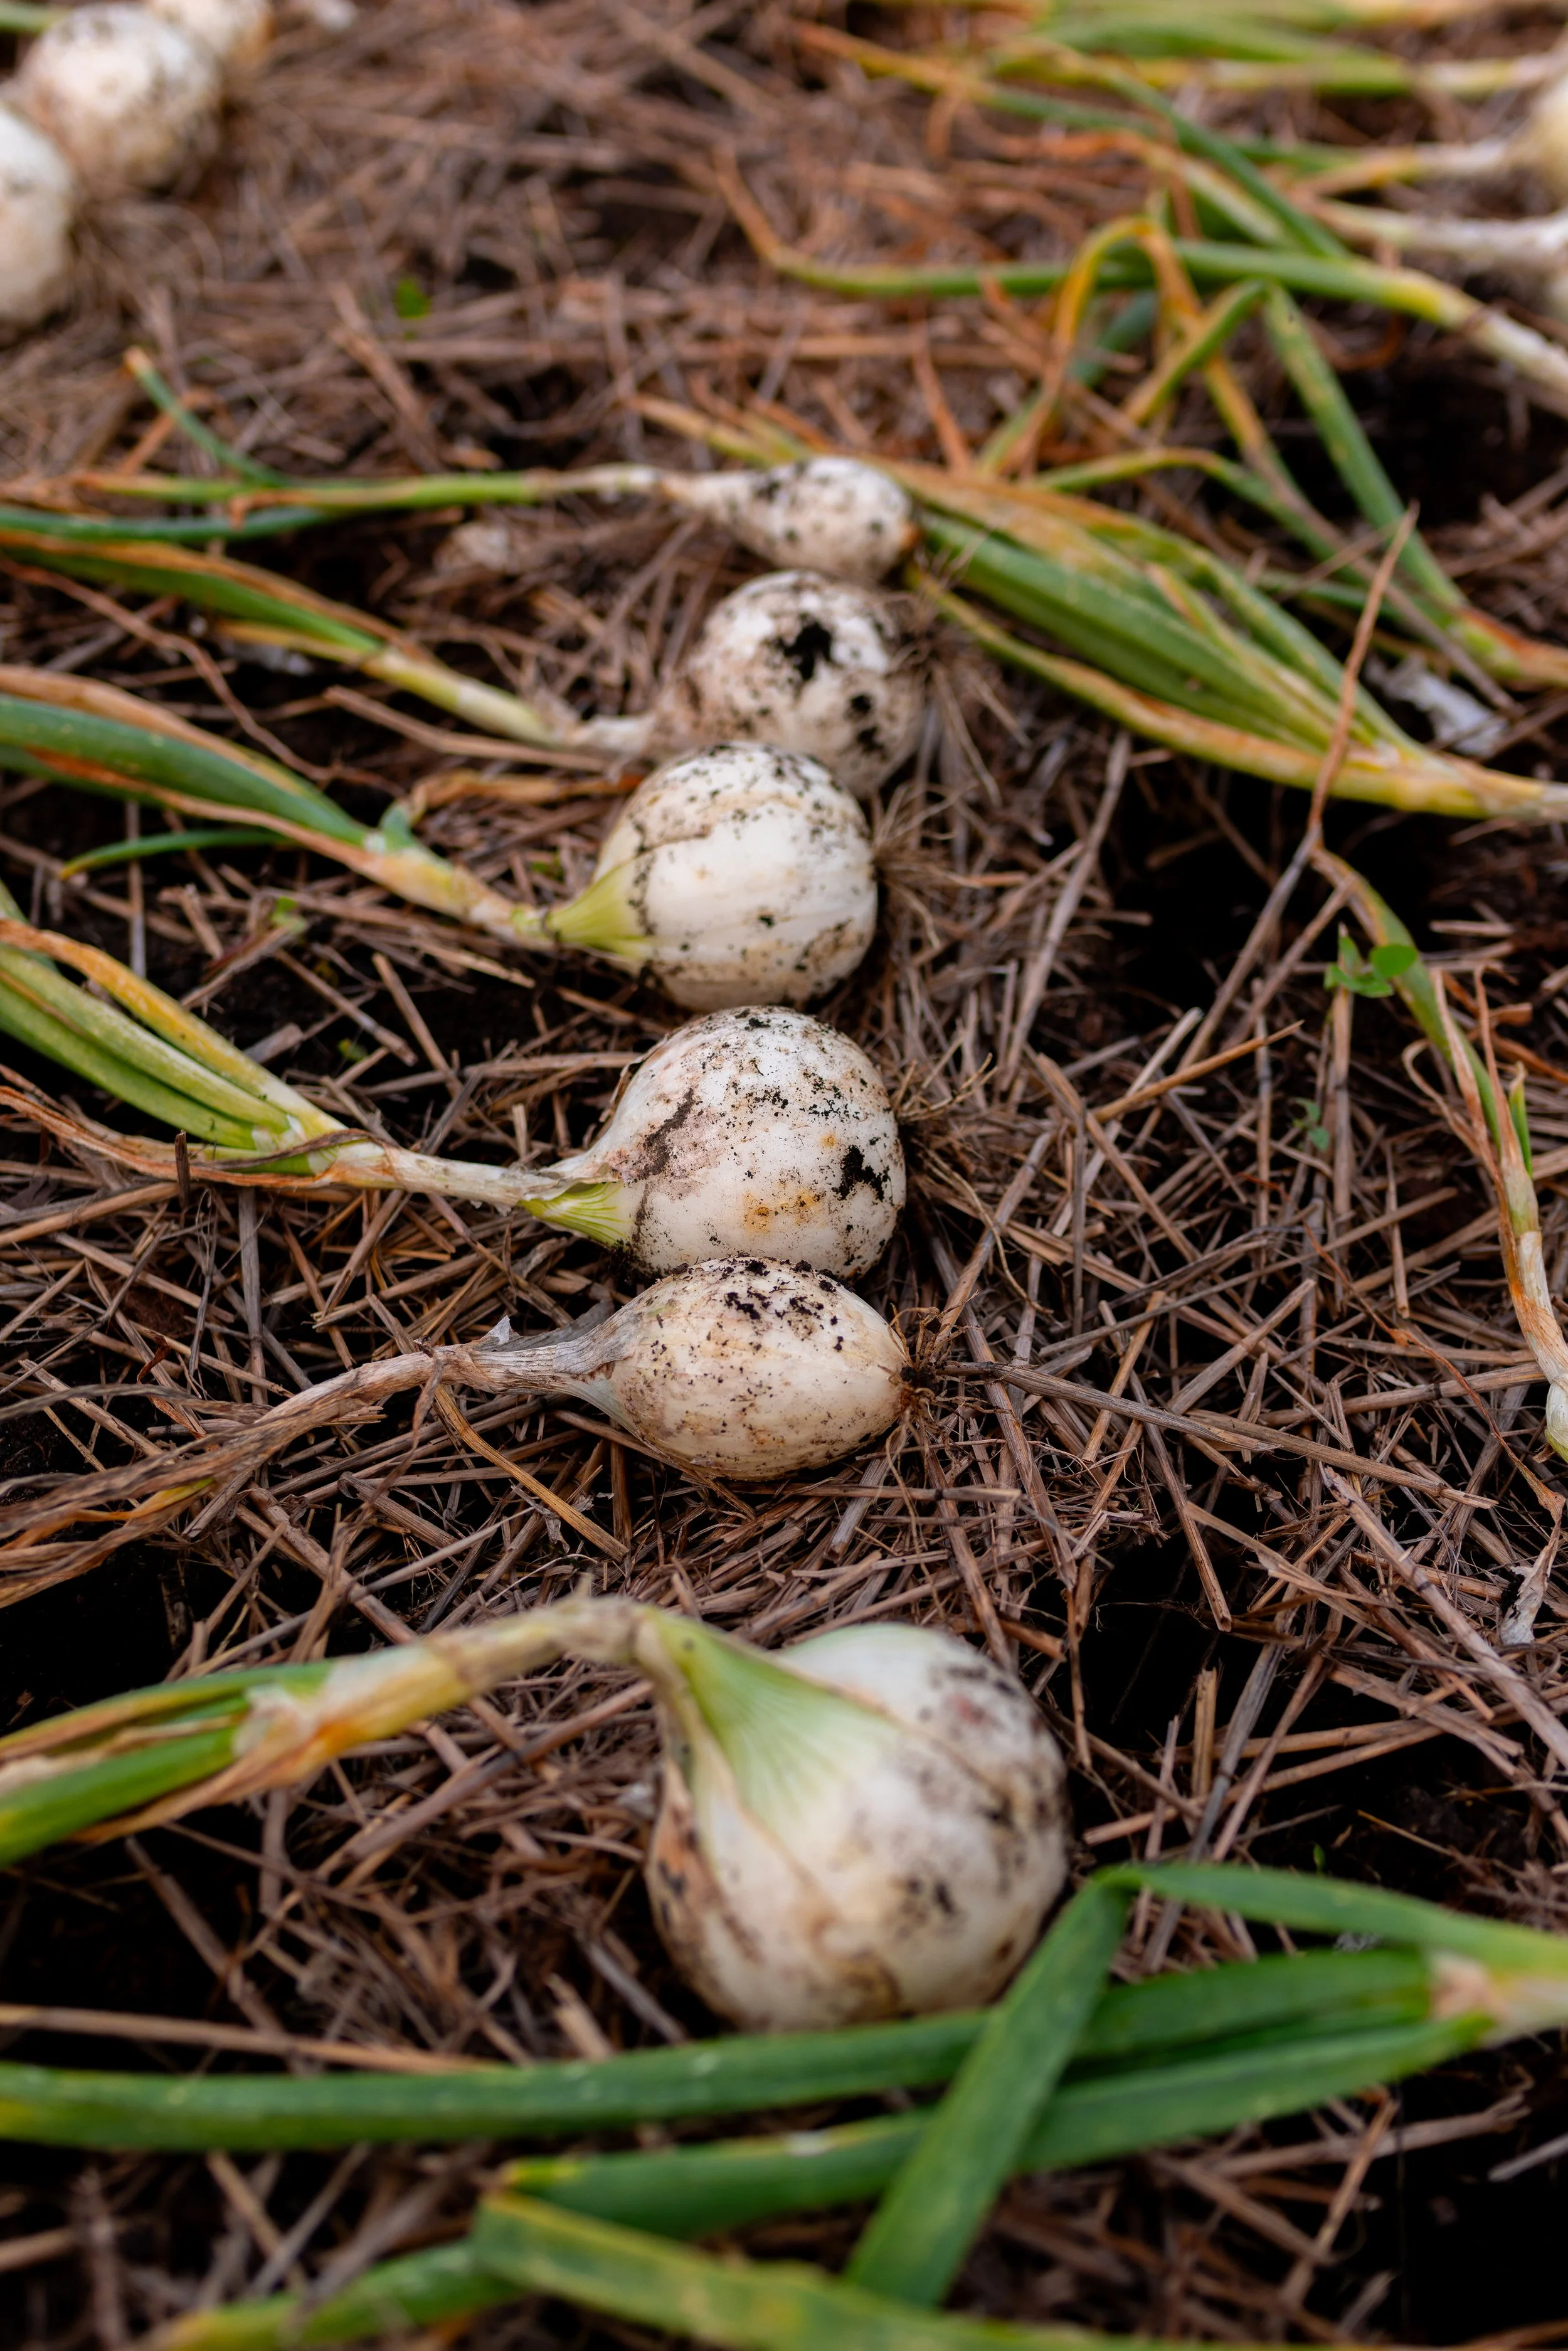
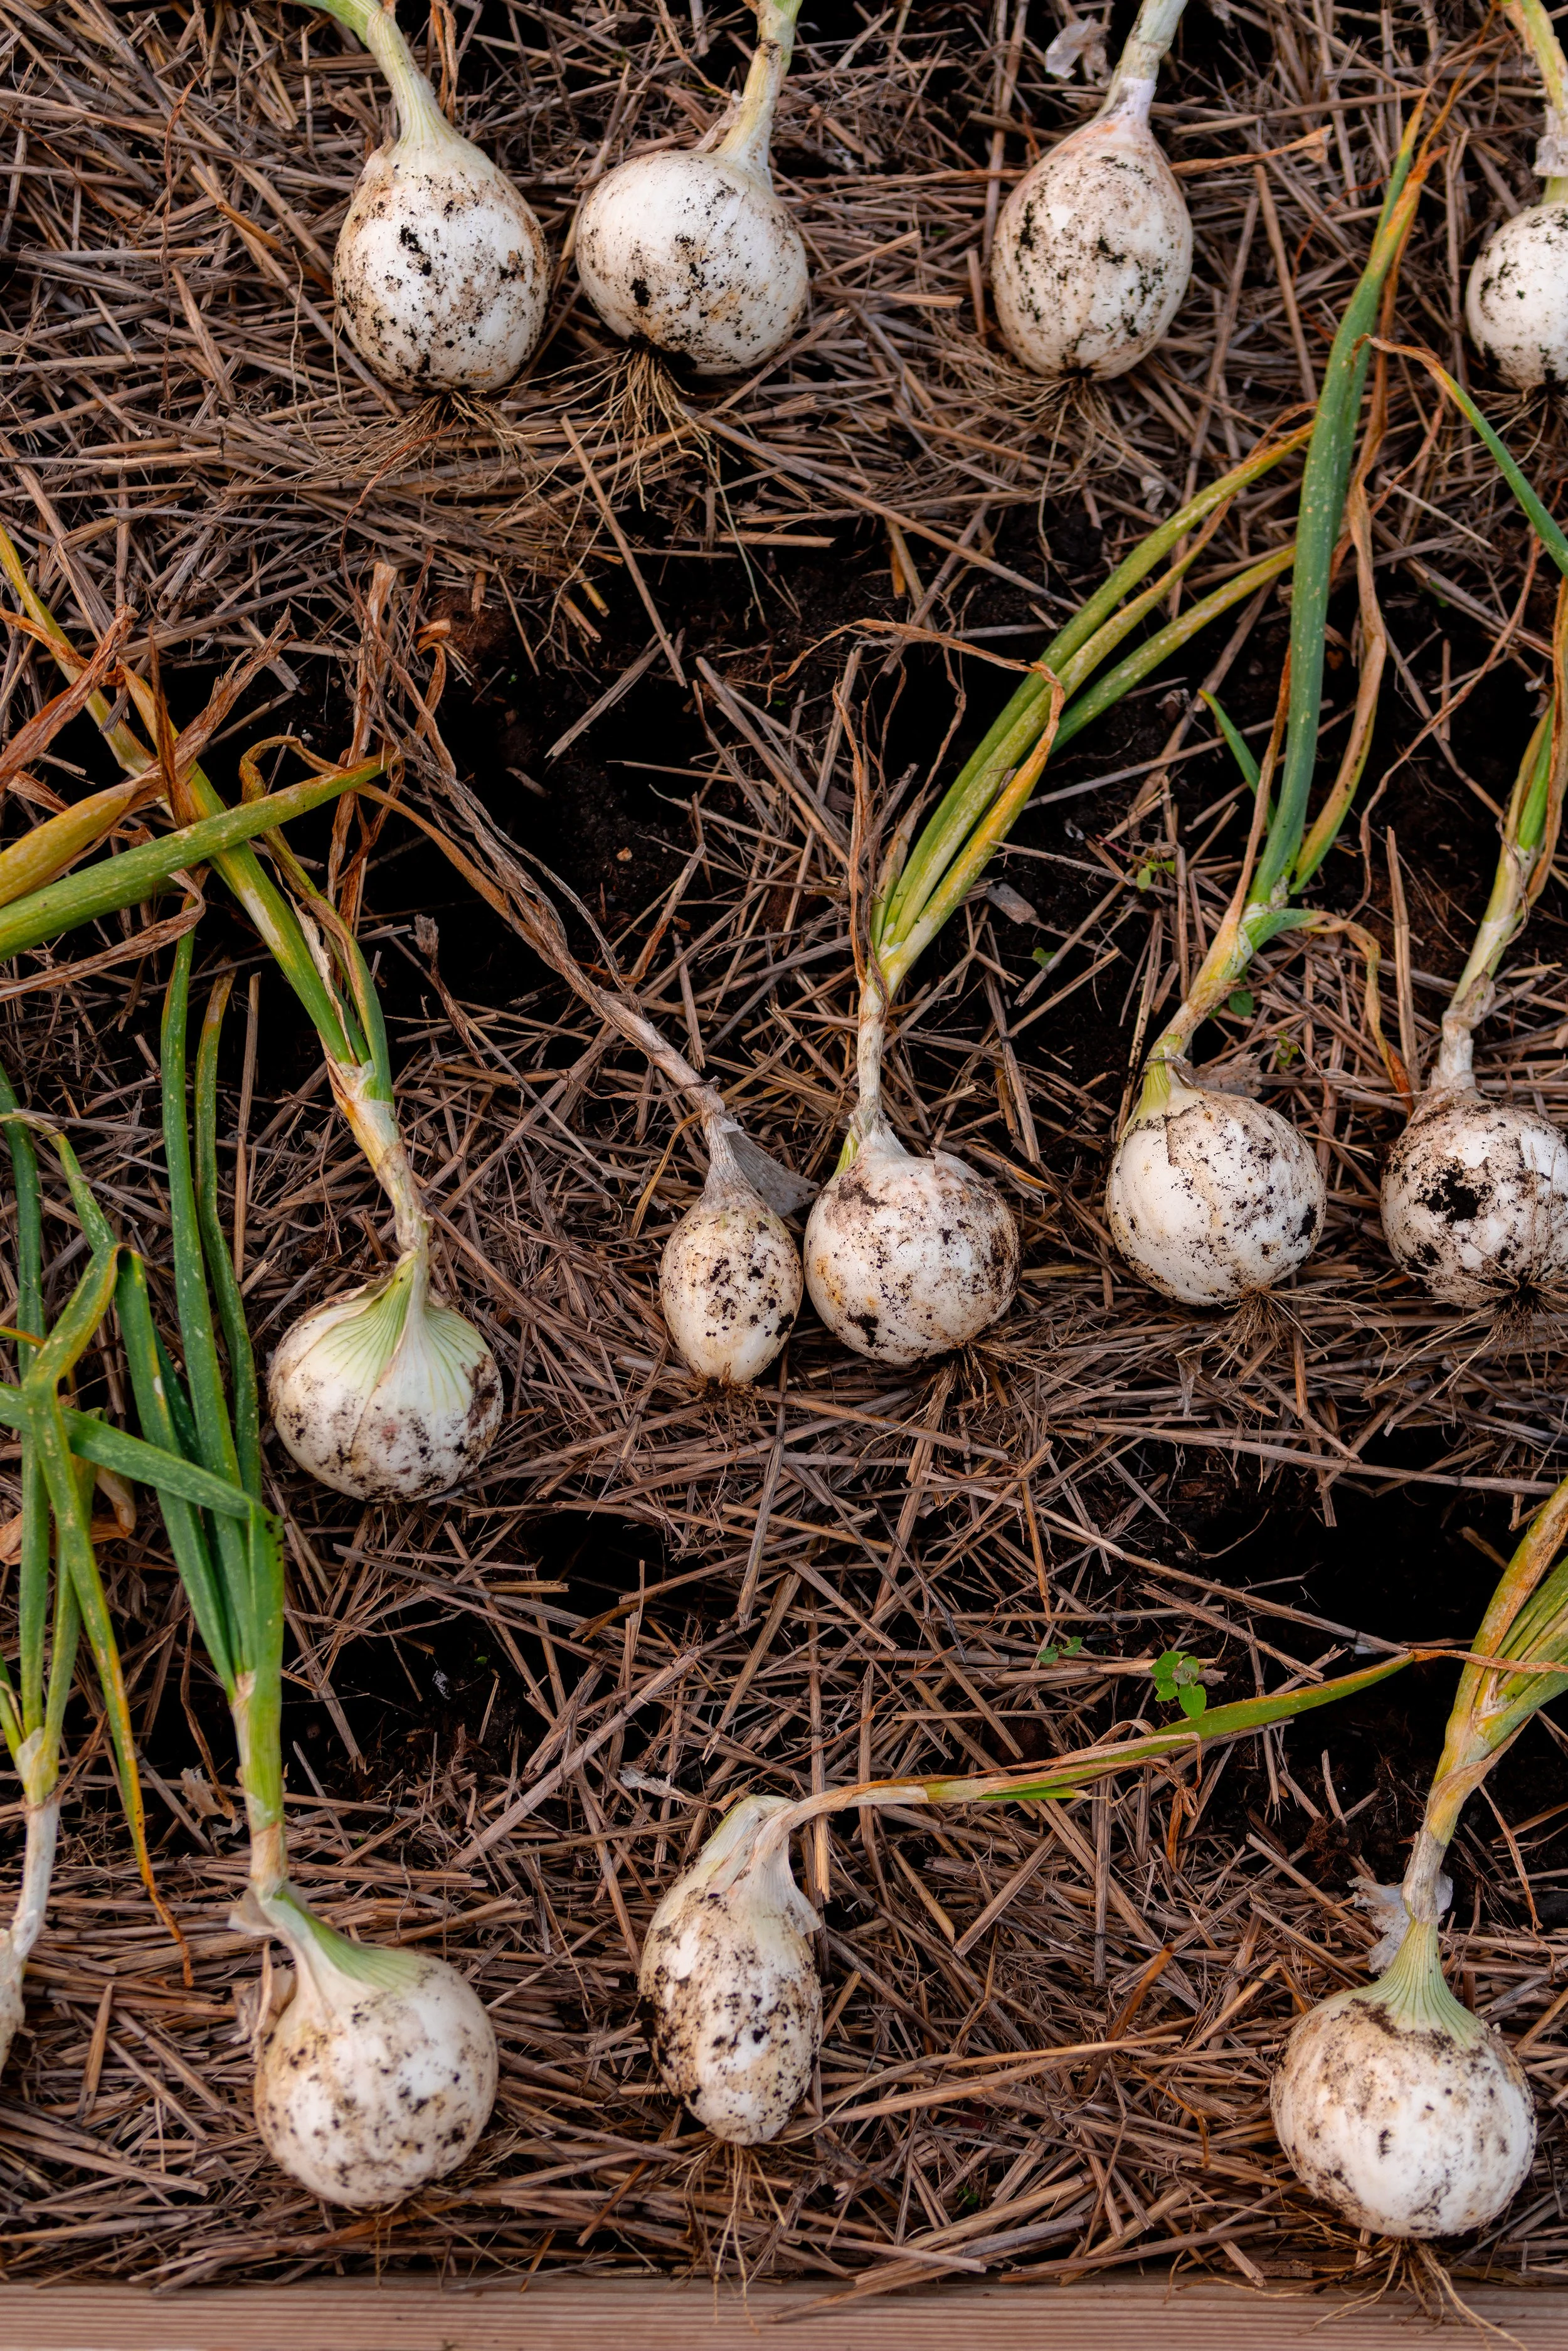
Loosen the soil— To help the onions dry out, loosen the soil around the bulbs— don’t pull them yet!
Harvest in dry weather— this is always a good idea if you are wanting to store your onions for the long-term. Wait for a time when there is no rain predicted in the forecast for a few days. You will also want to make sure that the bulbs themselves are fairly dry and not moist, or they will rot.
Wait for tops to brown— When the onion tops are brown, they are ready to dig out of the soil. Because the soil is already loosened, you can gently pull the onions. However, be careful to not damage the tops in case you want to braid them!
Handle onions carefully— Onions that have been bruised or damaged will rot in storage. They are a bit fussy when it comes to bruising!
Cut or Braid Tops— Once harvested, you can cut or braid the tops. Cut tops back to 1 to 2-inches.
Pro Tip: Pull any onions that send up flower stalks! The bulbs have stopped growing if flowers appear, and they will not store well. They can be stored in the fridge and eaten within a few days instead.
Curing Onions
You will know your onions are ready to harvest and cure when the tops have browned and the skin on the bulbs has started to form dry layers that are thin like paper!
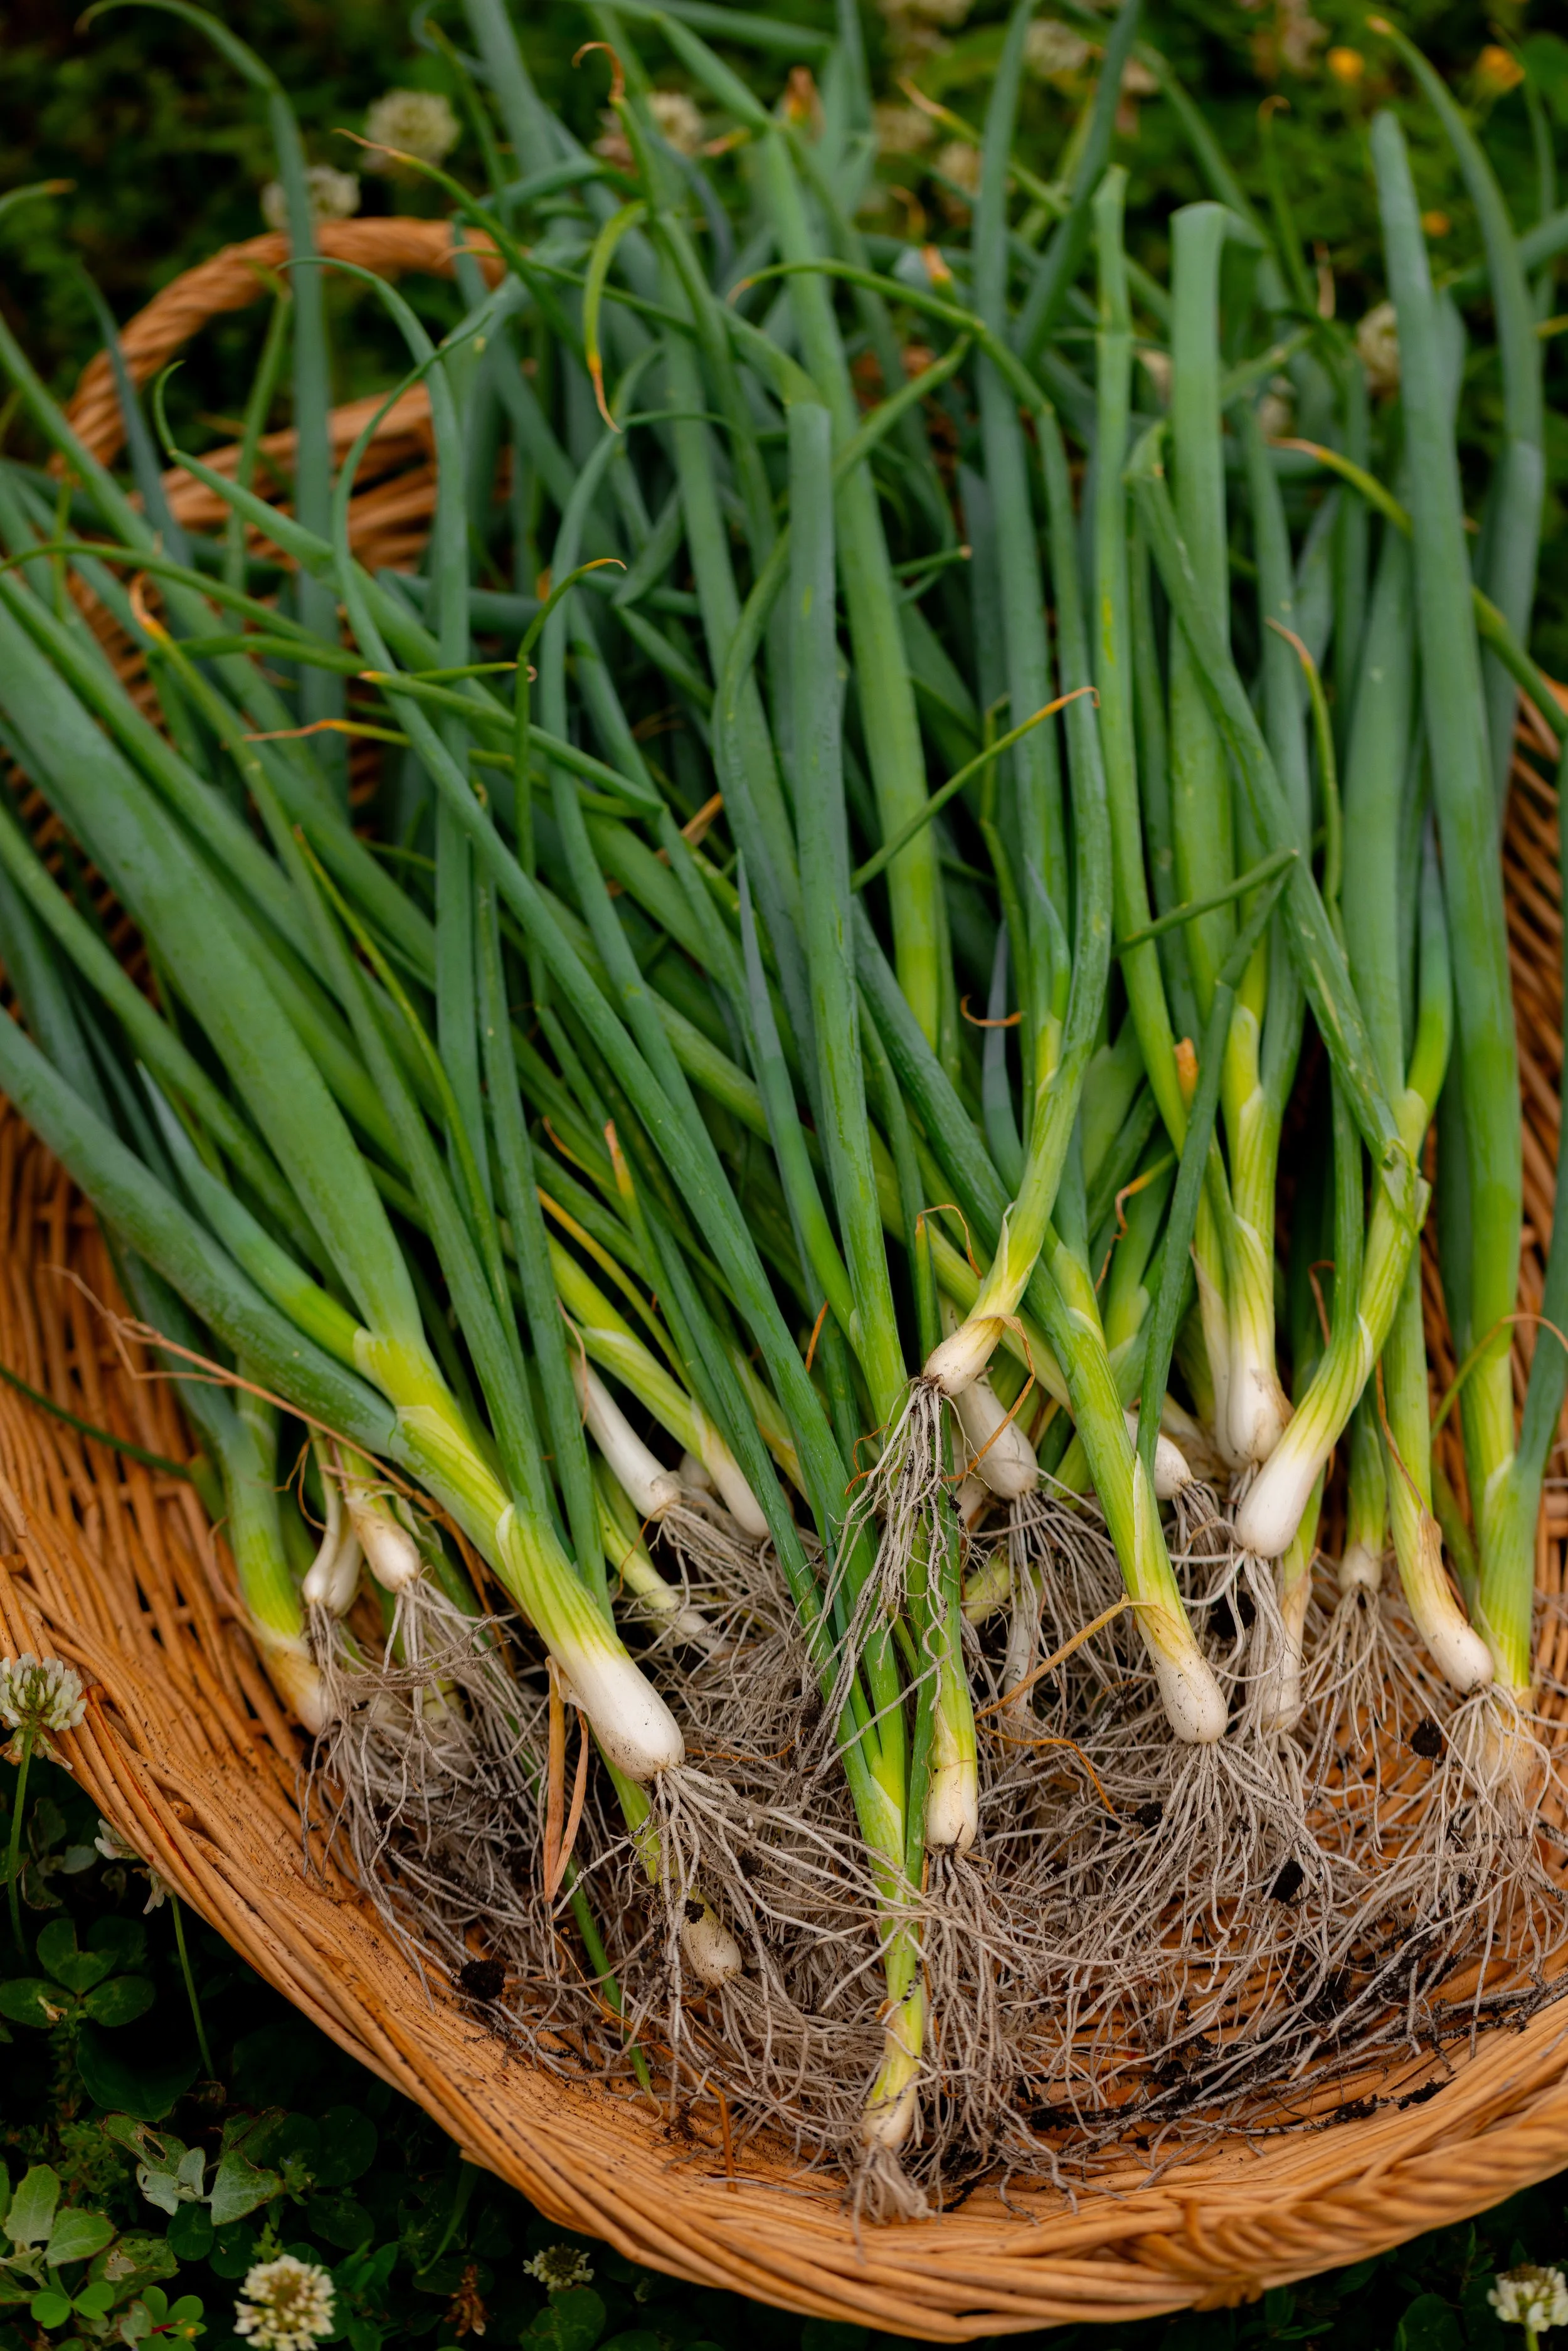
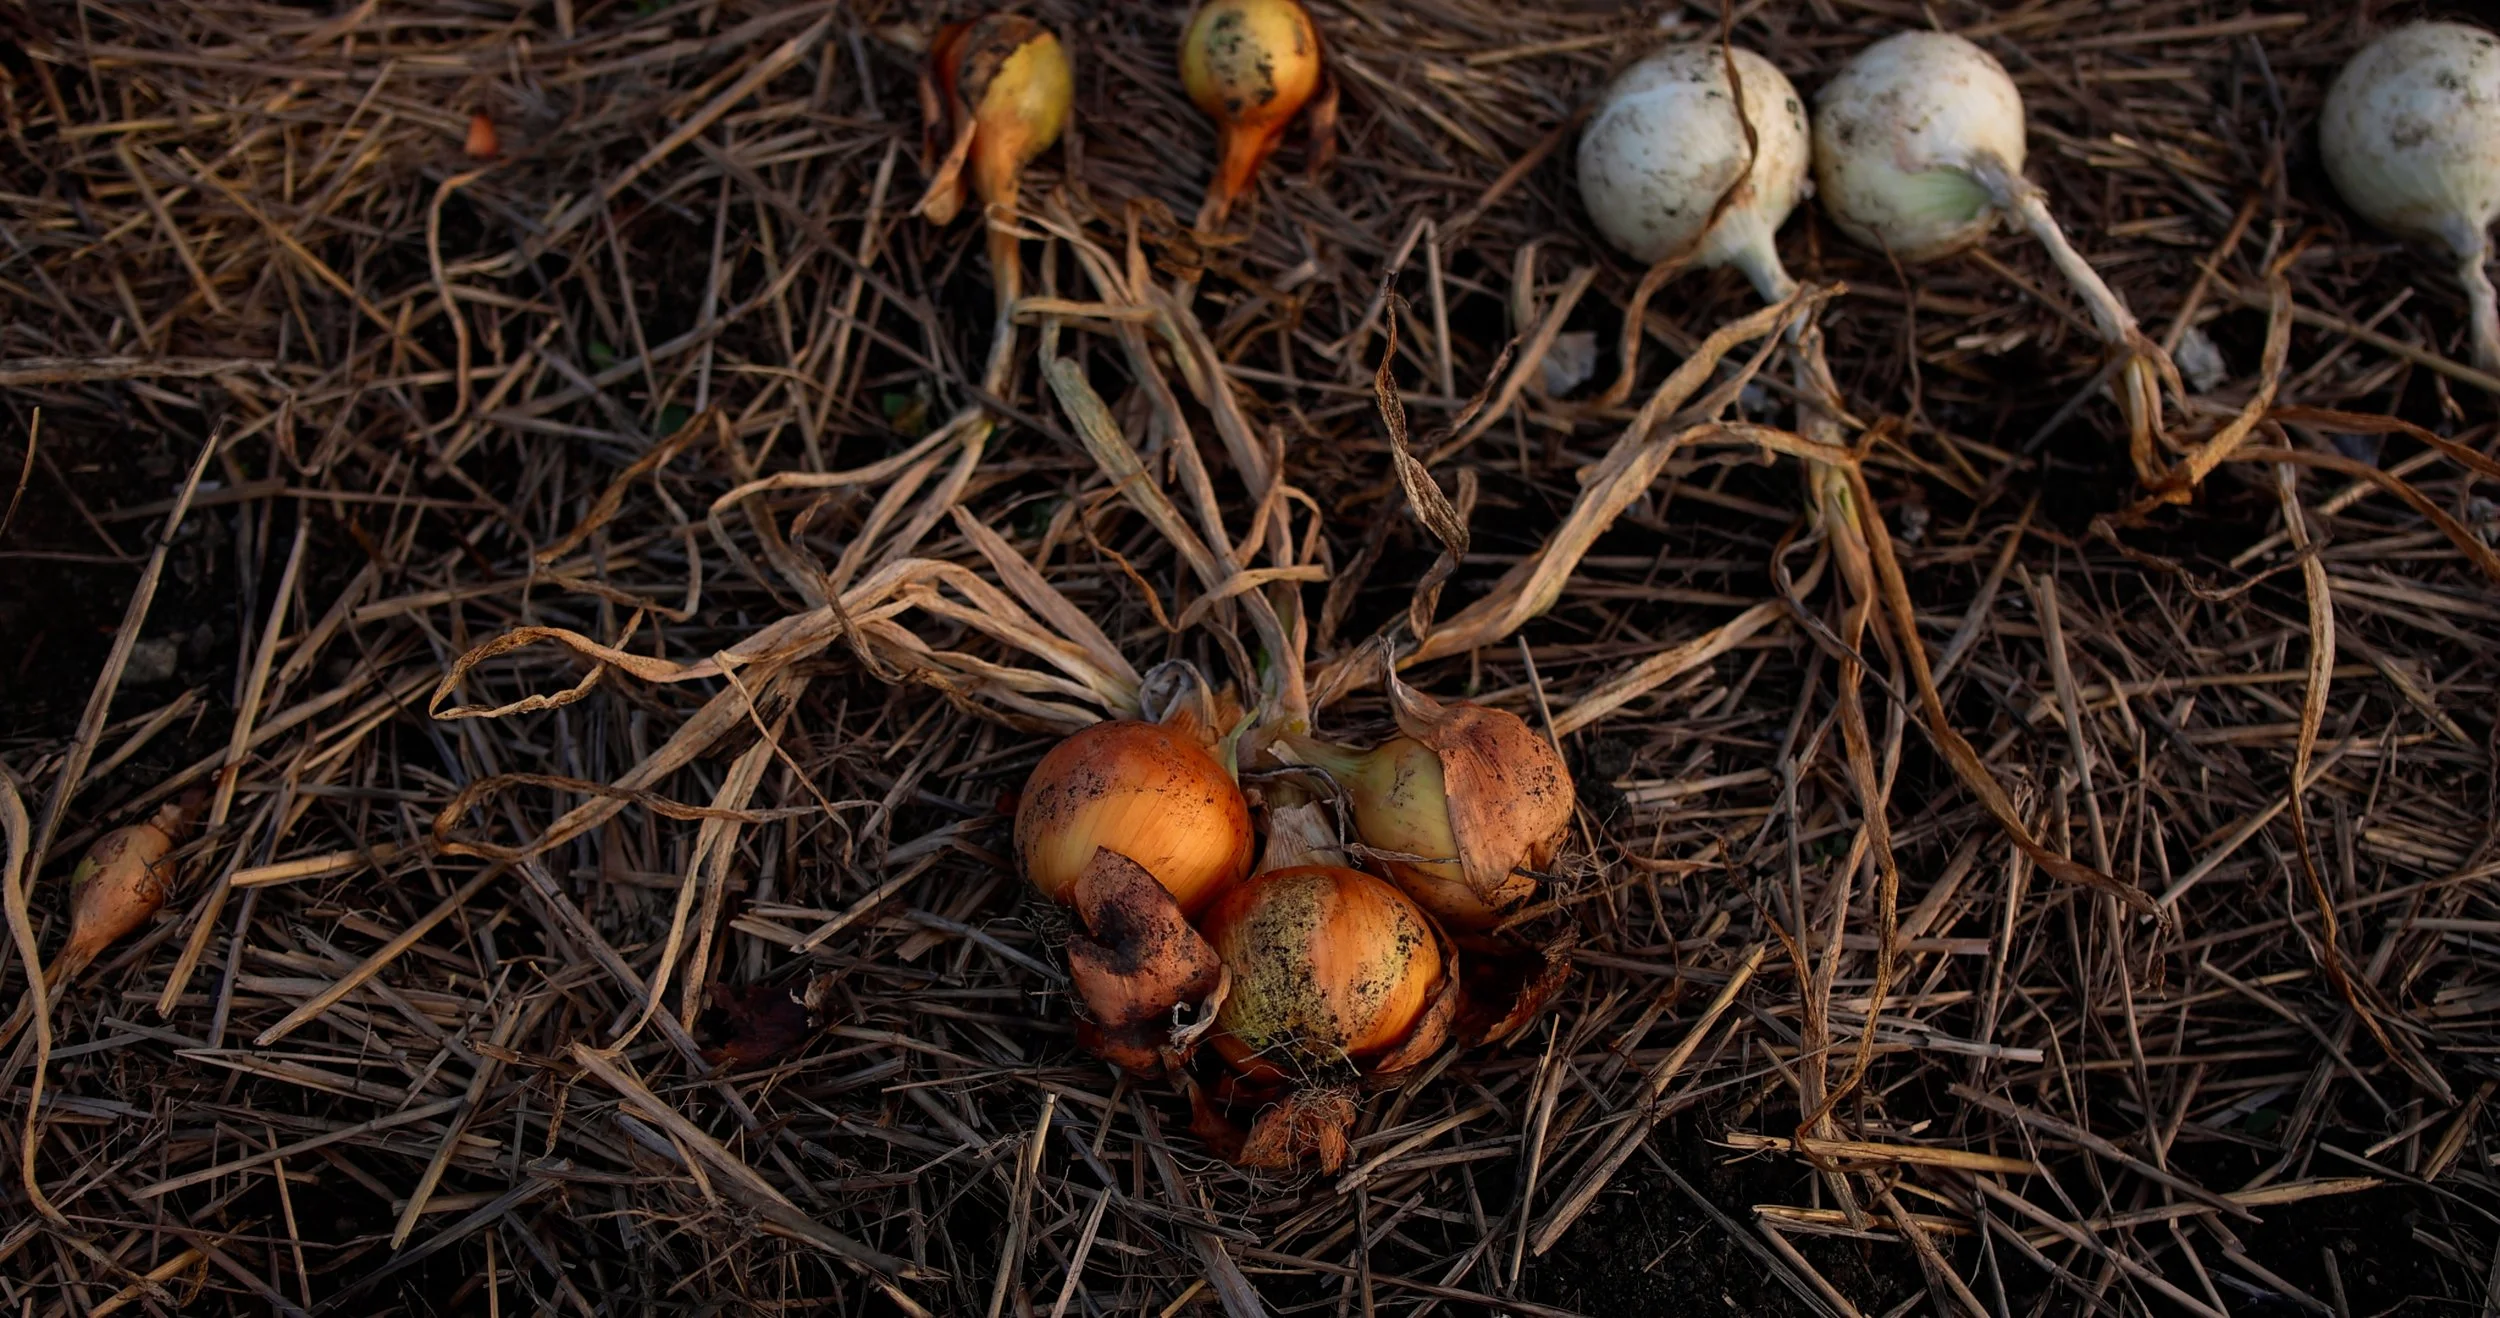
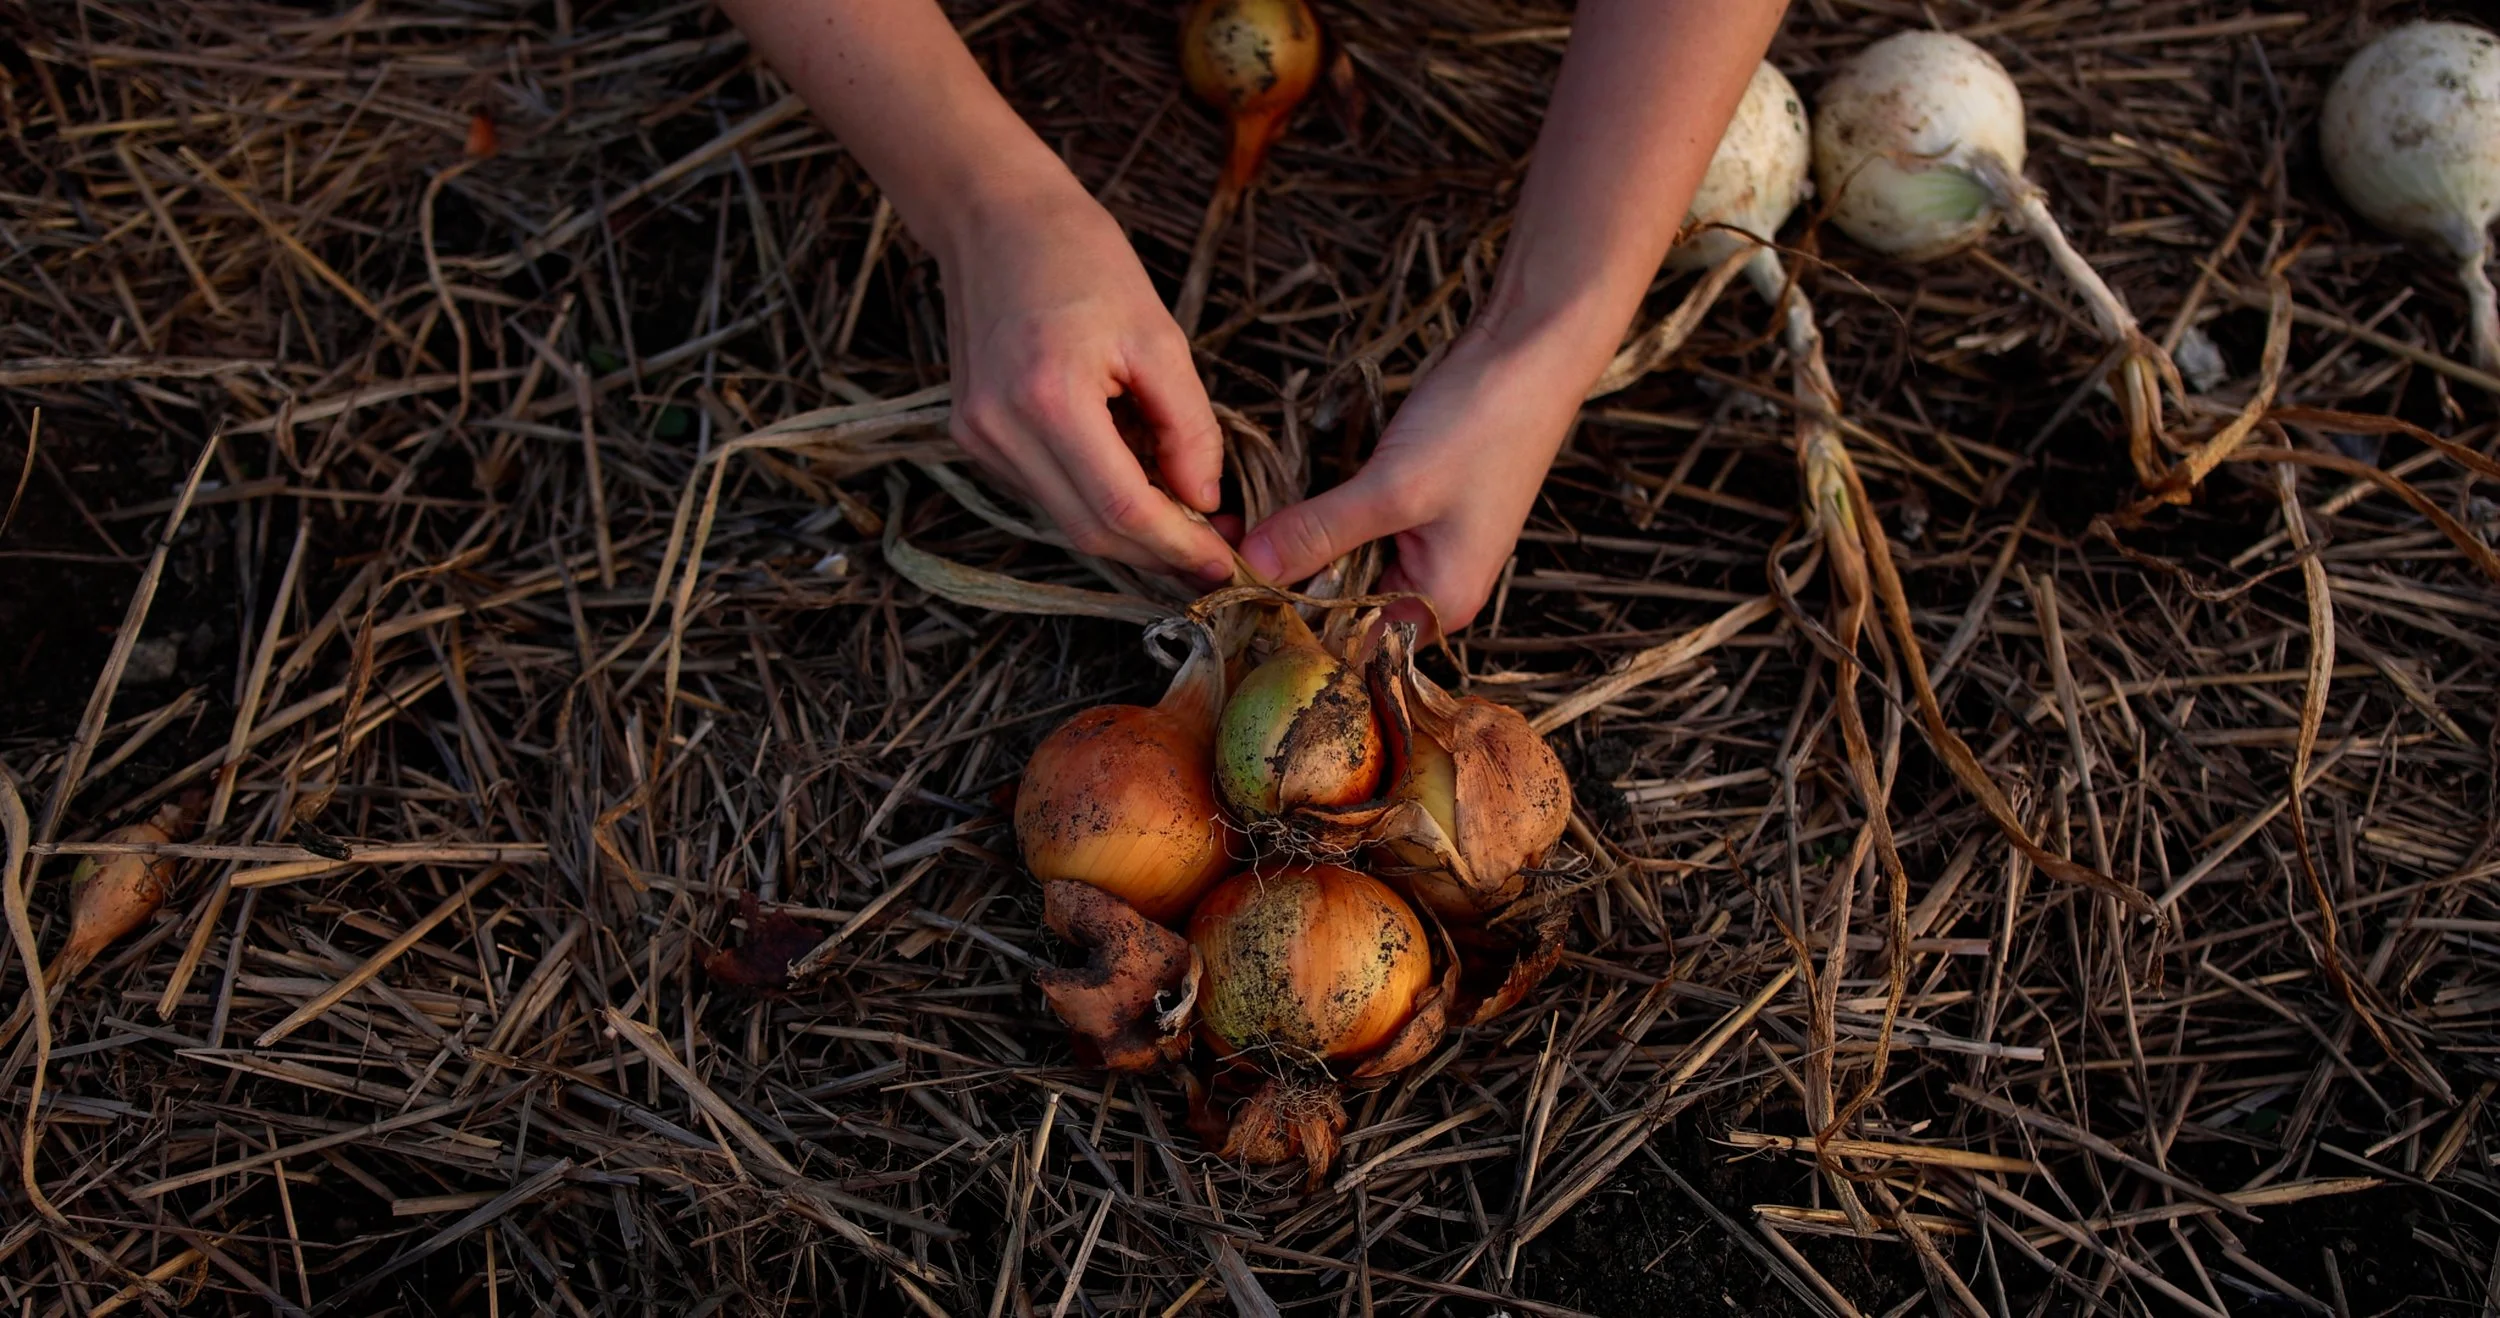
Do Not Wash: Leave the dirt on your bulbs! When you pull the bulbs from the ground, you can gently brush off any large clumps of soil. But leave the rest. Any leftover soil can be brushed or rubbed off later, once fully cured.
Cure After Pulling: After harvesting your onions from the soil, gently shake off any large clumps of soil. Lay the onion on dry ground for a few days to cure. If there is rain predicted in your forecast, move the onions to a protected area that is not overly damp/moist, such as a garage or barn.
Braid the Onions: At this point, you can braid the onions. Read below to learn how!
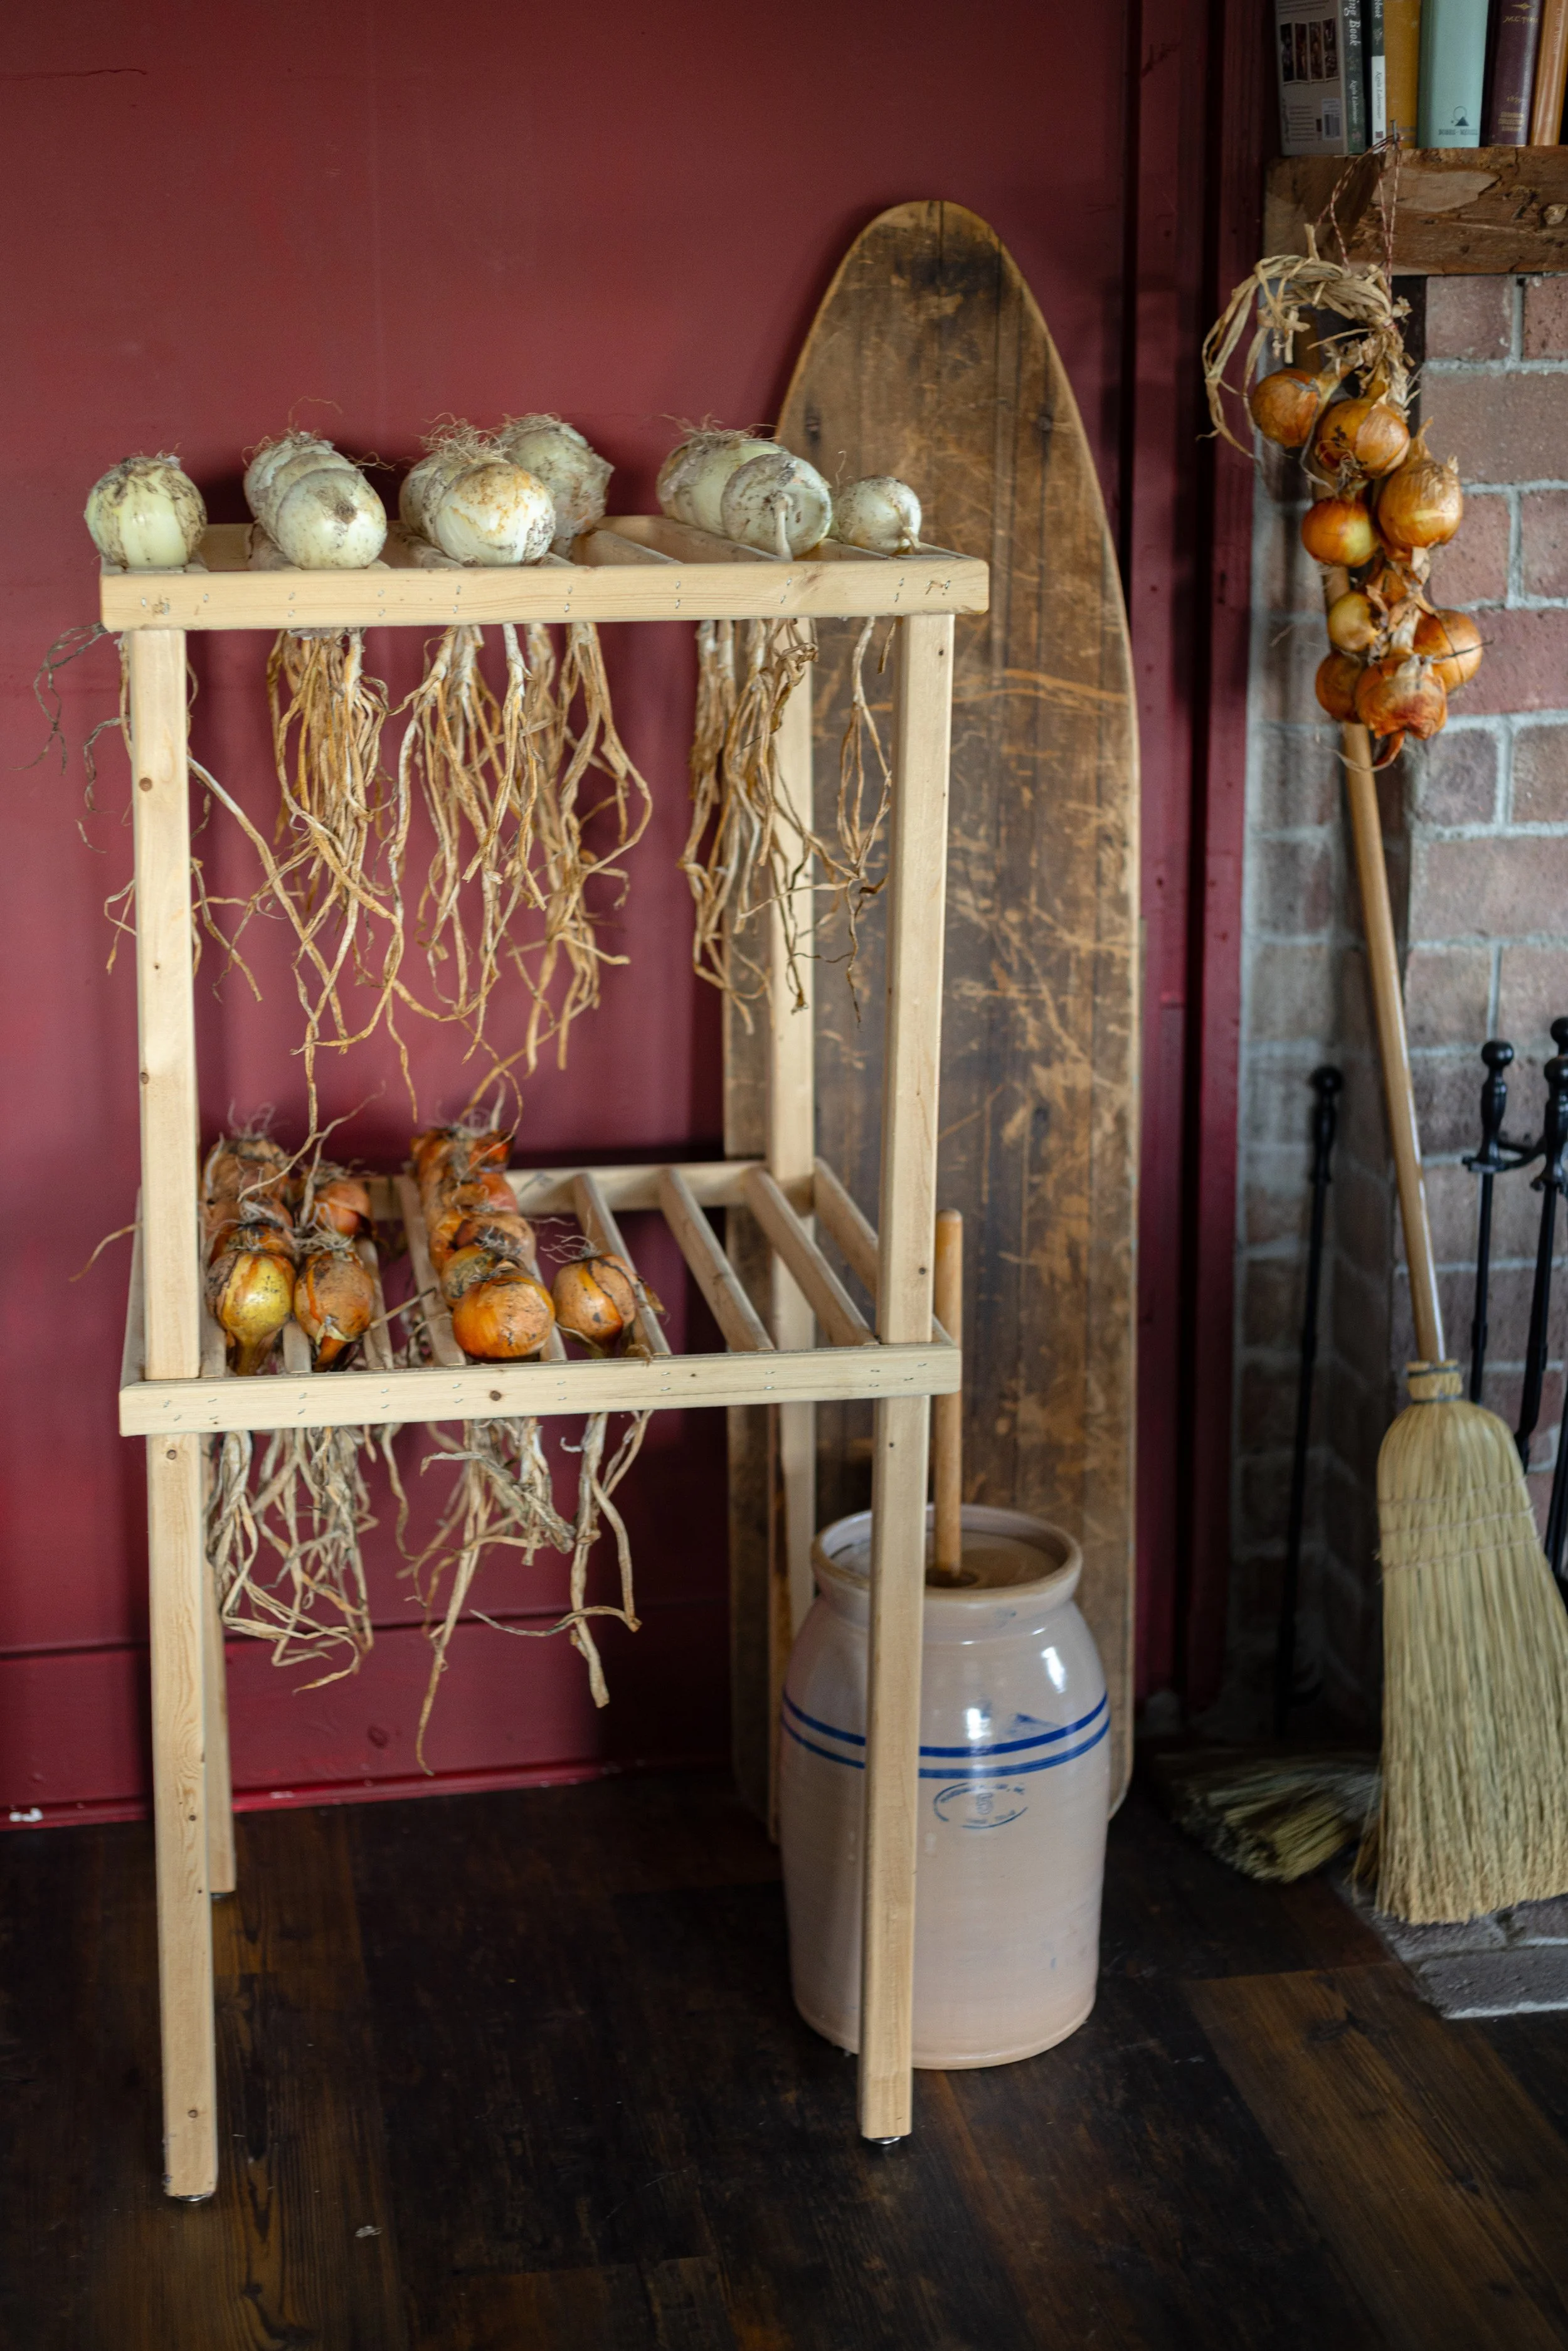
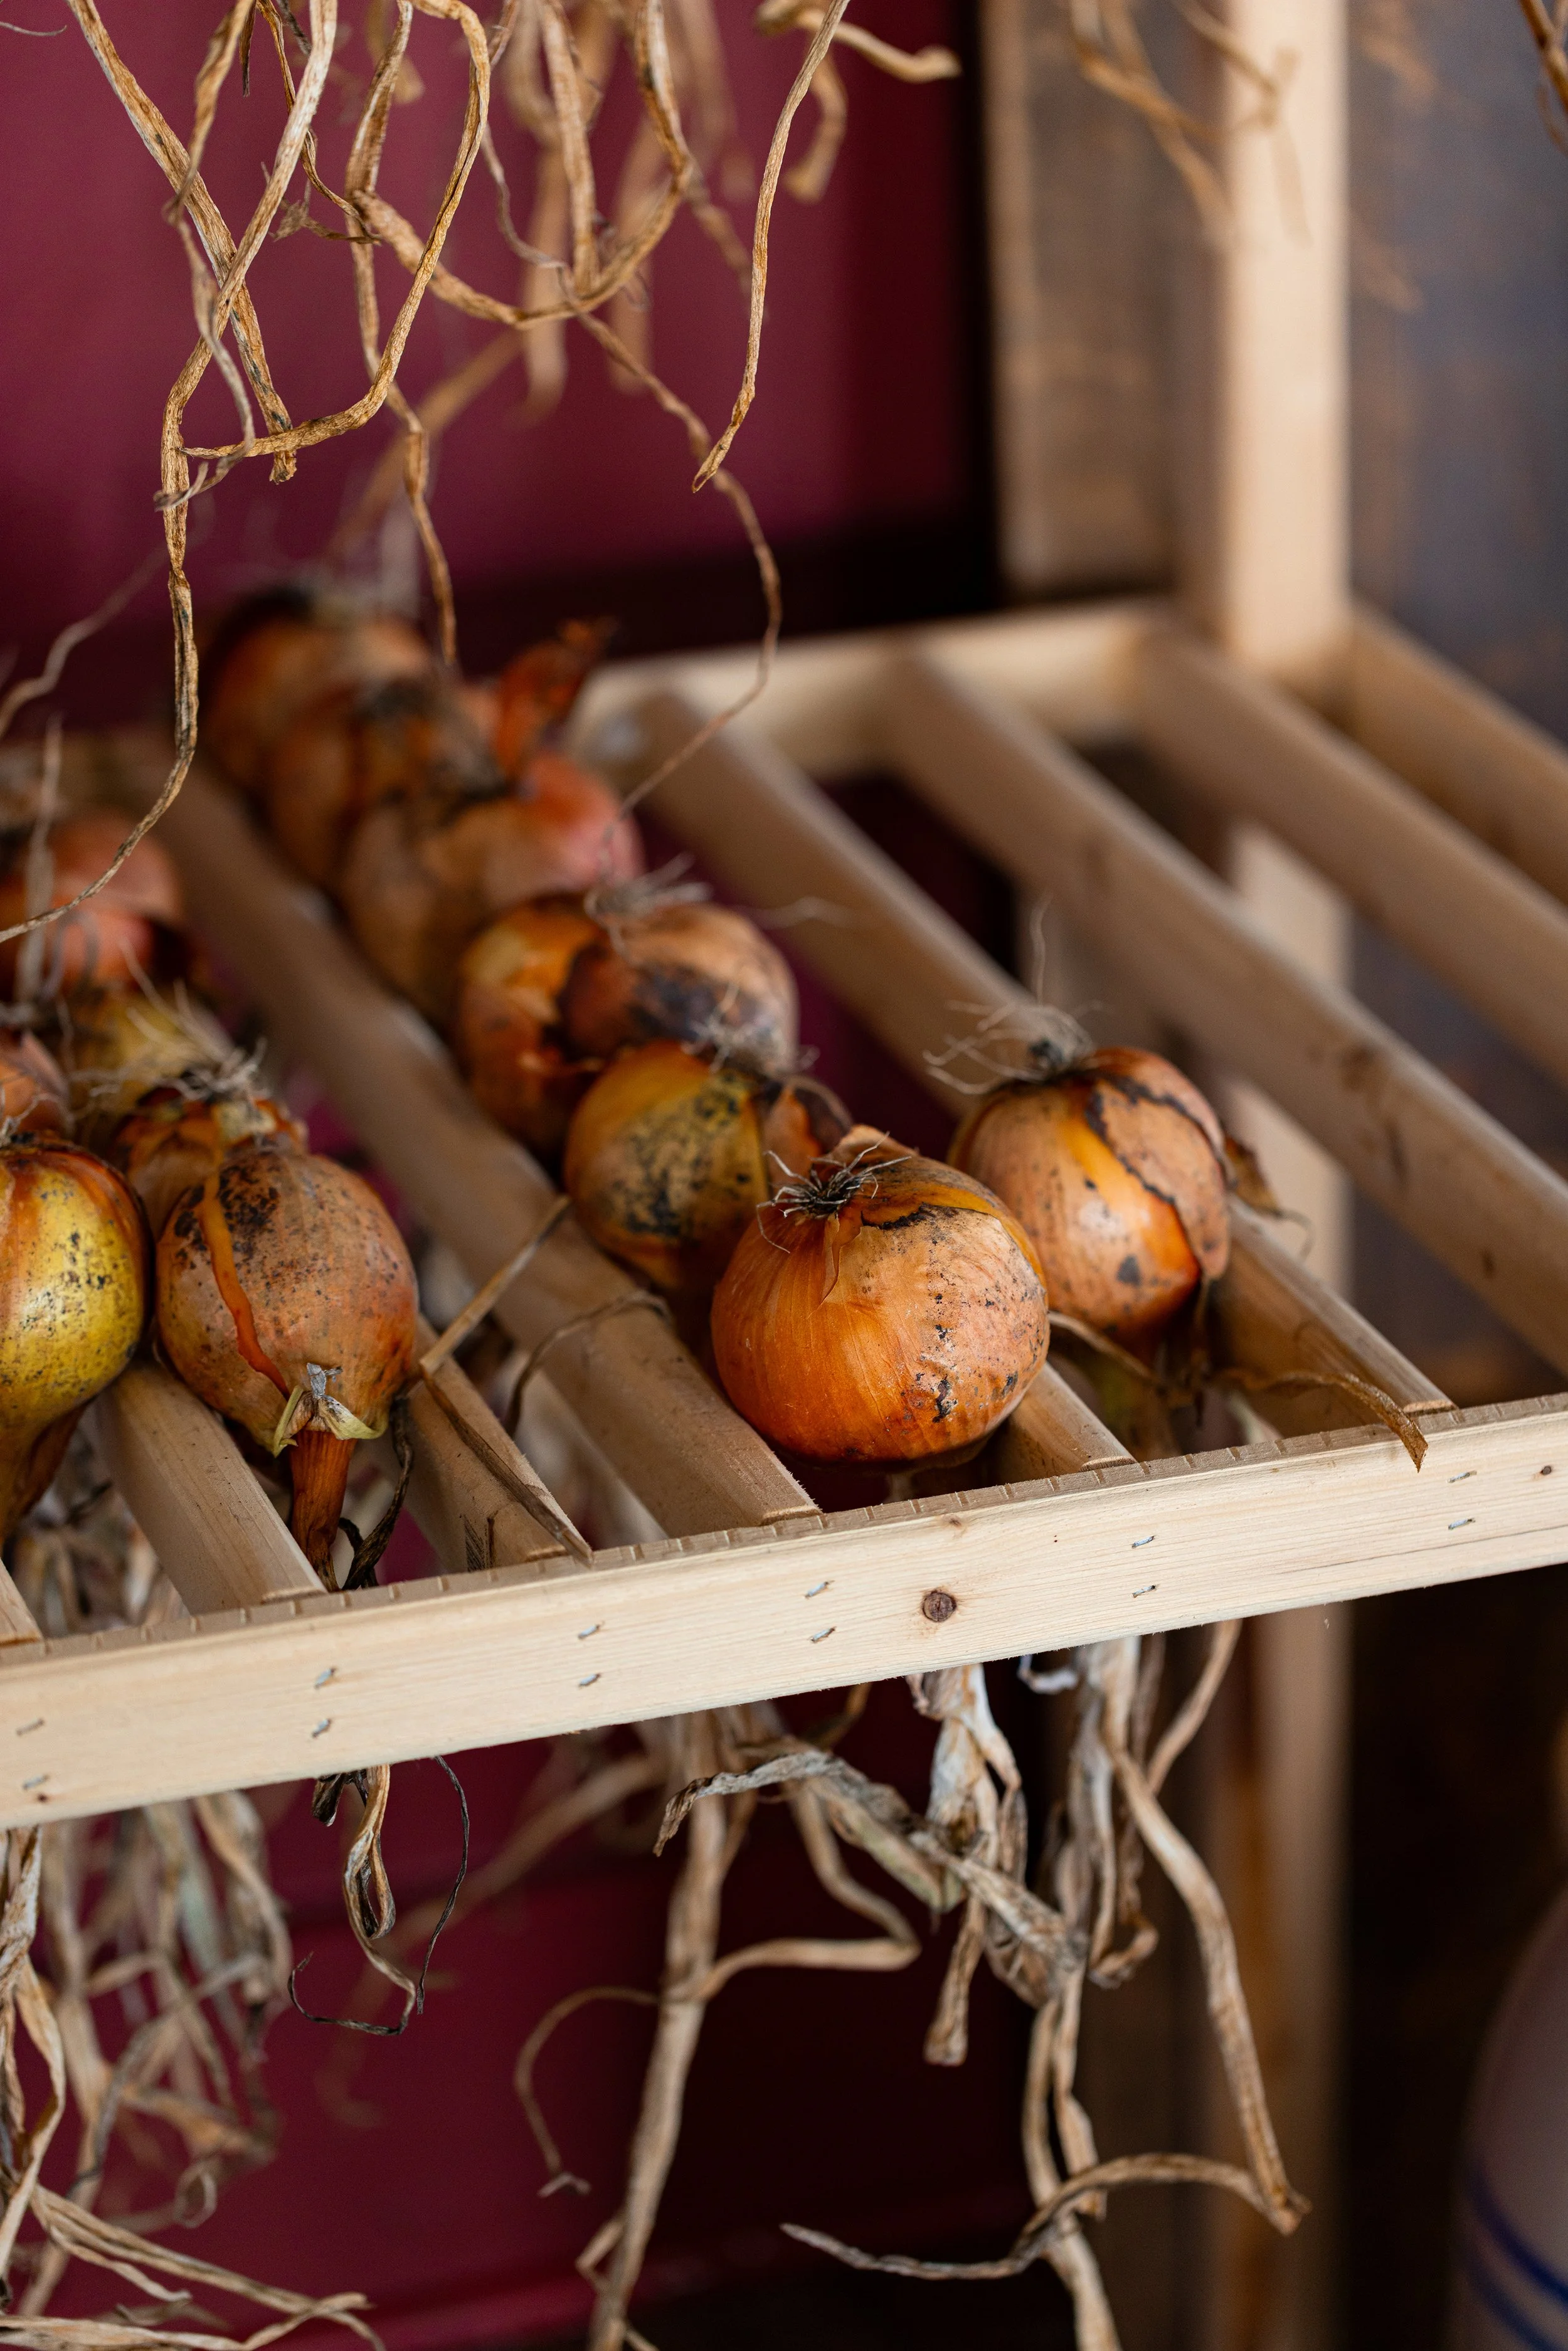
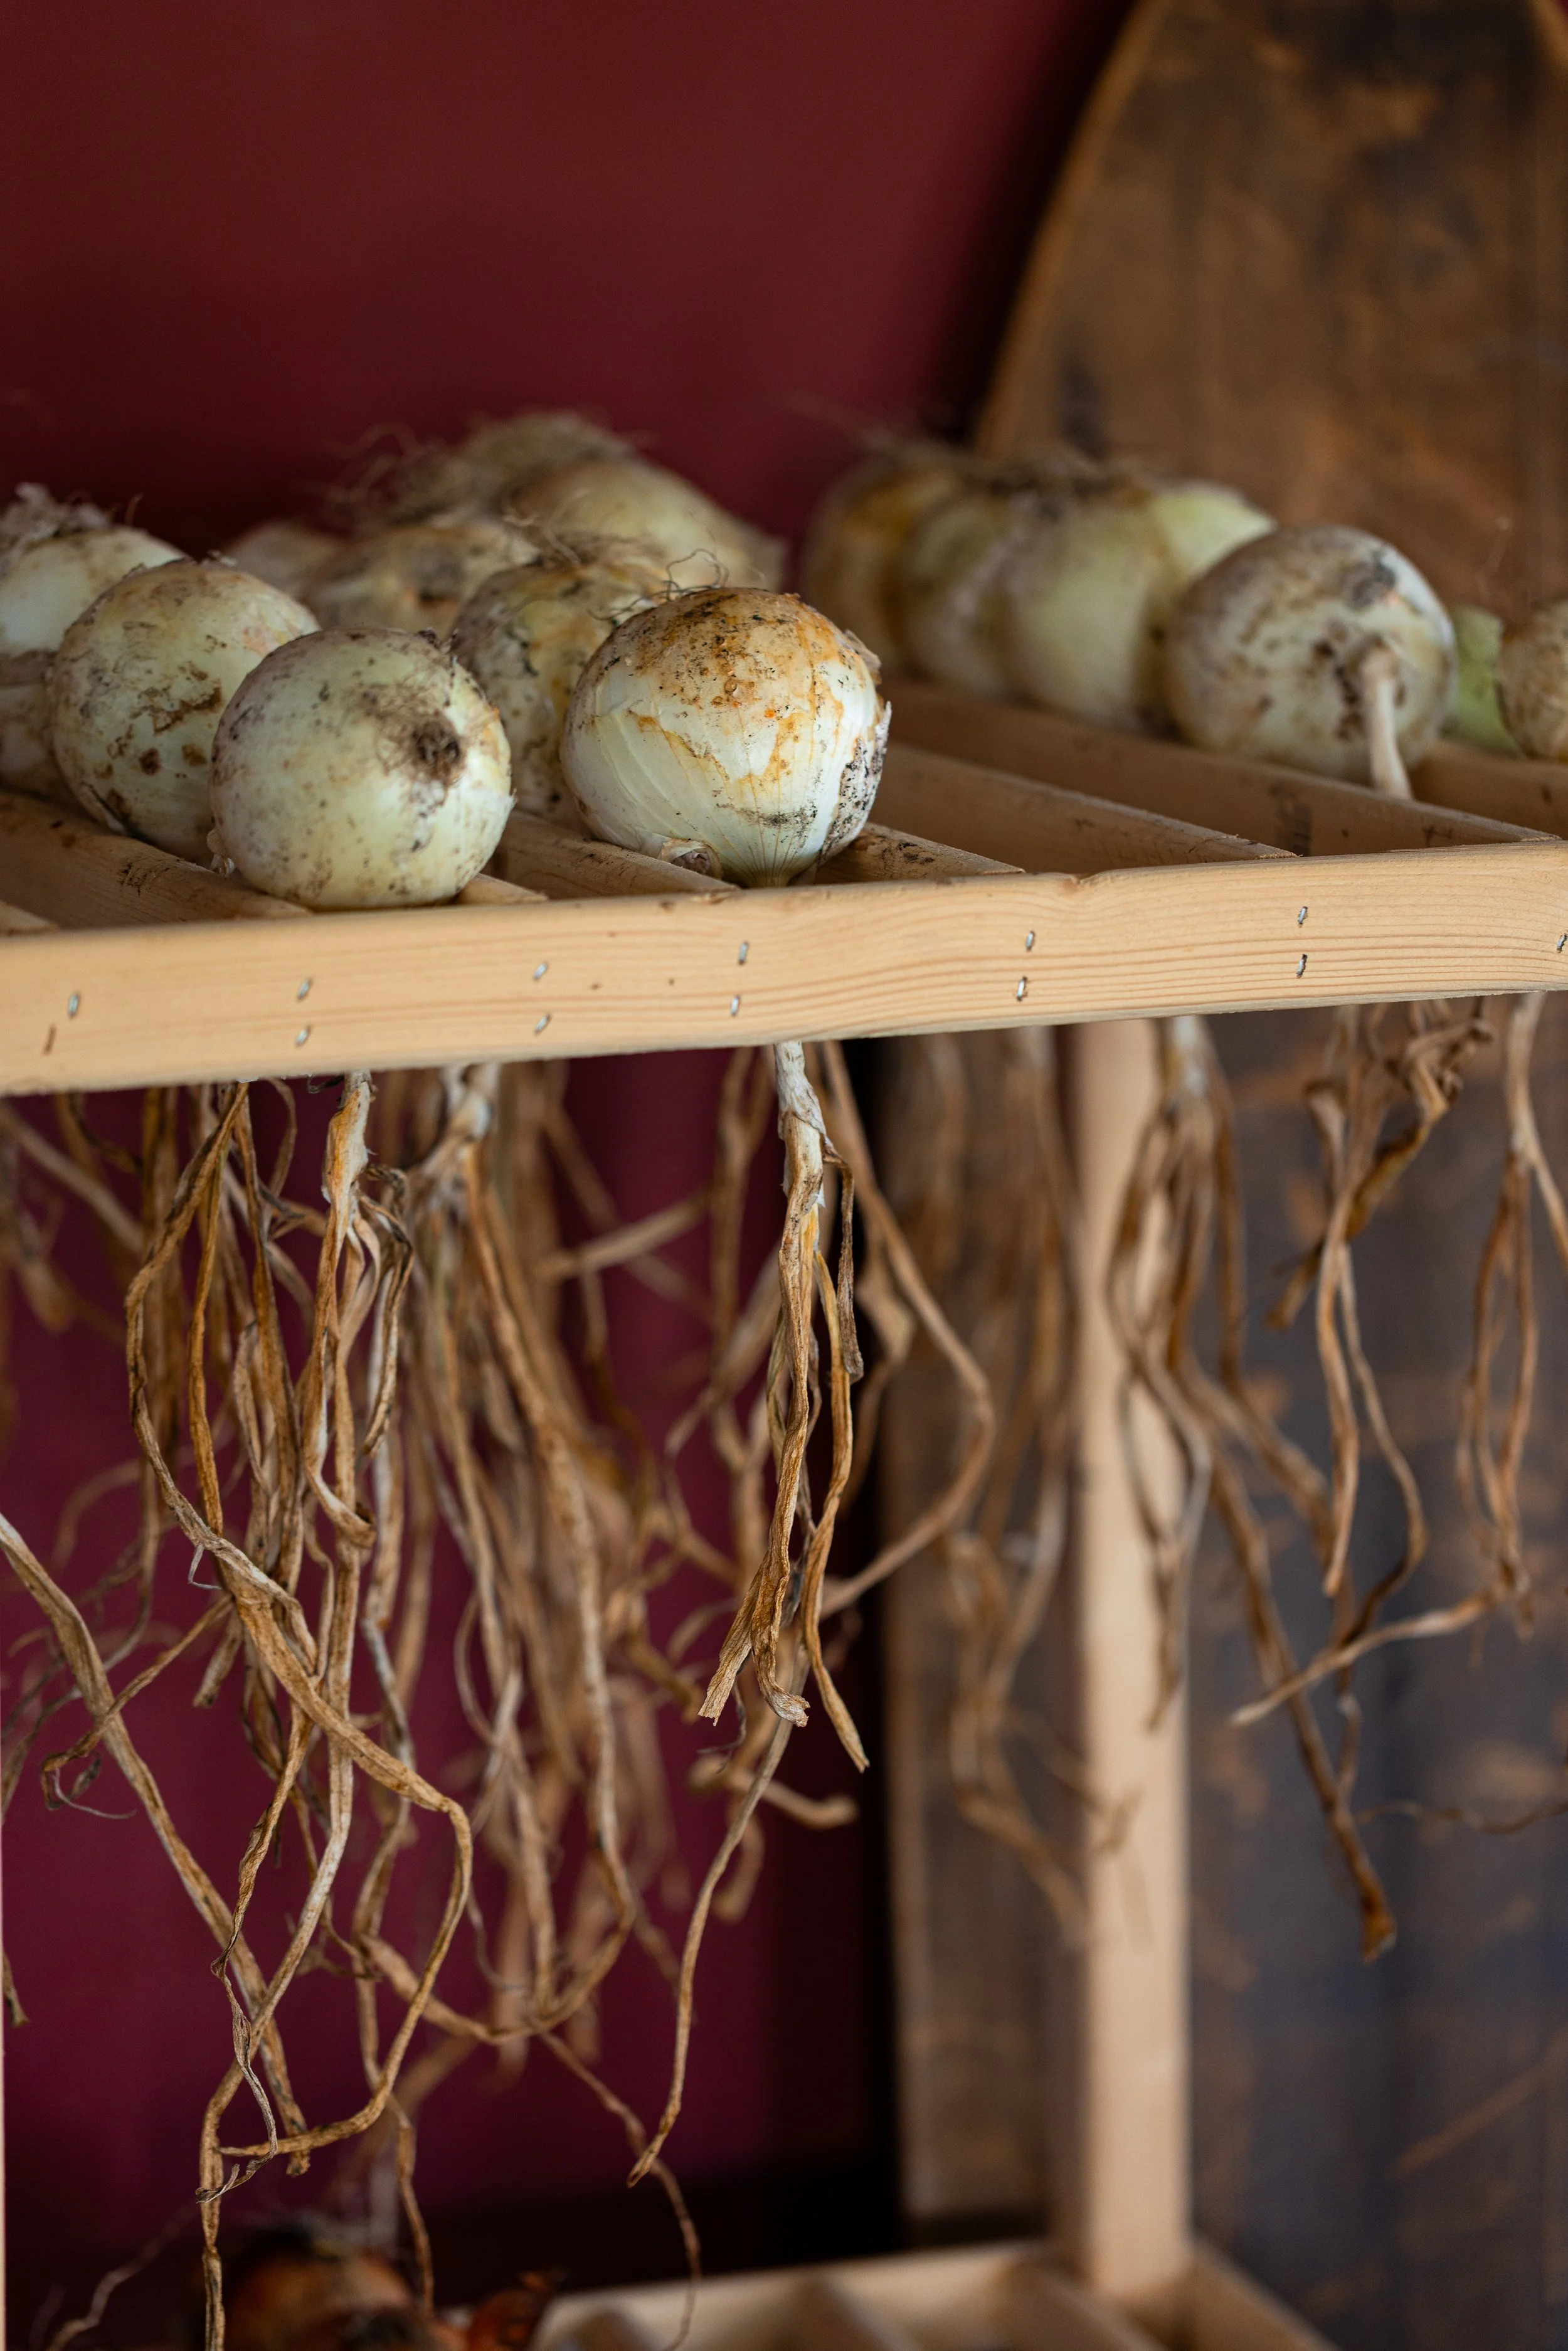
Hang to Dry: Hang the onions to dry, preferably upside down with the roots facing towards the ceiling. The onions should be dried in a well-ventilated, dry, and covered place that is out of direct sunlight. You can try making a homemade drying rack like the one in my photos! We made this one ourselves based on historical designs.
Check Weekly: The onions will be finished curing after about 3 to 4 weeks. The bulbs are fully cured when the skins are completely dry, papery, and the roots are fully dried out. The cloves should be hard and easy to crack apart.
Trim the Foliage & Roots: When the onions are finished curing, the foliage and roots can be trimmed back. Trim roots to 1/4-inch and cut tops to 1 to 2-inches (2.5 to 5-cm).
How to Braid Onions
Step One: Taking 3 onions, secure them together with a length of twine tied in a knot. Begin braiding the three onions’ foliage together in a traditional braid style.
Step Two: Set a new onion on top of the three, slightly above them. Like a french braid, begin to weave in the new onion’s foliage into the already established braid. Continue adding a new onion every pass of the weave.
Step Three: Continue to add more onions, braiding up the length of the foliage. Secure them snuggly to each other, but be careful not to break the foliage.
Step Four: Once you reach your desire length, tie off the top of the braid with more twine. Tie the twine into a loop to hang the onion braid from a hook or nail in your kitchen or pantry.

How to Store Onions
Like most vegetables, onions store best in a cool, dark, and dry place. They will keep for several months if properly cured and stored in the right conditions.
Ideally, onions will store best in an open pantry, dry basement, dry cellar, or heated garage. Often, a ventilated woven basket, mesh bag, or nylon stocking on your kitchen counter is great! I like these root storage baskets — they’re beautiful and work well.
Temperature: The ideal temperature to store garlic is 45 to 55°F (7 to 13°C).
Humidity: Ideal humidity levels for storing onions generally falls between 65% to 70% relative humidity. They like it cool, dry, and well-ventilated. A root cellar is typically too humid for storing garlic, though it can work. It likes an environment that is a bit on the dry side. Don’t store your garlic in the basement if it’s humid!
Light Exposure: Sunlight can cause your onion bulbs to sprout. This reduces their shelf life and alters their flavor. Store your onions in a dark place.
Air Flow: You want good air flow and ventilation to store your onions for longer. Don’t store onions in an airtight container as this can lead to mold and mildew. You want the onions to stay as dry as possible.
Refrigeration: Onions do not store well in the fridge. The high moisture levels and cold temperatures will encourage them to start growing.
Alternate Storage Methods for Onions
Freezing:
Peel, chop, and portion onions into freezer bags or freezer-safe containers. Remove as much air as possible before freezing to prevent odor absorption and freezer burn.
Dehydrating:
Dehydrated onions are a great way to store them that lasts even longer than whole, cured onions. Make your onion powder or onion salt.
Dehydrator: Slice peeled onions thinly and place them on dehydrator trays. Dry at 125°F (52°C) until crisp and brittle.
Oven: Arrange sliced onions on a parchment-lined baking sheet. Dry in the oven at the lowest temperature setting (150 to 200°F or 65-93°C). You may want to leave the oven door slightly open to allow some air circulation. Rotate the trays occasionally.
Onion Powder: Grind fully dried onion slices in a coffee grinder or spice grinder into flakes or a fine powder.
Pickling:
Another great way to preserve onions is by turning them into pickles! Pickled onions are absolutely delicious in various dishes. To pickle onions, it is stored in an acidic brine made from vinegar. This mellows the raw onion flavor. To store pickled onions, it can be water bath canned or stored in the refrigerator for several months.
Common Pests & Diseases
Learn about these common pests and diseases that can affect your onion plants. While these are all generally rare to happen, they can happen, and it can be good to know how to fix the problem or prevent it in the future. In any case, I believe that the best method for dealing with plant pests and diseases is to put preventative methods at play before planting. This lowers your risk of issues from the beginning!
| Symptoms | Cause | Prevention/Solution |
|---|---|---|
| Silvery streaks and speckling on bulbs; curled/twisted leaves; reduced bulb size | Onion Thrips (pest) | Overhead rinse to knock down insects in heat waves; insecticidal soap; mulch; reduce weeds |
| Sudden wilting; yellowing foliage; tunnels in bulbs from larvae; plant collapse | Onion Maggots (pest) | Apply floating row cover; remove and cull damaged bulbs; avoid raw compost or manure |
| Premature yellowing or plant collapse; white fluffy mycelium at base; black poppy-seed sclerotia on roots | White Rot (disease) | Do not replant alliums in infested bed; sanitize beds; plant clean, disease-free bulbs; improve soil drainage |
| Fluffy, purple-gray mold to appear on leaves; yellowing of foliage; plant collapse | Downy Mildew (disease) | Plant resistant varieties; thin plants for better airflow; adjust planting dates |
Final Thoughts
Now that you know how to grow, harvest, and store your own homegrown onions, you are ready to reap the rewards! Onions reward steadiness more than growing perfection. To grow amazing onions in your garden, remember to match the variety to your day length, plant them in a well-fed garden bed with loose soil, keep moisture even, and stay on top of weeds and mulch. Your onions will quietly bulb up while you’re busy tending the rest of the garden!
xoxo Kayla
You Might Also Like


Learn how to grow big beautiful onions easily in this beginner planting guide.