Floral Painted Country Loaf (Crusty Dutch Oven Bread with Edible Paint)
This post may contain affiliate links, please see our privacy policy for more information.
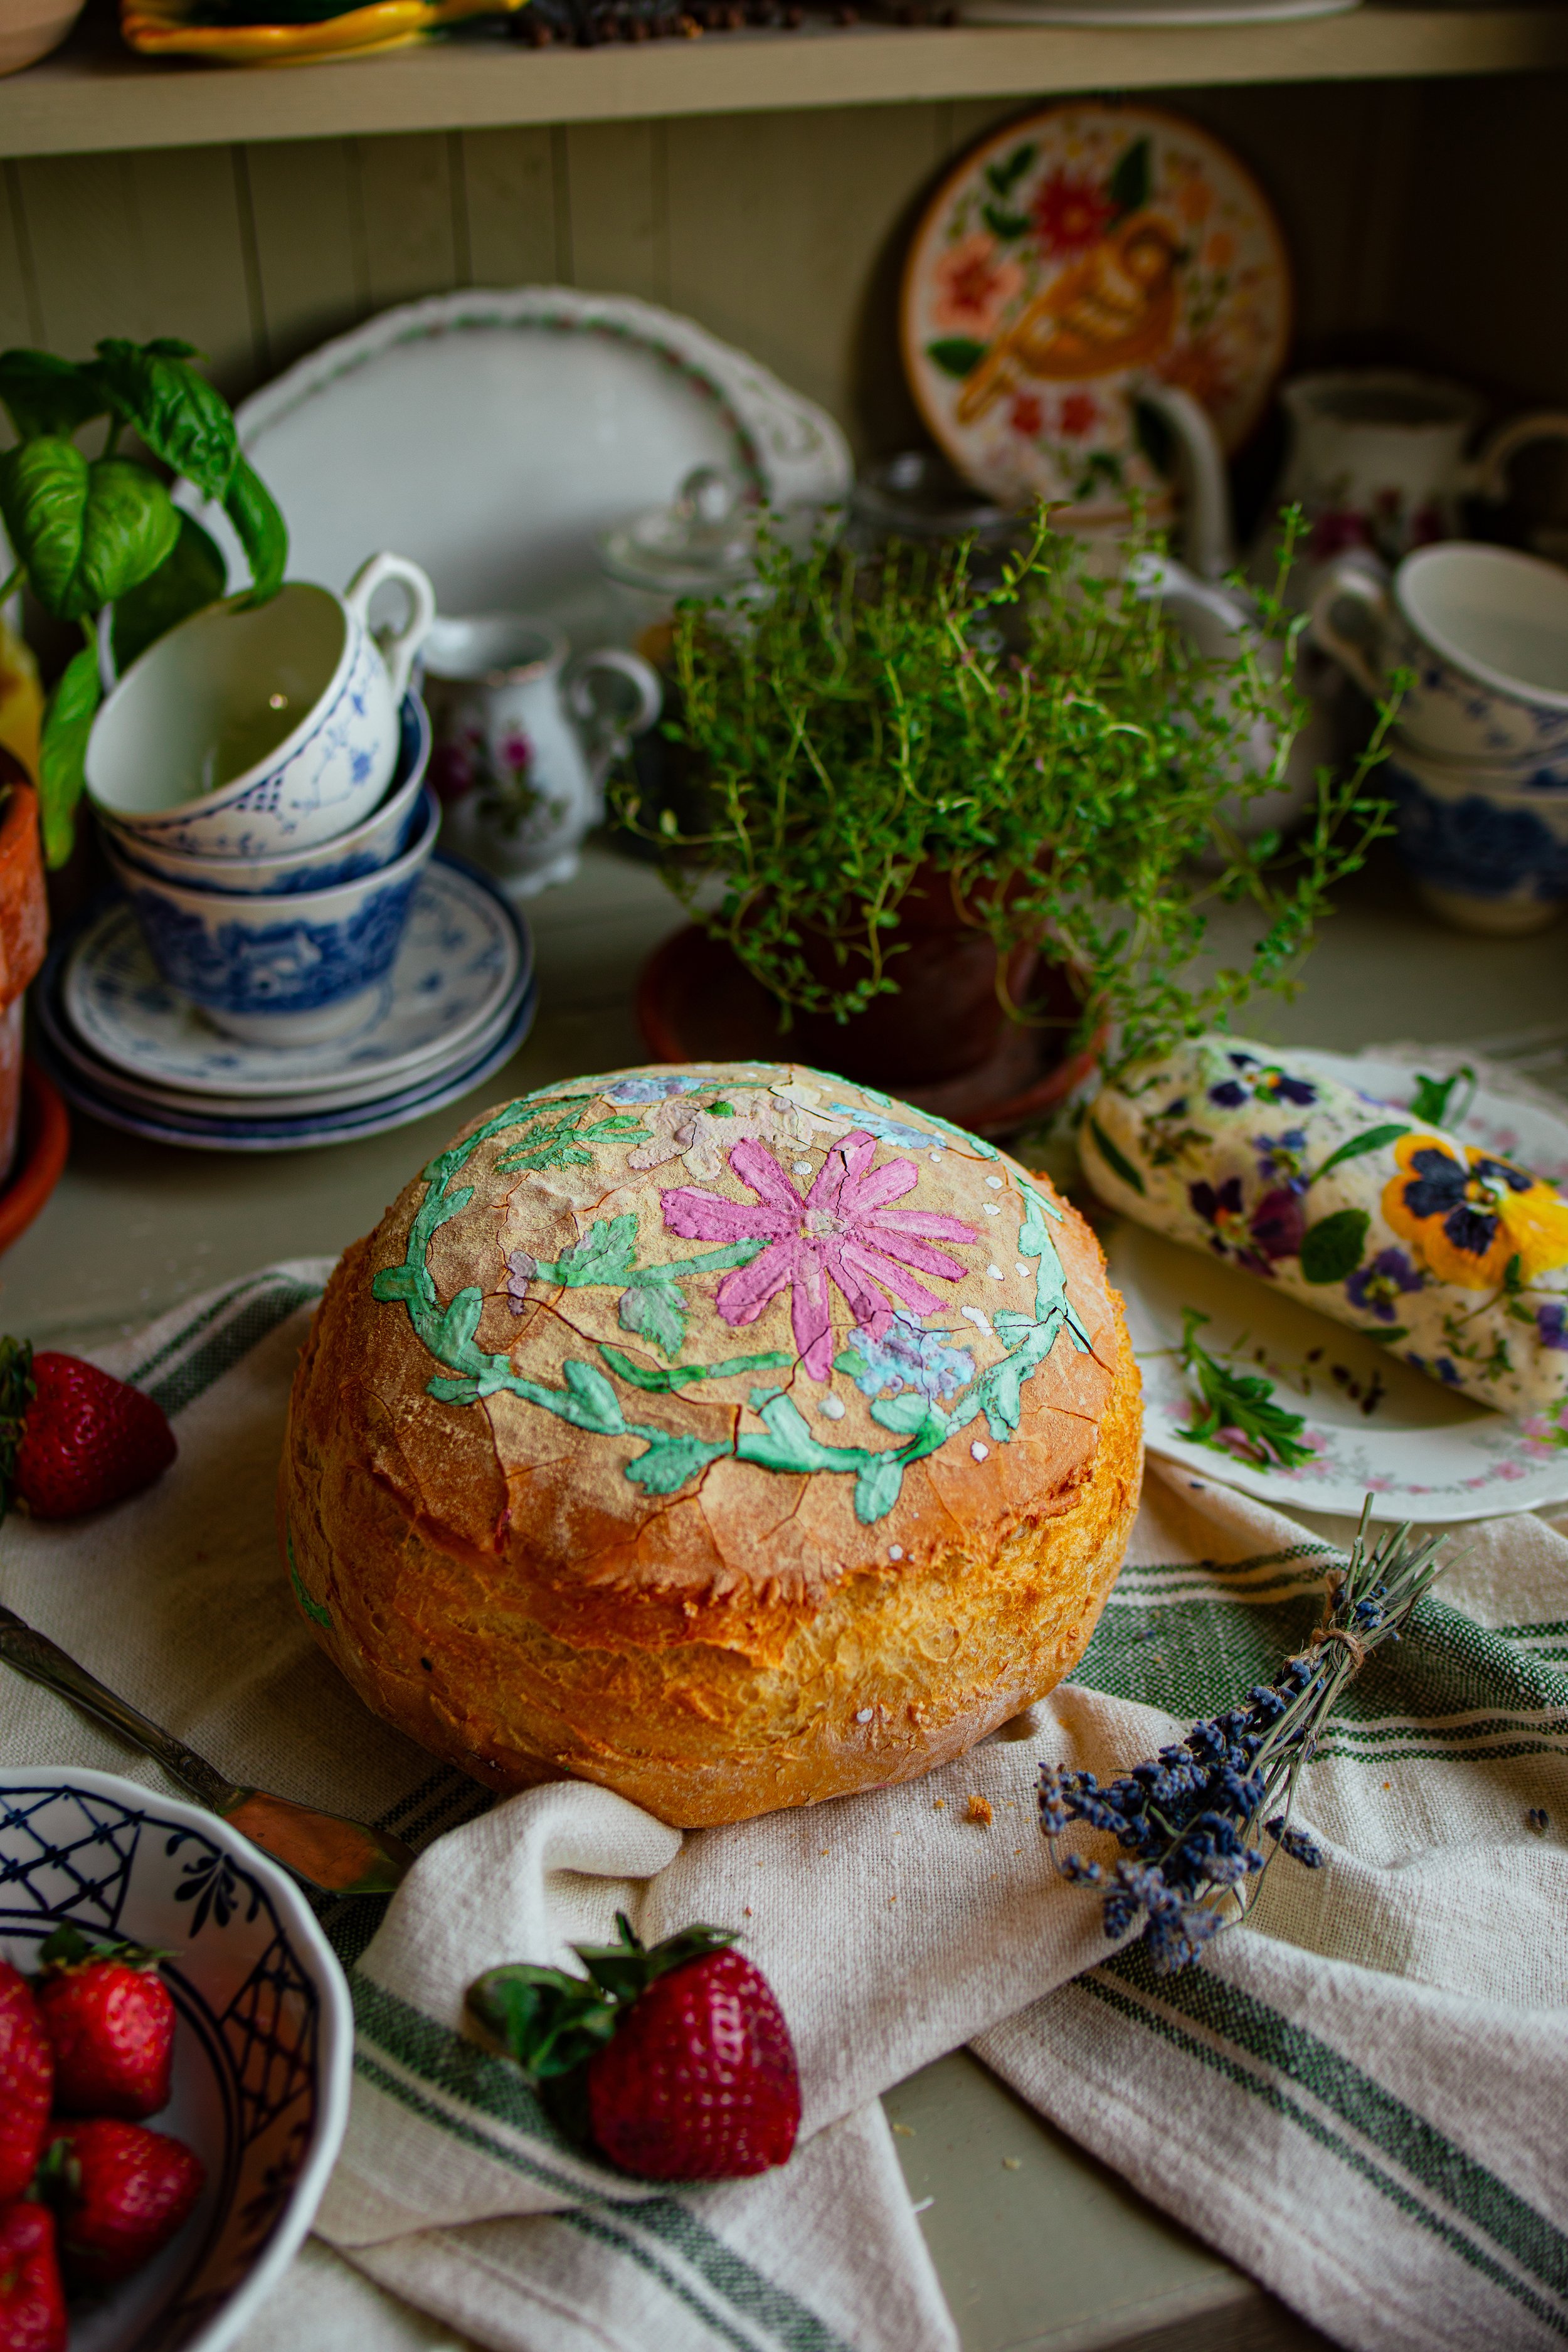
Want to make your next loaf of bread truly unforgettable? This Floral Painted Country Loaf is a stunning Dutch oven crusty bread with a soft interior and edible floral art painted right on the crust using food-safe colors. It’s a whimsical, nature-inspired centerpiece that tastes as lovely as it looks.

About The Recipe
I have been absolutely mesmerized seeing various beautiful painted breads on Pinterest and social media. I had to give it a try for myself! Rather than trying this edible decorating technique on sourdough, I used the recipe for my Crusty French Country Boule from my first cookbook, The Prairie Kitchen Cookbook. It worked out great! The result was a positively lovely floral design on bread with a crusty crunchy outside and a soft squishy inside.
Why You’ll Love This Recipe
Simple dough recipe made with minimal ingredients.
The beautiful design is sure to impress your guests!
Customizable painted design (use floral, herbs, abstract art, or letters).
Great introduction to dutch oven bread baking.
Whimsical, creative, and meditative to make.
Tools You’ll Need
Before you begin painting, you will have to gather up some supplies! These ingredients and tools are necessary to successfully paint your loaf so that it looks like a beautiful botanical painting.
Liquid Food Whitener. I used this one by Chefmaster, and it worked wonderfully!
Gel Food Coloring. While you can mix liquid food coloring into the liquid whitener, it will not have the same viscosity as when you use gel food coloring. I would recommend using the Chefmaster brand, if that is the brand of liquid whitener that you purchase as they are made to work together. They also sell an option for natural food coloring.
Round Tip Paintbrushes. Just make sure that you are using paint brushes only for food!

Ingredients & Substitutions
Active Dry Yeast. You will want to use active dry yeast for this recipe and not instant yeast or self-rising flour.
Honey. You can substitute sugar for the honey or omit the honey altogether.
Kosher Salt.
All-Purpose Flour.
Liquid Whitener. I like this brand.
Gel Food Coloring. I like this brand.
How to Make the Floral Painted Country Loaf
Mix the dough.
Let the dough rise for 1 hour.
Shape and let rise again.
Paint the bread.
Bake the bread in a Dutch oven.
Let the bread cool for at least 1 hour.
Slice and serve.

Step One: Begin by combining the water, yeast, and honey in a large bowl. Gently whisk and let the mixture sit for about 5 to 8 minutes, or until the yeast blooms or grows and becomes bubbly. Then, whisk in the salt.
Step Two: To this mixture, begin slowly adding the flour about 1 cup (130 g) at a time. You may do this by hand with a dough whisk or wooden spoon. Otherwise, mix in an electric standing mixer with a dough hook attachment.
Step Three: Knead flour into the dough until the dough no longer clings to the sides of the bowl or to your fingers. Continue to knead for about 5 to 6 minutes, or until the dough is smooth, stretchy, and pliable. If it feels dense, then you have added too much flour. It should still be sticky, just not enough to clump up on your hands!

Step Four: Shape the dough into a ball and place it into a large lightly greased bowl. Cover the bowl with plastic wrap and let it rise until doubled, about 1 hour.
Step Five: Gently deflate the dough and stretch it by pulling at the corners. Then, fold the corners in to form another ball. Drag the ball towards you, with the seam side down, to tighten the loaf. Continue to do this until the dough feels nice and taught. Pinch the seam closed.

Step Six: Place a lightly floured kitchen towel in a bread banneton. Place the bread with the seam side up in the banneton and cover it with plastic wrap. If you do not have a bread banneton, or proofing basket, you can simply put the bread on a piece of parchment paper - the basket just helps the bread to hold its shape before baking, so you may have a more spread-out loaf.
Step Seven: Meanwhile, preheat the oven to 425° F (218° C) and place a 5-quart (4.7 L) dutch oven in to preheat.
Step Eight: Let the bread rise for about 40 to 45 minutes, or until nearly doubled in size. Mix your food colorings together with the liquid whitener to prepare for painting. During the last 10 to 15 minutes of proofing, paint your bread.

how to paint on bread
Step One: To begin painting on your bread, you will want to follow the recipe all the way to the final shaping and proofing before baking the loaf. You can paint on any kind of bread, but in general I would choose a recipe that has a final proofing window of at least 30 minutes so that you have enough time to paint on your design. Once your bread has been shaped, you will have a window of about 10 to 15 minutes to paint on your design.

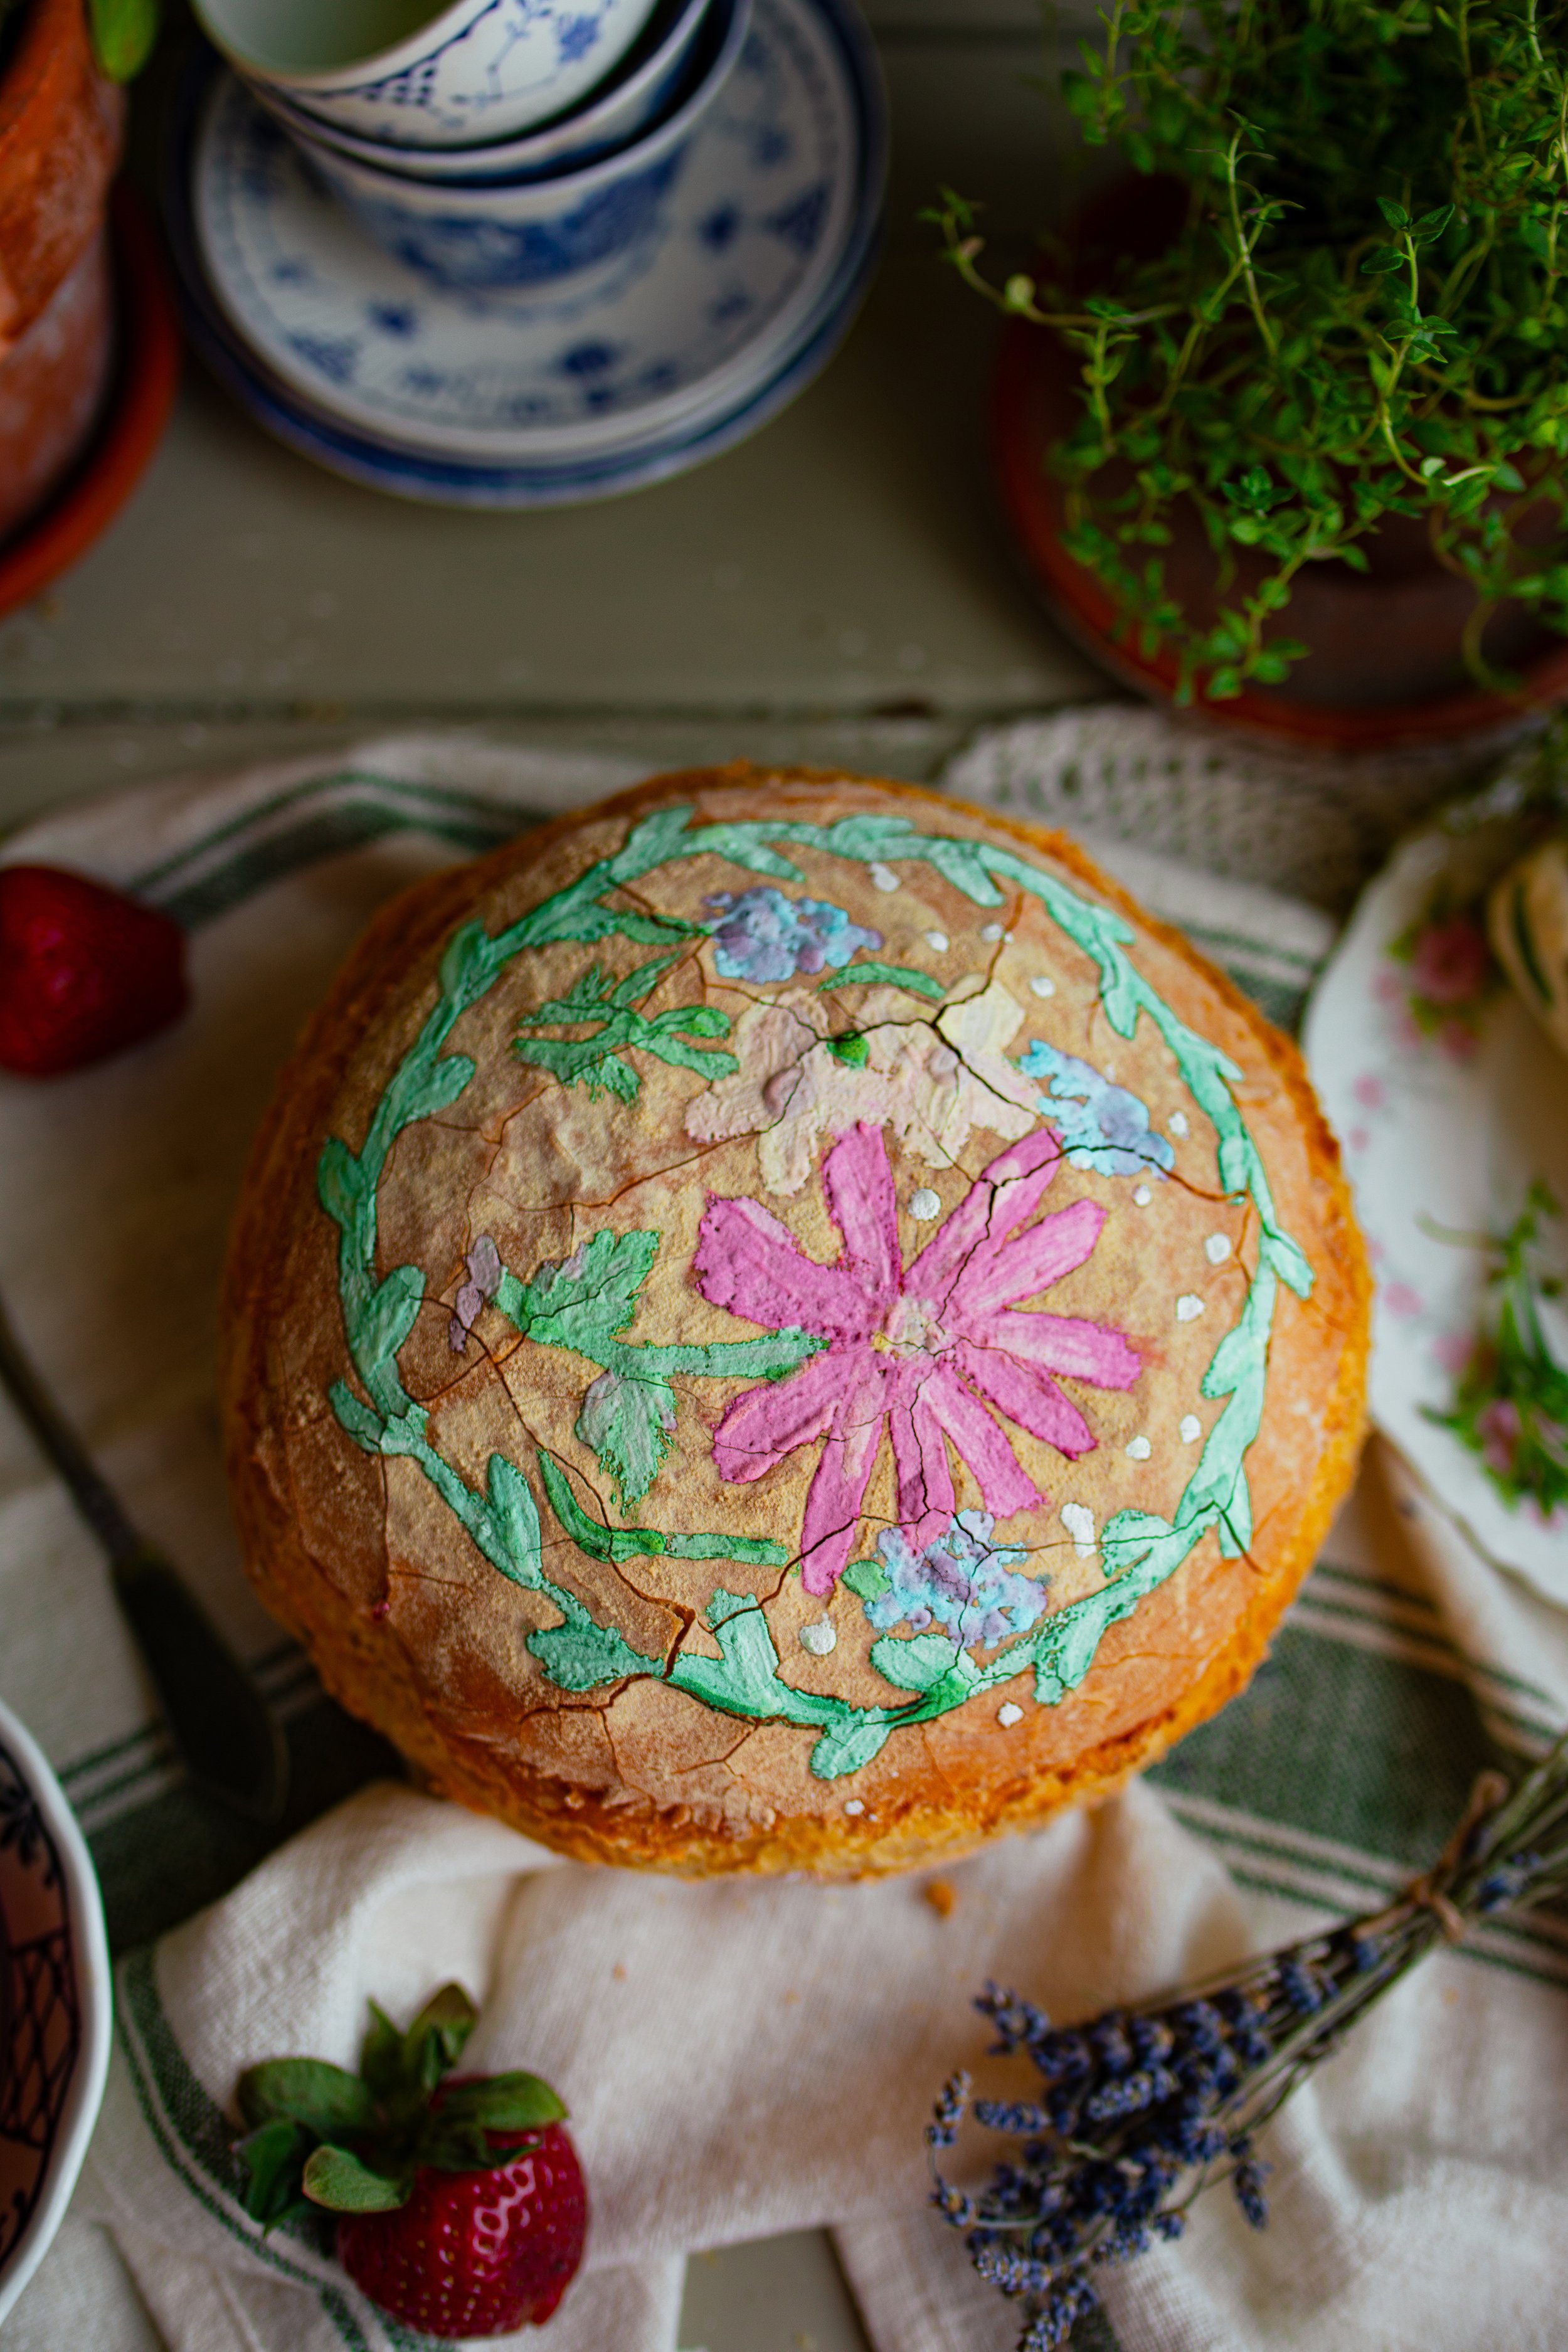
Step Two: Mix up your paints! For these thick, bright colors you will want to mix all of your colors with the liquid whitener. This helps the colors to stand out on the surface of the bread and mimic the look of acrylic paints. You can be as creative with this as you like, mixing together the colors on your artists palette. The colors I made did not actually turn out as soft as I was hoping and were quite bright - I’ll have to practice more!

Step Three: After your bread has almost finished its final proof, about 10 to 15 minutes before it’s ready to go into the oven, begin painting your design.
There is really not much advice I can give here, as your art will be unique to you! I do know that painting flowers and leaves is a perfect option if you do not consider yourself an artist. Personally, I am a terrible painter/drawer (my mom is the person who illustrates anything you see on our website/shop!), but I decided to just let myself have fun.
Making basic shapes and blending colors was really relaxing, and I think this is a creative outlet that anyone can do and enjoy. There are so many sources of inspiration on Pinterest and social media! I love this design (@jaclynnrenee30 on Instagram) and this design (@handmade.farmhouse on Instagram).

Step Four: Score your bread. With a bread lame or serrated knife, score a design on your bread. If you create a design similar to mine, I would suggest scoring a full circle around the bottom edge of the design so that it does not interfere with your painting! You could also plan a more complex score, like leaves, and have your painting interweaved within that design.
Step Five: Bake your bread according to your recipe’s instructions! Then enjoy!

Tips for the Best Painted Bread
Pre-plan your design. This kind of goes without saying, but I just went into this project with few expectations and no plan! My design certainly could have been much better, but like almost everything in my life, I just went for it. If you have a certain design in mind, you may want to pre-plan where it will go and where to score your bread as the final bake may change the final design!
Pre-mix your colors. Just like pre-planning your design, pre-mixing your colors can be helpful in achieving the color palette that you want before feeling rushed to paint your design. These food colors were a new brand to me, so I was not quite sure of the results that I would get. They have several other colors, too, but I thought this pack would blend together nicely. They were much brighter than I was originally planning and they did not dry up excessively so I could have spent more time blending the paints.
Keep brush strokes light. Do not put too much pressure on your dough as you paint to avoid deflating the dough, which will result in a dense crumb.
Use a plastic palette and not paper plates. I ended up using paper plates to mix my colors as I could not find my paint palette. This was a poor choice as the paints began to soak into the paper plates!
Remove excess flour. The next time I try this, I will be wiping away any excess flour on top of the loaf with a damp cloth. The flour would clump up on the paint brush, which would interrupt my strokes and then mix into the paints on the plates.
Variations
Botanical Art: Add real edible flower petals or herbs to your design (laminate into dough or use dry ingredients on top).
Themed Loaves: Paint fruit, fall leaves, or seasonal themes for different holidays.
Flavored Dough: Try adding rosemary, lemon zest, or roasted garlic to the dough for a savory twist.

Serving Suggestions
This delightful crusty bread recipe makes a show stopping addition to garden parties or a spring charcuterie board with cheeses and jams. This is a perfect cottagecore bread to bring along on a picnic with homemade spreads and dips like my Wild Violet and Lavender Herbal Compound Butter. Try pairing it with my Wild Cream of Mushroom Soup or Dill Radish and Cucumber Salad.
Storage Instructions
Store uncut loaf at room temperature wrapped in a clean towel or bread bag for 2 to 3 days
Slice and freeze individual pieces for up to 2 months

Frequently Asked Questions
Is it safe to paint on bread?
Yes! For this recipe I used gel food coloring and liquid whitener made specifically for gel food coloring to create edible paints. While these ingredients are not natural, they are edible. There are other options if you are looking to avoid food coloring, though you will not achieve the same results without the liquid whitener as it really helps the colors to mimic the look of acrylic paints. Thankfully, Chefmaster also makes gel food colorings that are derived of natural ingredients!
Can I use natural food dyes instead of gel coloring?
Yes! Beet powder, matcha, turmeric, and activated charcoal all work. Just mix with a drop of water to form paint.
Does the paint affect the flavor of the bread?
No—the amount of coloring used is minimal and doesn't alter the taste.
Can I make this gluten-free?
This specific loaf relies on gluten structure. A gluten-free version would need a different recipe base.

final thoughts:
In the end, I think that this floral painted bread turned out really pretty for a first attempt! I absolutely loved expressing my creativity with this simple yet lovely baking technique. It was the perfect spring bake to make. If you love flowers and bread and painting, then I would highly recommend making your own beautiful painted bread recipe. This painted bread recipe is an excellent way to personalize your baking!
xoxo Kayla
My dress is the Edwina 22 from Linennaive (gifted).

Floral Painted Country Loaf Bread
Ingredients
- 1 1/2 cups (360 ml) warm water
- 1 tbsp (12 g) active dry yeast
- 1 tbsp (15 ml) honey
- 1 tbsp (18 g) kosher salt
- 4 cups (500 g) all-purpose flour
- Liquid whitener
- Gel food coloring
Instructions
- Begin by combining the water, yeast, and honey in a large bowl. Gently whisk and let the mixture sit for about 5 to 8 minutes, or until the yeast blooms or grows and becomes bubbly. Then, whisk in the salt.
- To this mixture, begin slowly adding the flour You may do this by hand with a dough whisk or wooden spoon. Otherwise, mix in an electric standing mixer with a dough hook attachment. Begin first with the spelt flour, fully mixing in before adding the all-purpose flour, about 1 cup (130 g) at a time.
- Knead flour into the dough until the dough no longer clings to the sides of the bowl or to your fingers. Continue to knead for about 5 to 6 minutes, or until the dough is smooth, stretchy, and pliable. If it feels dense, then you have added too much flour. It should still be sticky, just not enough to clump up on your hands!
- Shape the dough into a ball and place it into a large lightly greased bowl. Cover the bowl with plastic wrap and let it rise until doubled, about 1 hour.
- Gently deflate the dough and stretch it by pulling at the corners. Then, fold the corners in to form another ball. Drag the ball towards you, with the seam side down, to tighten the loaf. Continue to do this until the dough feels nice and taught. Pinch the seam closed.
- Place a lightly floured kitchen towel in a bread banneton. Place the bread with the seam side up in the banneton and cover it with plastic wrap. If you do not have a bread banneton, or proofing basket, you can simply put the bread on a piece of parchment paper - the basket just helps the bread to hold its shape before baking, so you may have a more spread-out loaf.
- Meanwhile, preheat the oven to 425° F (218° C) and place a 5-quart (4.7 L) dutch oven in to preheat.
- Let the bread rise for about 40 to 45 minutes, or until nearly doubled in size. Mix your food colorings together with the liquid whitener to prepare for painting. During the last 10 to 15 minutes of proofing, paint your bread.
- If you used a proofing basket, flip the bread out onto a piece of parchment paper. Paint on your design with paint brushes only used for food. Score the loaf with a bread lame or serrated knife in any design that you like to accompany your painting. Then, carefully lift the parchment paper up and into the hot dutch oven.
- Close the lid of the dutch oven and bake the bread for 35 minutes, covered. After 15 minutes, remove the lid and continue to bake the loaf, uncovered, for 15 to 20 minutes, or until the bread is a deep golden brown and it sounds hollow when tapped upon with the tips of your fingers.
- Let the bread rest for at least 30 minutes before slicing.
Notes
- If you would like to omit the spelt flour, simply replace with 1 cup (130 g) all-purpose flour.
Nutrition Facts
Calories
1897Nutritional information is only an estimate. The accuracy of the nutritional information for any recipe on this site is not guaranteed.