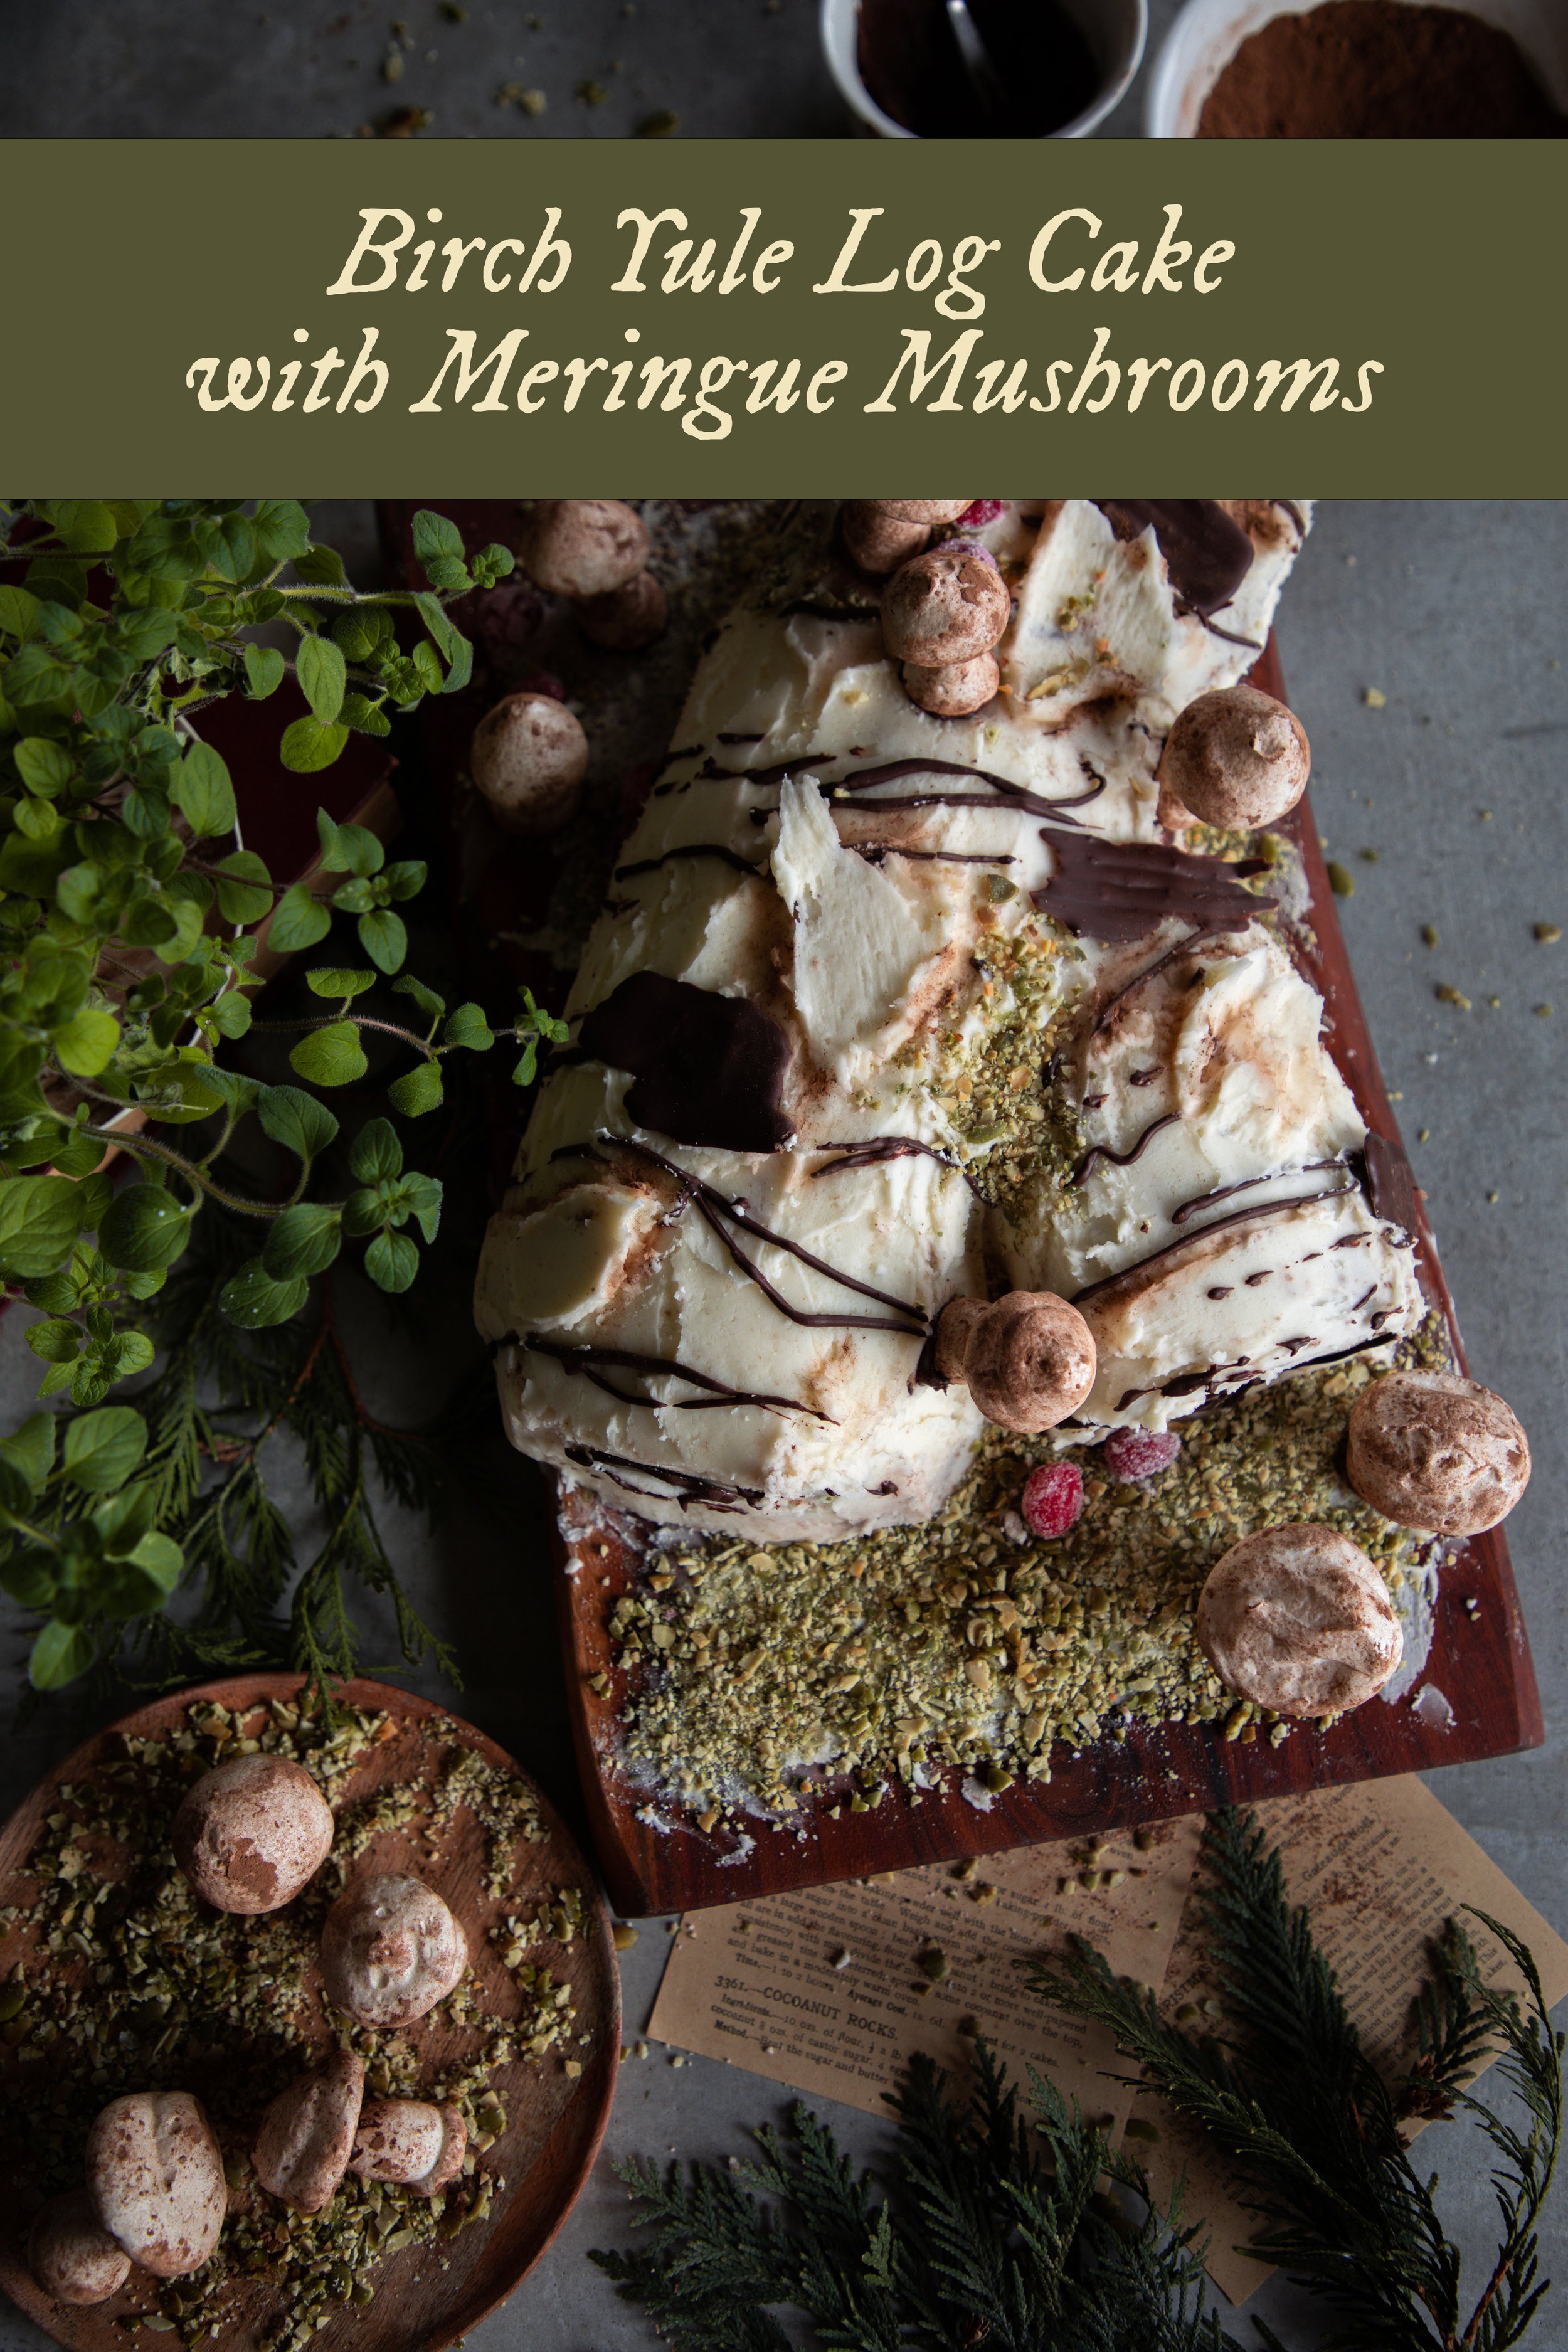
Birch Yule Log Cake with Meringue Mushrooms
Happiest Yuletide to you!
This cake was a labor of LOVE. Oh my. Truthfully, this cake took me a full week to make. I would not recommend taking that long if you plan to bake this yourself. With work, small children, and the holiday season… I had to break this up in to many parts. You will luckily not have that problem, if you do make the cake, because you do not have to figure out the recipe calculations like I did!
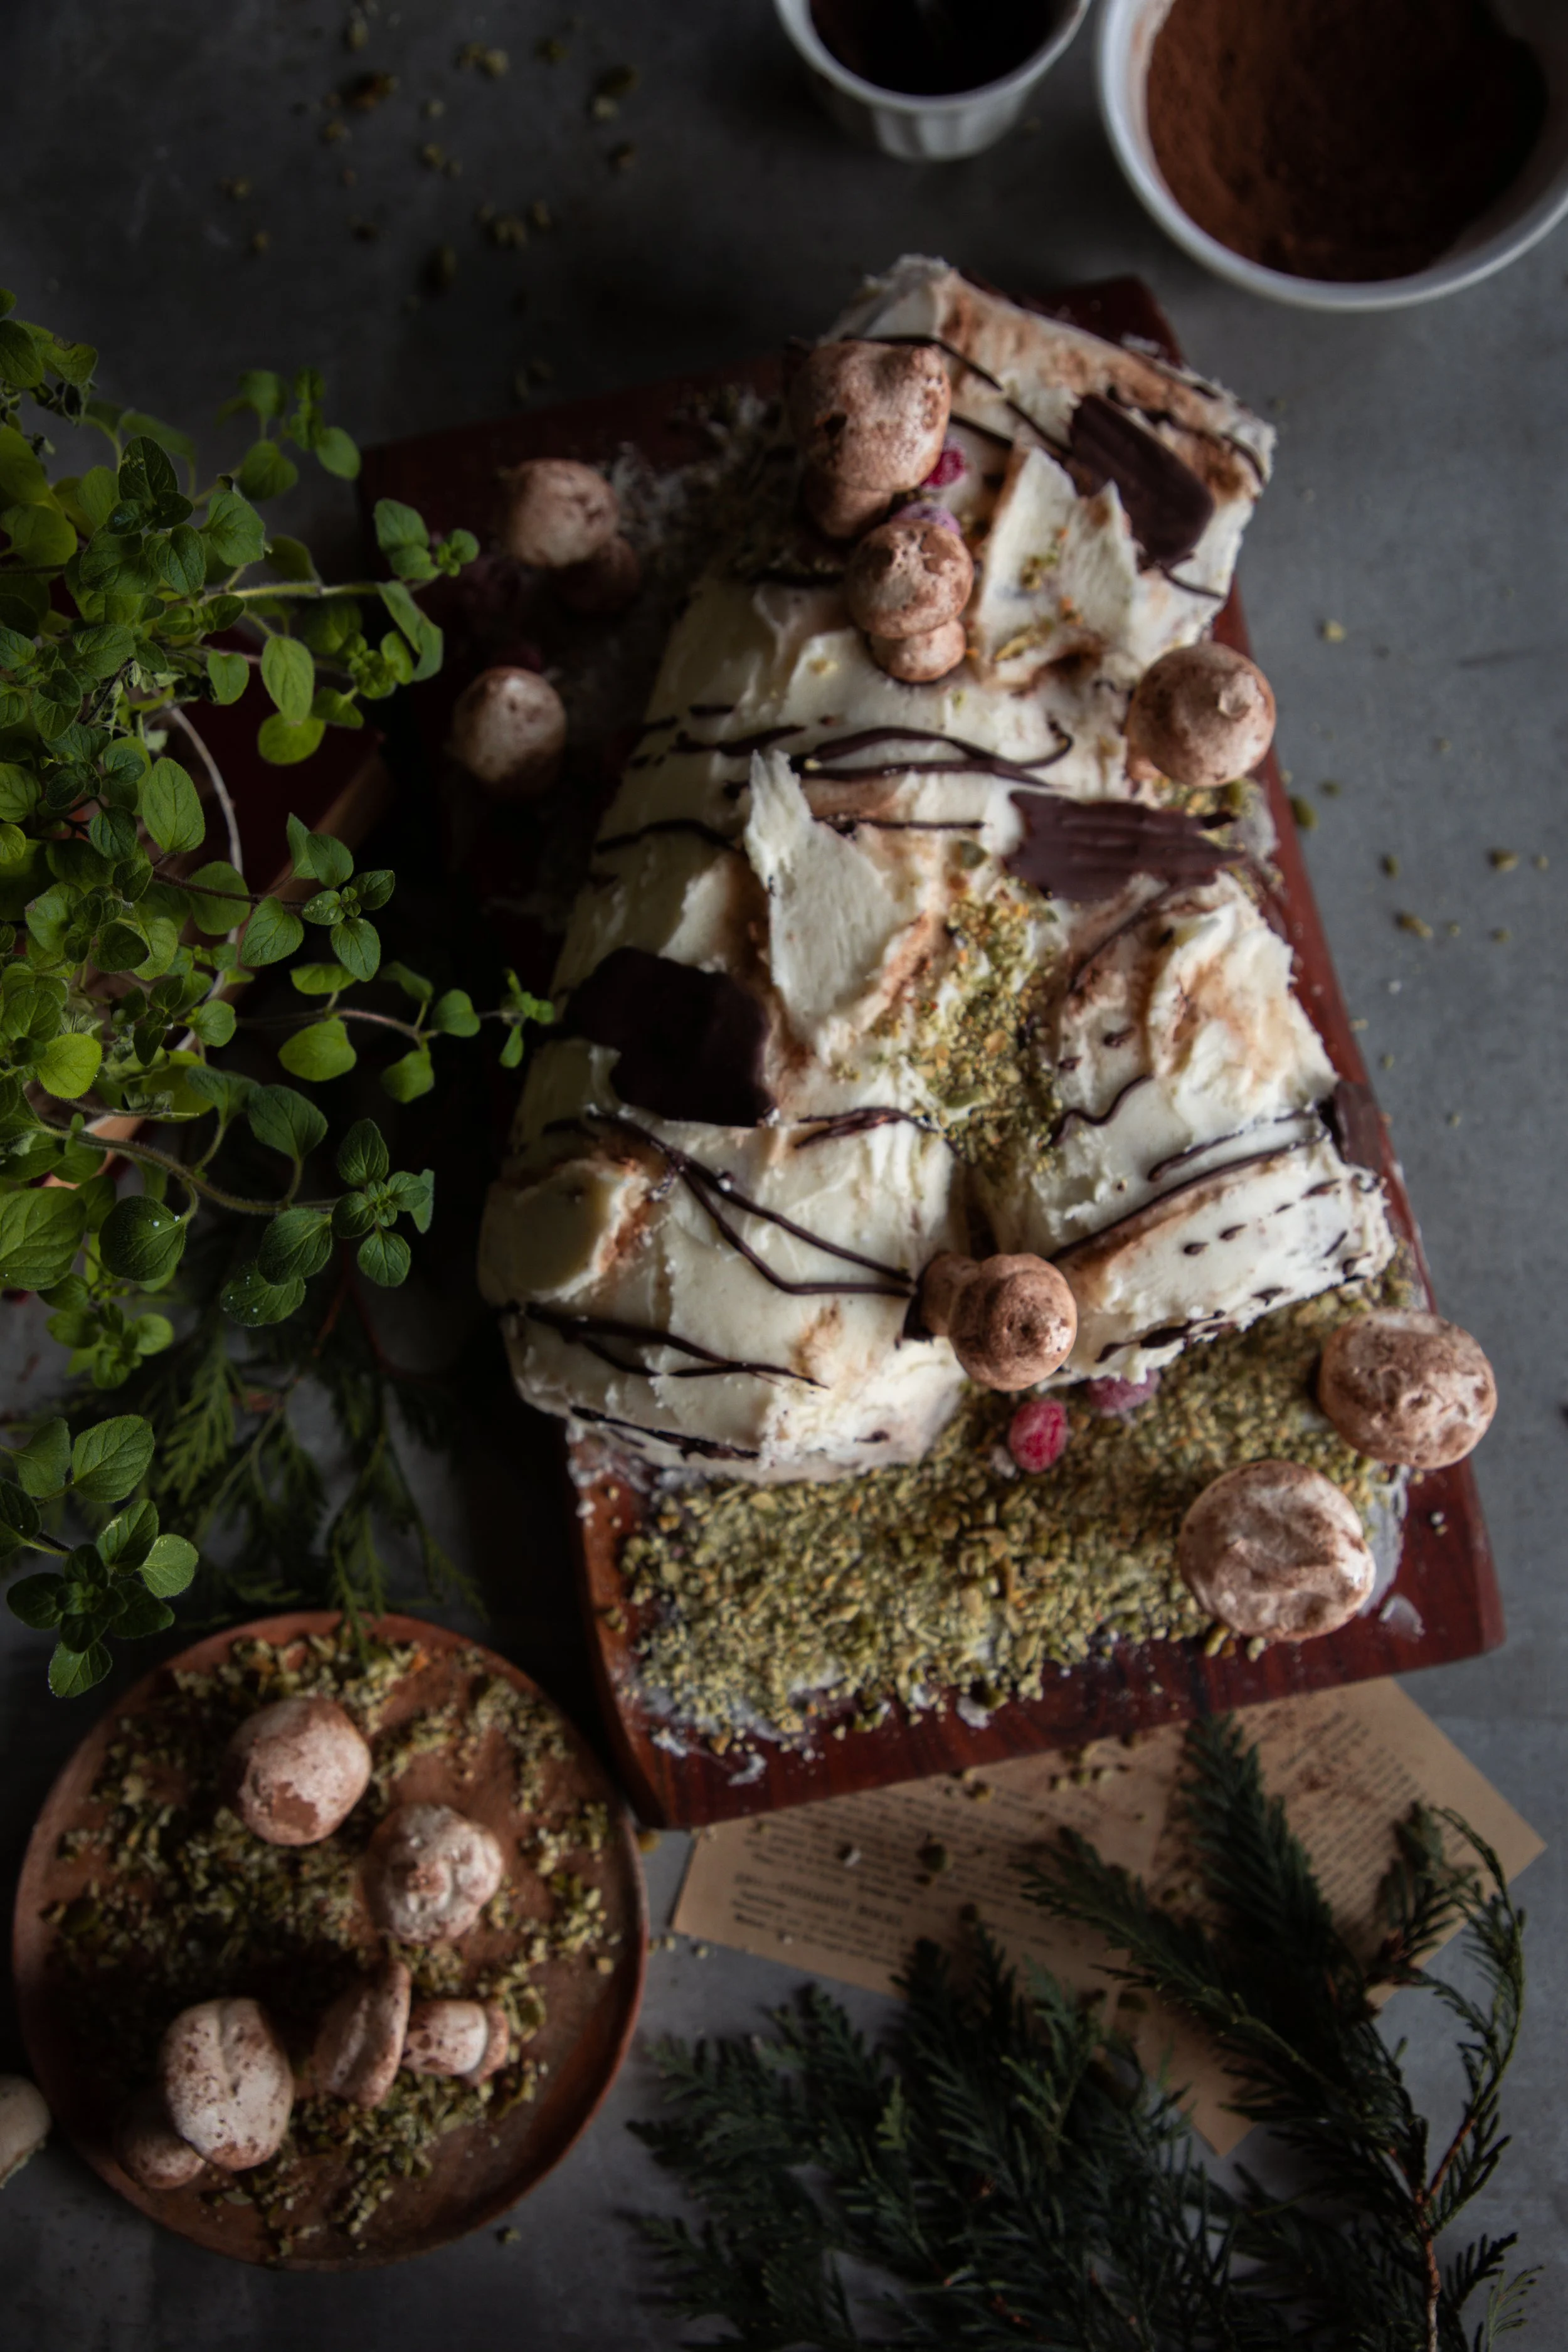
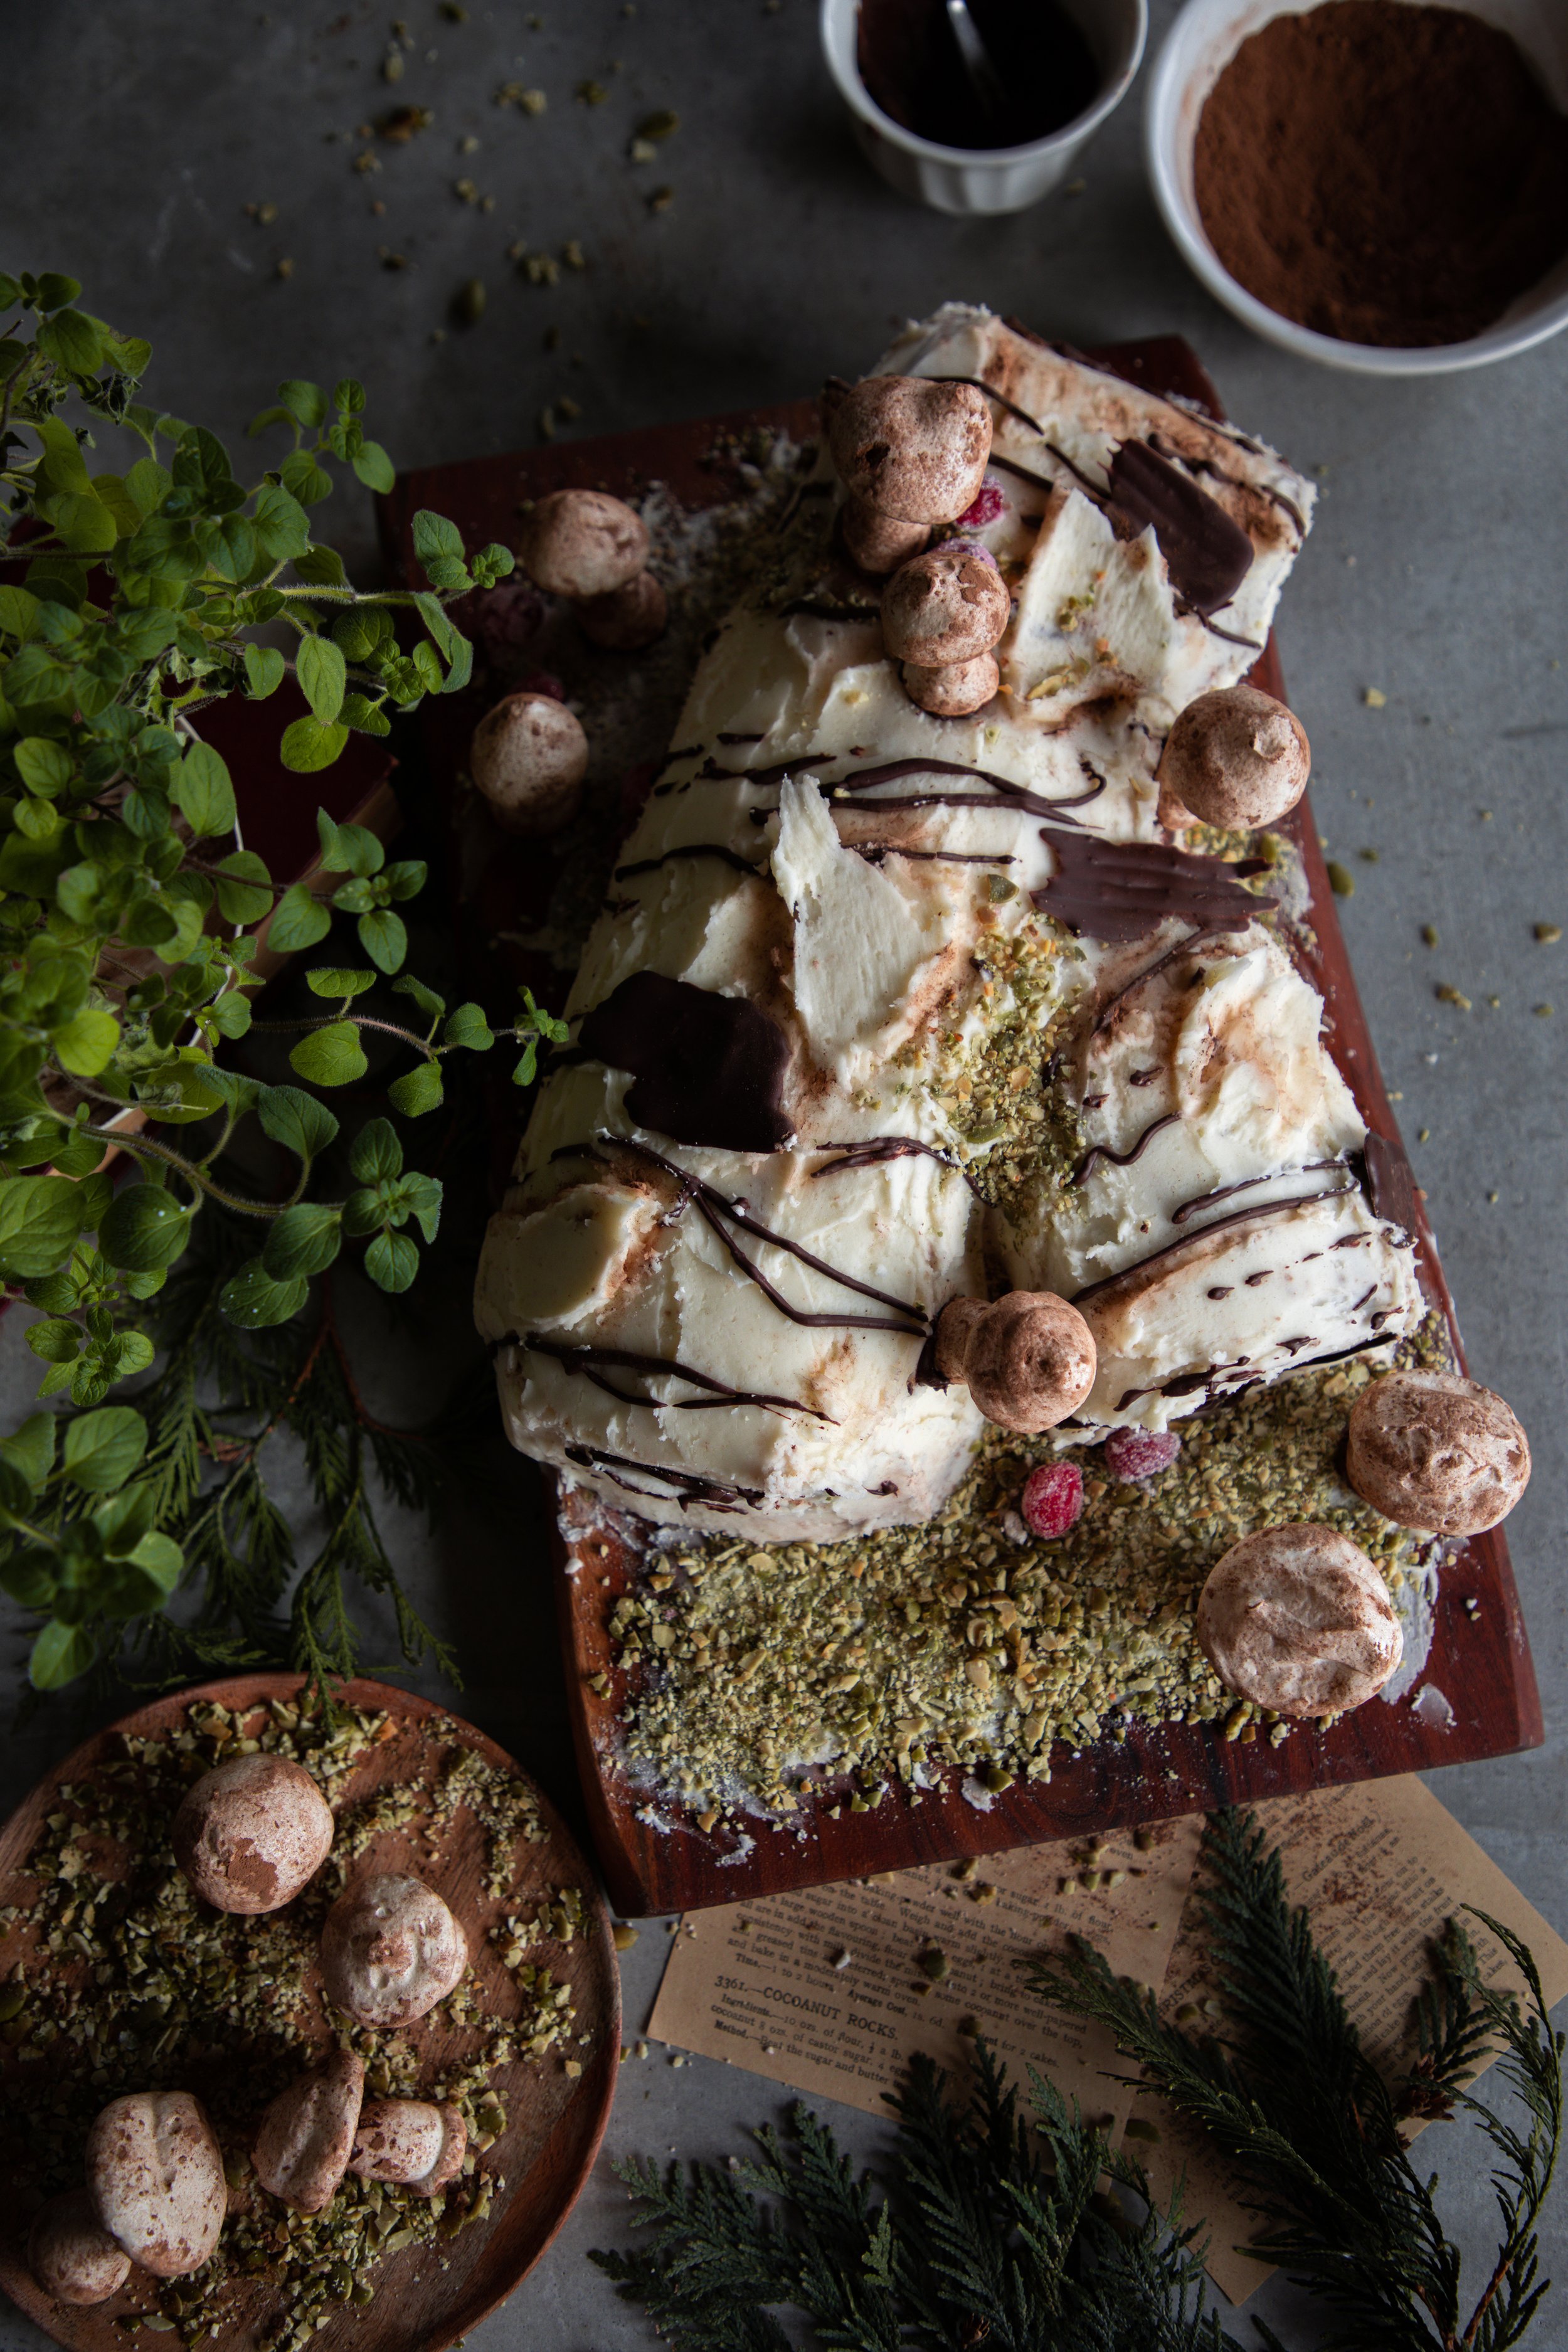
I wanted to make a Yule log cake this year that stood apart from others that I have made in the past. I do love a traditional looking Yule log, covered in brown colored buttercream and shaped with the tines of a fork to look like bark. I decided to go with a birch log, and I absolutely love how it turned out! It was so fun to build this somewhat realistic looking cake and make it feel as if it came out of the prettiest and magical woodland, covering with mushrooms and sugar-coated cranberries. Everything is edible!
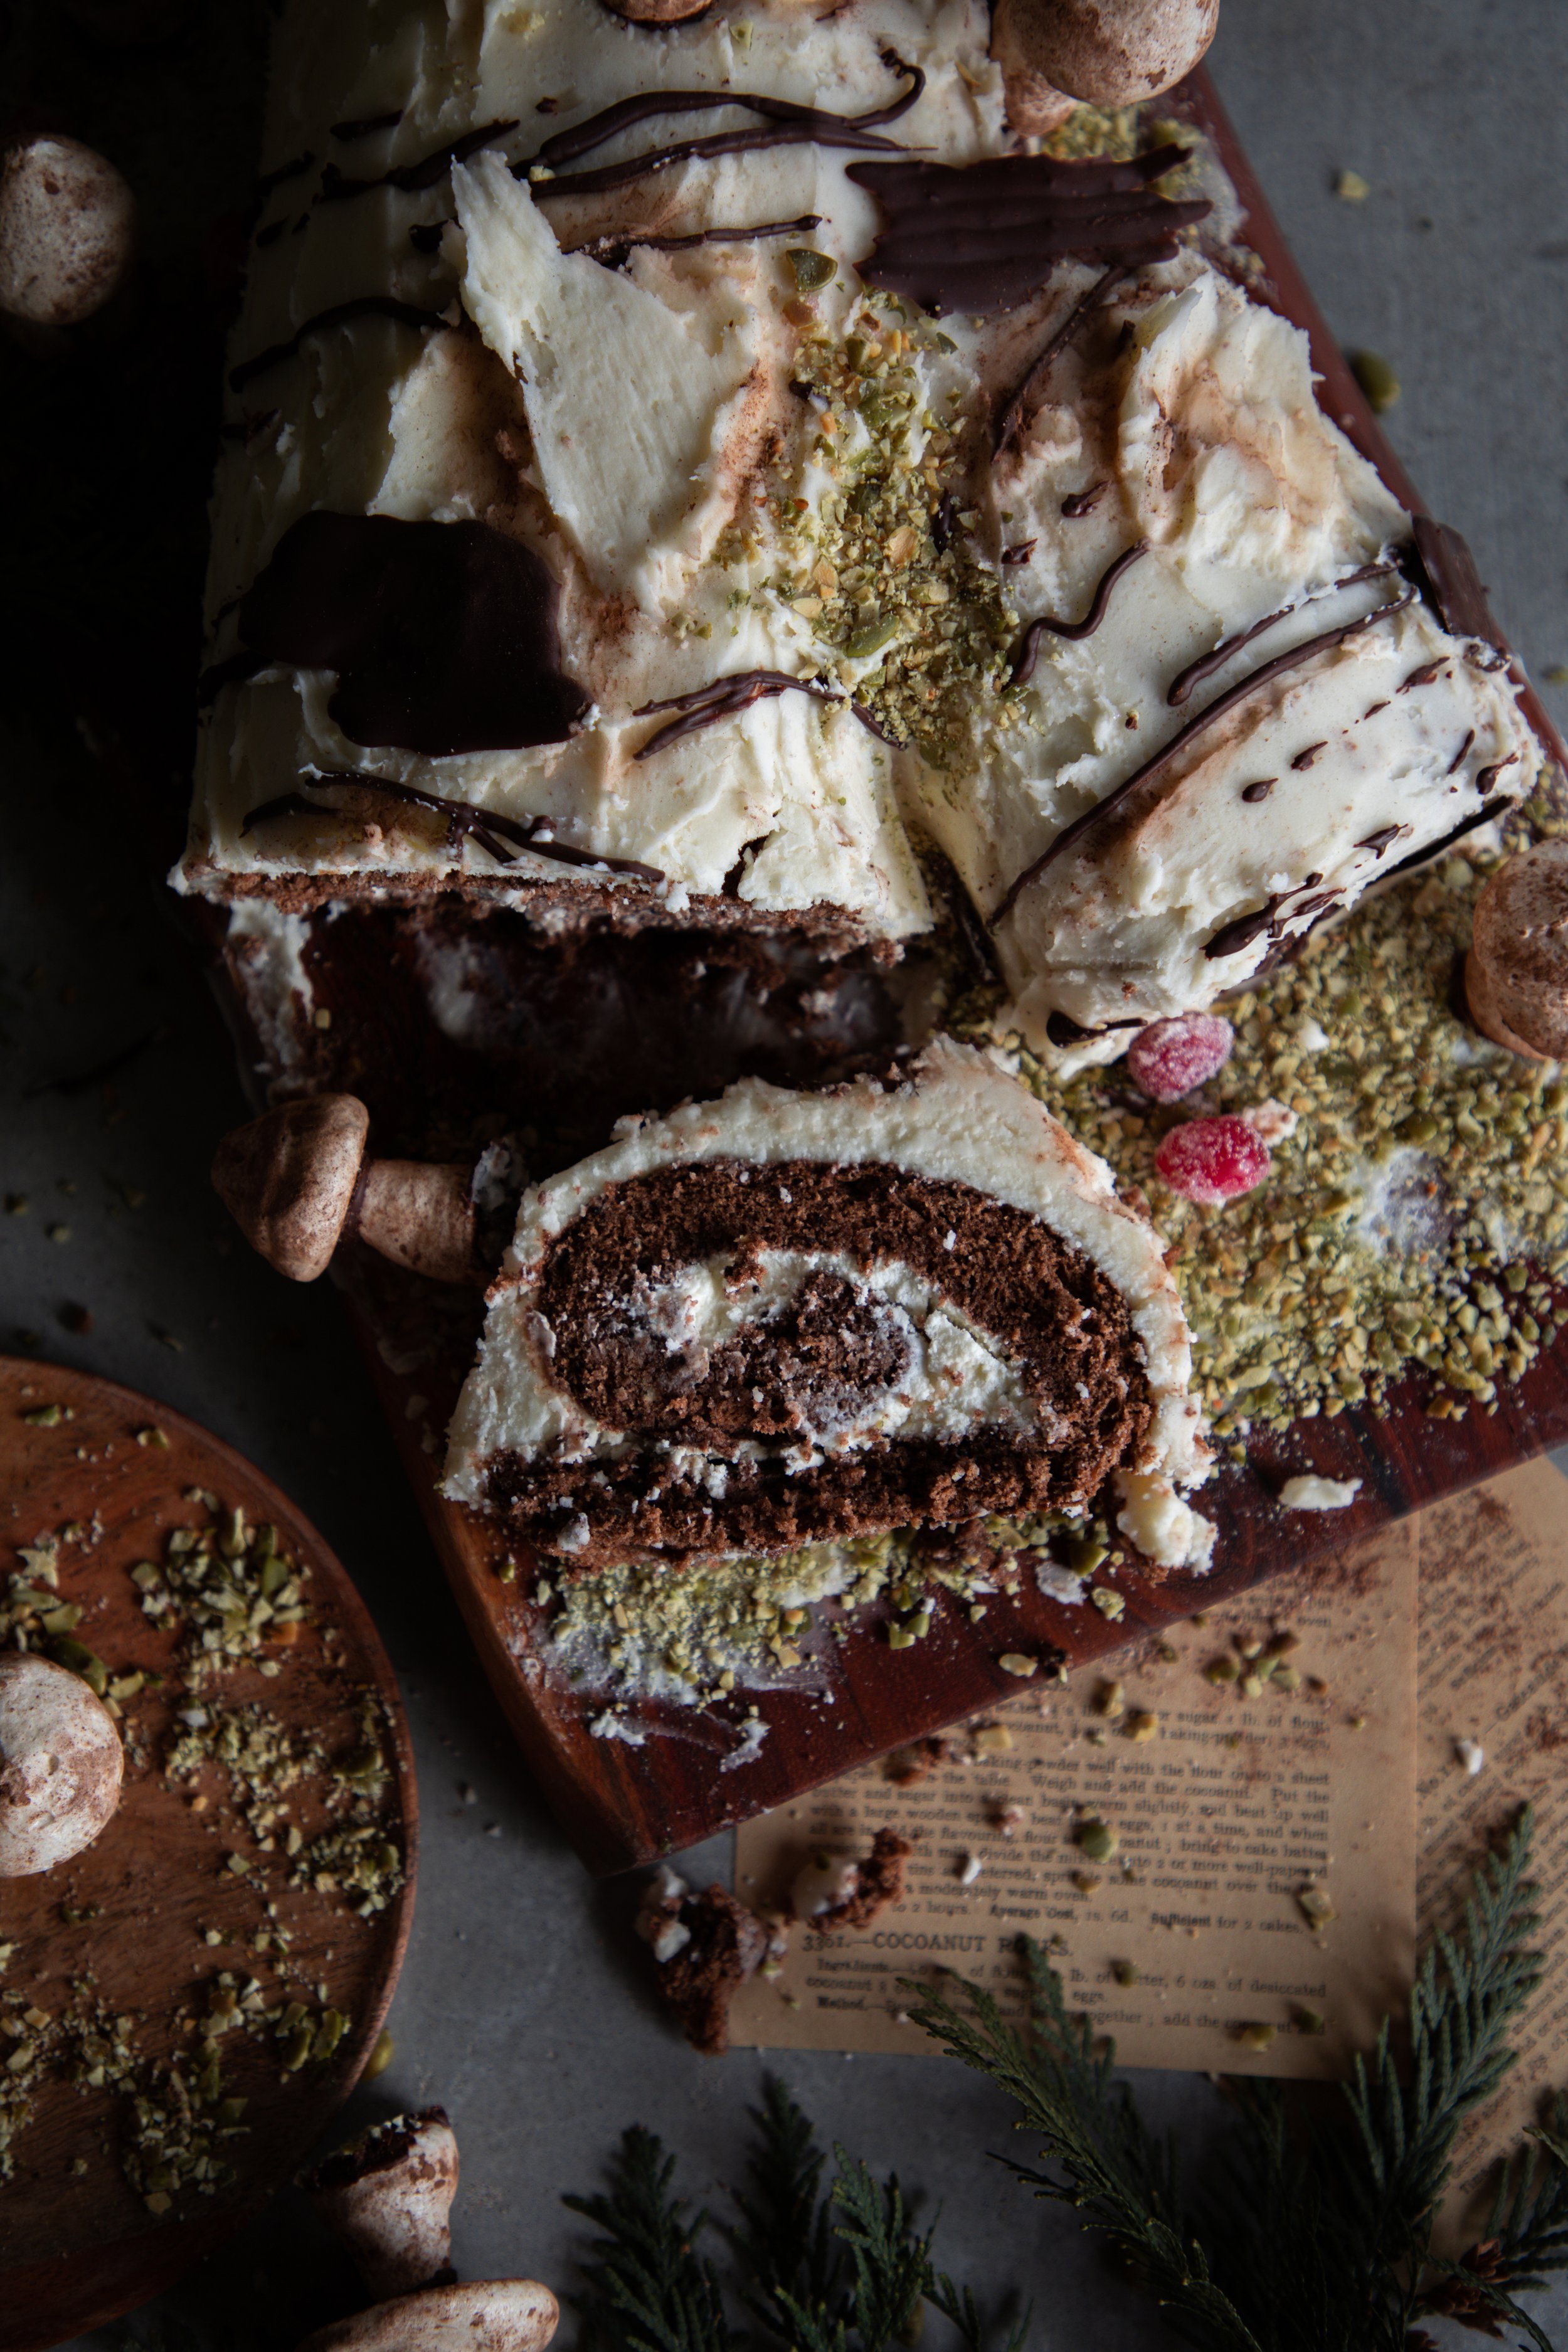
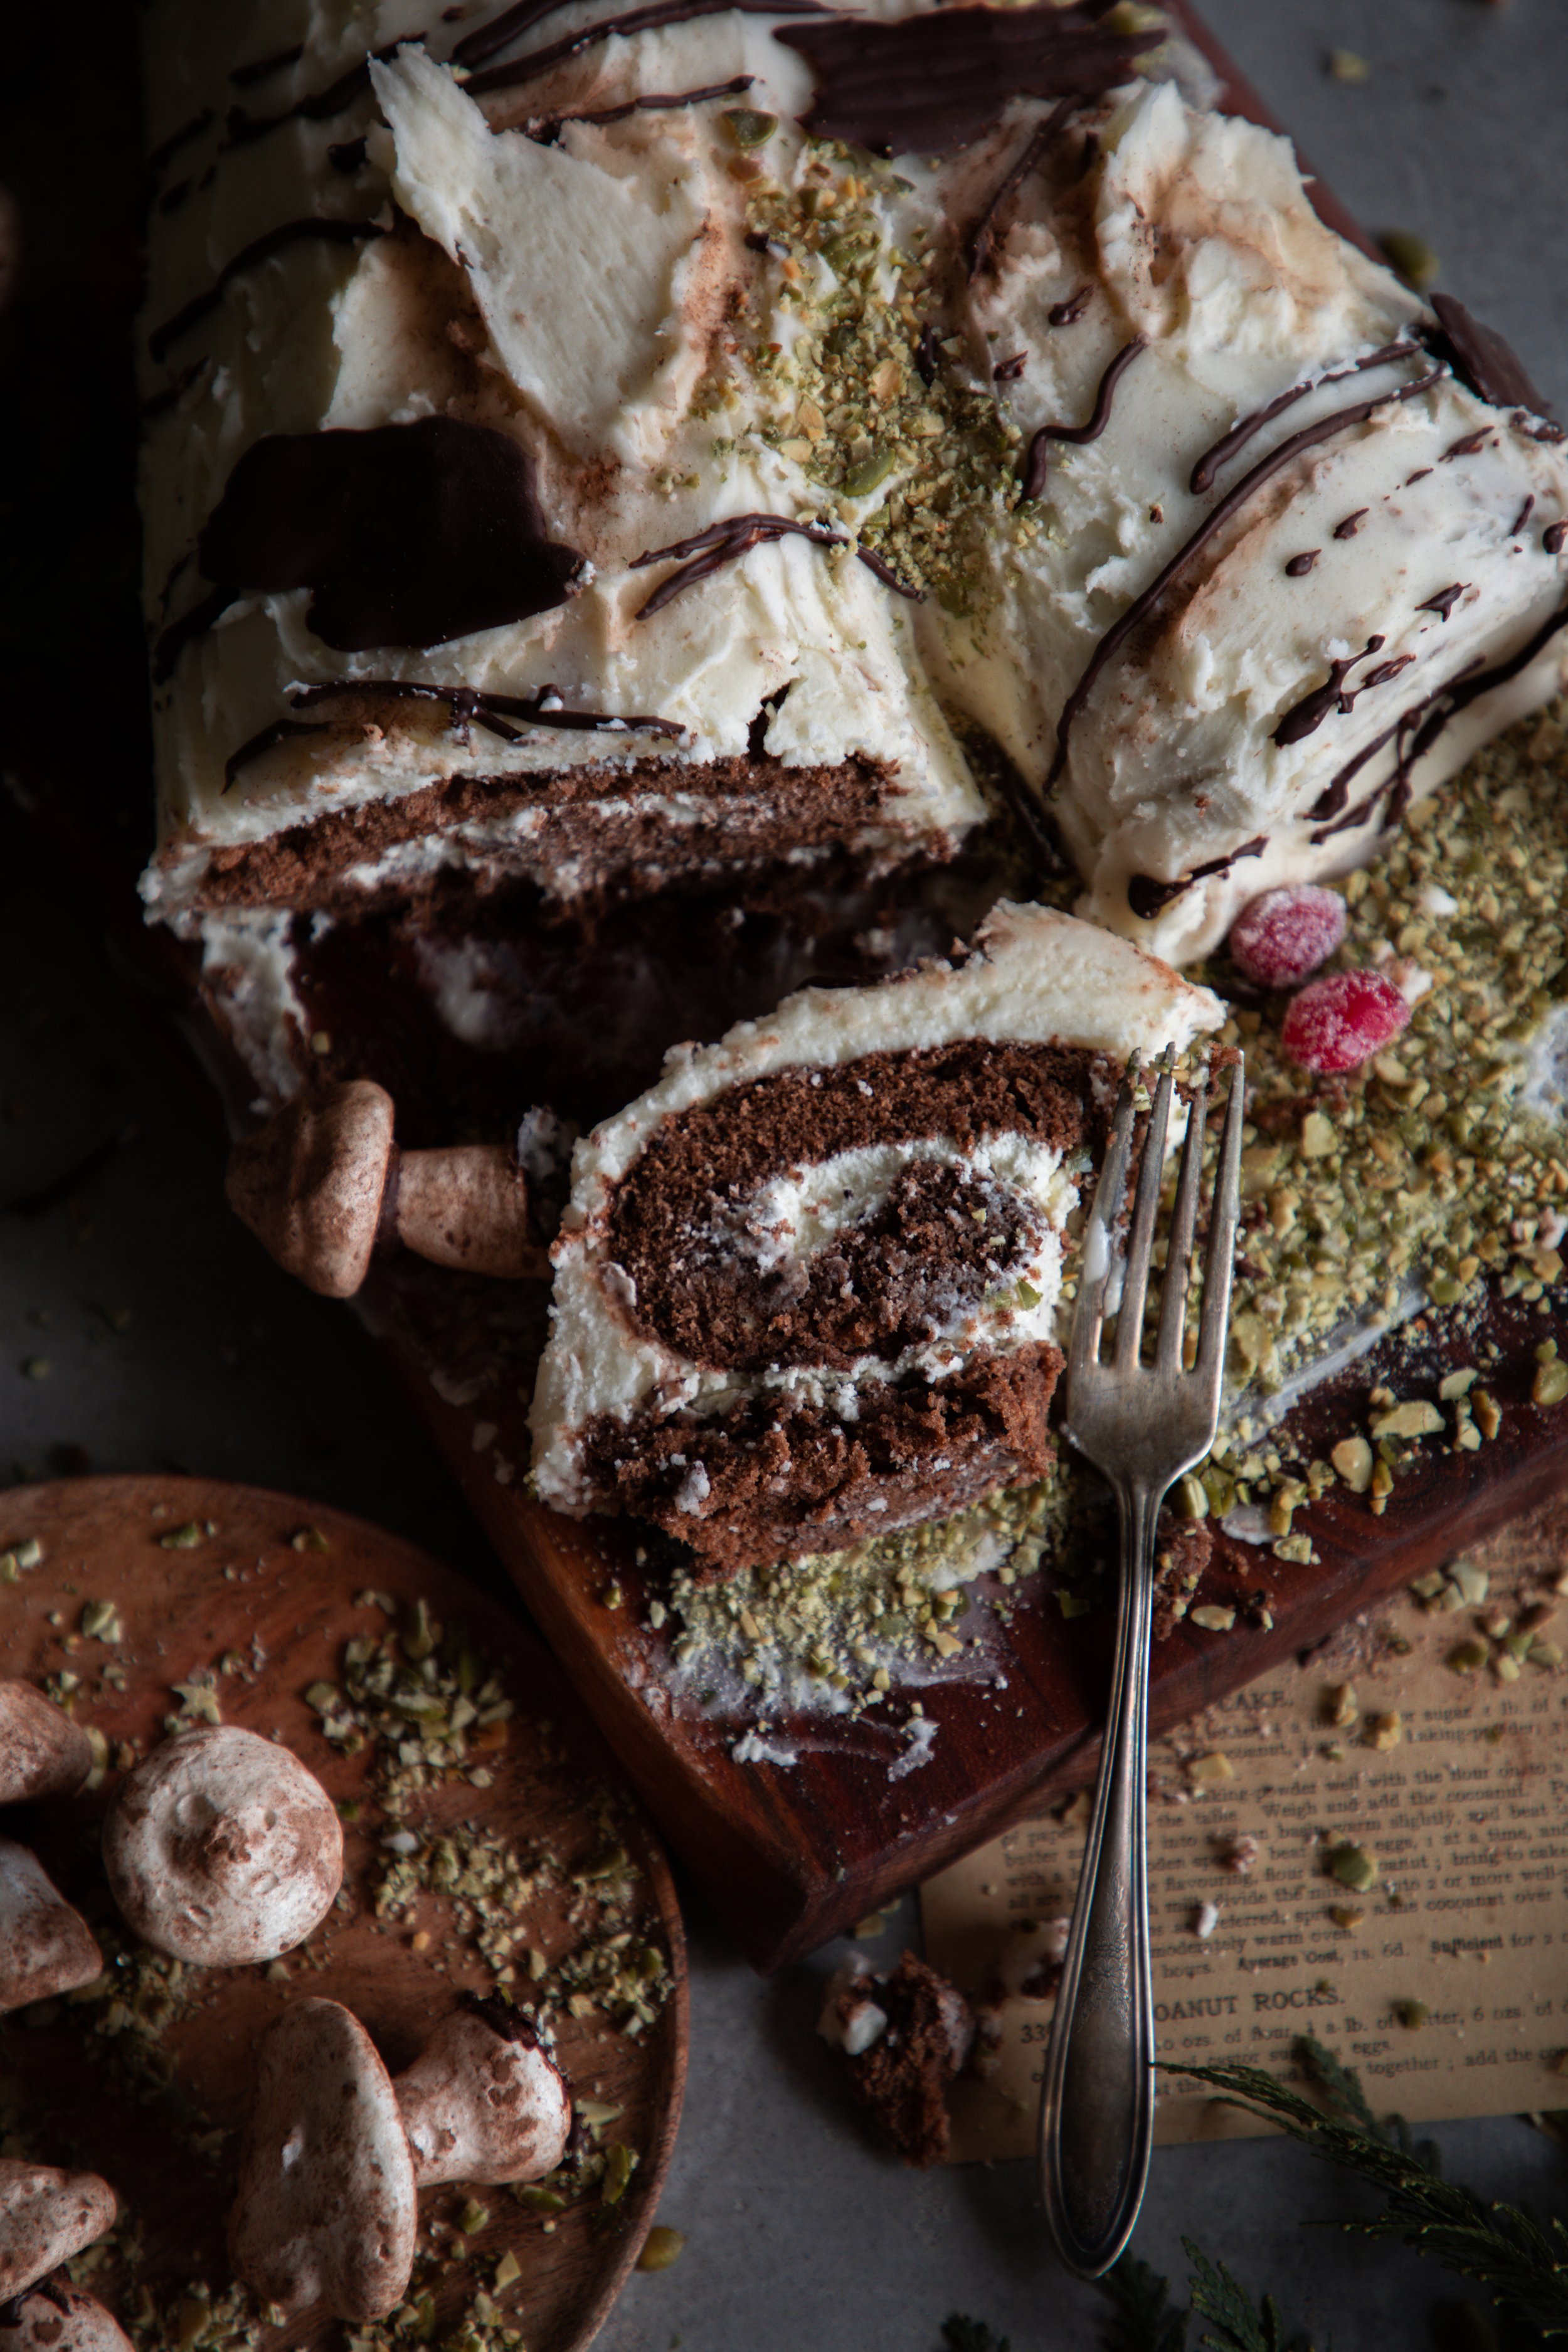
This cake is a classic sponge with a folded in meringue. It is a chocolate sponge baked in a jelly roll pan and rolled up with a whipped cream frosting. I actually made two separate cakes to create this beauty, and I used a vanilla whipped cream frosting in one and a mocha flavored cream filling in the other. They both tasted fantastic! Jill enjoyed the mocha cream best, and I like the vanilla. It looks like a classic ho-ho snack cake.
The frosting is a peppermint flavored buttercream, as I wanted to keep the coloring pure white. I covered the outside in drizzled semisweet chocolate, crushed pumpkin seeds, sugared cranberries, and meringue mushrooms. Read on for the recipes!


making the meringue mushrooms:
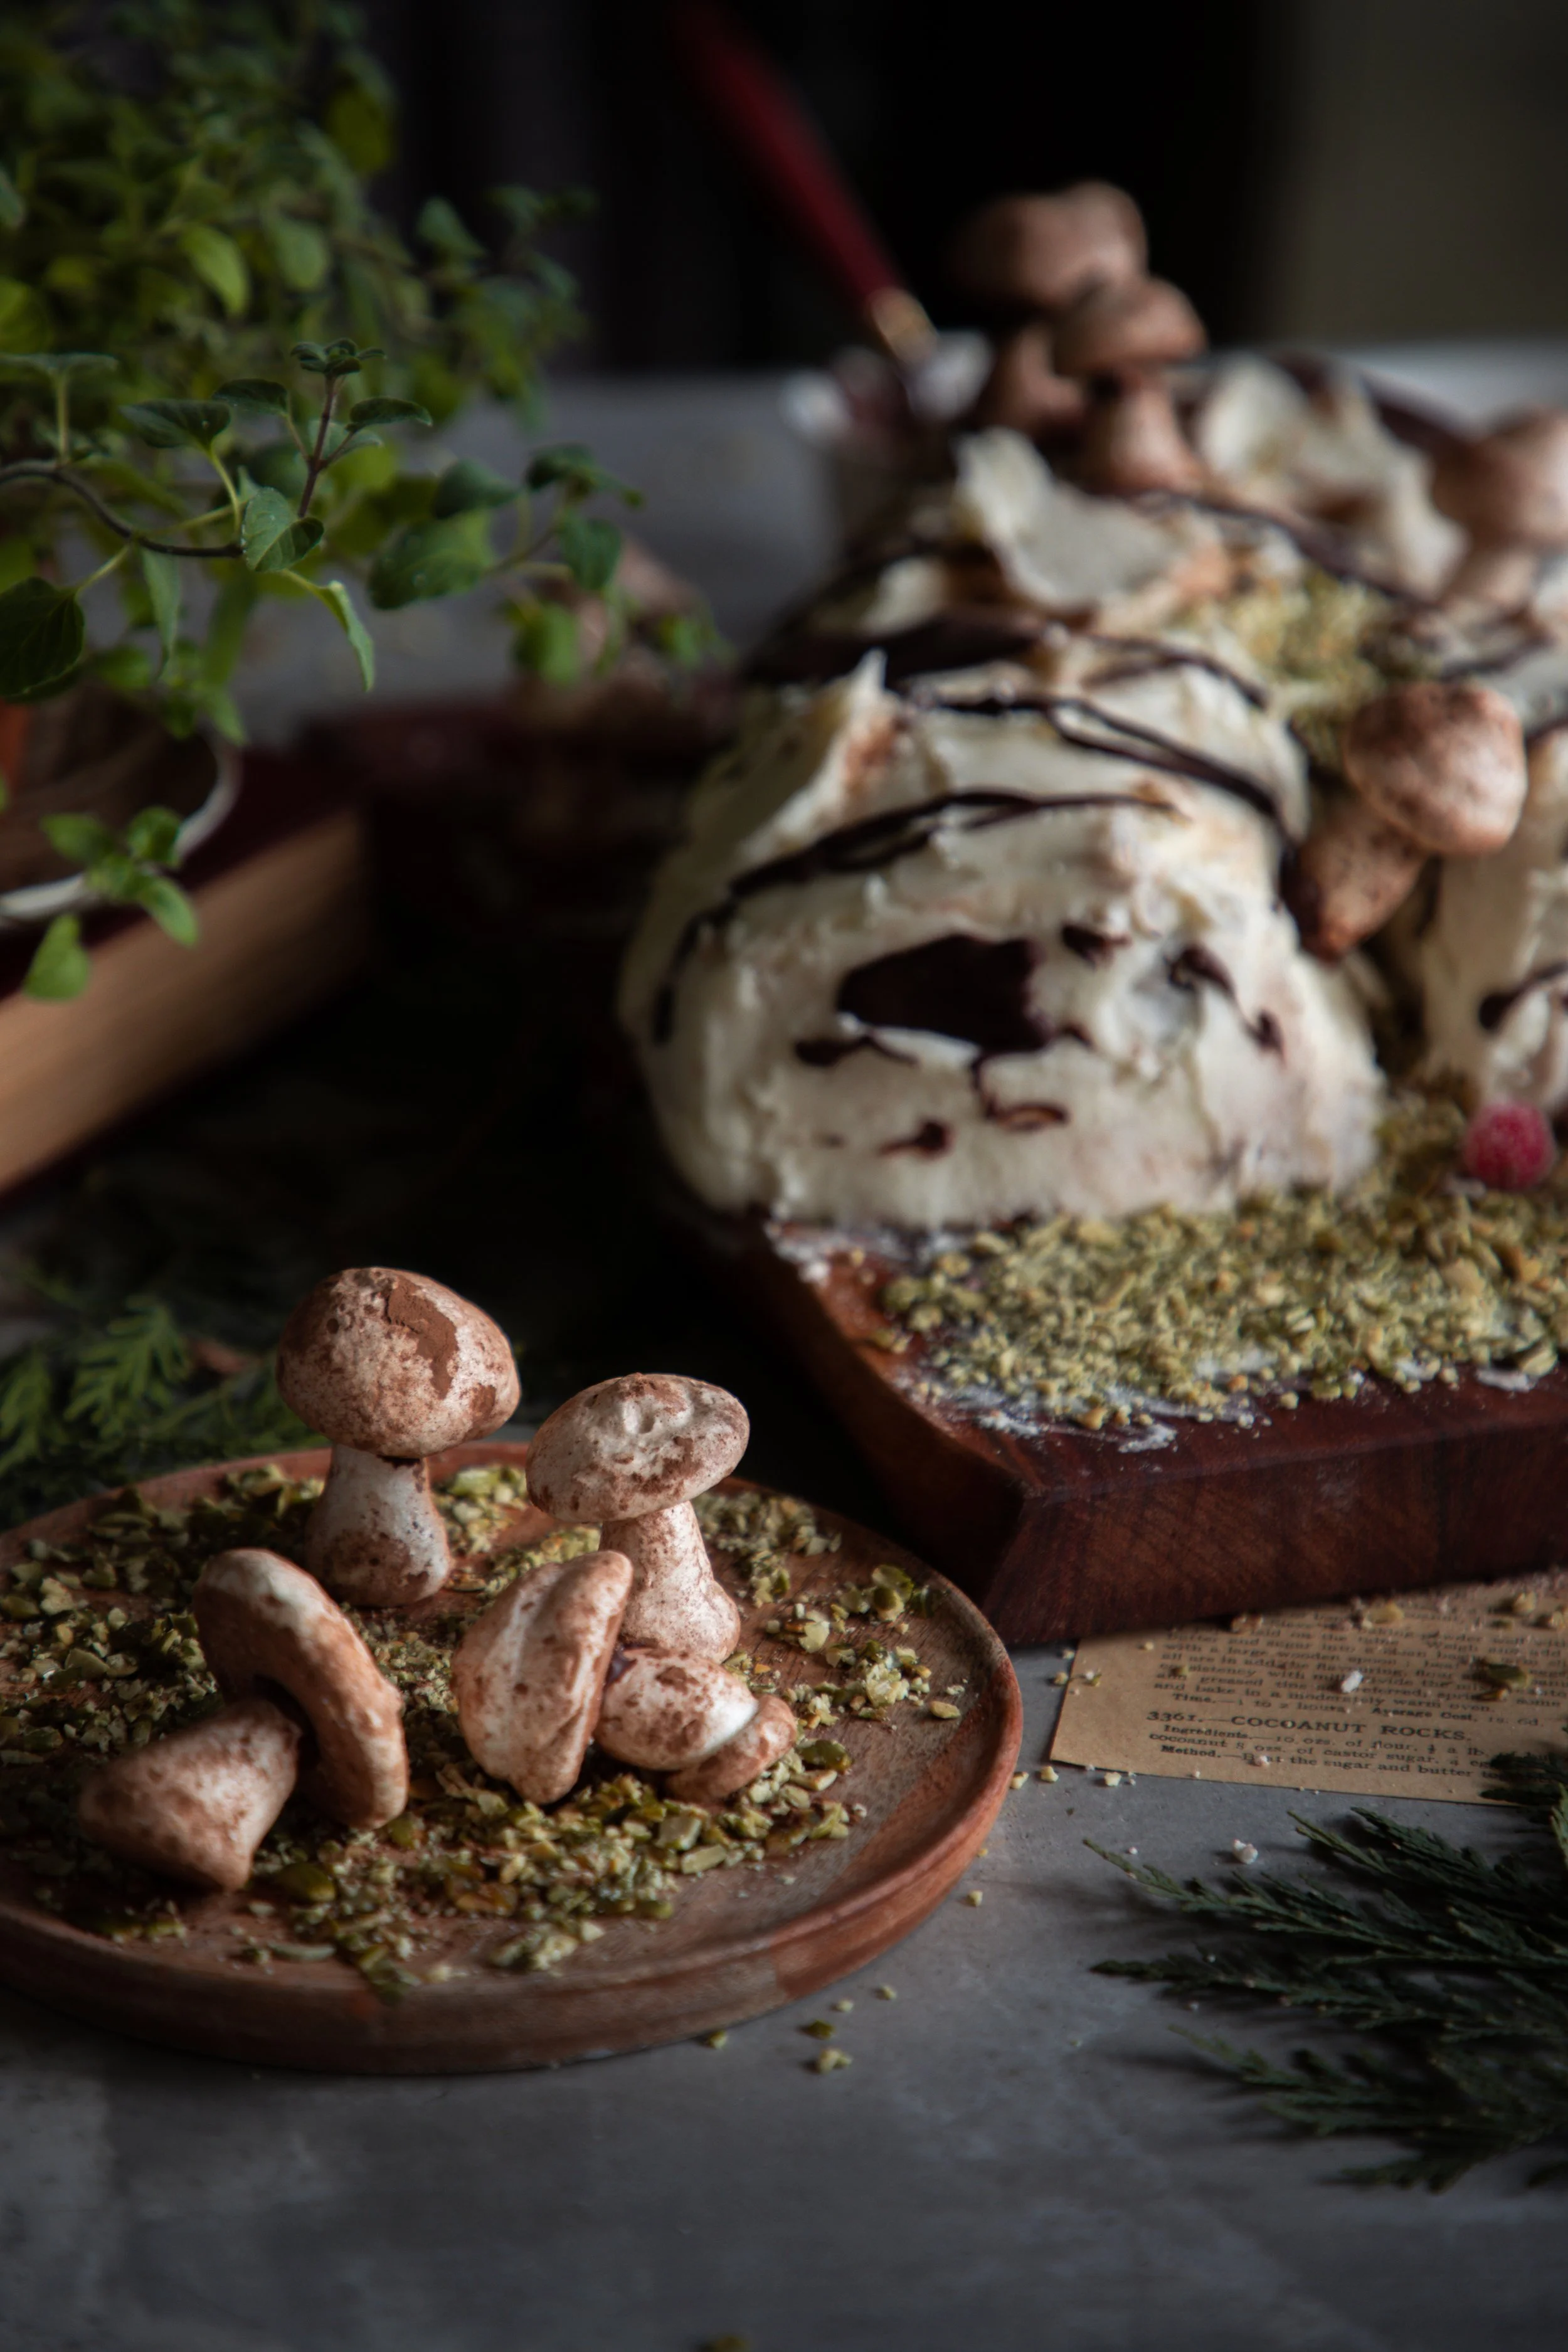
Meringue mushrooms are actually quite simple to make, and they turn out so realistic looking! I absolutely am obsessed with making them. You need a stiff meringue, a piping bag, and a round piping bag tip about size 808 or 12. The tip should be on the larger side.
Once the meringue is whipped to stiff peaks and can stand on its own, scoop it into the piping bag. Pipe the mushrooms onto a large baking sheet with parchment paper. Make large round mounds for the mushroom caps and tall stalks for the mushrooms stalks. They should stand up on their own, but some might topple over or lean over. Don’t fix these! These make excellent mushrooms with interesting stalks, and they can be attached to the side of the cake as if they are growing from the side and up towards the sun. It’s very realistic!
Bake the meringues at 200° F for 1 hour and 30 minutes, turn off the oven, and let them cool to room temperature inside of the oven.
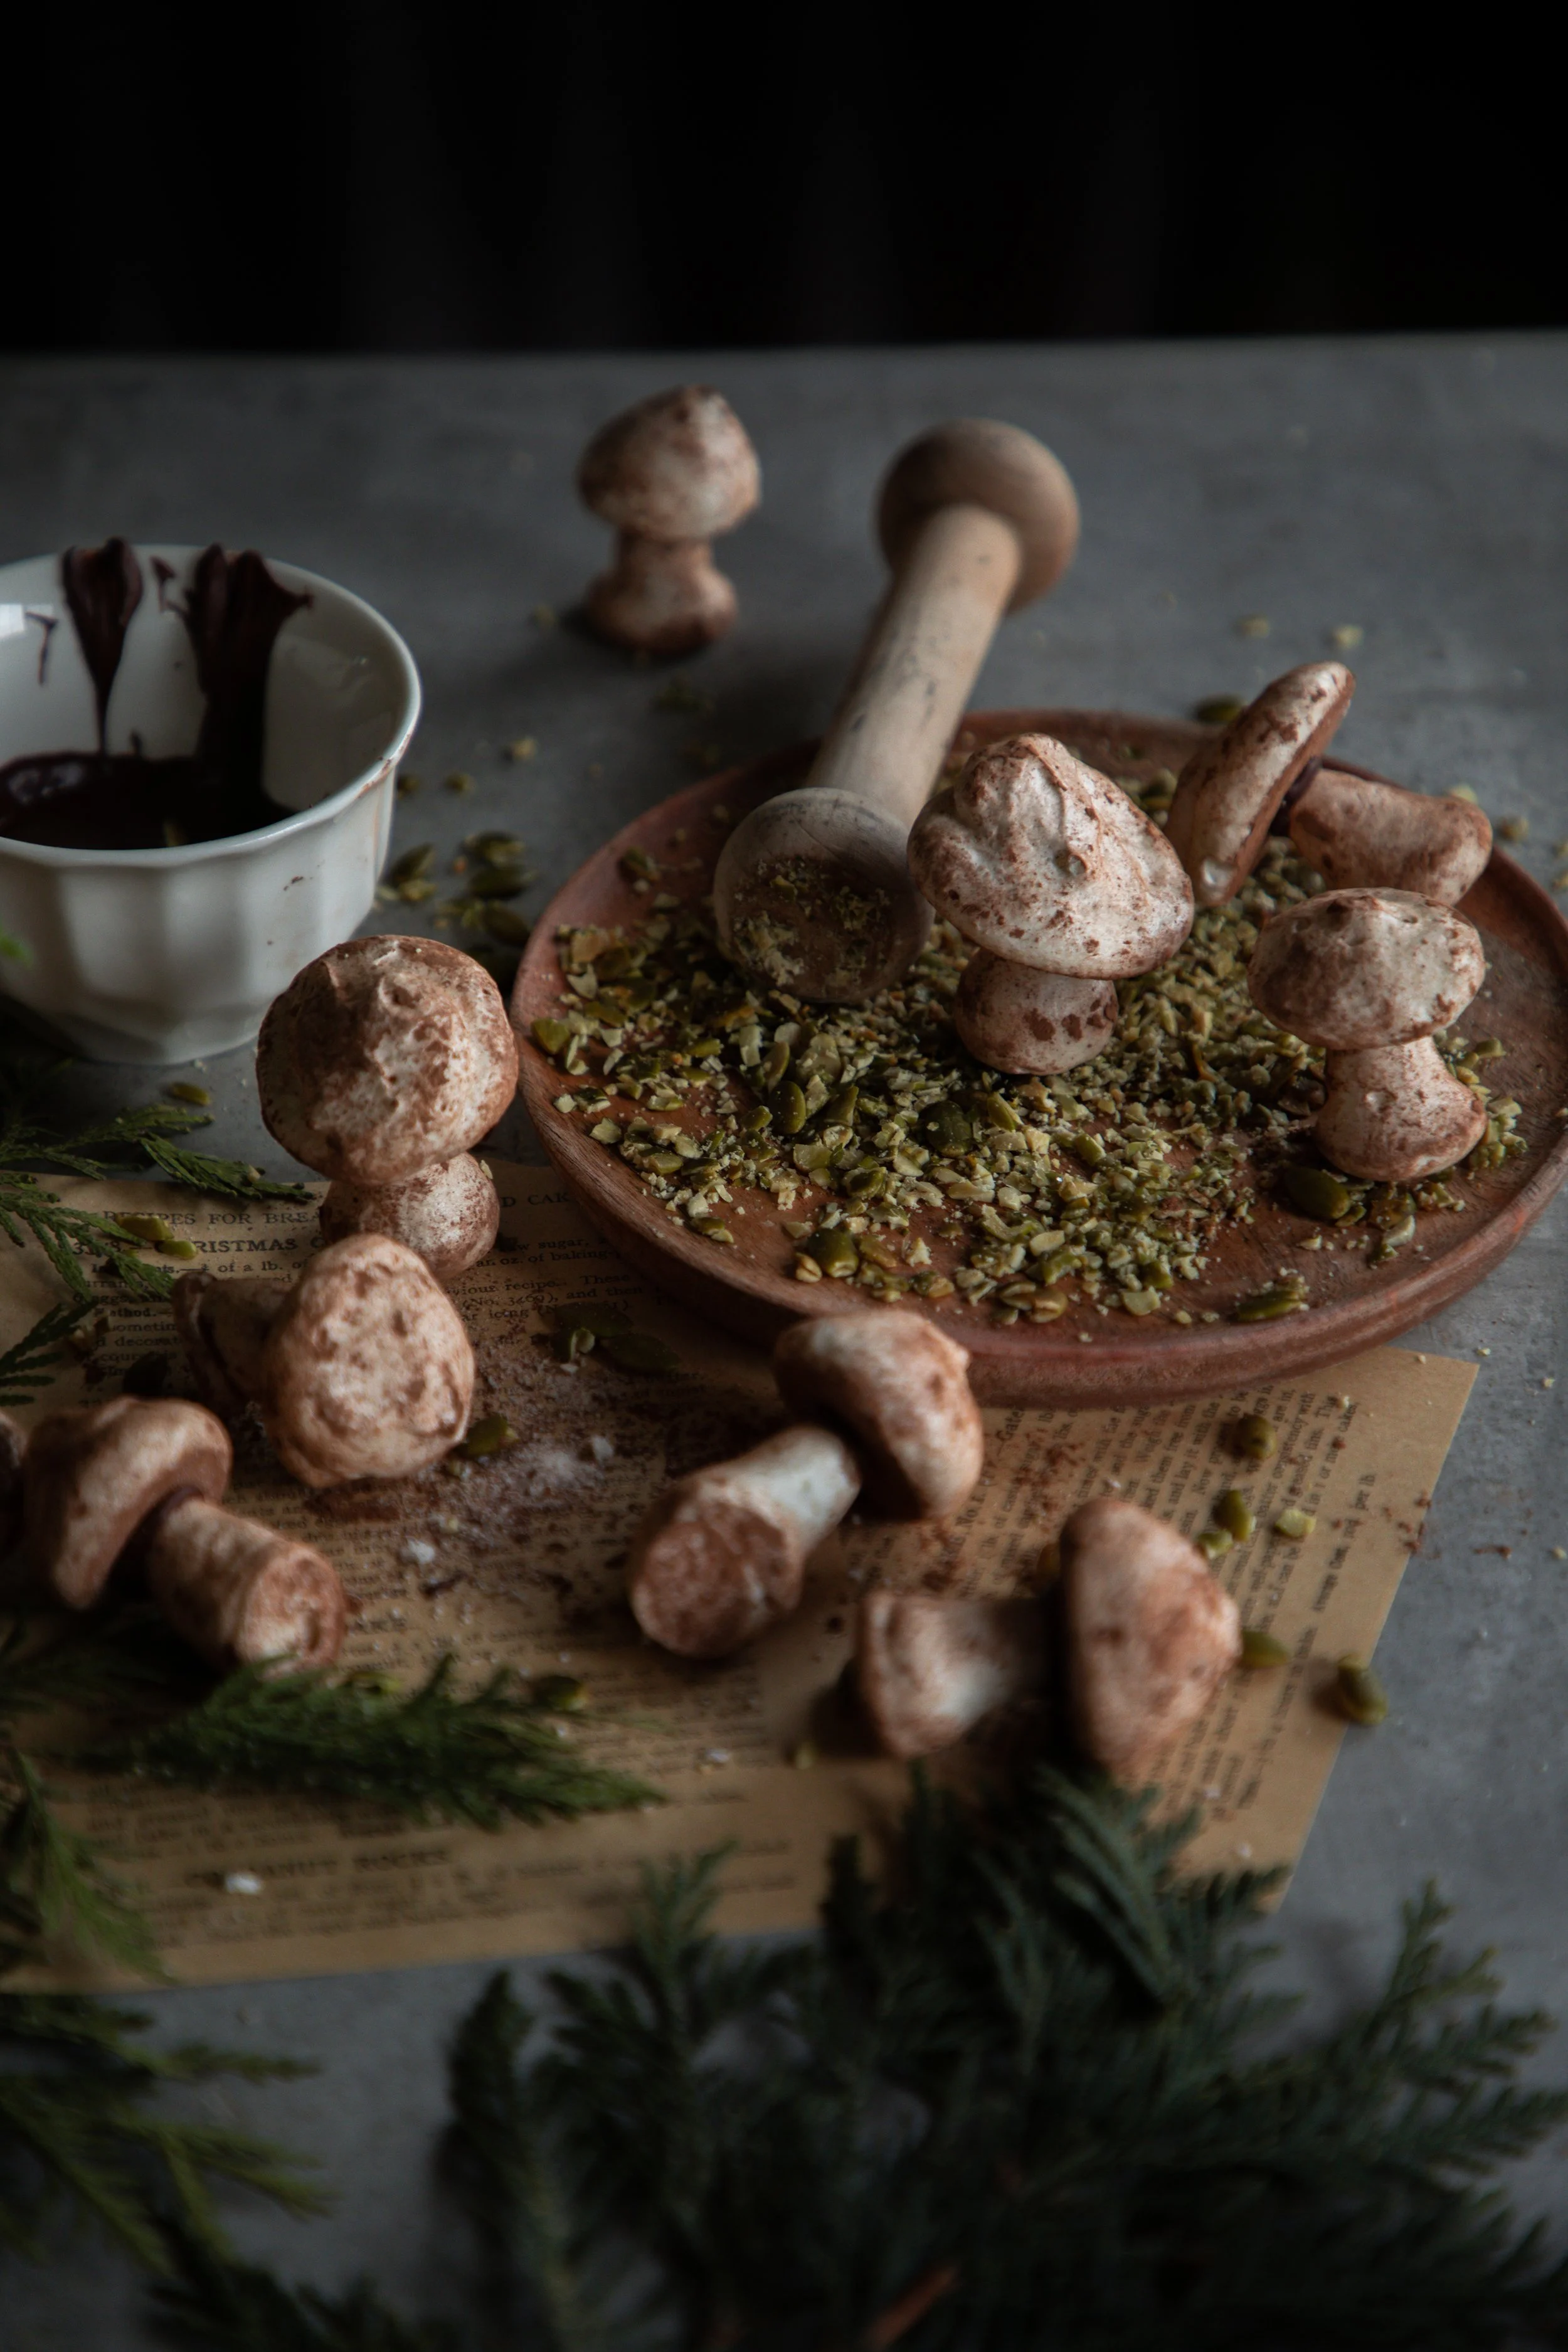
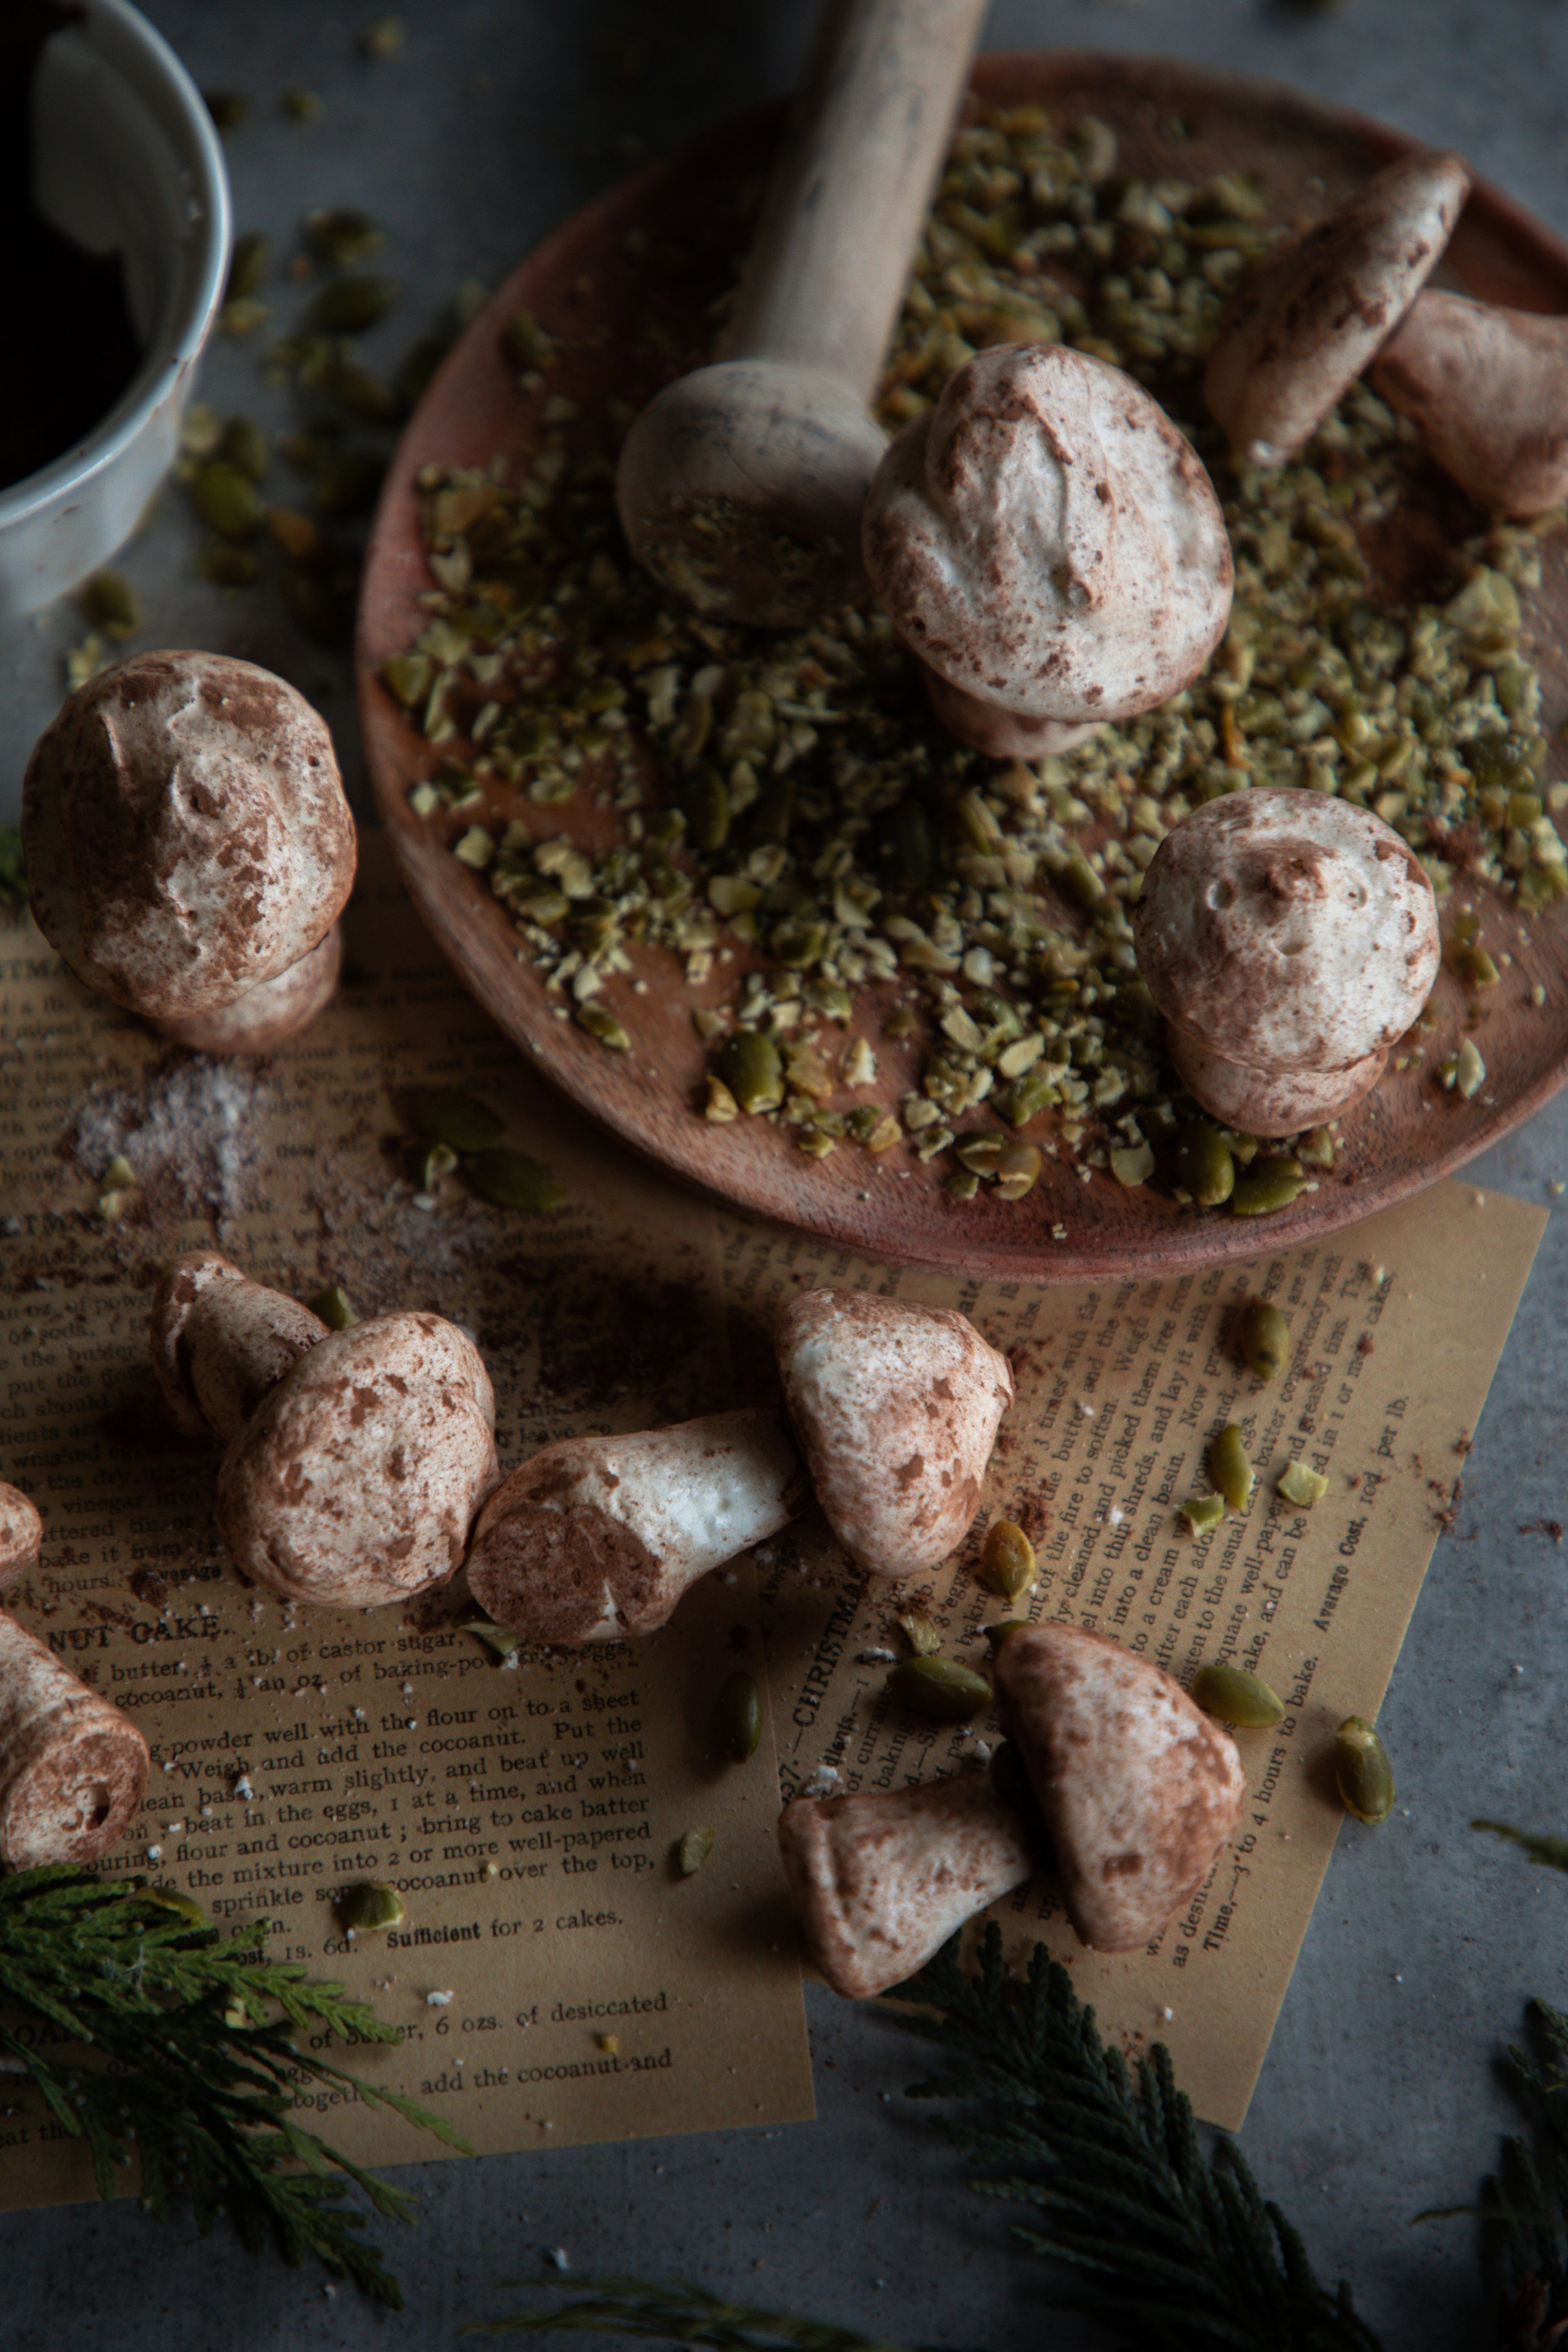
Once they are cool, I rolled them cocoa powder. A lot of people dust their meringue mushrooms with cocoa, but I thought rolling them around in it gave them a super realistic look. They look like the brown dusty mushrooms I purchase from the grocery store.
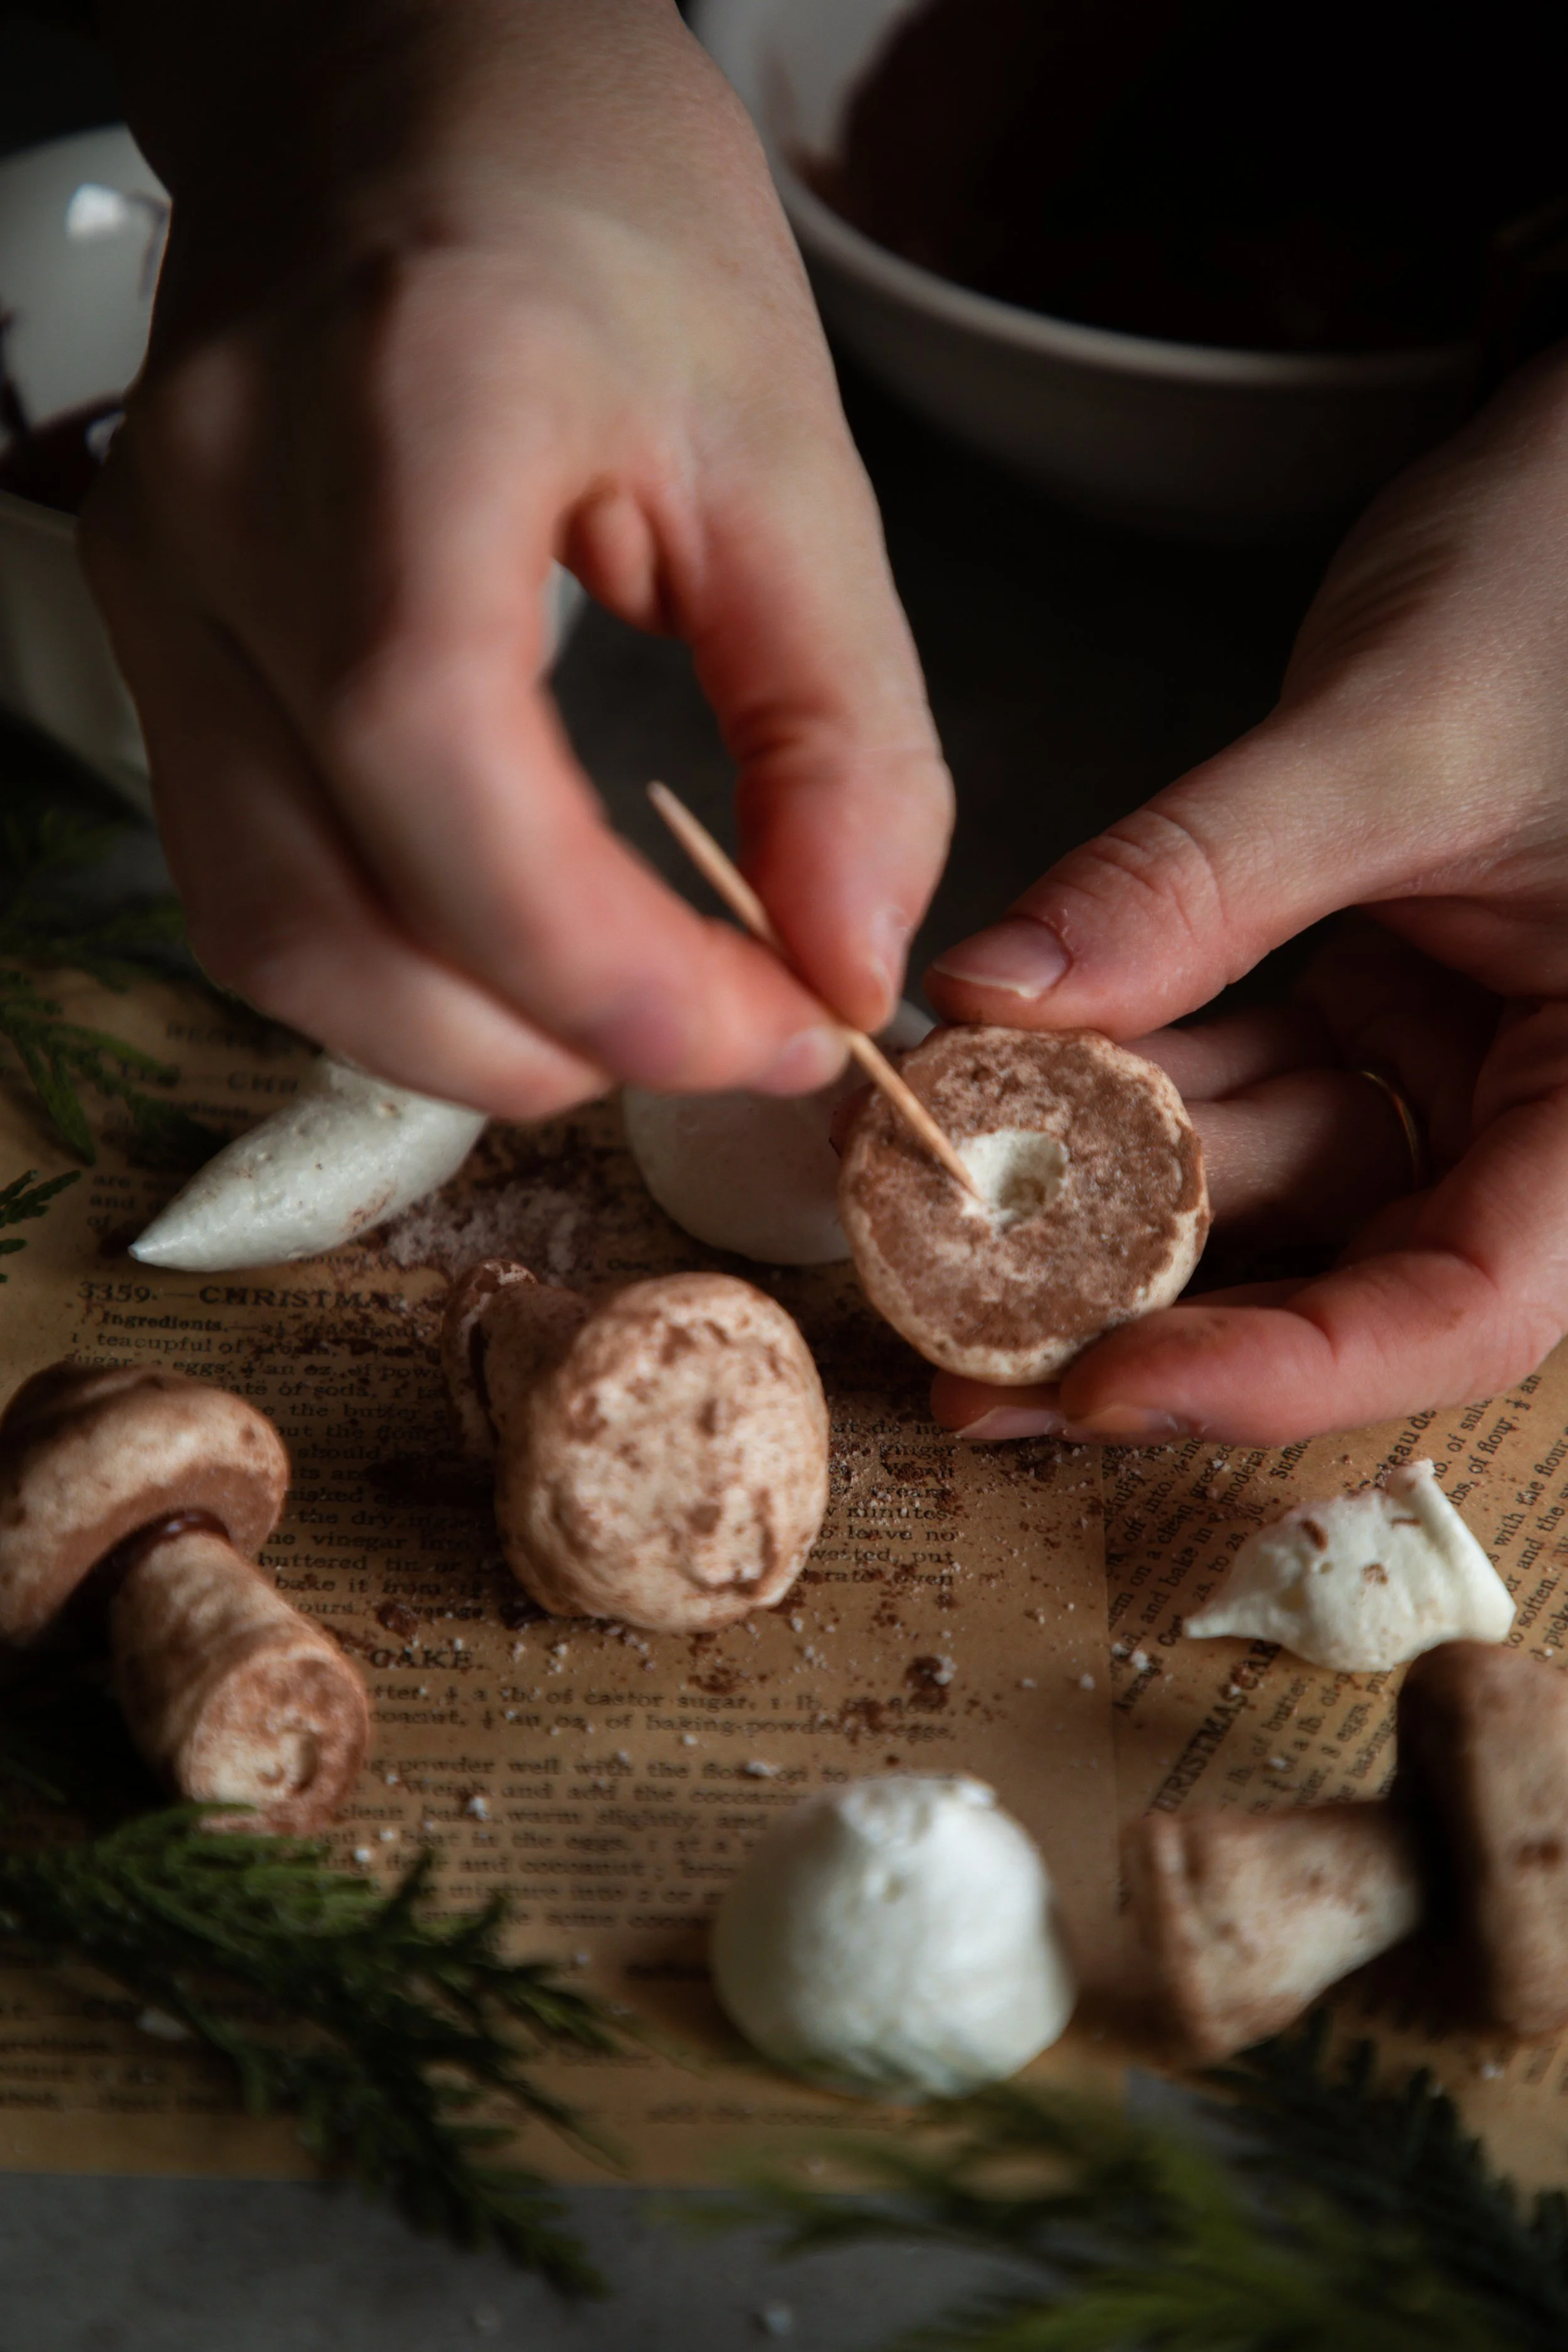
On the underside of the mushroom caps, I cored out a little hole with a toothpick. Then I dipped the tips of the stalks in melted chocolate and stuck them into the hole of the mushroom cap. Placing the mushrooms upside down or on their sides, I let the chocolate cool and harden. Done!
This makes a lot of meringue mushrooms, so you may want to scale back the amount of meringue or prepare for lots of little mushroom cookies.
Meringue Mushrooms

Ingredients
- 4 egg yolks, room temperature
- 1/2 tsp cream of tartar
- 1 tsp vanilla extract
- 1 cup superfine granulated sugar
- 1/2 cup Dutch cocoa powder
- 2 oz semisweet chocolate, melted
Instructions
- In a large clean bowl with a handheld electric mixer, whip together the egg whites with the cream of tartar and vanilla on high speed.
- When the whites have become foamy and doubled in size, with soft peaks (tips that curl), begin to add the sugar 1 tablespoon at a time. Continue to whip the whites and add the sugar until the meringue has turned pure white and the whites stand at stiff peaks (stand on their own). You should be able to flip the bowl upside down, and the meringue does not move.
- Preheat the oven to 200° F. Line 1-2 large baking sheets with parchment paper.
- Fill a piping bag with a medium to large round tip and the meringue. Pipe about 36 mushroom caps, or about 1-inch round mounds onto the baking sheet. You can smooth out the tops with your fingers, if you do not want little peaks.
- Pipe out 36 mushroom stalks by piping the meringue to stand straight up, about 1 to 2-inches tall. It is okay if they droop or fall over. This makes for more interesting and realistic mushrooms that can be growing from the side of the log!
- Bake the meringues right away for about 1 hour and 30 minutes. Turn off the oven and let them cool to room temperature inside of the oven, about 30 minutes to 1 hour.
- Remove the meringues from the oven and continue to let them cool. Once fully cooled, roll them in the cocoa powder until they are fully coated and have some patches of cocoa on them.
- With a toothpick, core out a small hole in the underside of the mushroom caps. Be careful not to poke all of the way through. Dip the pointed ends of the mushroom stalks in the melted chocolate. Stick the dipped stalks into the hole of the mushroom caps to attach them.
- Lay the finished mushrooms on their sides or upside down to dry. Once the chocolate has hardened, use them to decorate or to eat! They can be stored at room temperature, covered, for about 1-2 days. After that they become a bit soggy.
fun toppings for your log:
There are so many fun toppings that you can add to your Yule log to make it look realistic or festive! I kind of went for somewhere in between reality and fantasy. I love the look of sugared cranberries, so I made some to add to this log to give it some color and contrast. There is a lot of brown going on.
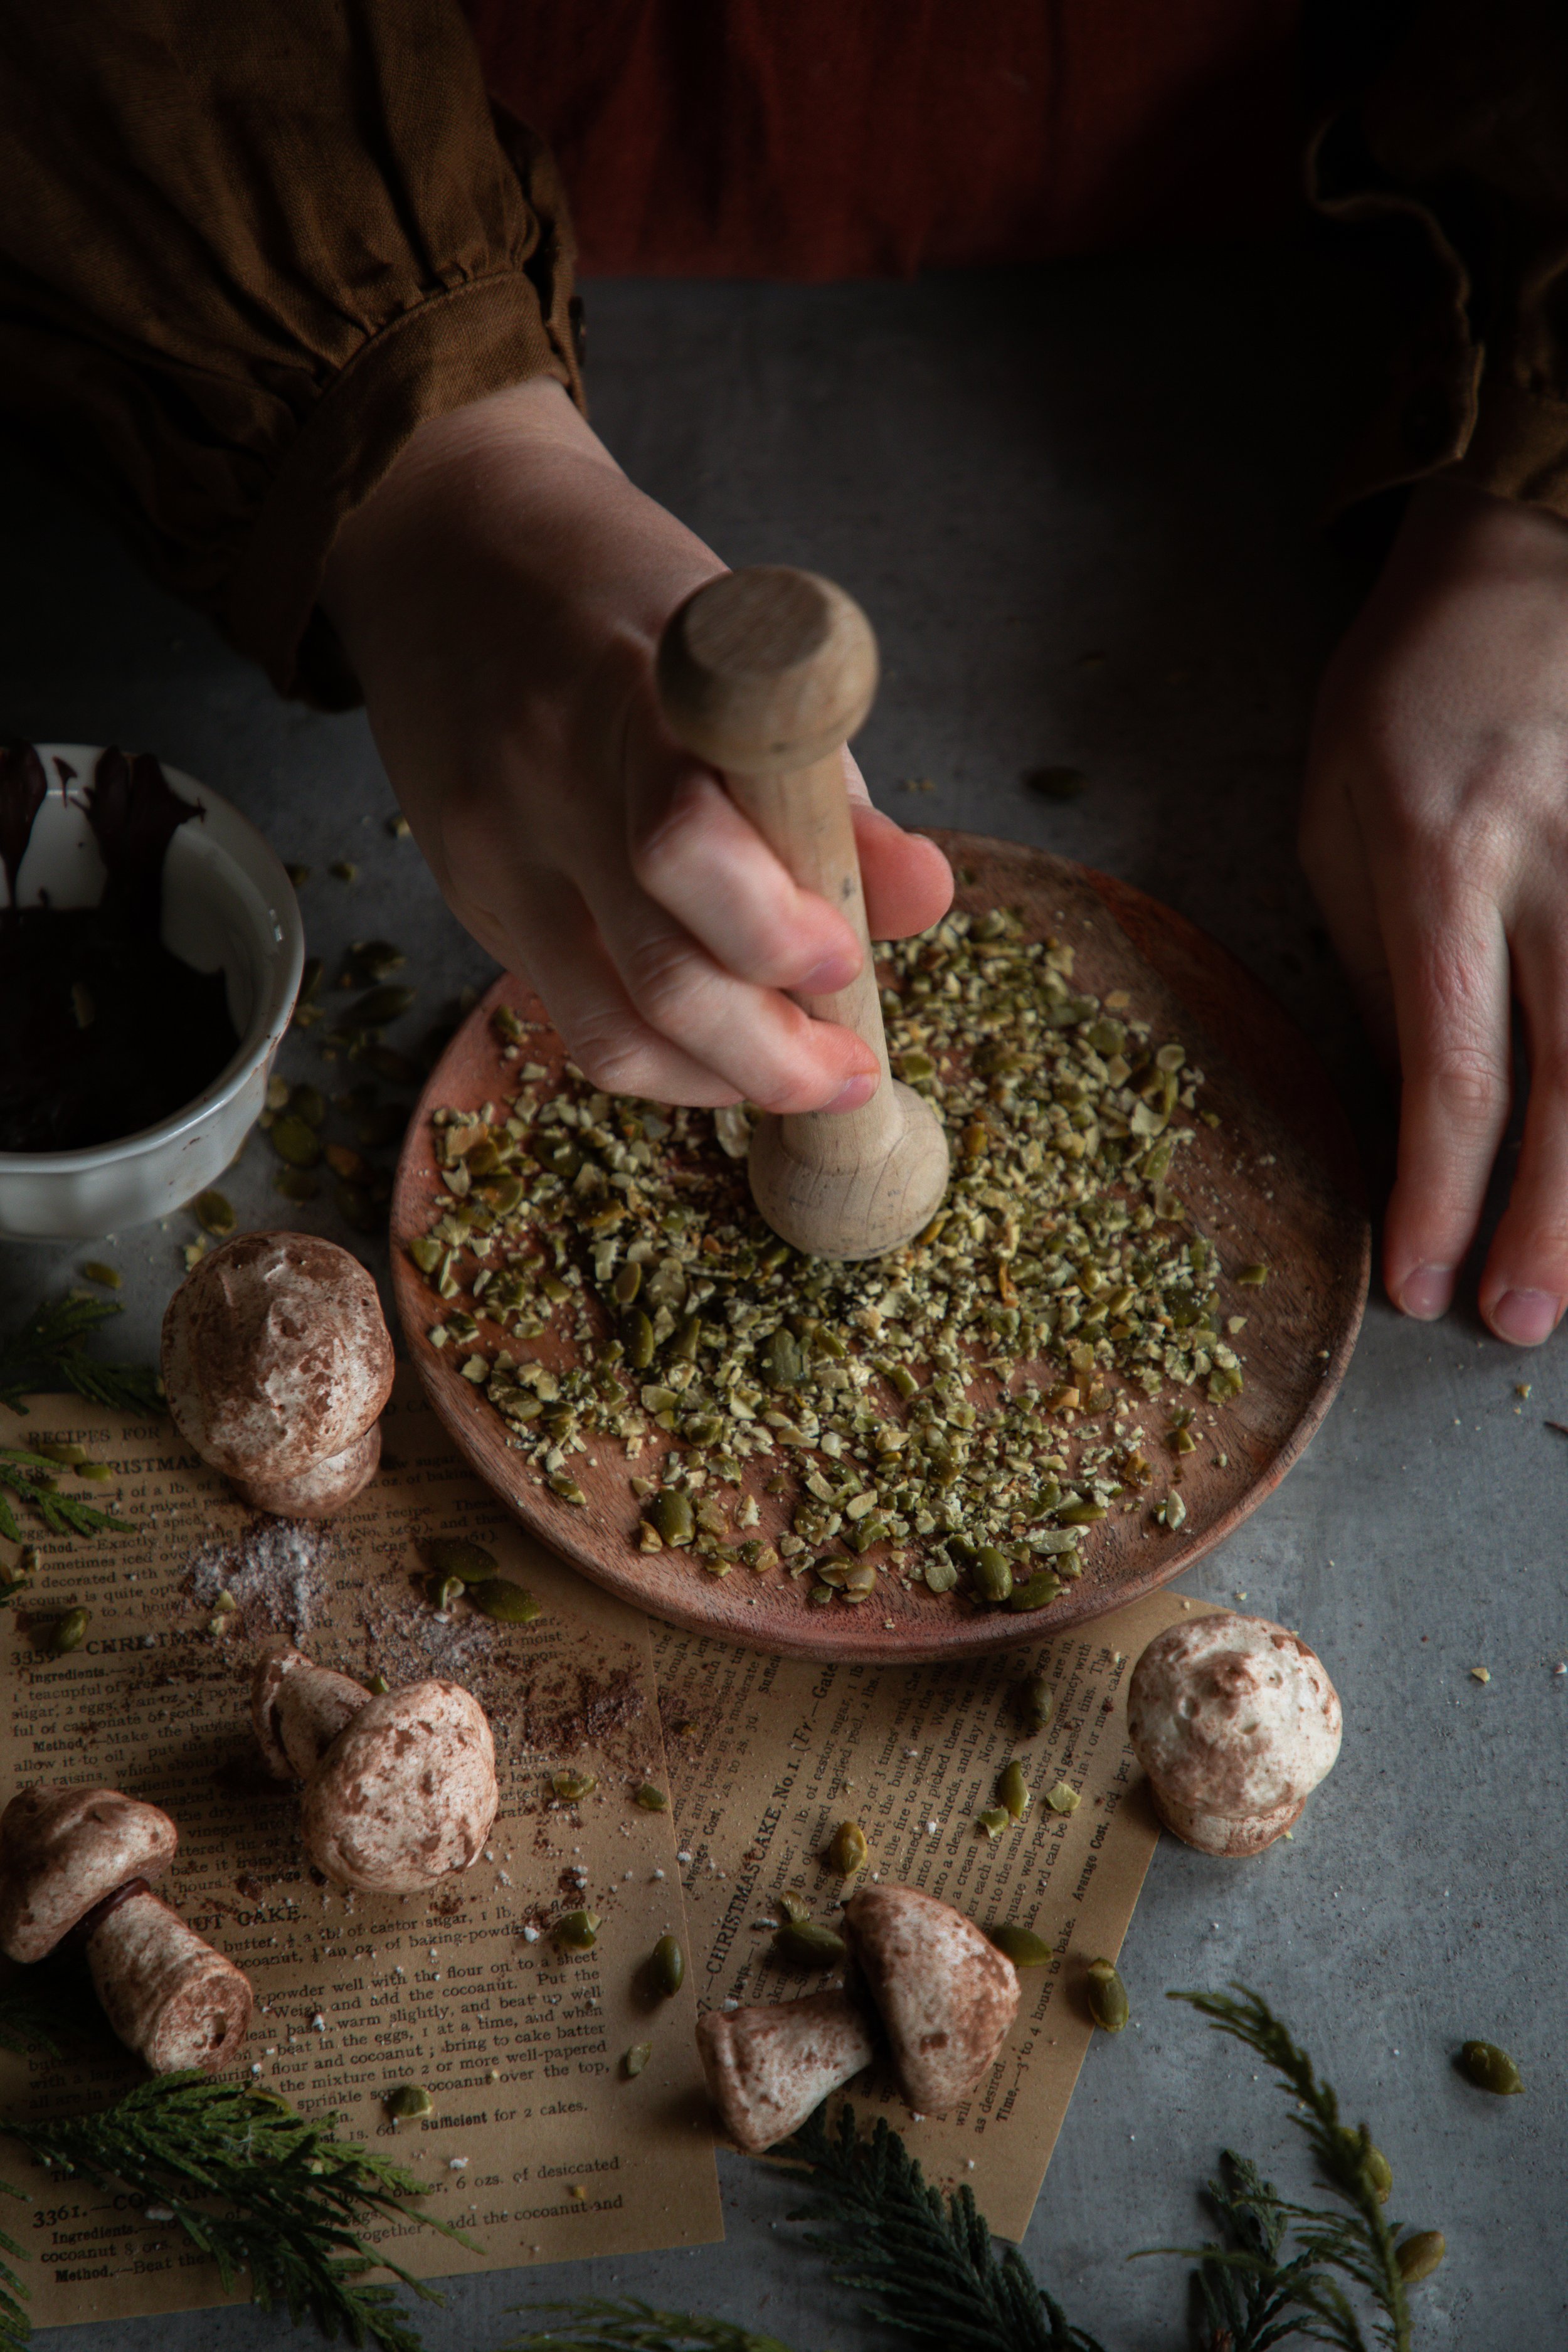
I used crushed pumpkin seeds for the moss. While they are not necessarily the ideal option for flavor, they made a lovely looking forest carpet. I would have preferred pistachios, but they are so ridiculously expensive right now. I had some pumpkin seeds saved that I used instead! You could also use crumbled cake or graham cracker crumbs colored with green food coloring. This might be a bit sweet, though!
I used semisweet melted chocolate to create the details for the birch log. I scooped the melted chocolate into a disposable piping bag and simply cut the tip off so there was a very small opening. I drizzled the chocolate in stripes. For a birch log, the real tree grows with this almost eye-shape on the bark, and then there are large dark patches. For the patches, I piped the chocolate onto a piece of parchment paper and popped it into the fridge for about 5 minutes.
You can see that there is a bit of shadowing detail underneath the frosting. This is cocoa powder that I painted on with a small paintbrush.

making the cake:
The cake is a somewhat complicated recipe, but not too complicated that a beginner couldn’t figure it out. It’s just not your typical cake mix because it has no fat in it with the exception of eggs. There is no butter nor oil, so you are making two separate batter parts and combining them. It’s a bit like making an angel food cake with the addition of the egg yolks.
In one bowl, you will beat together the egg yolks and part of the sugar. In a separate bowl, you will make a meringue with the egg whites and the remaining sugar. These two parts will be folded together, and then the flour will be folded in. The batter is like a soft foam, and you simply spread it into the pan and bake for only 15 minutes.
As this is a jelly roll style cake, you will want to have a kitchen towel coated in powdered sugar ready for when the cake is done baking. Immediately invert the cake onto the prepared towel, remove the pan, and roll up the cake in the towel.

Once the cake has cooled, it will then be unrolled gently and the whipped cream filling will be spread on. The cake then gets rolled back up, Swiss roll style, and allowed to cool further.
Then you make the frosting! I wanted a pure white frosting, but it needed to have some flavor. I decided to go with peppermint. I thought that would pair nicely with chocolate cake and mocha cream filling. It really did! It tastes like a fancy coffee. You could also use clear vanilla, if you do not like peppermint extract.
The frosting is a simple buttercream, and is super easy to make. I suggest spreading it onto a chilled cake with the frosting at room temperature.
In the end, while there are many things that I can improve upon, I am really loving how this final cake turned out. It tastes good, and it looks magical! Jill and I have been really inspired by whimsical looking foods lately, and we are hoping to incorporate more projects like this onto the blog in the coming year. We also have another new project in the works that pertains to some fun food art… Yay! Can’t wait to share more.
Have you made a Yule log cake before? I hope that you enjoy making this birch log!
xoxo Kayla
Birch Yule Log Cake

Ingredients
- 5 egg yolks
- 1 cup granulated sugar, divided
- 1 tsp vanilla extract
- 2 tbsp hot black coffee
- 4 egg whites
- 1/4 tsp cream of tartar
- 3/4 cup all-purpose flour
- 1/4 cup Dutch cocoa powder
- 1 1/2 tsp kosher salt
- Powdered sugar, for coating a kitchen towel
- 1 cup heavy whipping cream
- 1/4 cup powdered sugar
- 2 tbsp instant coffee granules
- pinch of salt
- 1/2 cup salted butter, softened
- 2 tsp peppermint extract
- 4 cups powdered sugar
- 1-2 tbsp heavy cream
- 2 oz semisweet chocolate, for decorating
Instructions
- Preheat the oven to 375° F. Spray a 15.5 x 10.5-inch jelly roll pan with cooking spray. Place a piece of parchment paper on the bottom and fold it to stick up the sides a bit. Set this aside.
- In a large bowl, whip together the egg yolks and 1/2 cup of the sugar together until the yolks become pale yellow in color, and the sugar is almost dissolved. Stir in the vanilla and coffee.
- In a separate large bowl, whip together the egg whites and cream of tartar until soft peaks form (tips curl). Add in the remaining 1/2 cup sugar, 1 tablespoon at a time, until stiff peaks form (tips stand up).
- In a small bowl, whisk together the flour, cocoa powder, and salt.
- Gently fold the egg yolk mixture into the meringue until fully incorporated. Then fold in the flour mixture, spooning it in a little bit at a time, until it is no longer visibly dry.
- Spread the batter into the prepared jelly roll pan and bake for 15 minutes or until the cake is a light brown in color. It should be very fluffy looking, and you will know that it is finished baking by gently touching the top of it and pressing in. It should be foamy and cooked through, not doughy or runny.
- While the cake is baking, lay out a clean kitchen towel. Sprinkle it generously with powdered sugar. Once the cake comes out of the oven, immediately invert it on to the towel. The pan should lift off, if you used parchment paper. Peel off the parchment paper from the bottom of the cake.
- With the towel, roll up the cake so that the towel is inside of the rolls, like a Swiss roll. Place the entire cake on a wire cooling rack and let it cool to room temperature.
- While the cake is cooling, make the whipped filling.
- In a large bowl, whip the heavy cream and powdered sugar until stiff peaks form (tips stand straight). Add in the instant coffee granules and continue to whip until they dissolve.
- Cover and chill the filling until it is ready to use. Once the cake has cooled, gently unroll it from the towel making sure that it does not break. Spread the whipped filling on the inside of the cake and immediately roll it back up. Cover the cake in plastic wrap and chill until ready to frost.
- Make the frosting in a large bowl or standing electric mixer with a paddle attachment.
- Beat the butter until it is smooth and creamy. Add in the peppermint extract and beat until incorporated. Slowly begin to add the powdered sugar alternately with the heavy cream until you reach a desired consistency. I like around 4 cups of powdered sugar, but you make like more or less.
- Frost the cake when the frosting is at room temperature and easily spreadable. The cake frosts a bit easier after it has been chilled for at least 30 minutes.
- Spread a crumb coat over the cake, or the first layer of thin frosting where the crumbs spread a bit. Stick the cake back into the fridge for about 15 minutes. Frost on a second layer. On this layer, you can start to be creative with making the frosting look like the curling layers of birch bark. Chill the cake to allow the frosting to set in place.
- Once chilled, drizzle the cake with the melted chocolate. I put this into a disposable piping bag and cut off the very end of the tip so it was a super small opening. The chocolate should harden almost instantly, if the cake is cold.
- Decorate with the meringue mushrooms, crushed pumpkin seeds or pistachios, and sugared cranberries. Slice and serve!
Notes
To make a cake that looks like mine with branches, I doubled this recipe.