How to Raise, Butcher, and Process Turkeys at Home | A Complete Guide
This post may contain affiliate links, please see our privacy policy for more information.
In this comprehensive guide, learn how to raise backyard turkeys for meat, humanely butcher turkeys, and process the meat for the table or freezer storage for up to one year.
A Homestead Tradition Rooted in Respect
Raising and processing your own turkeys can be one of the most rewarding and humbling experiences on the homestead. We have been raising our own meat and processing it ourselves for several years now, and we have been actively purchasing locally and ethically raised meats for a decade. It is something that we learned made our bodies feel so much better, the meat itself was incomparable to what we could purchase at the store, and it was better for our community.
Locally raised meat that has been raised on pasture has an incredibly higher quality and superior flavor over factory farmed meats; it is an absolutely better quality of life for the animal overall.
Our minds changed about meat back in 2014 and 2015 after watching several documentaries and researching about industrial and conventional farming and slaughtering processes. While we fully understand that this is not always a feasible option for everyone, and that small farming most likely won’t become a part of every person’s life and change the way the world eats, we know that this is a small way that we can actively make a change.
We also hope that this helps to open the eyes of others. While viewing and learning about the butchering process can be triggering for some, I do honestly believe that if you eat meat or have ever eaten meat, this is something that you need to see and understand! All meat that humans eat once had a face, a heartbeat, and a personality. It did not simply appear at the grocery store processed and ready to consume. Personally, I would rather know about the life of that animal and its slaughter than not know anything about it, and that justifies this lifestyle enough for me.
is it safe to butcher your own meat?
As we enter our fifth year of animal butchering, I feel the most at peace with the process than I have felt in the past. There are several sides to this story. One being the loss of the mindset that this is dangerous for our health. I have a complicated relationship with the information and regulations provided by the USDA and FDA when it comes to processing homegrown meat and other foods. Their guidelines are in place to prevent illness, food poisoning, and food contamination. There is also plenty of information that leads me to believe that there are too many hands in the commercial food industry’s pot, and those hands like to scare us into believing that factory farmed food is the only type of food that’s safe for us to consume, and we can see that isn’t necessarily true. Food recalls continue to happen more frequently, and we are becoming more aware that the added ingredients in processed meats are making us terminally ill.
As someone who grew up in a city setting, if I was looking at my own blog right now with no prior knowledge of an off-grid lifestyle, I would have a hard time believing myself. Isn’t it unsanitary? Aren’t you going to get salmonella?
The short answer is: it’s highly unlikely. Understanding basic food sanitary practices is enough to understand how to butcher and process a chicken. This is something that you can easily learn online, in books, or take a food and kitchen safety class online or in-person. All restaurant and food establishments (including me) have to take this class, and it’s incredibly helpful things to know!
You can do this, too. It just takes a lot of research and a little bit of courage.
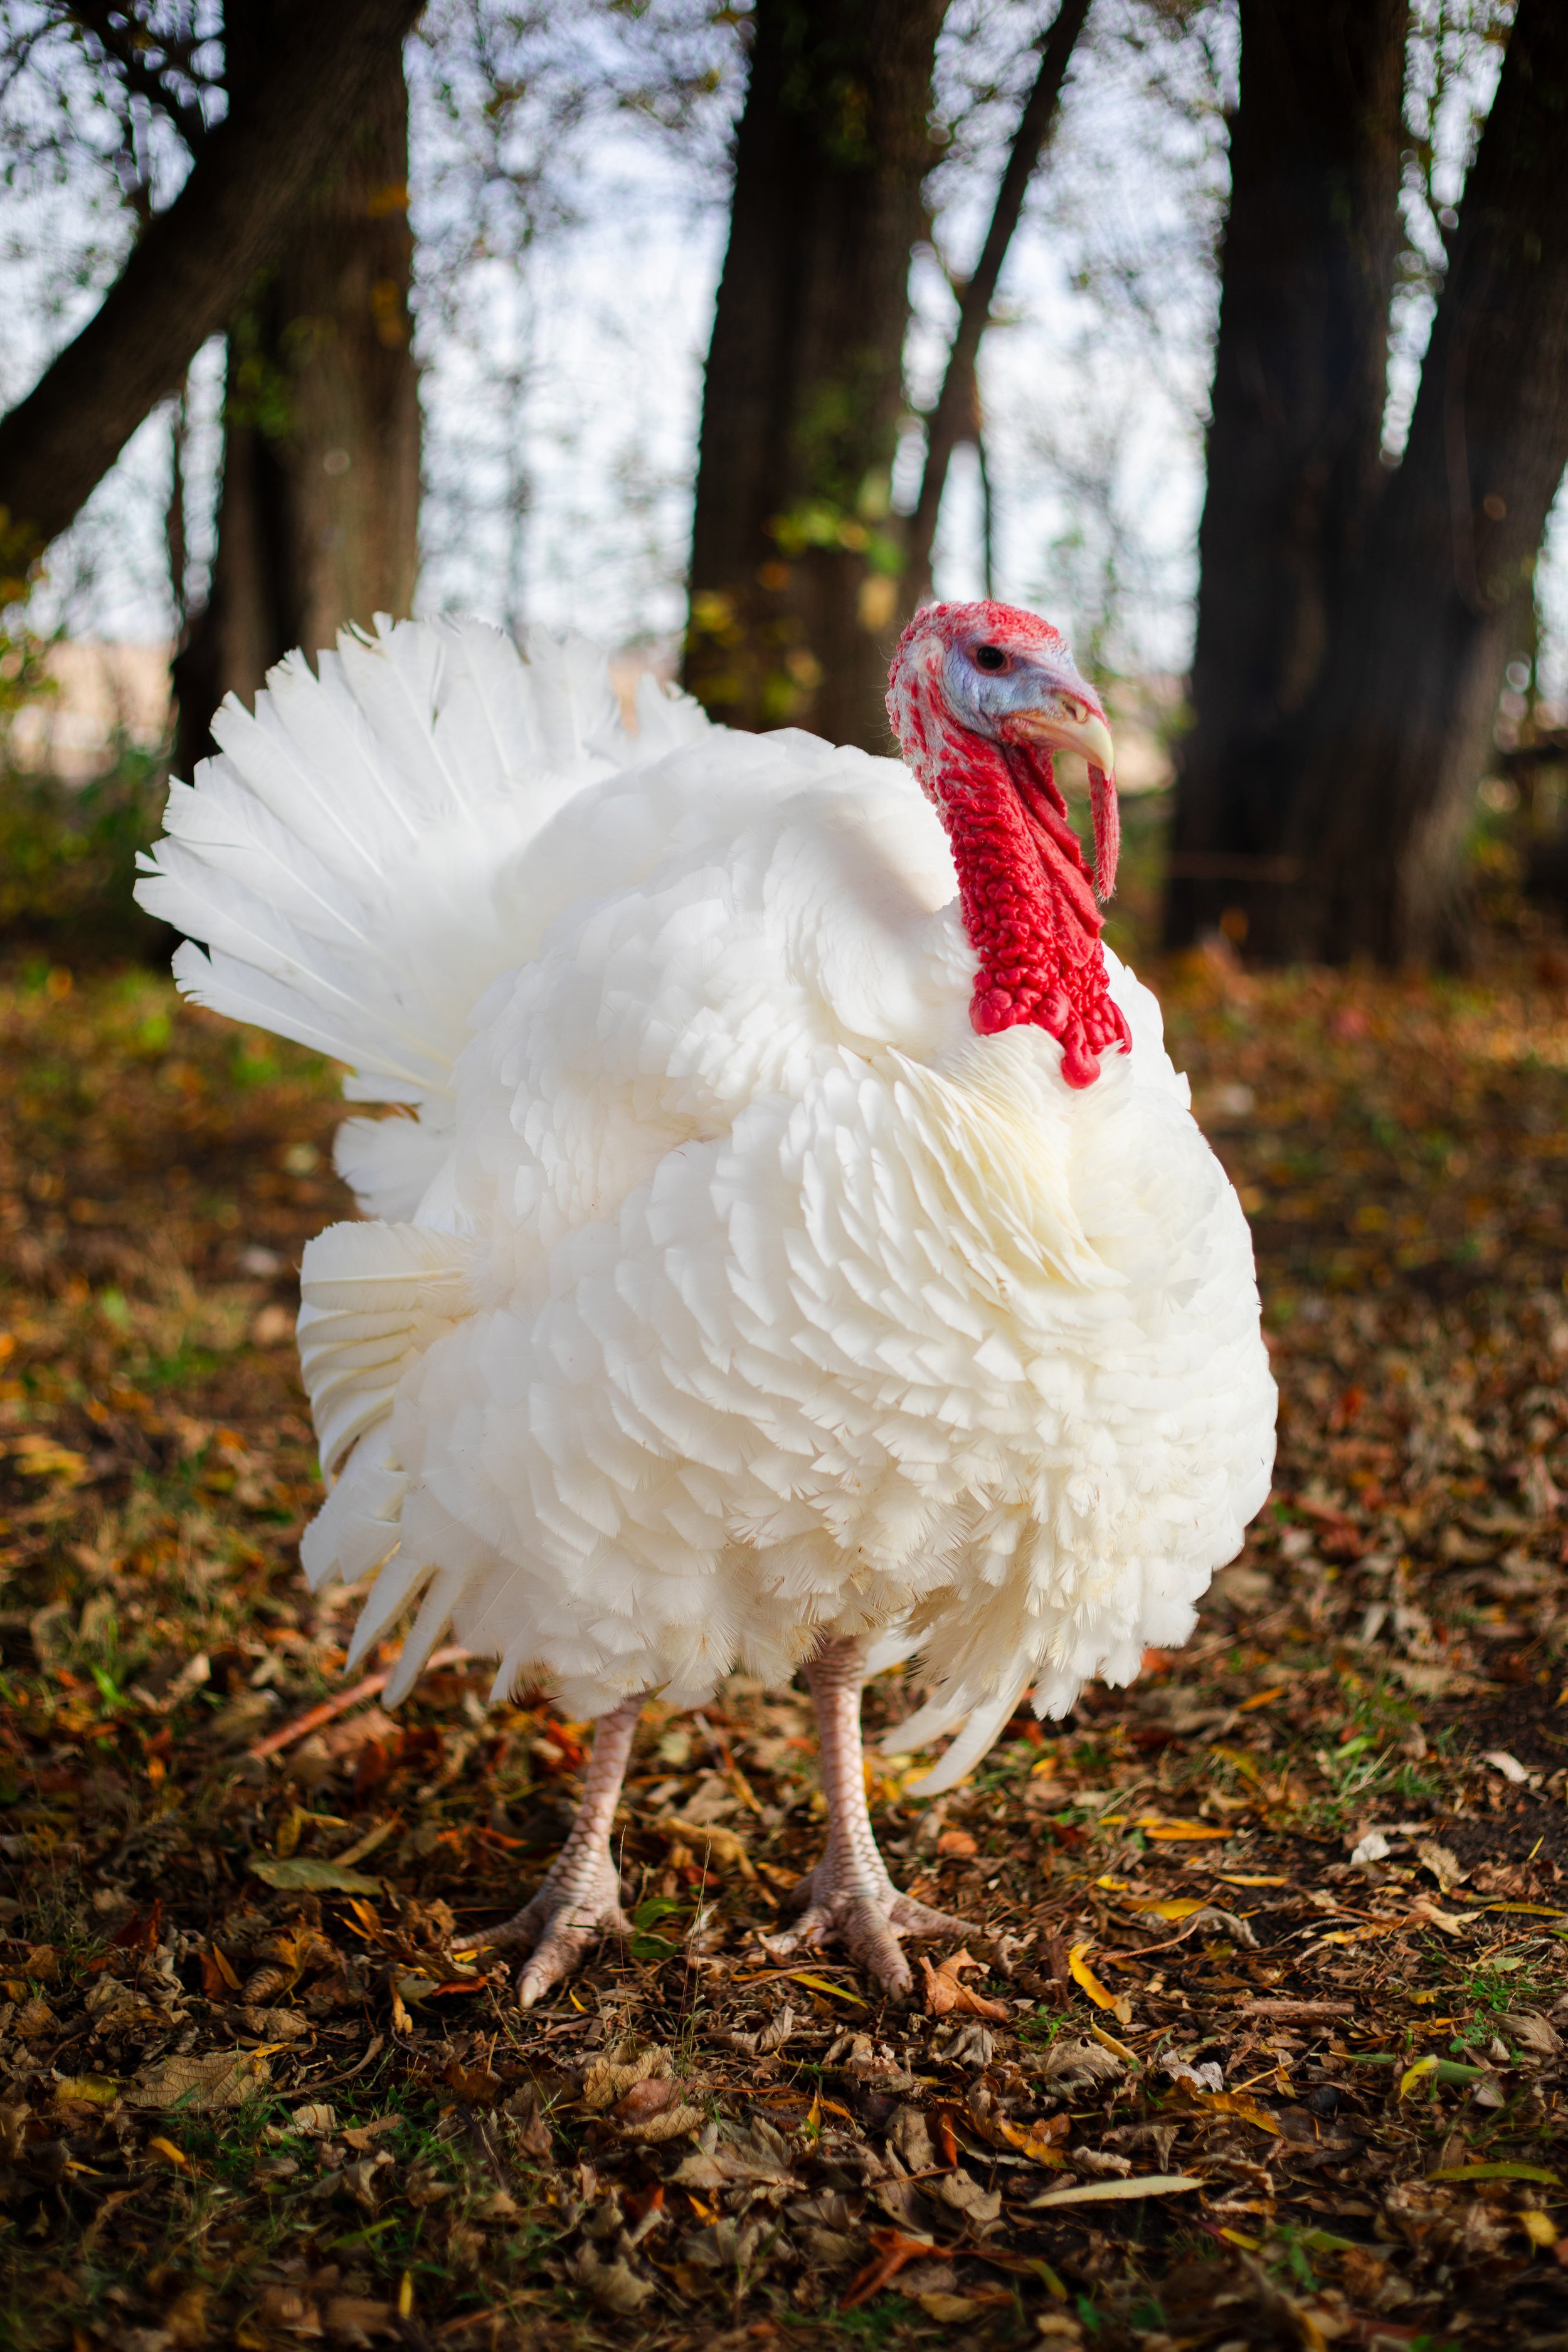
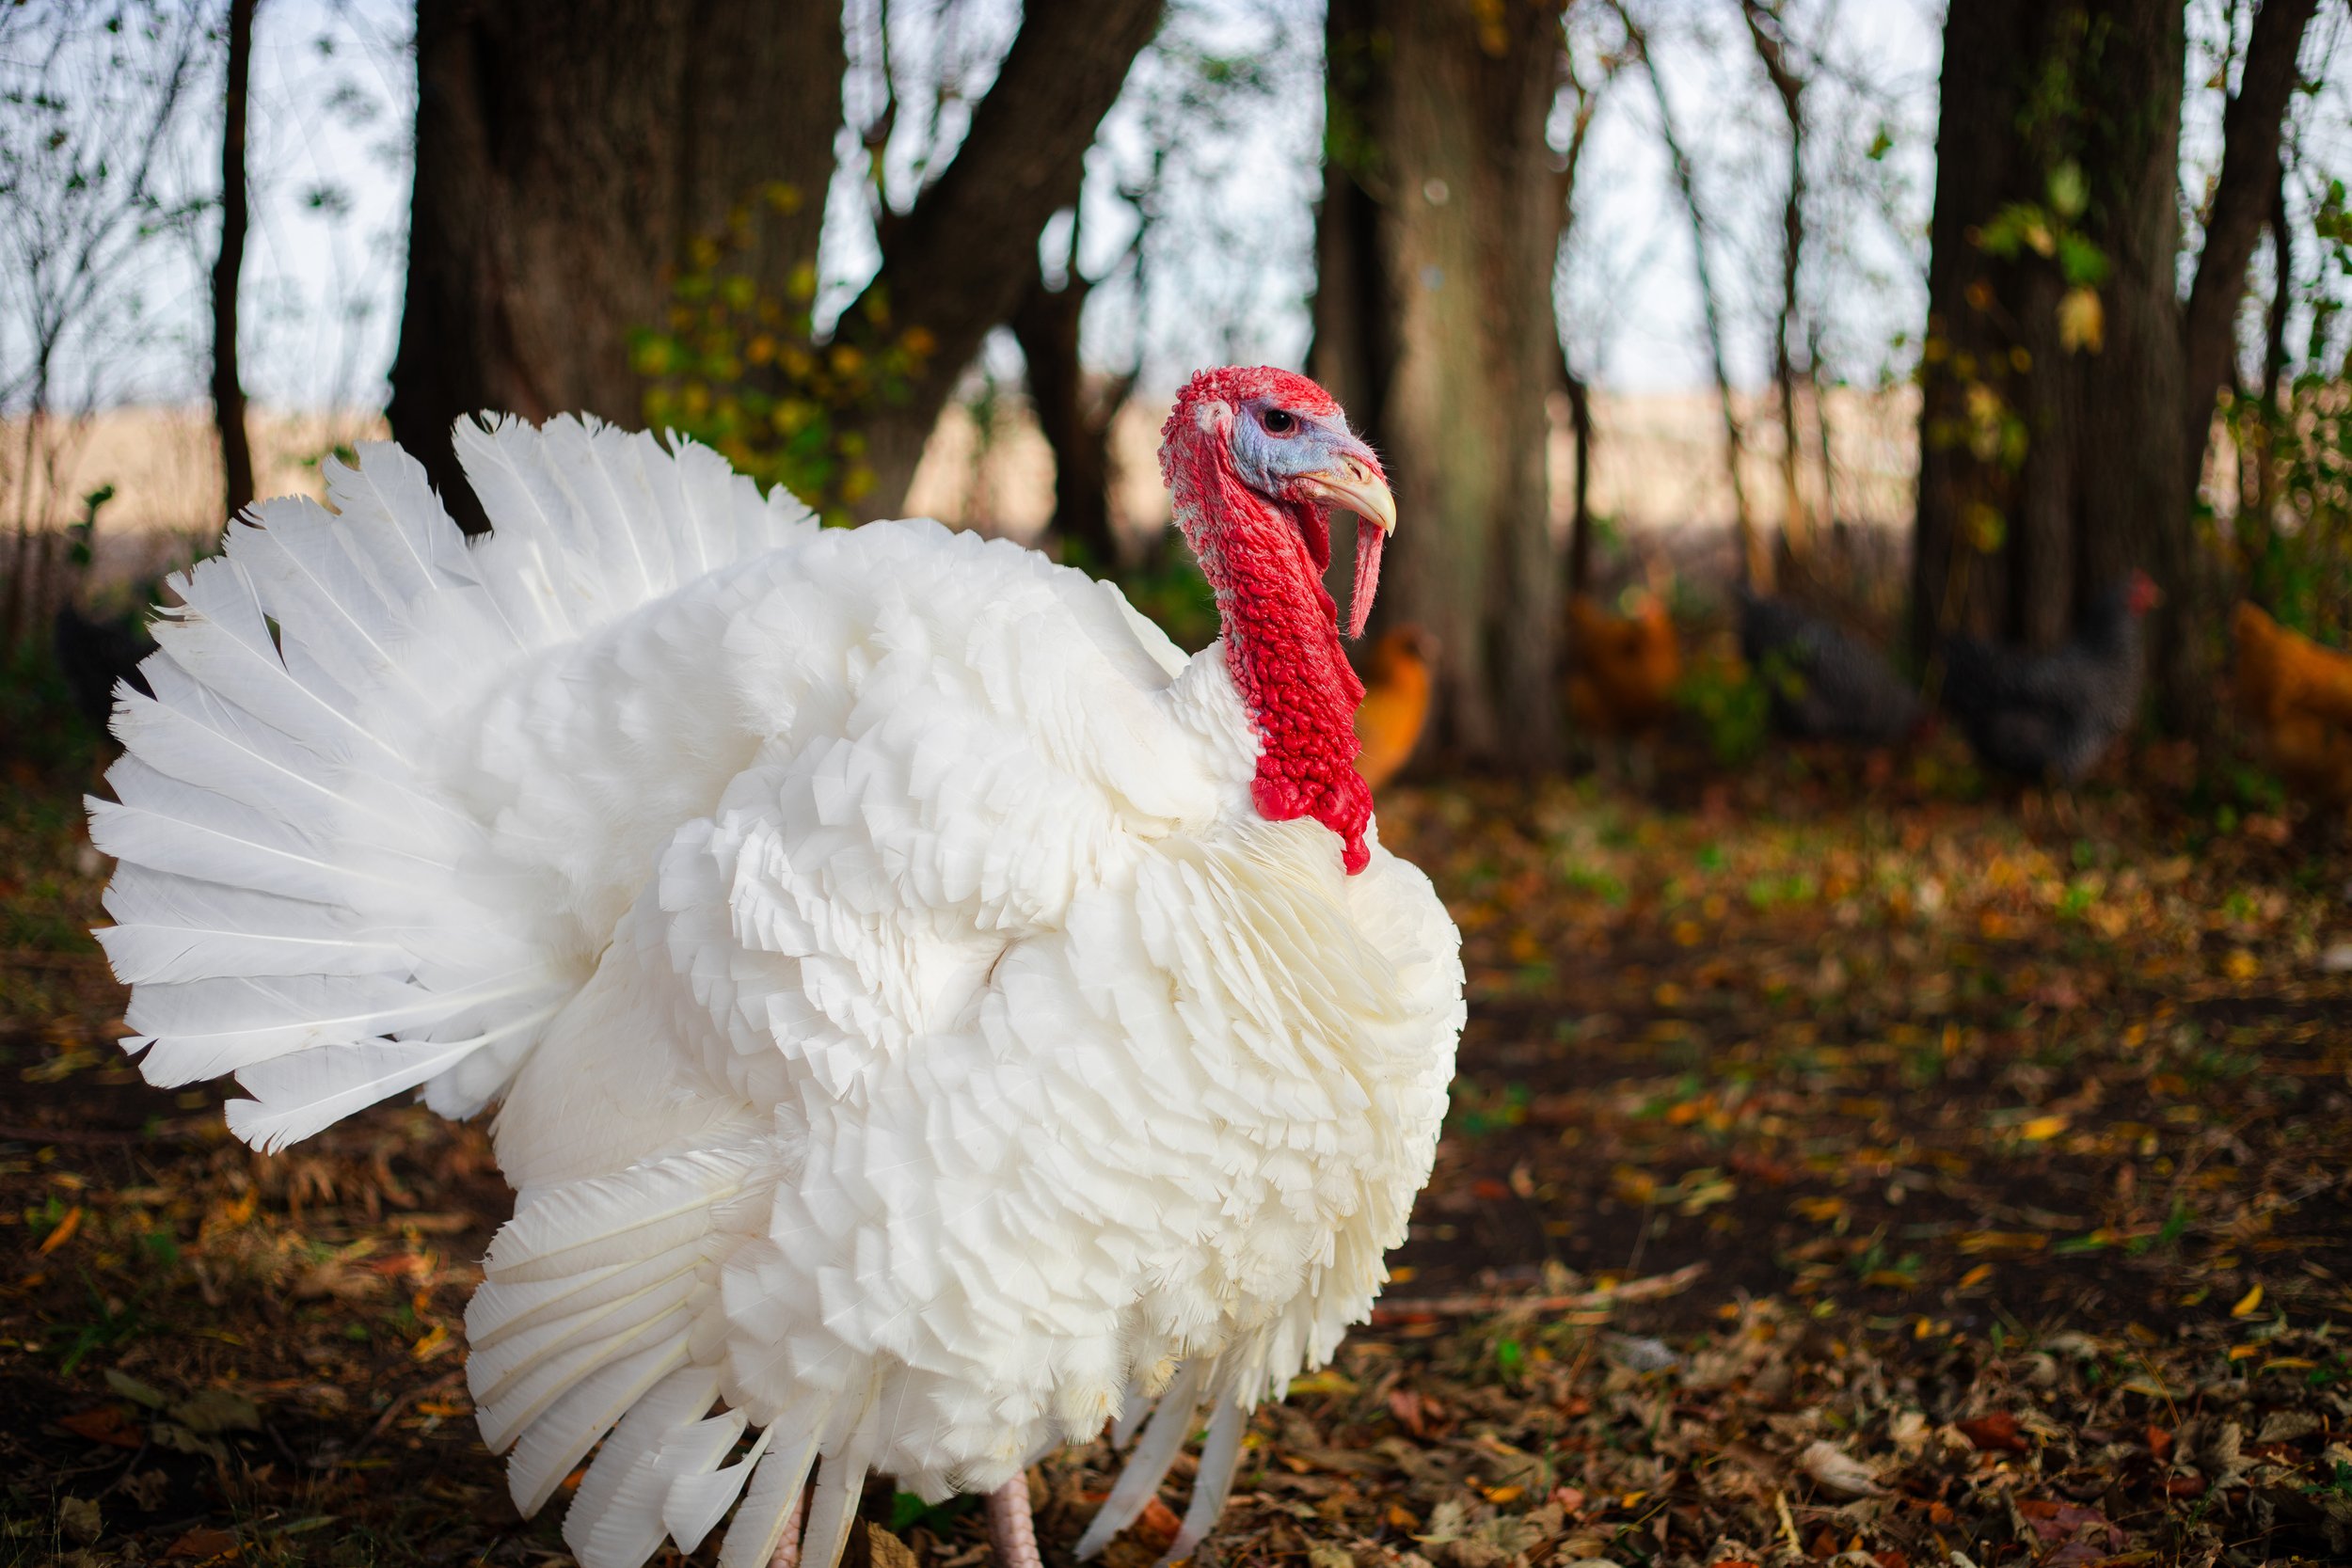
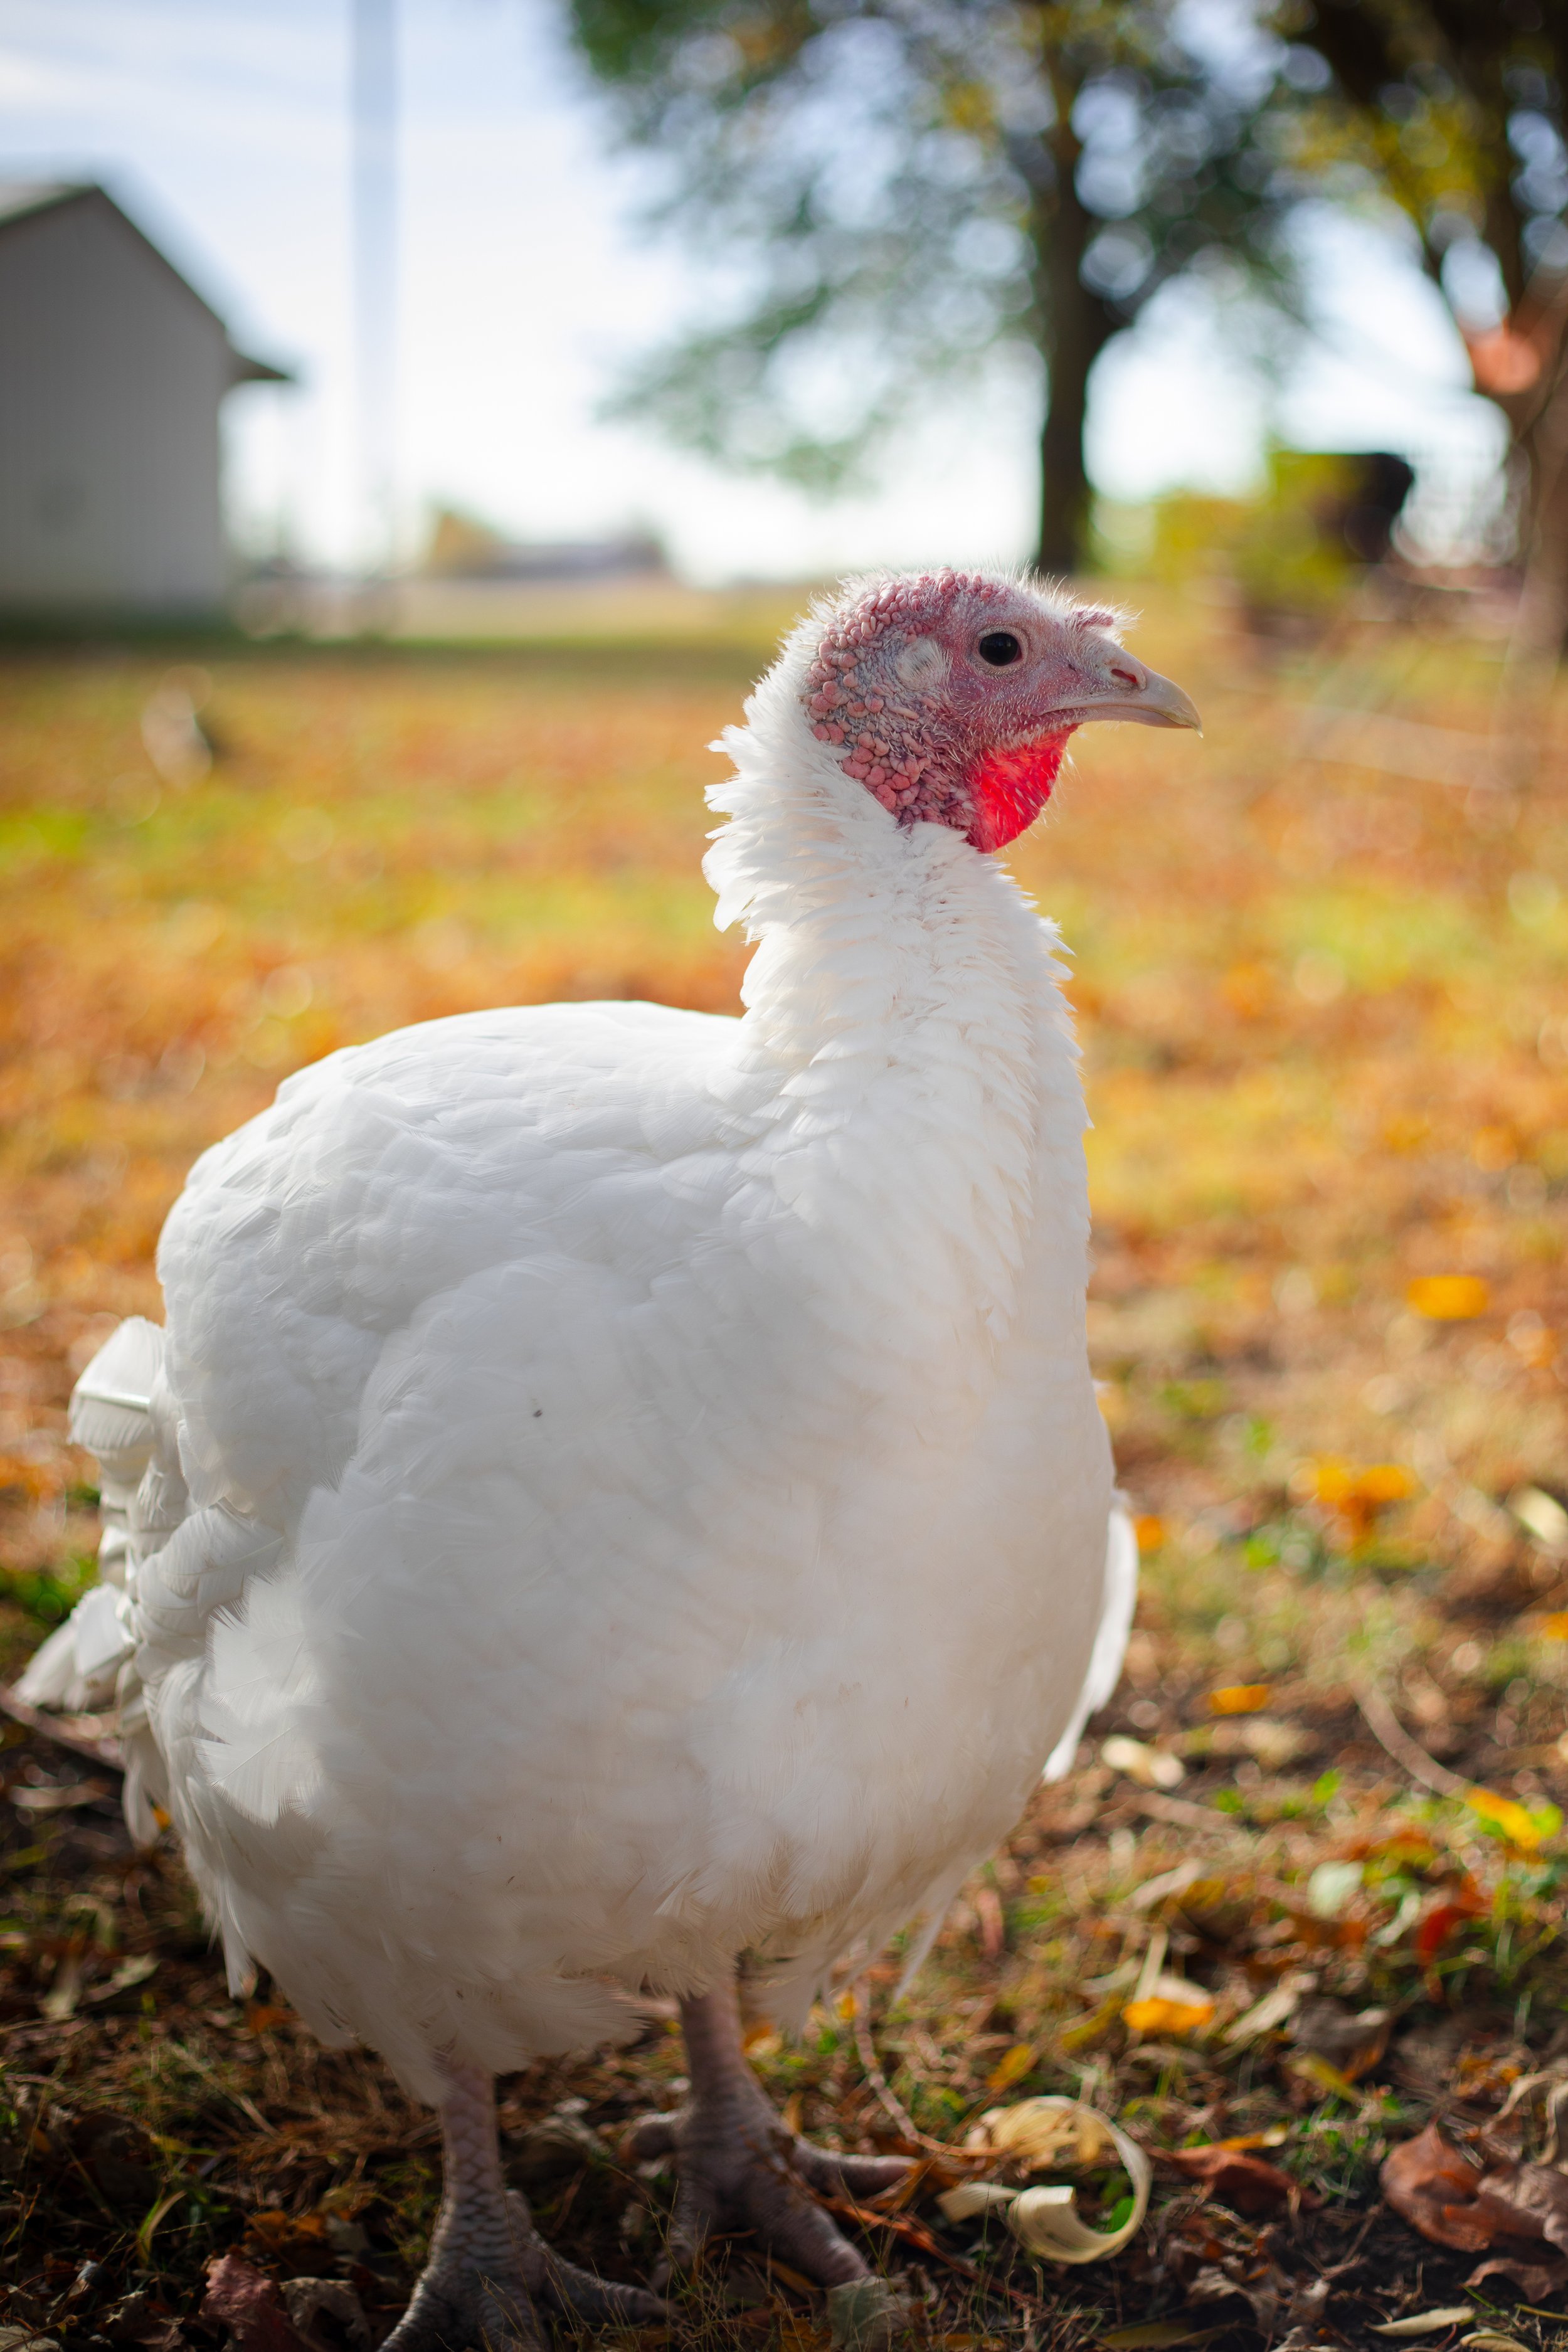
Choosing the Right Turkeys (Best Breeds for Meat)
For maximizing meat production, there are a couple of breeds of turkey that are better choices than others. These are domesticated turkeys that have been bred for larger breast meat and shorter bones. They also mature faster, making the entire process from poult to harvest more efficient and cost effective. However, this efficiency can come at the price of flavor and ethical food production.
Broad Breasted White: This is the most commonly raised turkey for meat, and it is most likely what you have eaten for Thanksgiving or Christmas dinner every year if you purchased your turkey at the grocery store. This breed has incredibly large breasts, though many believe that its not as flavorful as heritage breeds. It is a crossbreed between the Broad Breasted Bronze and White Holland, and it can grow to larger than 40 lbs (18 kg). This breed is easy to acquire from most hatcheries. Be wary of raising this breed as a pet as they are often unable to breed naturally (they need human assistance with artificial insemination), they have a predilection for overeating, are often sedentary, and prone to health problems related to obesity such as heart disease, respiratory failure, and joint damage.
Broad Breased Bronze: This turkey used to be the dominant breed raised for mass production, but it is no longer as popular as the Broad Breasted White. However, you will recognize it still as the image we all know of the American turkey with its iridescent bronze feathers. It is a cross between domestic turkeys of England with wild turkeys in North America, created in the 18th century. Like the Broad Breasted White, is has incredibly large breast meat but is slower to mature. They also cannot mate naturally and are prone to health issues when kept as pets.
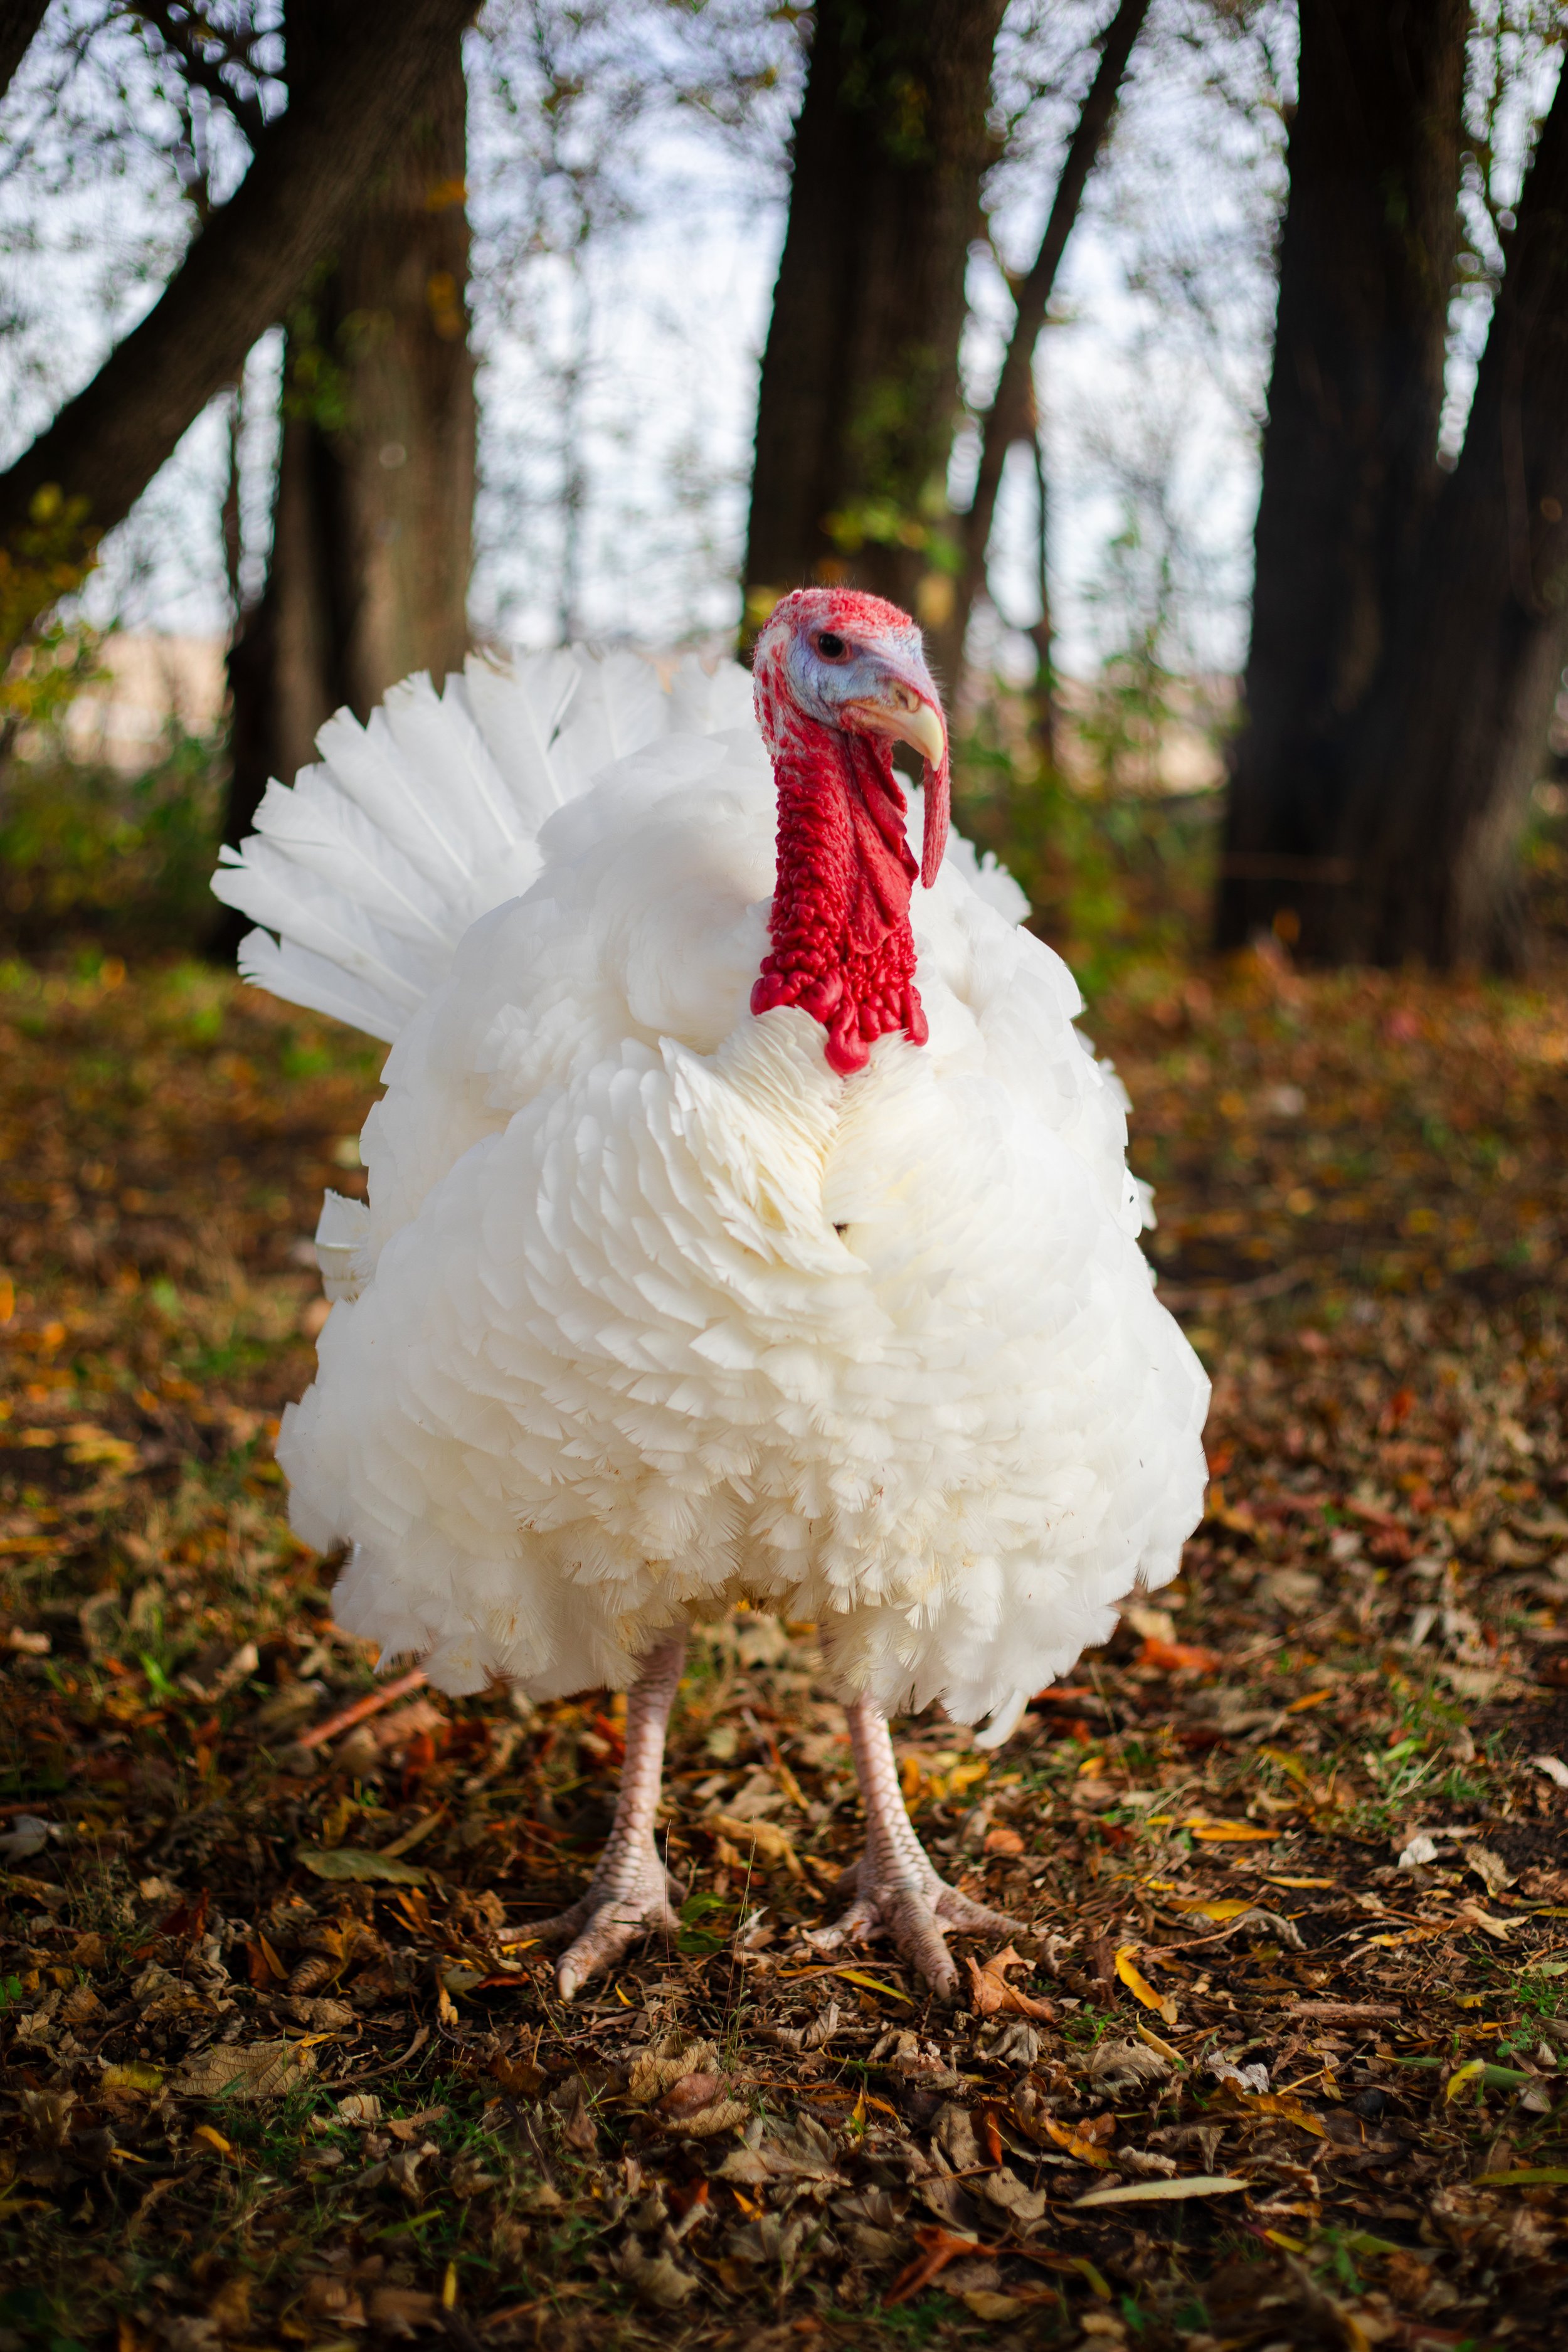
Heritage Breeds: If you are looking for a more “slow food” approach to raising turkeys, you may consider a heritage breed. There are a handful of breeds to choose from, and they are truly quite beautiful. Heritage breeds are slower to mature, though they have excellent flavor, more natural behaviors, and are better foragers (which improves their flavor and helps maintain the insect populations on your property!). These breeds can mate naturally, which means you can breed and hatch your own turkeys year after year for steady production. Some heritage breeds include The Bronze, Narragansett, Bourbon Red, and Blue Slate.

2. General Turkey Raising Information
If you have ever raised chickens on your homestead or backyard, the process to raise turkeys is relatively similar. Like all poultry, turkeys need quality feed, fresh water, and a safe and secure living space that is kept clean to prevent pest infestations and disease from spreading.
The only exception to this is that turkeys are much larger than chickens. This means that they need more of everything— more food, more water, and more space.
It takes 16 to 28 weeks to raise a turkey from poult to slaughter, depending on the breed. This makes purchasing your turkeys for Thanksgiving something that you need to plan ahead for. Another aspect to consider is that baby turkeys, or poults, are usually sold as straight run, which means they are not sexed at birth. You will have a mixture of males, called toms, and females, called hens.
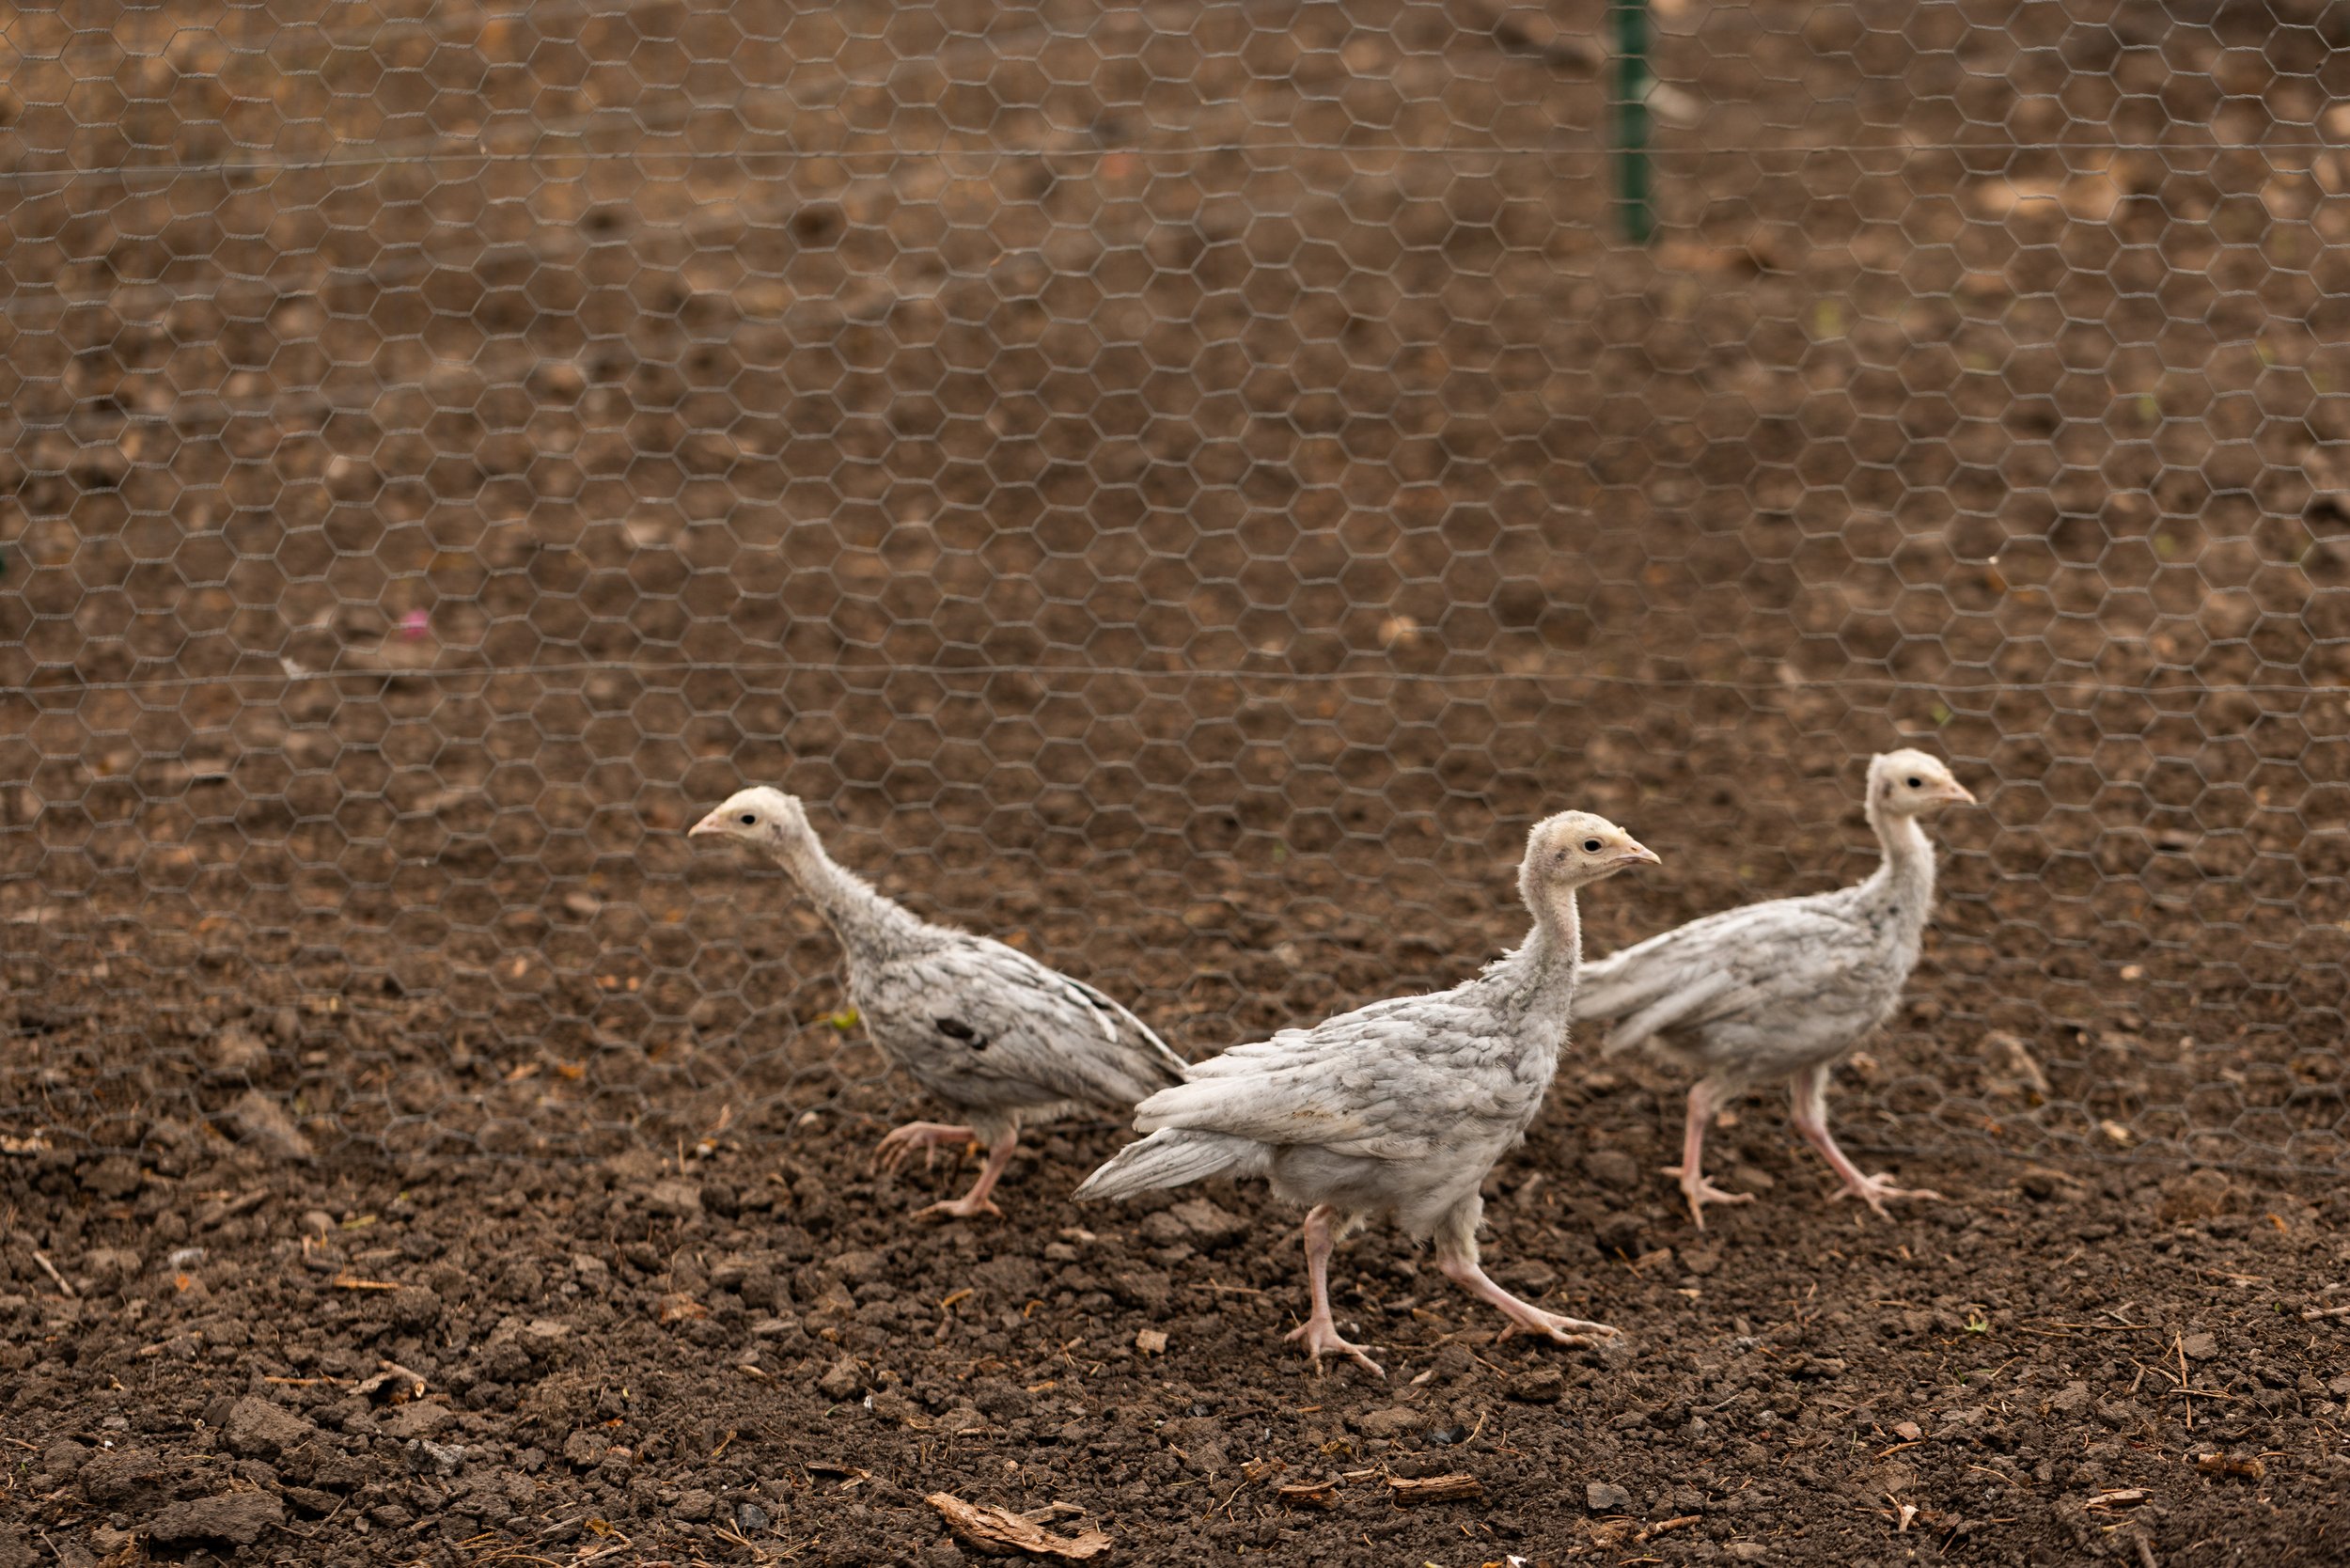
3. How to Raise Turkeys from Poults
Like raising laying hens, caring for turkeys poults is a very similar process. Because turkeys take at least 16 weeks to raise from hatch to processing, they’re a bit more difficult to raise in a chicken tractor-type situation. However, this can still be done, it just means a lot more moving around for you.
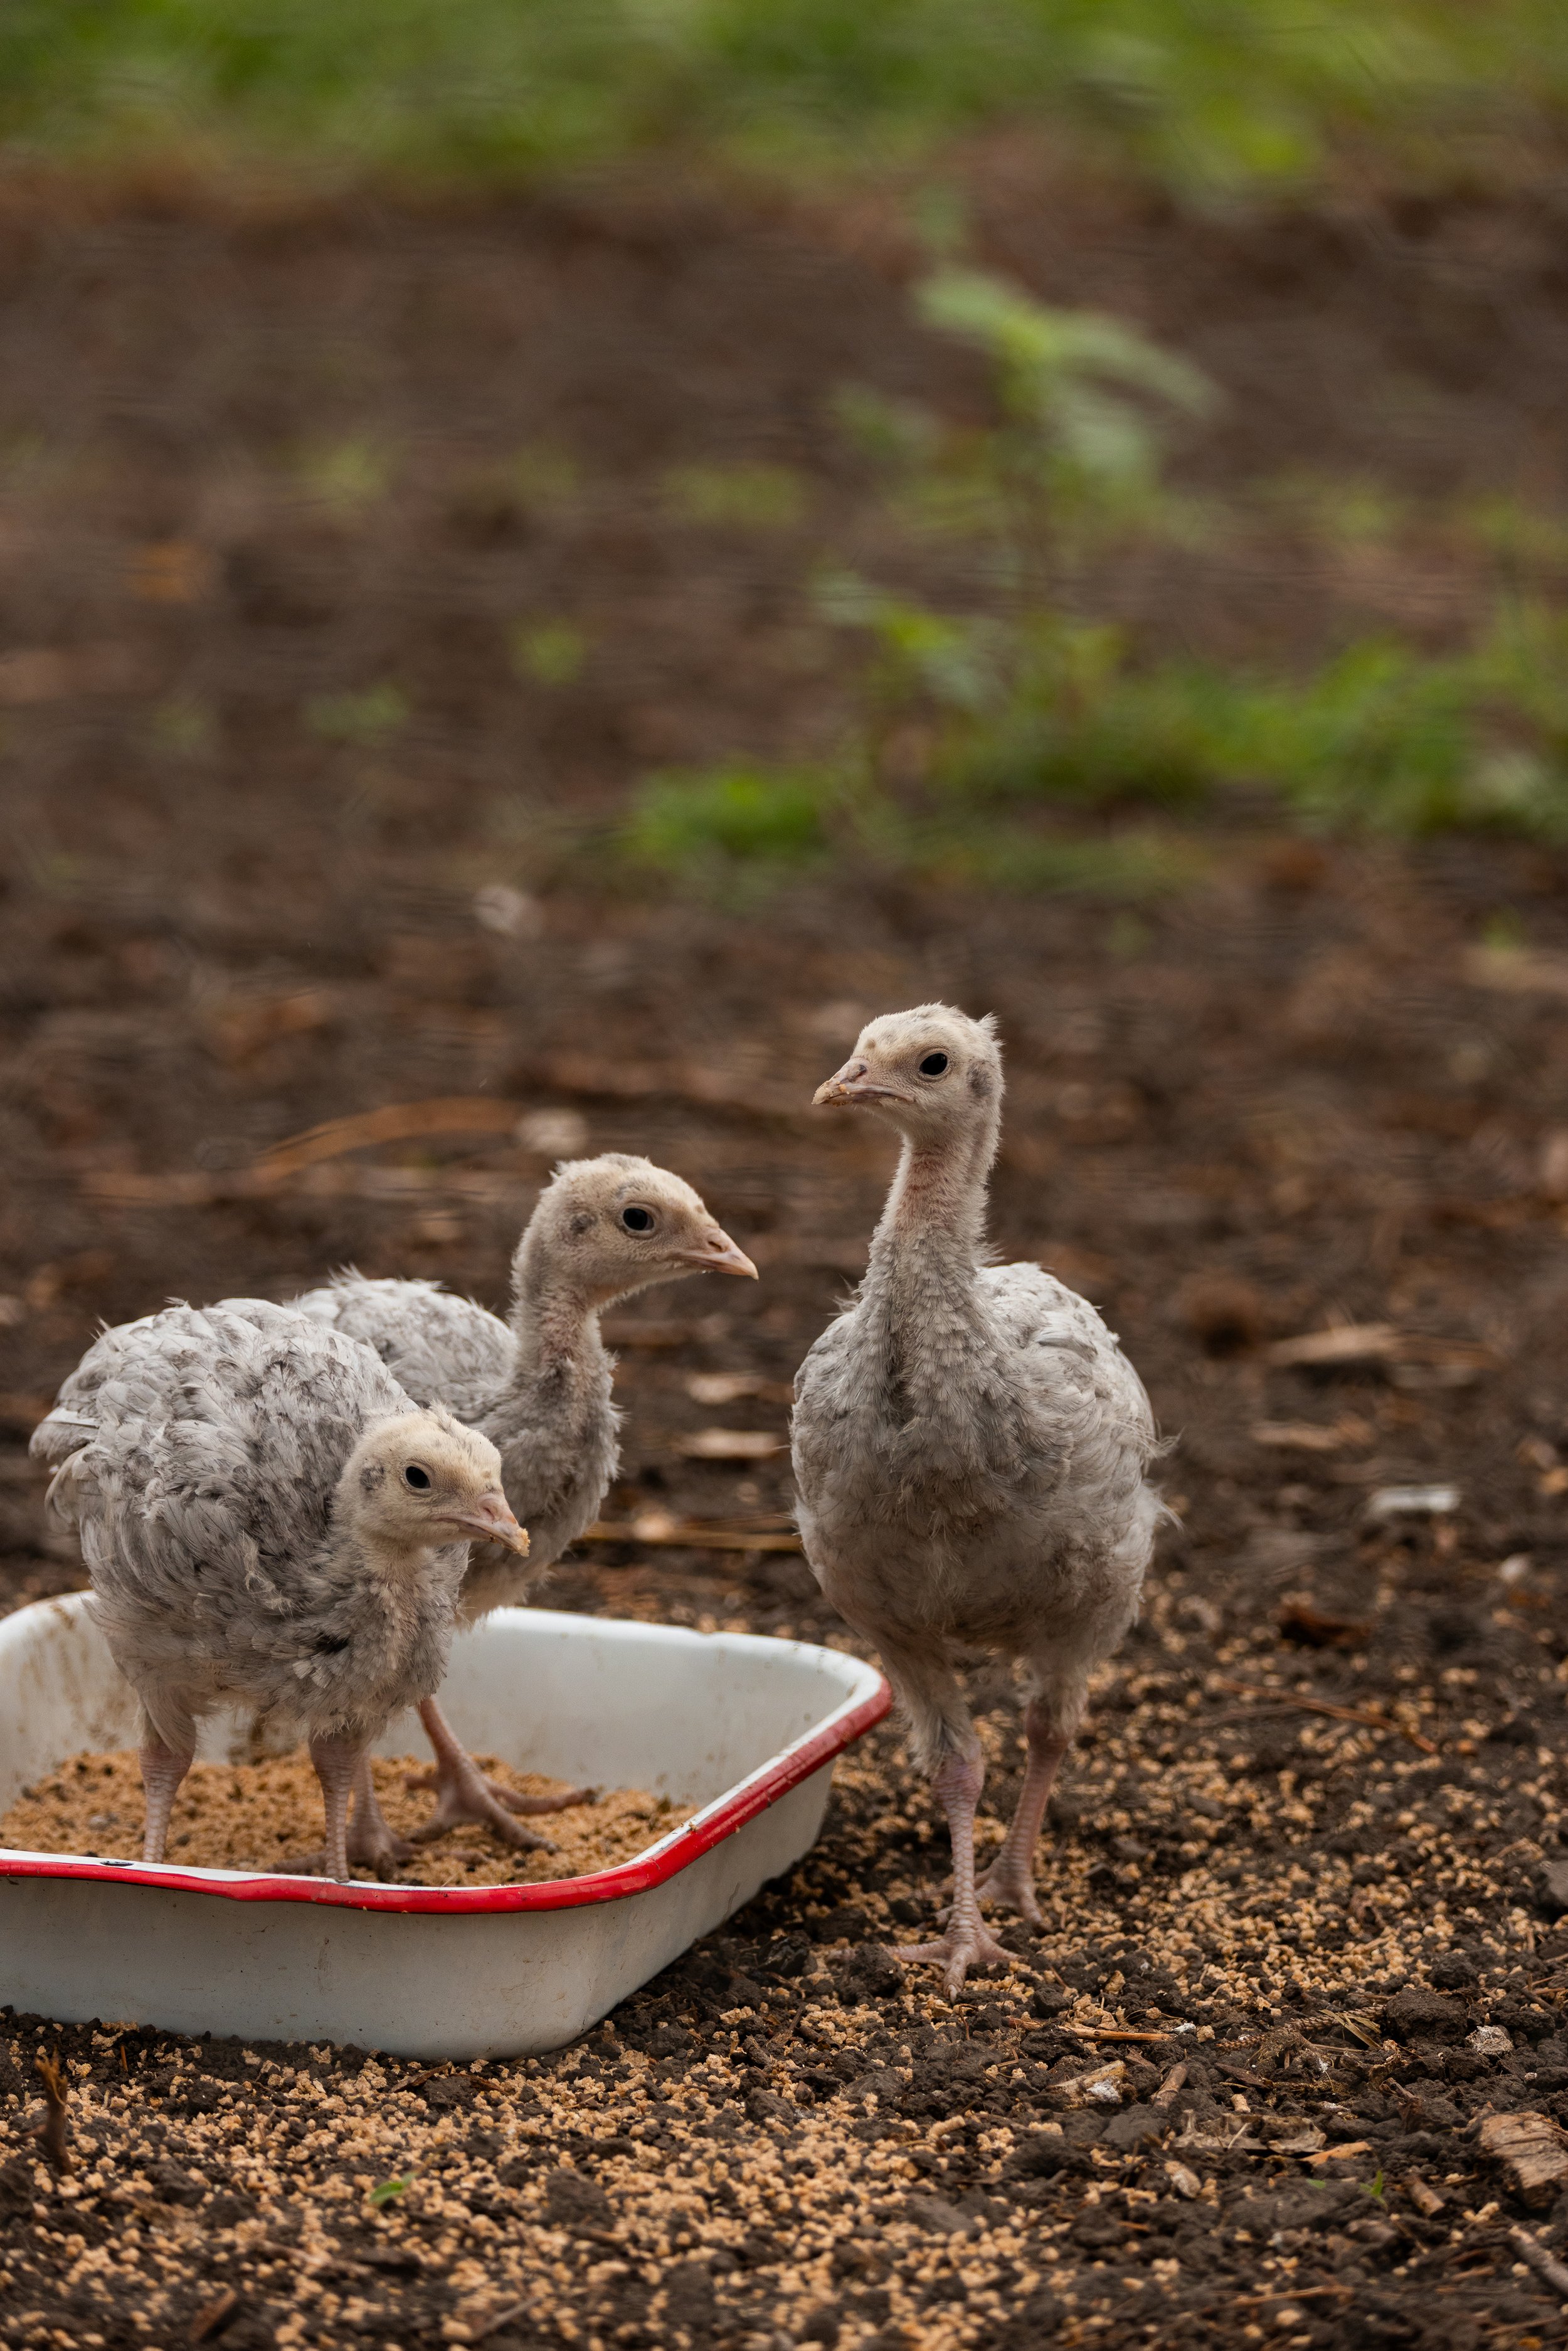
Brooder Setup (0-6 weeks)
Structure: A brooder for turkeys can be similar to one you might use for chickens, though turkeys will grow to be much larger than your standard chicken by the time they are 6 weeks old. They are also fairly good jumpers, so plan for escapees if you have a small brooder by using a chicken wire or mesh covering over the top. We like to use a 100 to 170 gallon stock tank as a brooder to raise our chicks and turkey poults in. It’s tall enough that escapes don’t happen often, there’s not as much dust being kicked up and out, and they have plenty of room to run around without crowding each other.
Temperature: Start at 95°F (35°C) and decrease by 5°F each week until 6 weeks of age. You will need to purchase a heat lamp and adjust its height as they age.
Bedding: Use pine shavings for bedding and change frequently, at least once a week, more often if wet to prevent mold growth and insects.
Feed: During this time, feed your turkeys a free-choice starter feed of at least 28% protein. It best to use a feed that is specifically made for turkeys so that they are meeting the required amounts of protein they need, which is good for their health overall. For water, you can use a standard chicken waterer. Place a few marbles in the bottom of where they drink so that they do not accidentally fall asleep in the water and accidentally drown themselves.
Additional Items: You can add electrolytes and probiotics to their water in the first few weeks to help them recover after hatching and travel.

Grow-Out Phase (6 weeks to harvest)
Shelter: The turkeys are ready to leave the brooder once they have feathered out, or grown all of their mature feathers and no longer show their fluffy down feathers. Turkeys are adaptable and can be grown in various ways such as free-range, pastured, or in a confined area. No matter which way you raise them, they will need some form of shelter to sleep in, find shade, and protect themselves from predators. Turkeys need at least 3 to 4 square feet per bird in their coop, so be sure to provide them with adequate room. Provide proper ventilation to prevent respiratory illness and be sure to clean out their coop regularly, usually a quick cleaning weekly and a deep cleaning monthly.
Feed: As turkeys age, their protein requirements lessen. By the time they are 6 weeks old, they need to moved to a grower feed or finisher feed for turkeys of at least 20% protein. Continue to provide fresh water and replace daily.
Enclosure & Pasture-Access: For the best tasting turkeys, provide access to fresh grass as much as possible. The more turkeys are able to forage on pasture, the healthier they will be and the better tasting their meat will be. When chickens and turkeys have the ability to exercise as well as eat fresh greens and insects, it changes the composition of their muscle creating a more fibrous and complex flavor profile.
Roosting: Turkeys, both wild and domesticated, prefer to sleep elevated from the ground. You will want to provide a roost in their coop. Generally, they prefer a roost that is higher off the ground than a standard roost for chickens, especially if they are of a heritage breed.
Nesting: Do turkeys need nesting boxes? Not necessarily if you are raising them to be butchered. However, if you want to breed your turkeys, then you will need to provide a nesting area. They prefer ground nests, so you may consider building a small walled off area at ground level in their coop.
Additional Items: Turkeys can be fed kitchen scraps and truly enjoy the added nutrients from vegetables! They can enjoy a variety of scraps including lettuce, ripened tomatoes, sweet corn, summer squash, sweet potatoes, berries, melons, and cucumbers.

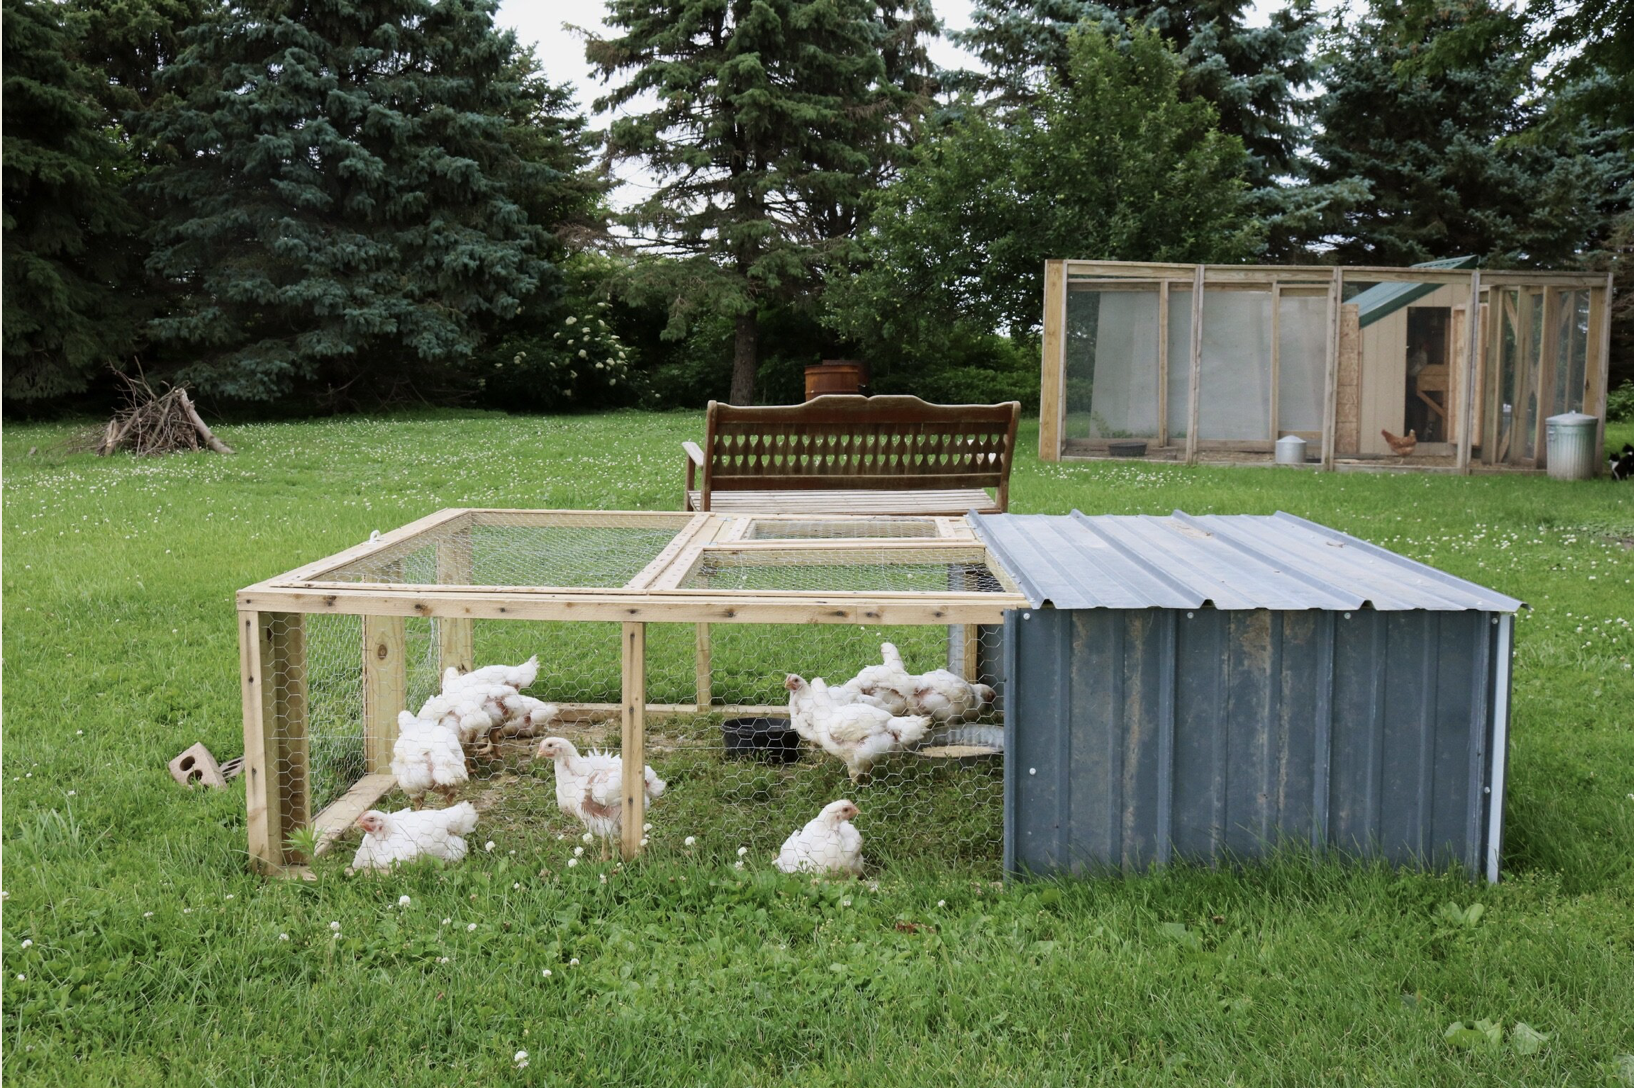
Turkey Housing Options
We have raised our chickens and turkeys with a few different methods for housing. These are my preferred ways to raise turkeys, though you can choose to do so any way that works best for your schedule and property.
Chicken Coop/Enclosed Run: My preferred method for raising turkeys is in a traditional chicken coop and enclosed run situation. Because turkeys take longer to raise until they are market weight, they need a more permanent structure. We like to free-range our turkeys, or pasture them. This means I simply open the door to their enclosed run and they spend the day going in and out of the coop and wander about the farm wherever they like. This is not always an option for people, especially if you live in a neighborhood, in a place with higher populations of predatory animals, or simply don’t want your turkeys in other areas of your yard. If this is the case, an enclosed run is a great way to allow them access to the outdoors while keeping them protected.
Chicken Tractor: Another option is using a chicken tractor, which is smaller enclosure that is open to the air but is moved once or twice daily around the farm so that the chickens or turkeys are on fresh grass. Chicken tractors are generally DIY operations, usually a simple frame covered in hardware cloth to protect from predators.
Pro-Tip: It’s always best to use hardware cloth when building your enclosure for turkeys. The holes in this type of fencing is smaller, meaning predators can’t as easily reach through it like chicken wire. Raccoons, for instance, will reach in and pull your turkeys out through the larger holes in chicken wire piece by piece.
BEFORE culling Your Turkeys
Before culling the turkeys, be sure to restrict their food intake for at least 12 hours and no more than 24 hours. Remember, this is the one worst day of their entire lives. Killing a turkey with a crop, stomach, and intestines full of food is not fun. I have done this, and it can be a mess if you make the wrong cuts!

4. When to Butcher Turkeys
As turkeys get older and larger, you may begin to wonder when the best time is to butcher your turkeys. Generally, they are ready to butcher in early to late fall if you started raising them in the spring. The time to butcher will depend on the breed of turkey you are raising as some mature faster than others.
Broad Breasted: These breeds grow faster and are at their mature weight at around 16 to 20 weeks for a 15 to 25 lb (7 to 11 kg) bird.
Heritage Breeds: These breeds take longer to mature and are ready to harvest at around 24 to 28 weeks depending on weight goals.
Other factors that could influence your timing depends on if you are wanting to butcher them around a holiday. The typical desired size for a turkey is around 12 to 15 lbs, so you may be able to butcher at a younger age. Generally, turkeys yield about 75 to 80% of their live weight after butchering (removing feathers, internal organs, etc).


5. preparation and tools for butchering
Bleach. I do not normally use bleach very often in our home as I prefer more natural disinfecting products. However, for the sake of being extremely sanitary, especially since we butcher outdoors (which is a GREAT place to do this for open air circulation), I do use bleach for sanitizing surfaces and tools as we work.
Easily Cleanable Surfaces. You will have to process your birds somewhere. I prefer to use a stainless steel prep table as it easy to clean and disinfect.
Wash Bucket/Sink. If you are doing this inside, have a wash bucket with diluted beach on hand. For us, we have a hose nearby to spray off the surface and disinfect with bleach and paper towels. While I love primitive tools, it is better to be as sanitary as possible.
X-Large Culling Cone. We use a culling cone to slaughter our chickens. This is incredibly helpful to have as it prevents them from bruising and breaking their wings/legs. For turkeys, you will need a much larger culling cone like this 26-inch one.
Stainless Steel Tubs & Buckets. There will be a lot of mess. Some are things that you may want to save like blood, feathers, and internal organs. Have stainless steel buckets set aside for collecting these things.
30 Quart Stock Pot. To remove the feathers, you must dunk the entire chicken into a pot of boiling water. I like using a 30 quart stock pot best.
Outdoor Gas Cook Stove. To boil the water to scald your turkeys, you will want some heat source. I like to use a gas cook stove because it keeps the heat more consistently and is less work for me to keep a fire going while butchering. However, you can simply build a fire and boil the water over that as well as use it burn any parts of the turkey that you cannot keep (such as intestines). Honestly, I usually have both a fire and a gas stove going at the same time!
Automatic Chicken Plucker. While this tool is entirely optional. it can be incredibly helpful and save you time. The only drawback is that it is expensive. However, if you are planning to raise and butcher your own poultry for years to come, it is a worthy investment. We finally purchased one for the first time last fall, and it was so nice!
Butchering Knives. Butchering knives can be helpful as they are shaped specially for dealing with cutting around bone and through joints. You will need sharp knives of any kind for the slaughtering and evisceration. I love to use kitchen scissors for butchering, too.
Cooler with Ice. It is best practice to get the turkeys as cold as possible after butchering is finished. We do not have access to a commercial flash freezer, so an ice bath is the next best thing. As we butcher, we store the finished turkey carcasses in a cooler packed with ice and cold, clean water. They are dunked into the water immediately after being finished and stored in the cooler as we work or until the person preparing them for freezer storage can get to them. Make sure the cooler is sanitized before using.
Food Sealer OR Freezer Bags. Once the turkey is finished, we use a vacuum Food Sealer to package the birds and freeze them. You will want to use vacuum sealer bags for extra large items!
6. how to slaughter Turkeys
There is no FDA or USDA approved “humane” way to kill a turkey, at least in terms of slaughtering at an approved slaughter house. The most humane way to kill a turkey is debated. It is my belief that the least traumatic way to cull a chicken or turkey is to stun the animal and then kill in the least painful and quickest way possible. Some people gas chickens in a chamber or use a firearm. I do not think either of these options are feasible for small homestead butchering, and is really quite traumatic.
The best methods are slicing the carotid arteries in the neck, decapitation, or breaking the neck. We prefer slicing the carotid artery, as it is the easiest way for us. Here is the step-by-step processing of culling a turkey this way:
Prepare the Culling Area: Drill the culling cone into the side of a tree or wooden post. Place a stainless steel bucket underneath the culling cone to collect any dripping blood (if desired). Have a pot of boiling water ready to go, the butchering station cleaned and ready for evisceration, and a cooler filled with ice and water for storing the finished turkey.
Stun the Turkey: Hold the turkey around the entire body with the wings pressed to its sides— this is easier said than done. With a swirling motion, move the turkey around in a circular motion in front of you. This disorients them and makes them dizzy, which makes it easier to get them into the culling cone.
Put the Turkey in the Culling Cone: Once disoriented, flip the turkey upside down and place the head into the culling cone and out through the smaller hole at the bottom. The cone prevents their wings from flapping as they bleed out, which can result in broken wings and bruising. You will most likely need two people to do this as the turkeys are quite large and can be strong enough to kick and fight their way out of the cone.
Cut the Carotid Artery: With an sharpened knife, make a ventral neck cut, or horizontal cut across the entire neck just below the jaw bone. This type of cut bleeds out the turkey rapidly, and is beneficial for the welfare of the bird as well as the quality of the meat. Once cut, check to see if there are two jets of blood streaming in an upside-down V-shape. This indicates that both carotid arteries have been severed. If the blood is slow-flowing, the cut was not made deep enough. The skin of a turkey’s neck is much thicker than a chicken so make sure you are using a very sharp knife.
Bleed Out the Bird: Once the carotid artery is cut, the turkey’s body will go into shock and begin to involuntarily jerk and wiggle. This is normal, though difficult to witness. Wait for the bird to bleed out for at least 3 minutes, checking for any signs of life such as corneal reflex or rhythmic breathing. Make sure that the turkey is confirmed dead before continuing the process. If they were not cut deeply enough, it can be a good idea to decapitate the turkey at this point.
Clean the Carcass and Culling Cone: It’s fairly common for the turkey to defecate during its death, so you will want to have a hose and some diluted bleach on hand to spray down the turkey and culling cone before processing the next bird.
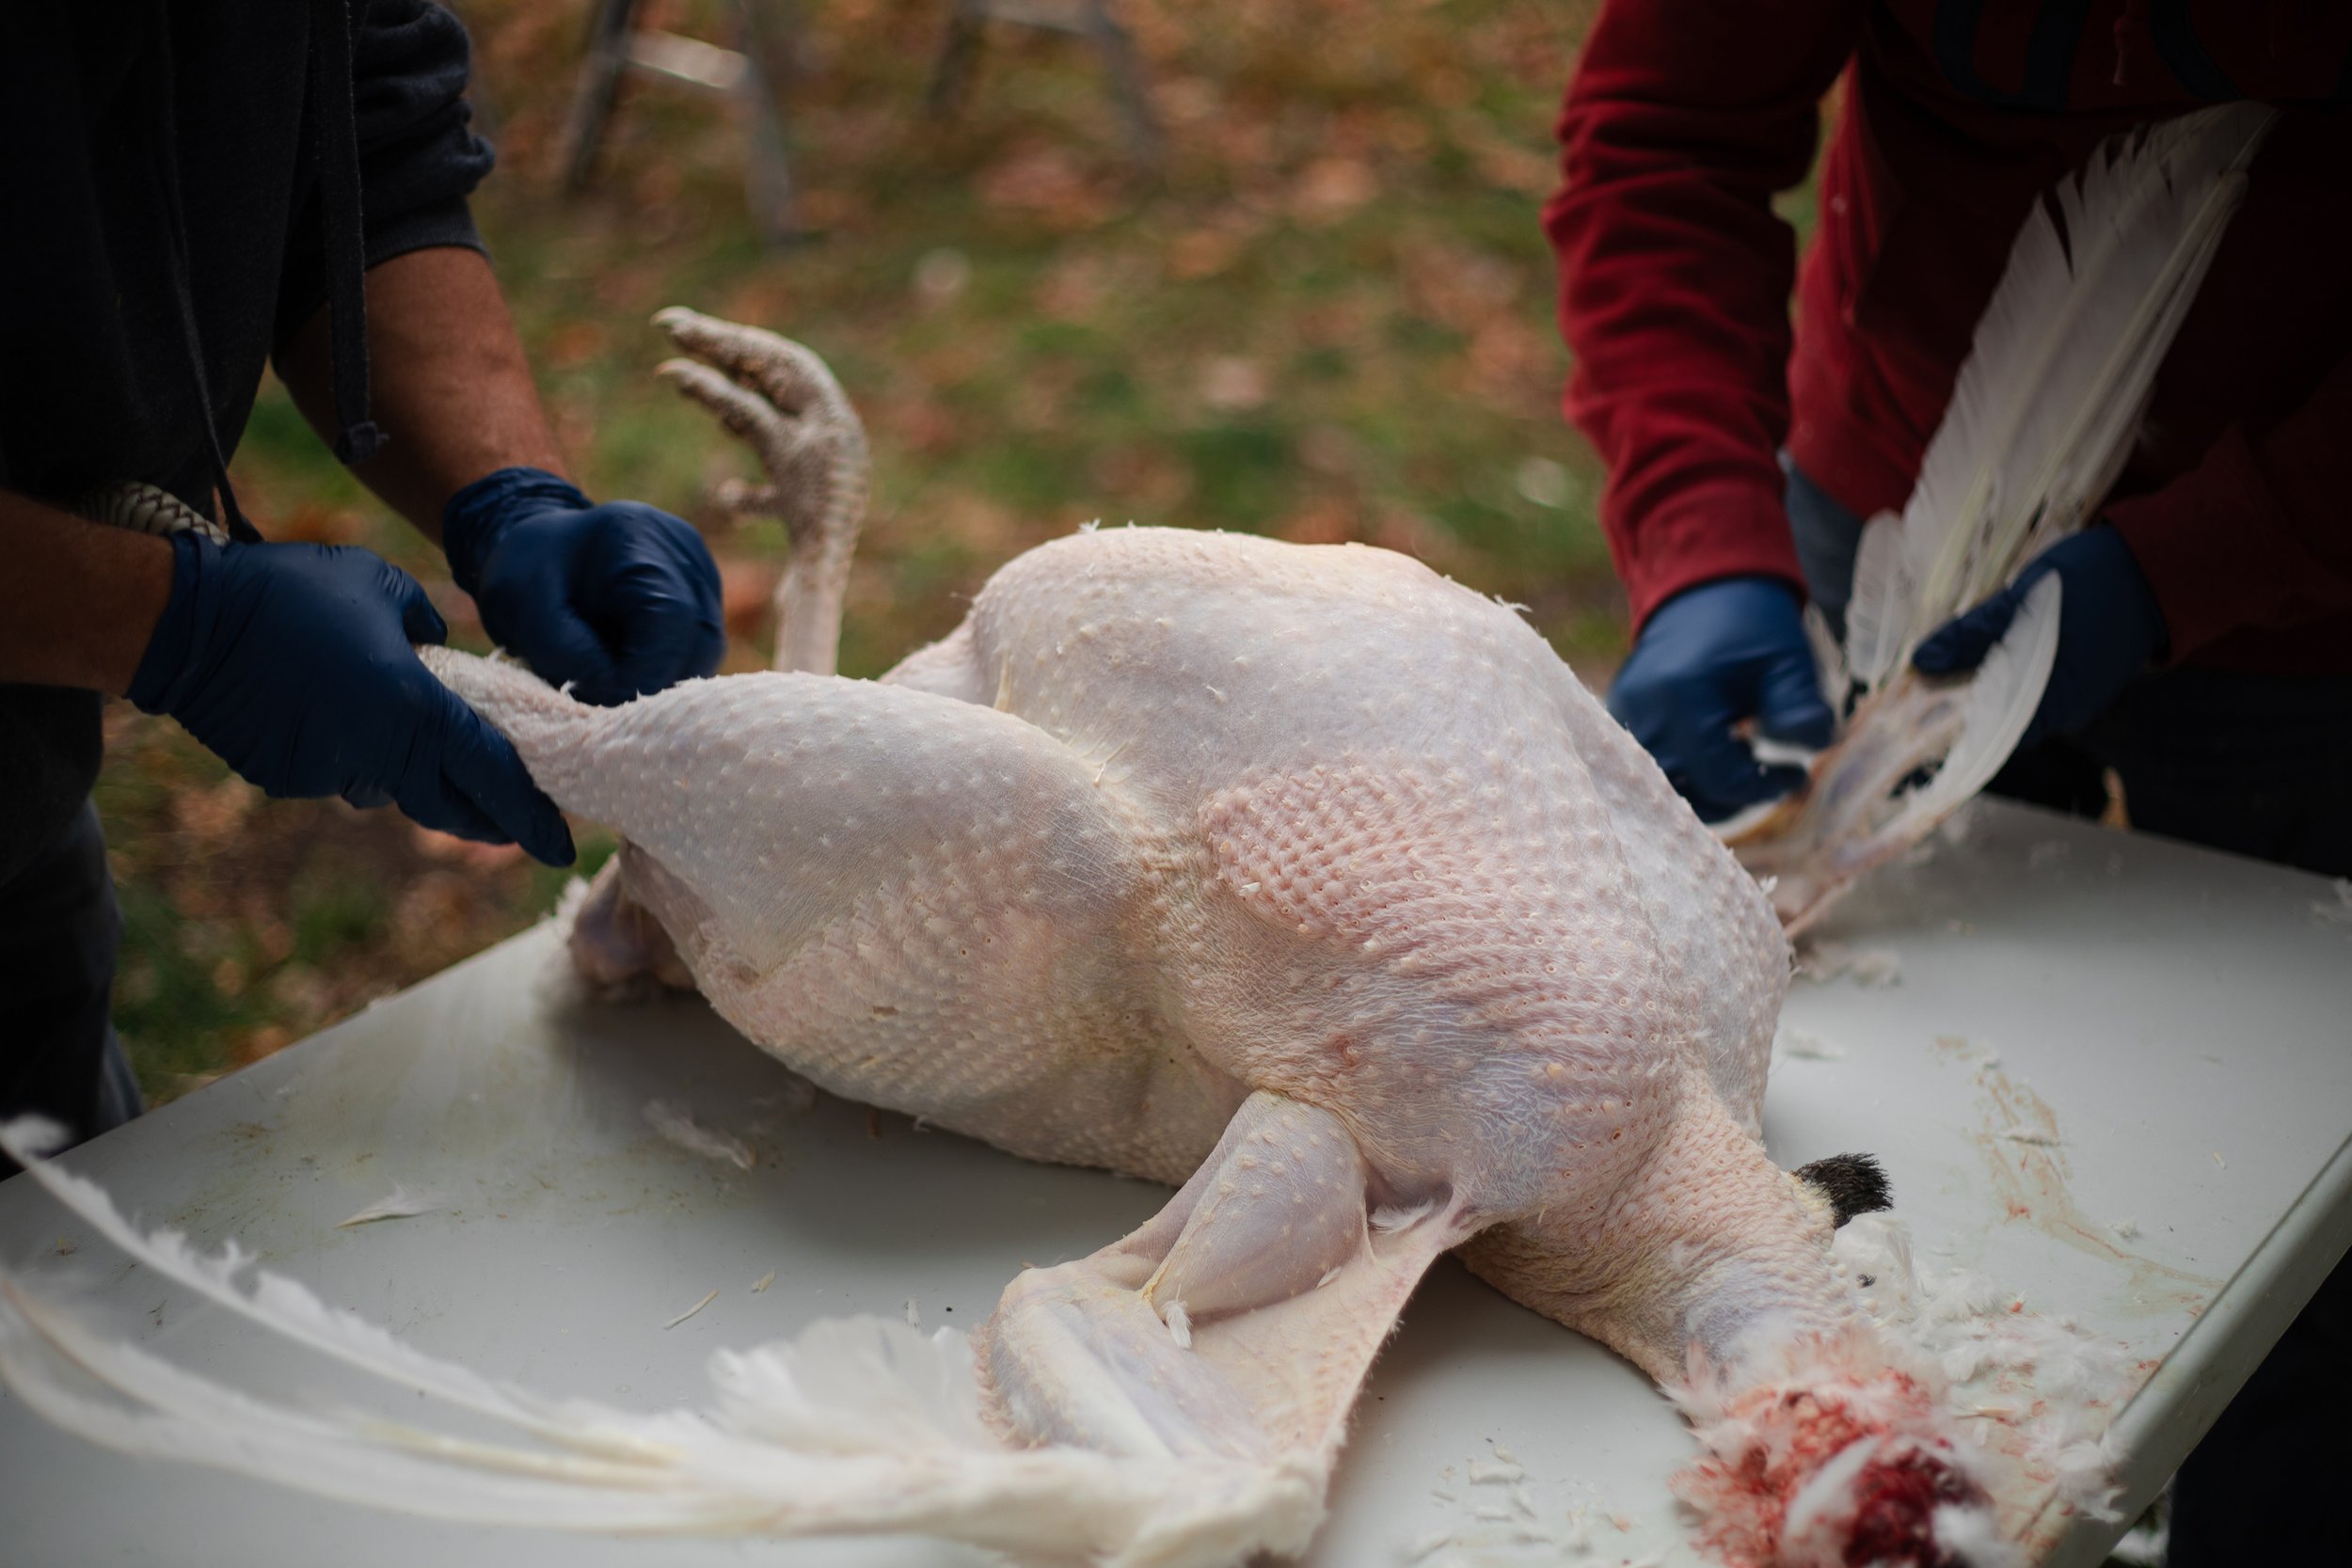
7. de-feathering Turkeys
While I have killed a several chickens and even hogs, I tend to be the chosen person that butchers, or rather, processes the animals into their various cuts. The next step in the turkey butchering process once the animal has been slaughtered is to remove the feathers.
Prepare the Work Area: As stated above, have the stock pot with boiling water ready to go at a consistent rolling boil (if using). We have used a propane burner stand in the past as well as wood fire. I prefer to work over the wood fire, but that’s just my personal preference, as I can use it to burn any parts of the turkey that are inedible.
WET PLUCKING METHOD:
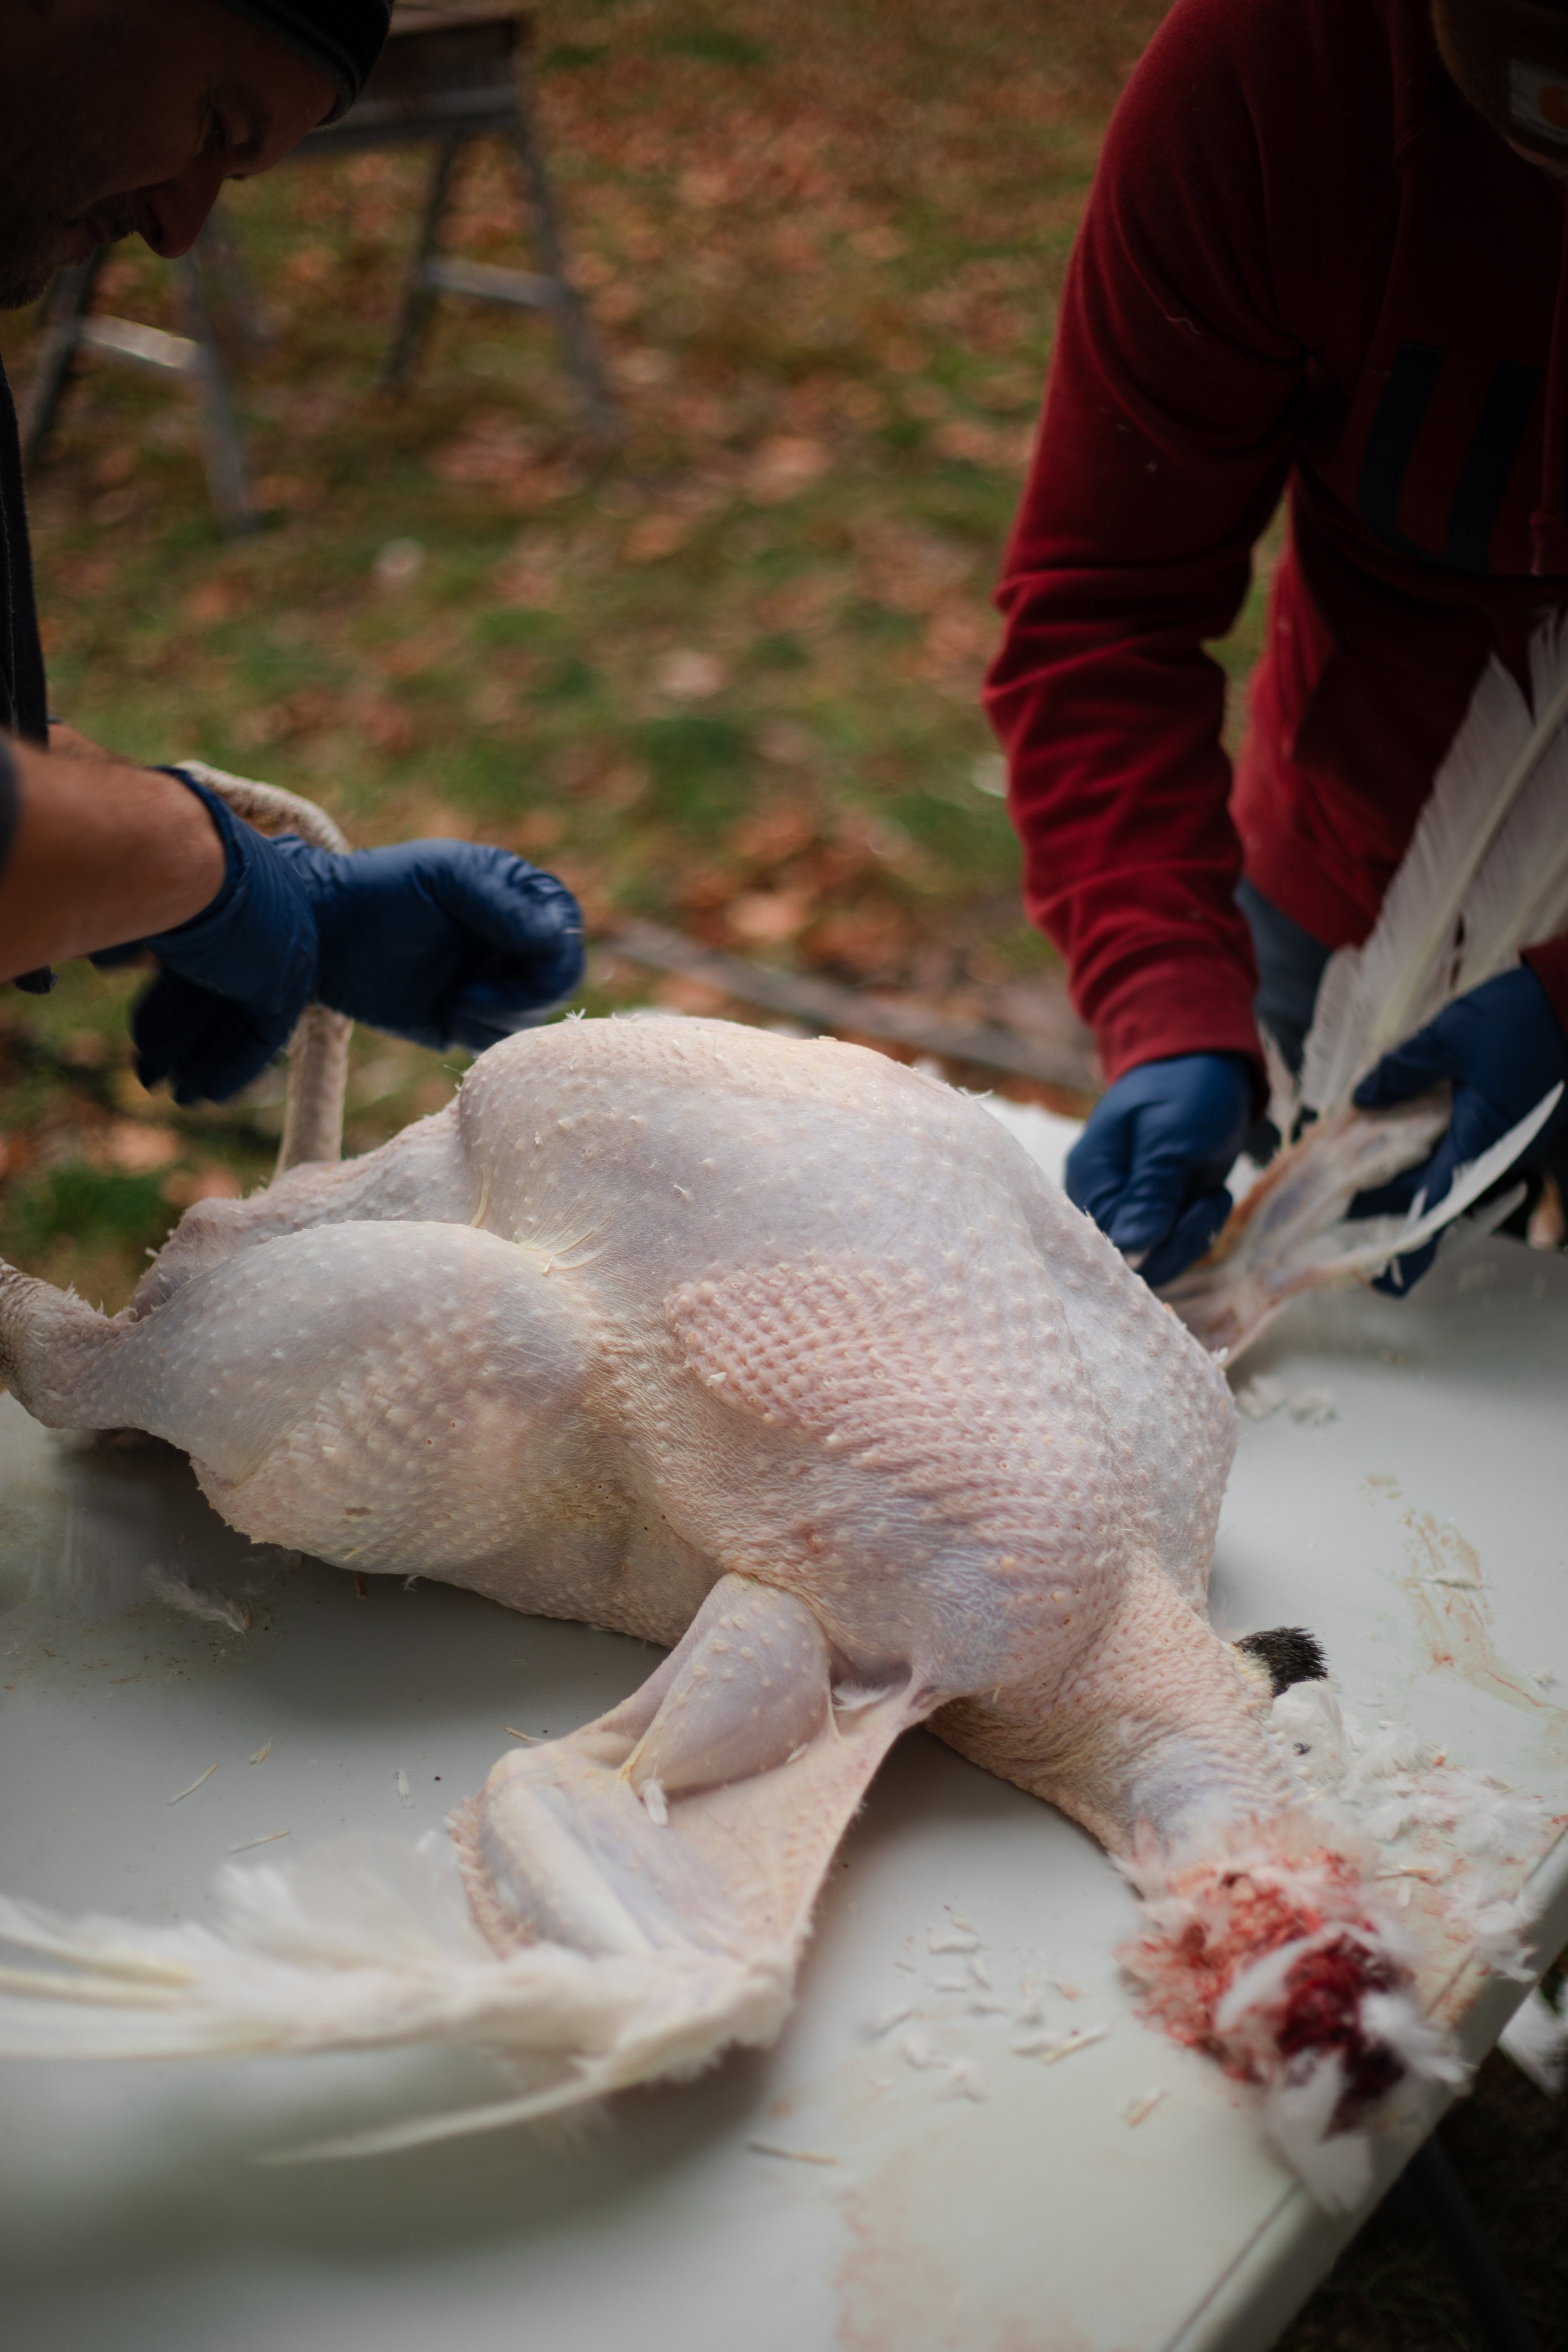
Dunk the Turkey: Holding the turkey by its feet, dunk the bird all the way up to the first joint in the legs, where the feathers end. You do not have to dunk the scaly feet. Dunk for 1 to 2 seconds then pull it out of the water completely. Repeat the dunking for another 1 to 2 seconds and let the water drip fully away from the chicken. Be careful not to drop them into the water - they can be heavy! You do not want to dunk them into the boiling water for too long, or you can damage the skin.
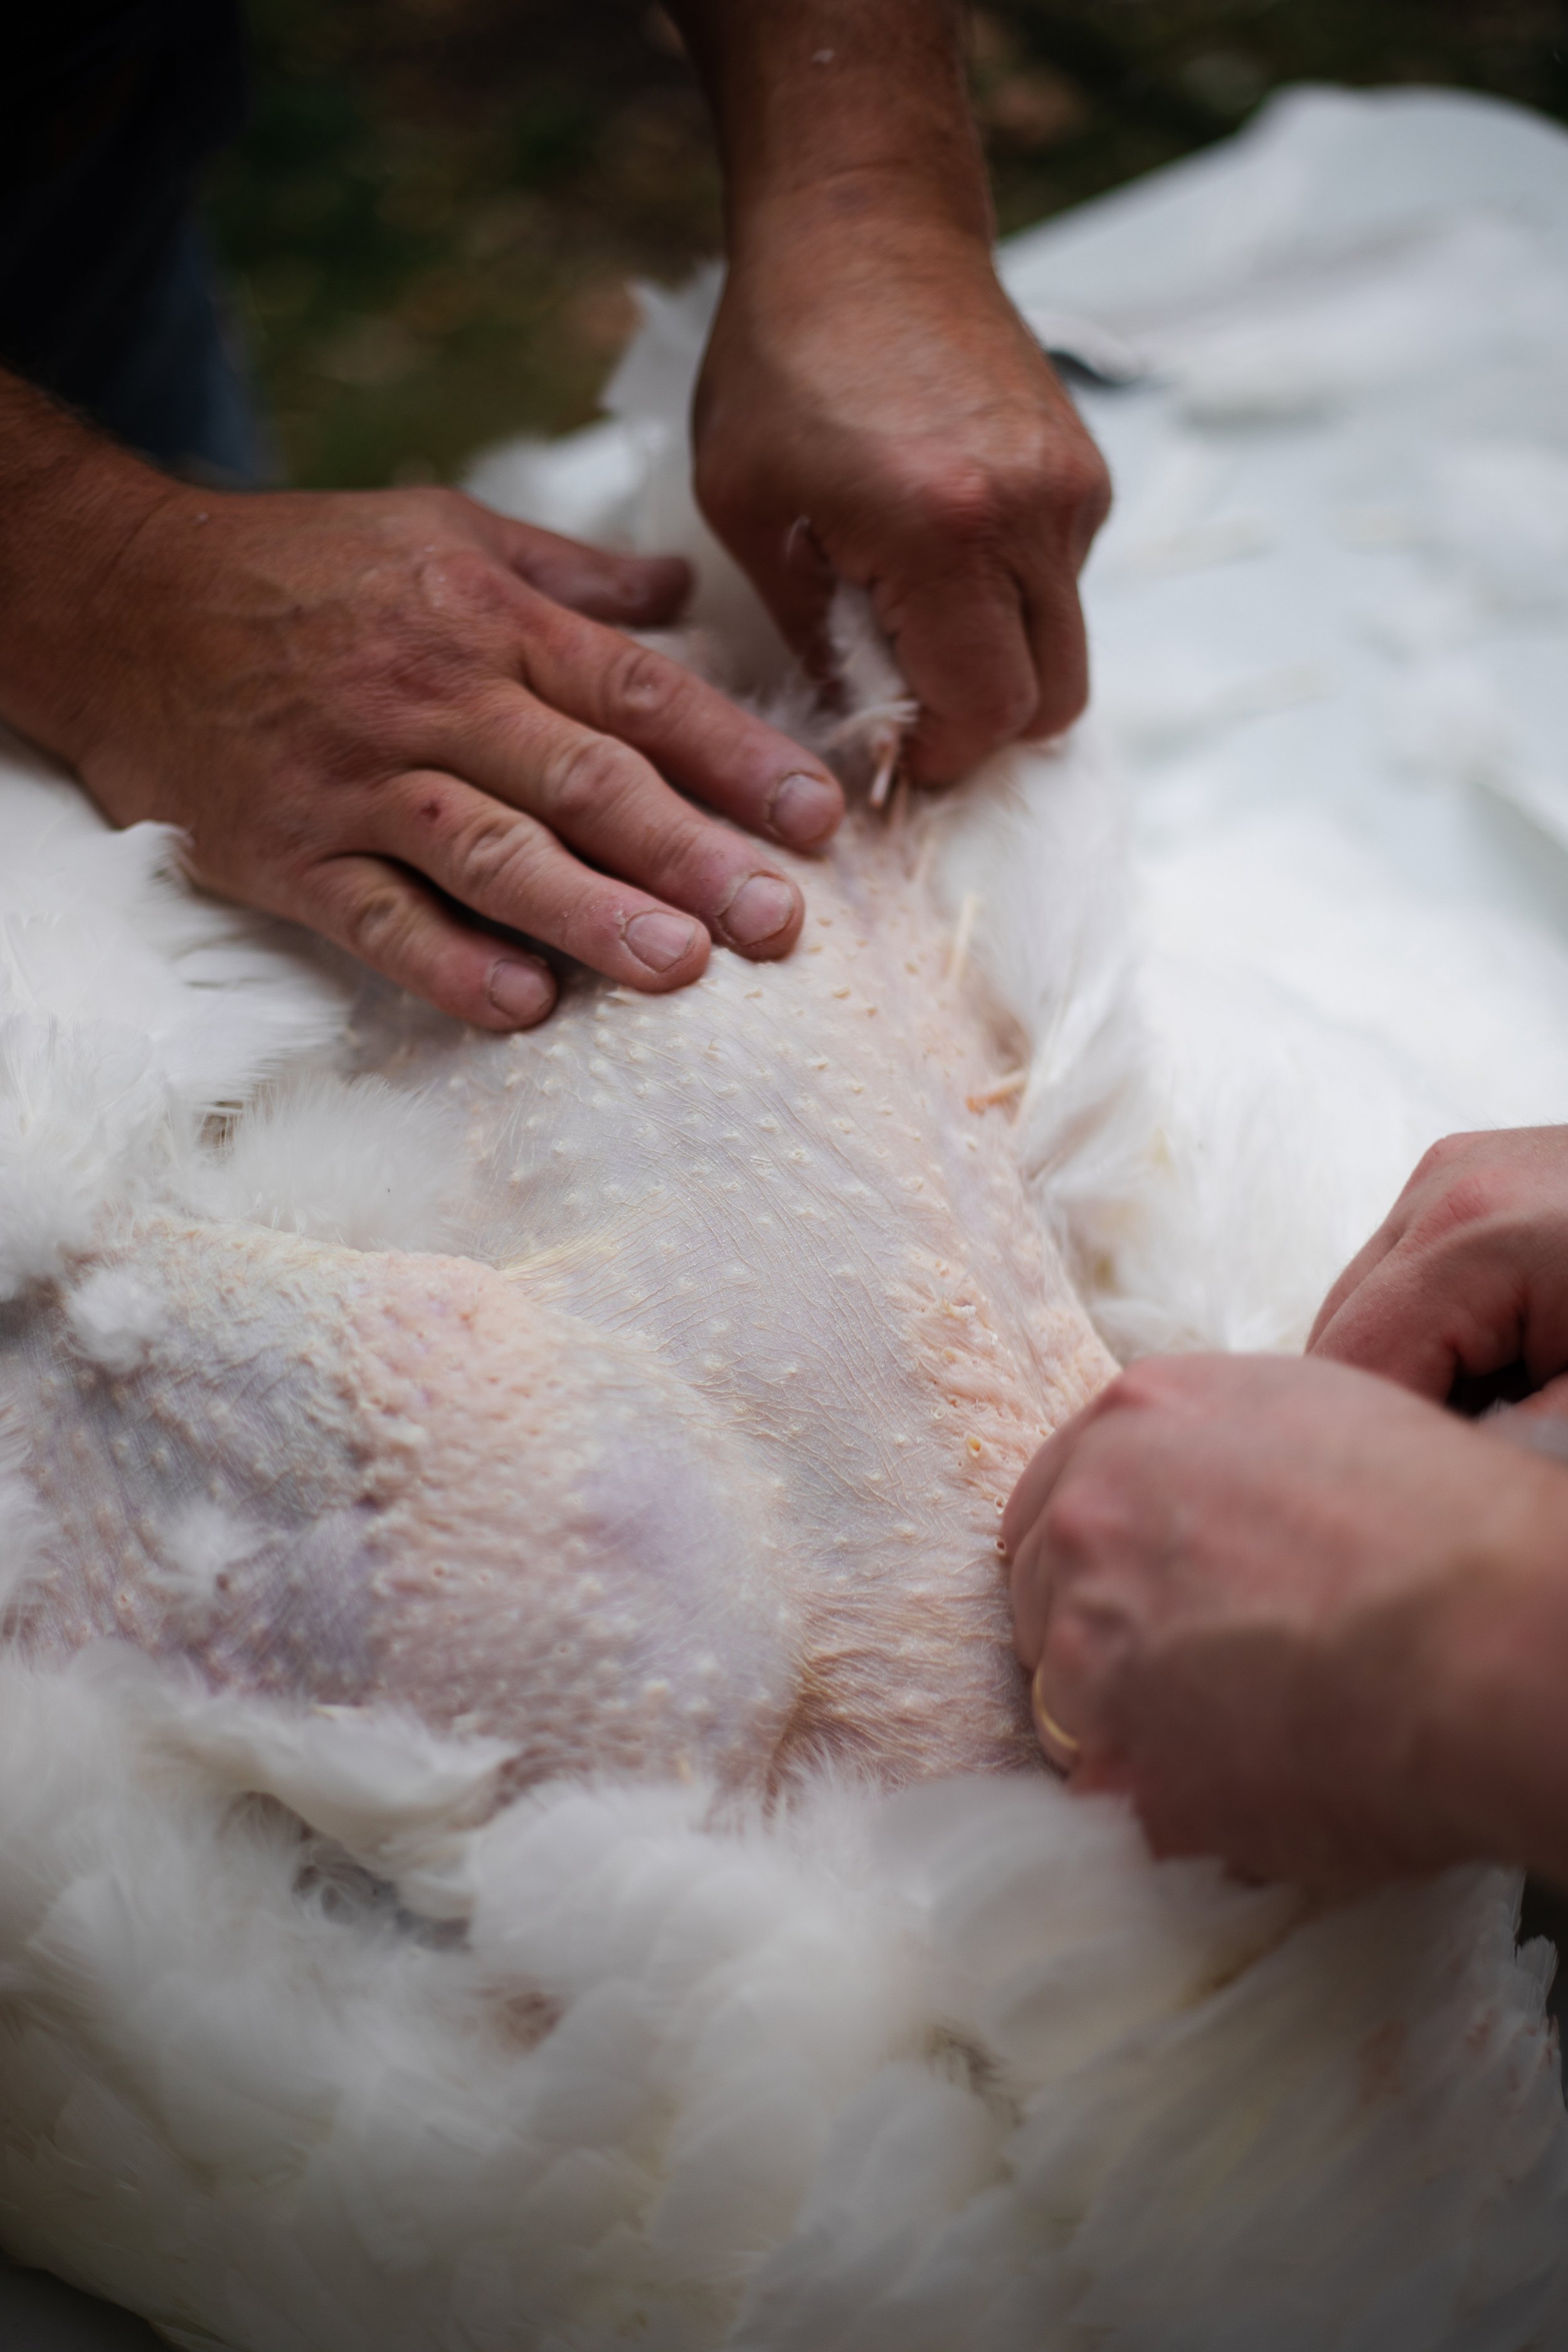
Pluck the Feathers: Move the wet turkey to a sanitized spot that is separate from where you will eviscerate the turkey. Begin pulling out the feathers with your fingers. Dunking the turkey in hot water opens up the pores to allow for easier removal of the feathers, which is harder to do with game foul such as ducks and turkeys. It is easiest to pull them out by pulling them in the opposite direction from which they grow. This job can be tedious, though you will begin to get faster at it as you process more birds.
DRY PLUCKING METHOD:
Begin by Plucking the Feathers: You do not have to dunk your turkey to de-feather it. In fact, I might recommend that you don’t to protect its skin. Dunking in boiling water often results in broken skin, which can be unappealing in your final presentation after roasting your beautiful turkey! For our turkeys, because we only raise about 2 to 4 of them a year, we dry-pluck them. Simply follow the same directions as above to pluck your turkeys. Dry plucking is much more tedious and harder to do, so get ready for the long-haul.

PLUCKING TIPS:
Do Your Best: The hardest feathers to remove are the wing tips, the tail, and around the vent (rectum). Try your best to remove all the small down feathers until the turkey is naked. It is okay if they are not all fully removed. This is hard to do in the moment, especially when there are other turkeys waiting to be processed. Just do your best and work at a steady pace, if possible! You can always remove any little feather that you missed later before cooking.
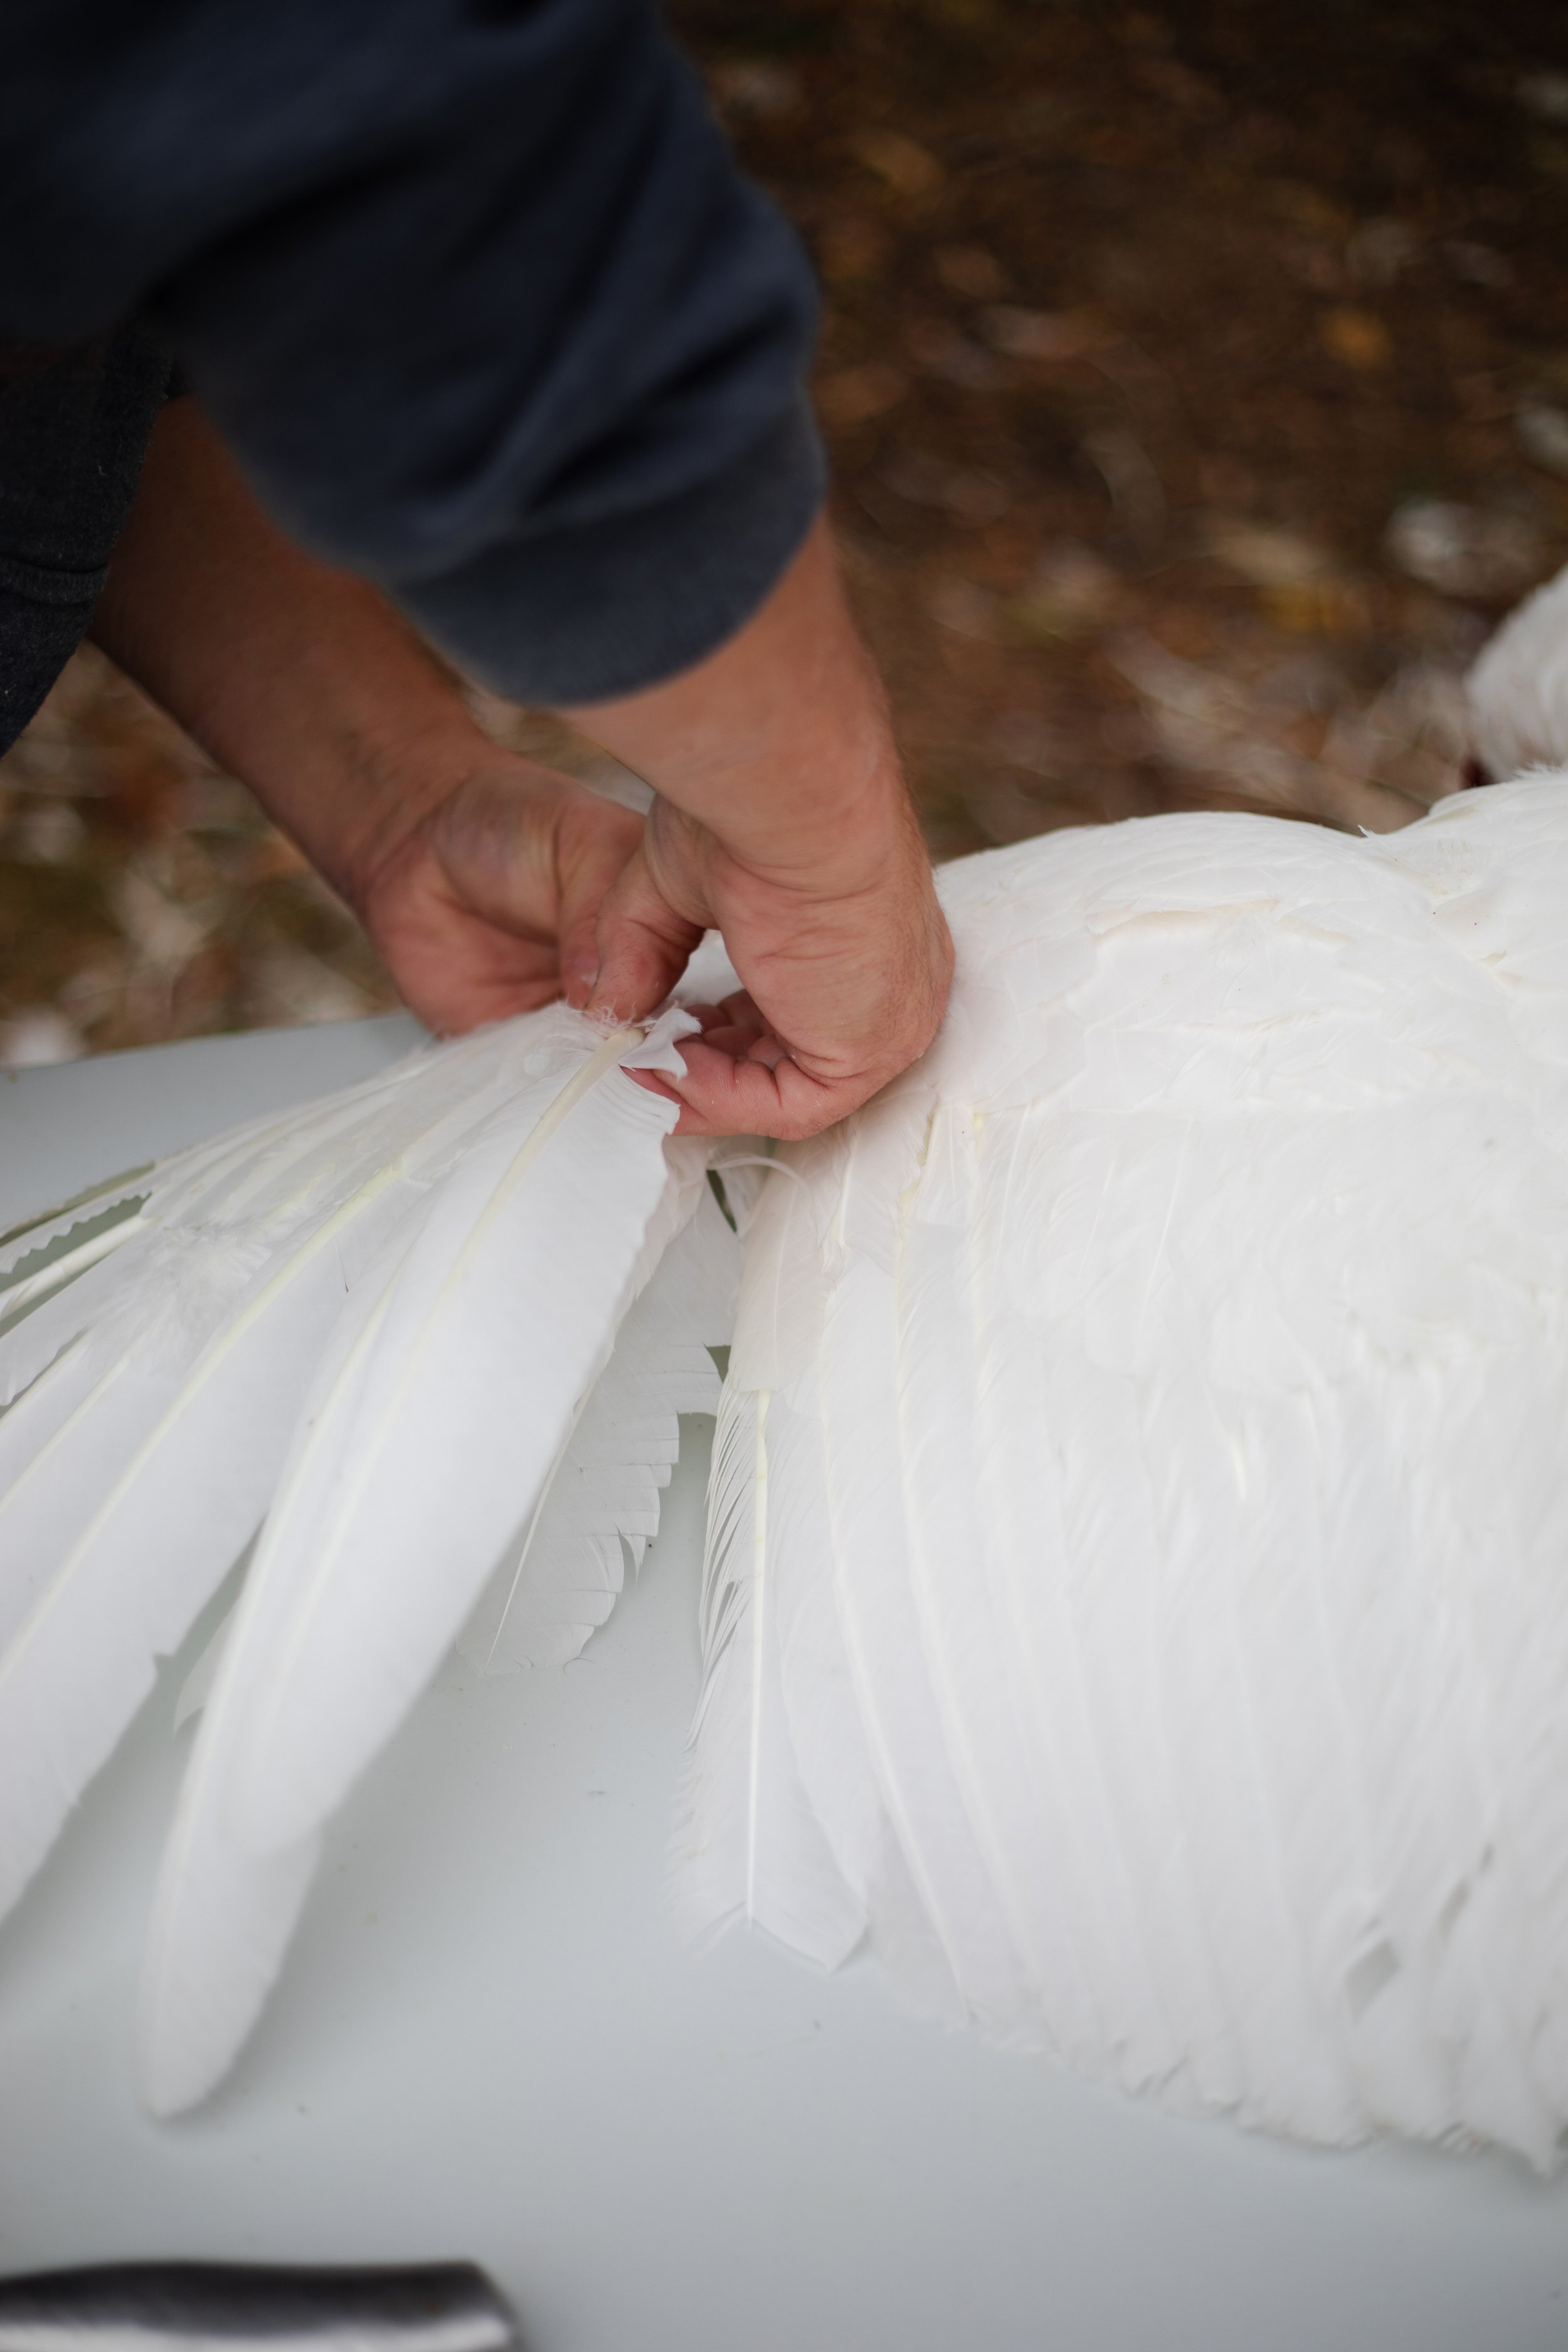
Use Pliers: Turkey wing and tail feathers, specifically, are incredibly difficult to remove. Even the strongest people have a hard time pulling them out, they are so truly stuck in there! If you are having trouble, using a pair of pliers (the big kind) can be really helpful to pull out these thick, stubborn feathers.
Keep the Down, Wing, and Tail Feathers: Unlike meat chickens, turkeys have incredibly beautiful down feathers underneath their contour feathers, or main body feathers. These can be washed and kept to use for making things such as pillows! My husband enjoys keeping the wing and tail feathers for projects like making homemade quills for writing and other historical outdoor gear and decorations.
8. eviscerating the Turkey
The next step is to eviscerate the turkey, or to remove the internal organs and turn it into an edible product, similar to what you would purchase at the grocery store or butcher. This is the most difficult part, aside from getting through the act of culling the turkey.
This is also where things can go wrong, namely contaminating the meat with the turkey’s feces while trying to remove the intestines. It can be a scary undertaking, but just remember that humans have been doing this for thousands of years. You can, too!
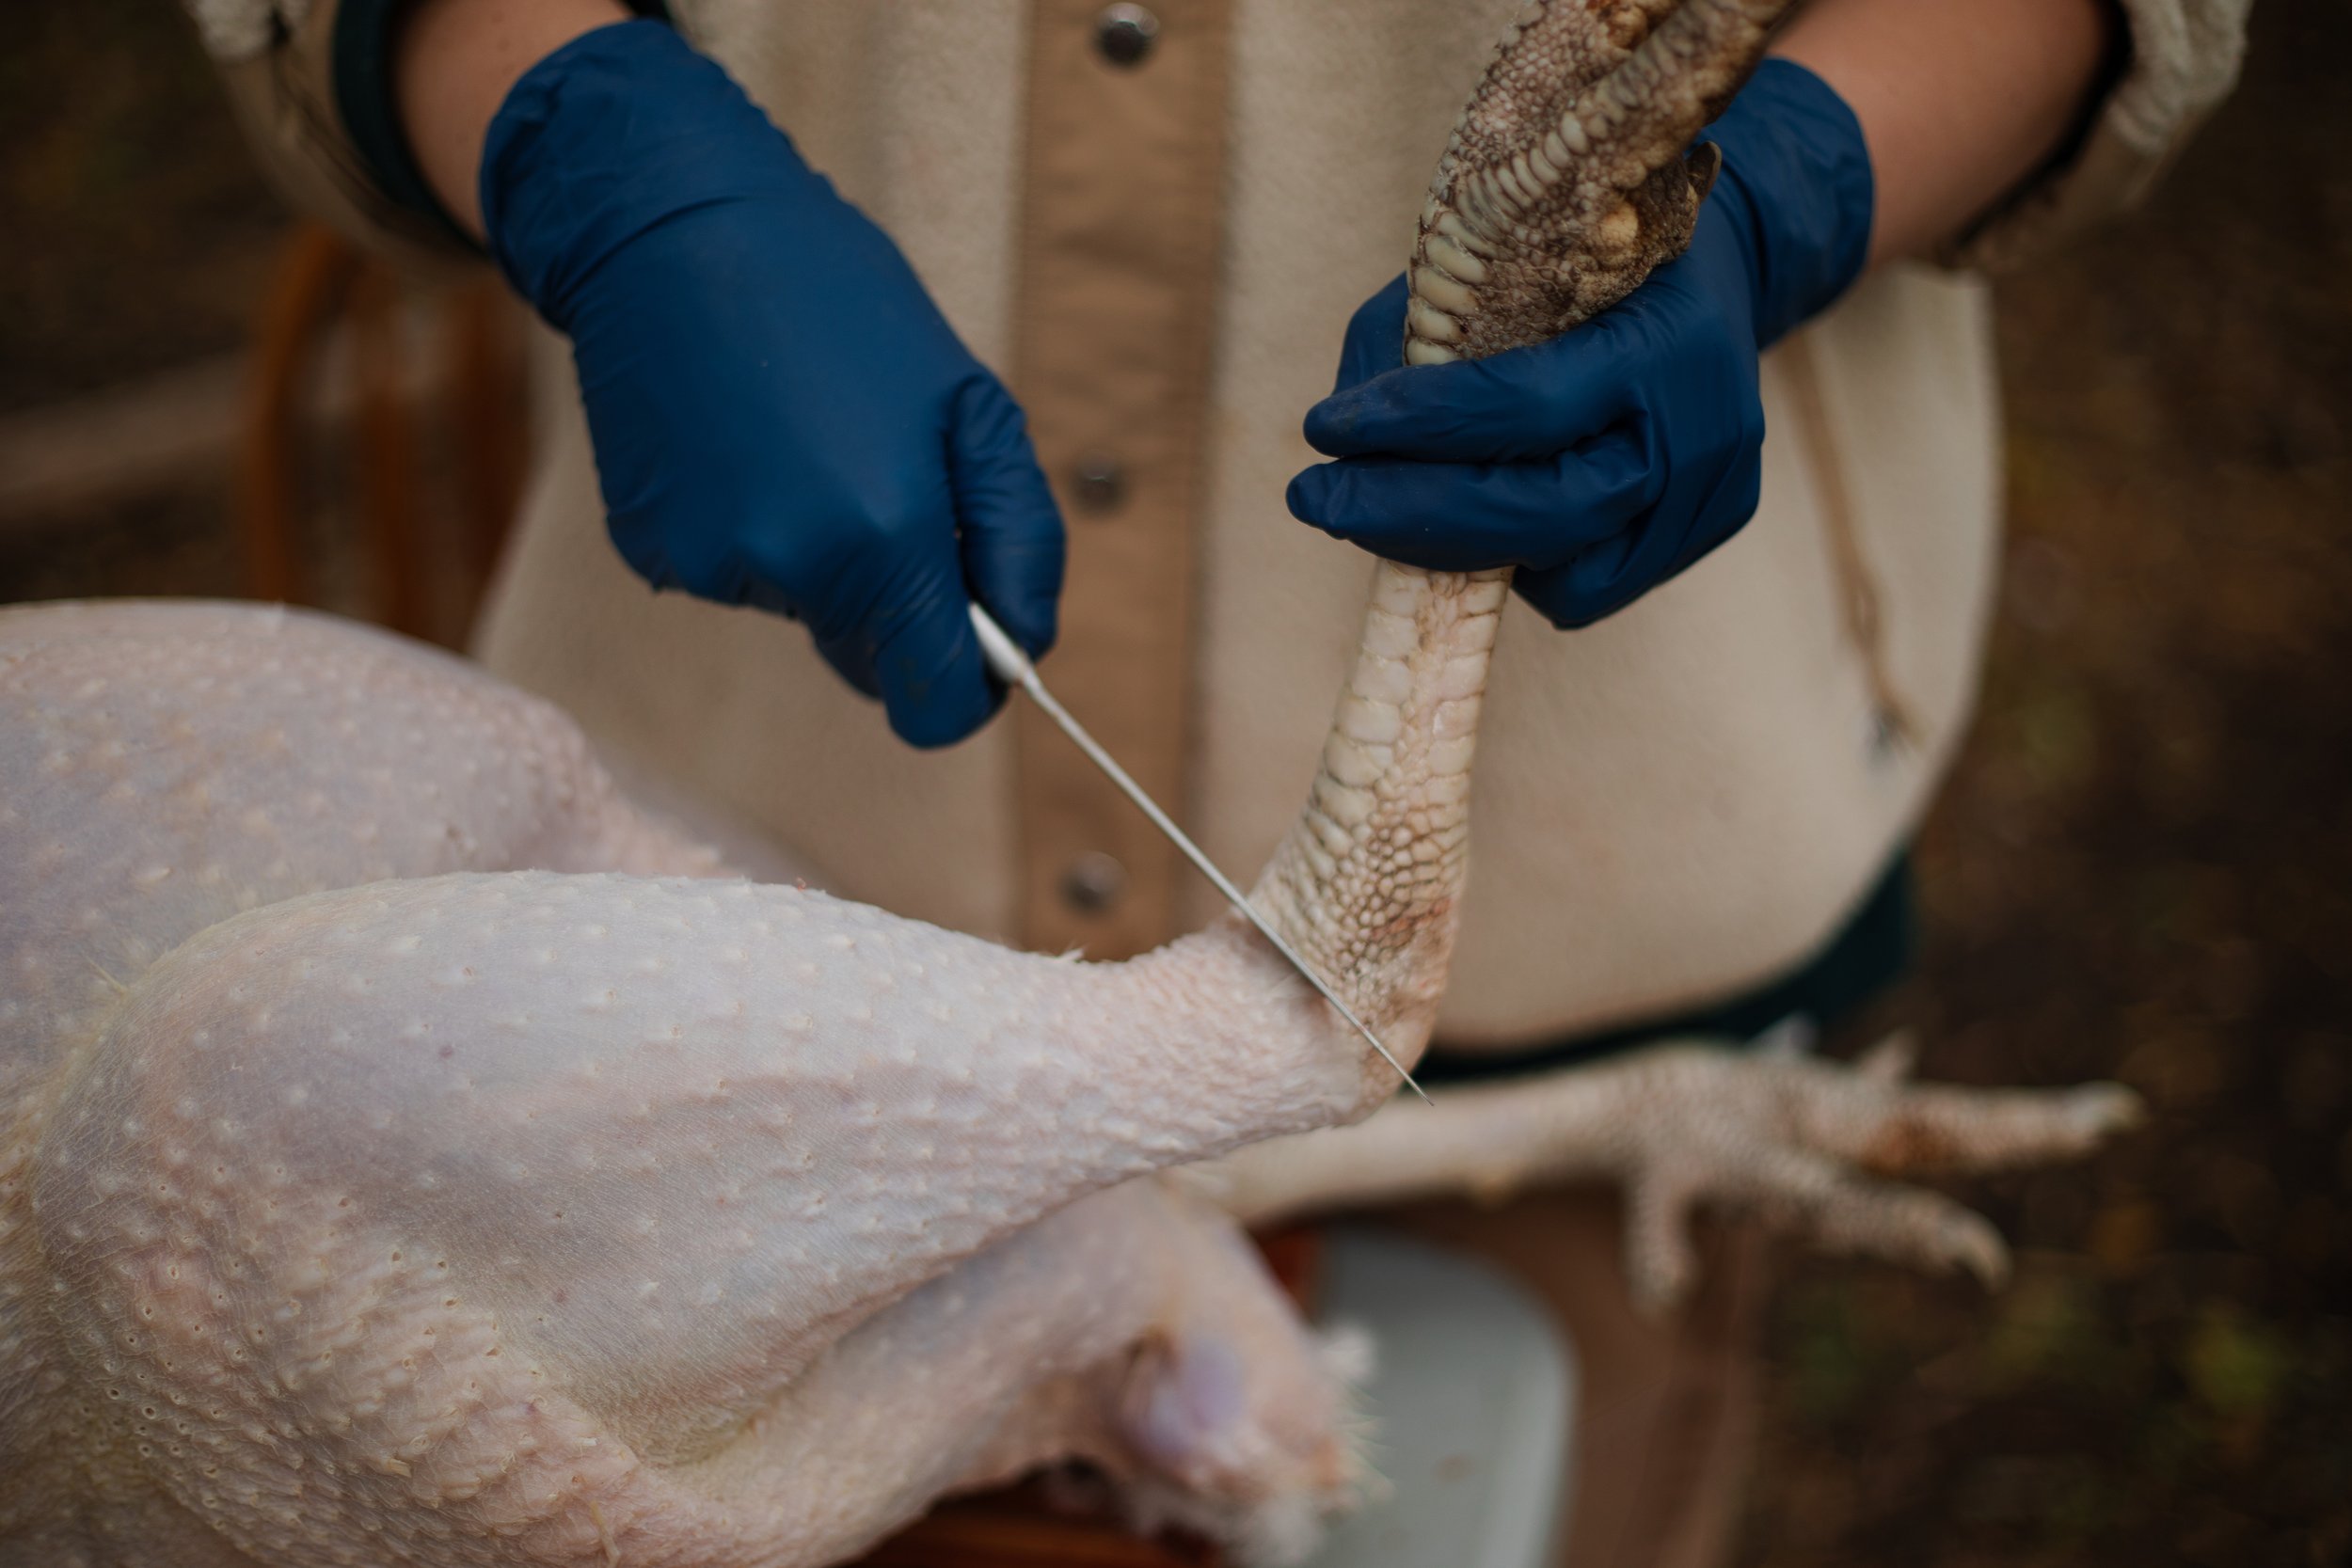
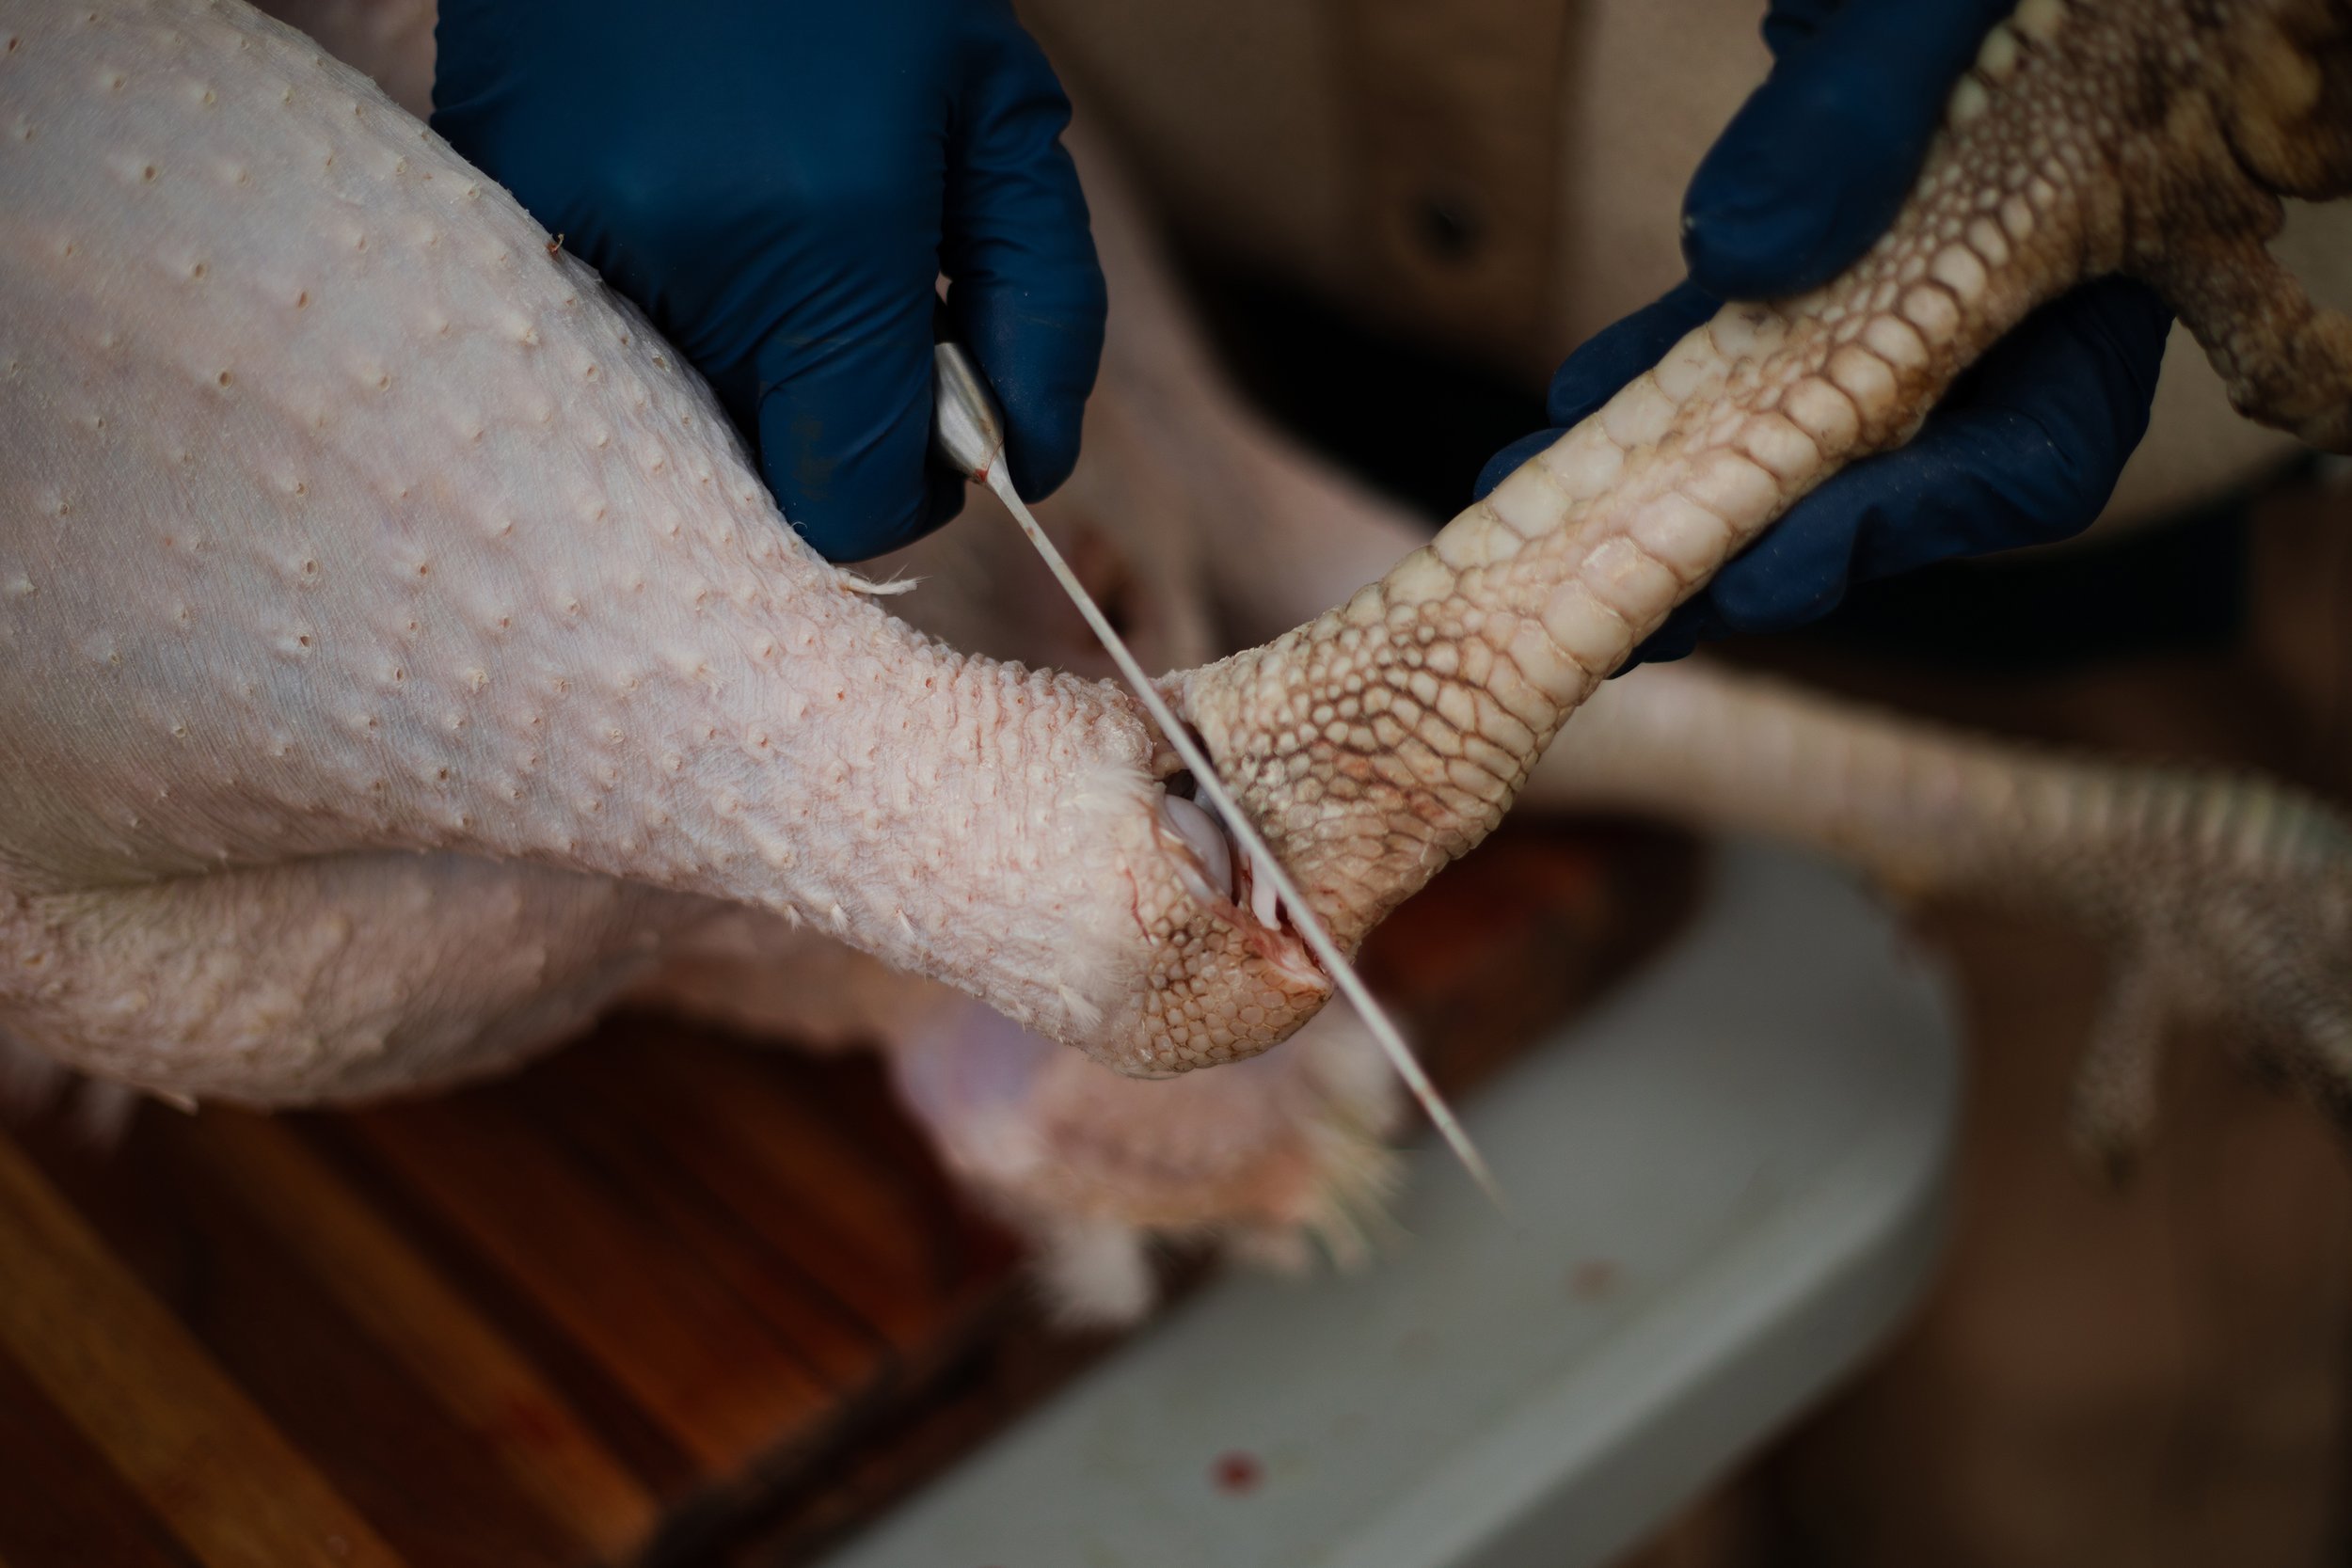
Step One: remove the feet
Cut the Foot Joint. The first cut is to remove the feet. Feel around with your fingers for the place where the joint of the foot and leg meet. With a sharp knife, slice in between the joints of the leg and foot. This should be one simple cut without touching bone that removes the entire foot.
Keep the Feet. The feet are entirely edible and should be kept! Remove the toes and discard them. Thoroughly wash the feet after the culling process is finished. They can be made into a gelatinous broth.
Step Two: remove trachea, esophagus, crop, and neck
Remove the Neck. Make a small cut into the skin of the throat, near the top of the breast bone, until you can see the muscles of the neck. Pull this skin up and over the top of the neck, so that it falls to the back of the turkey.
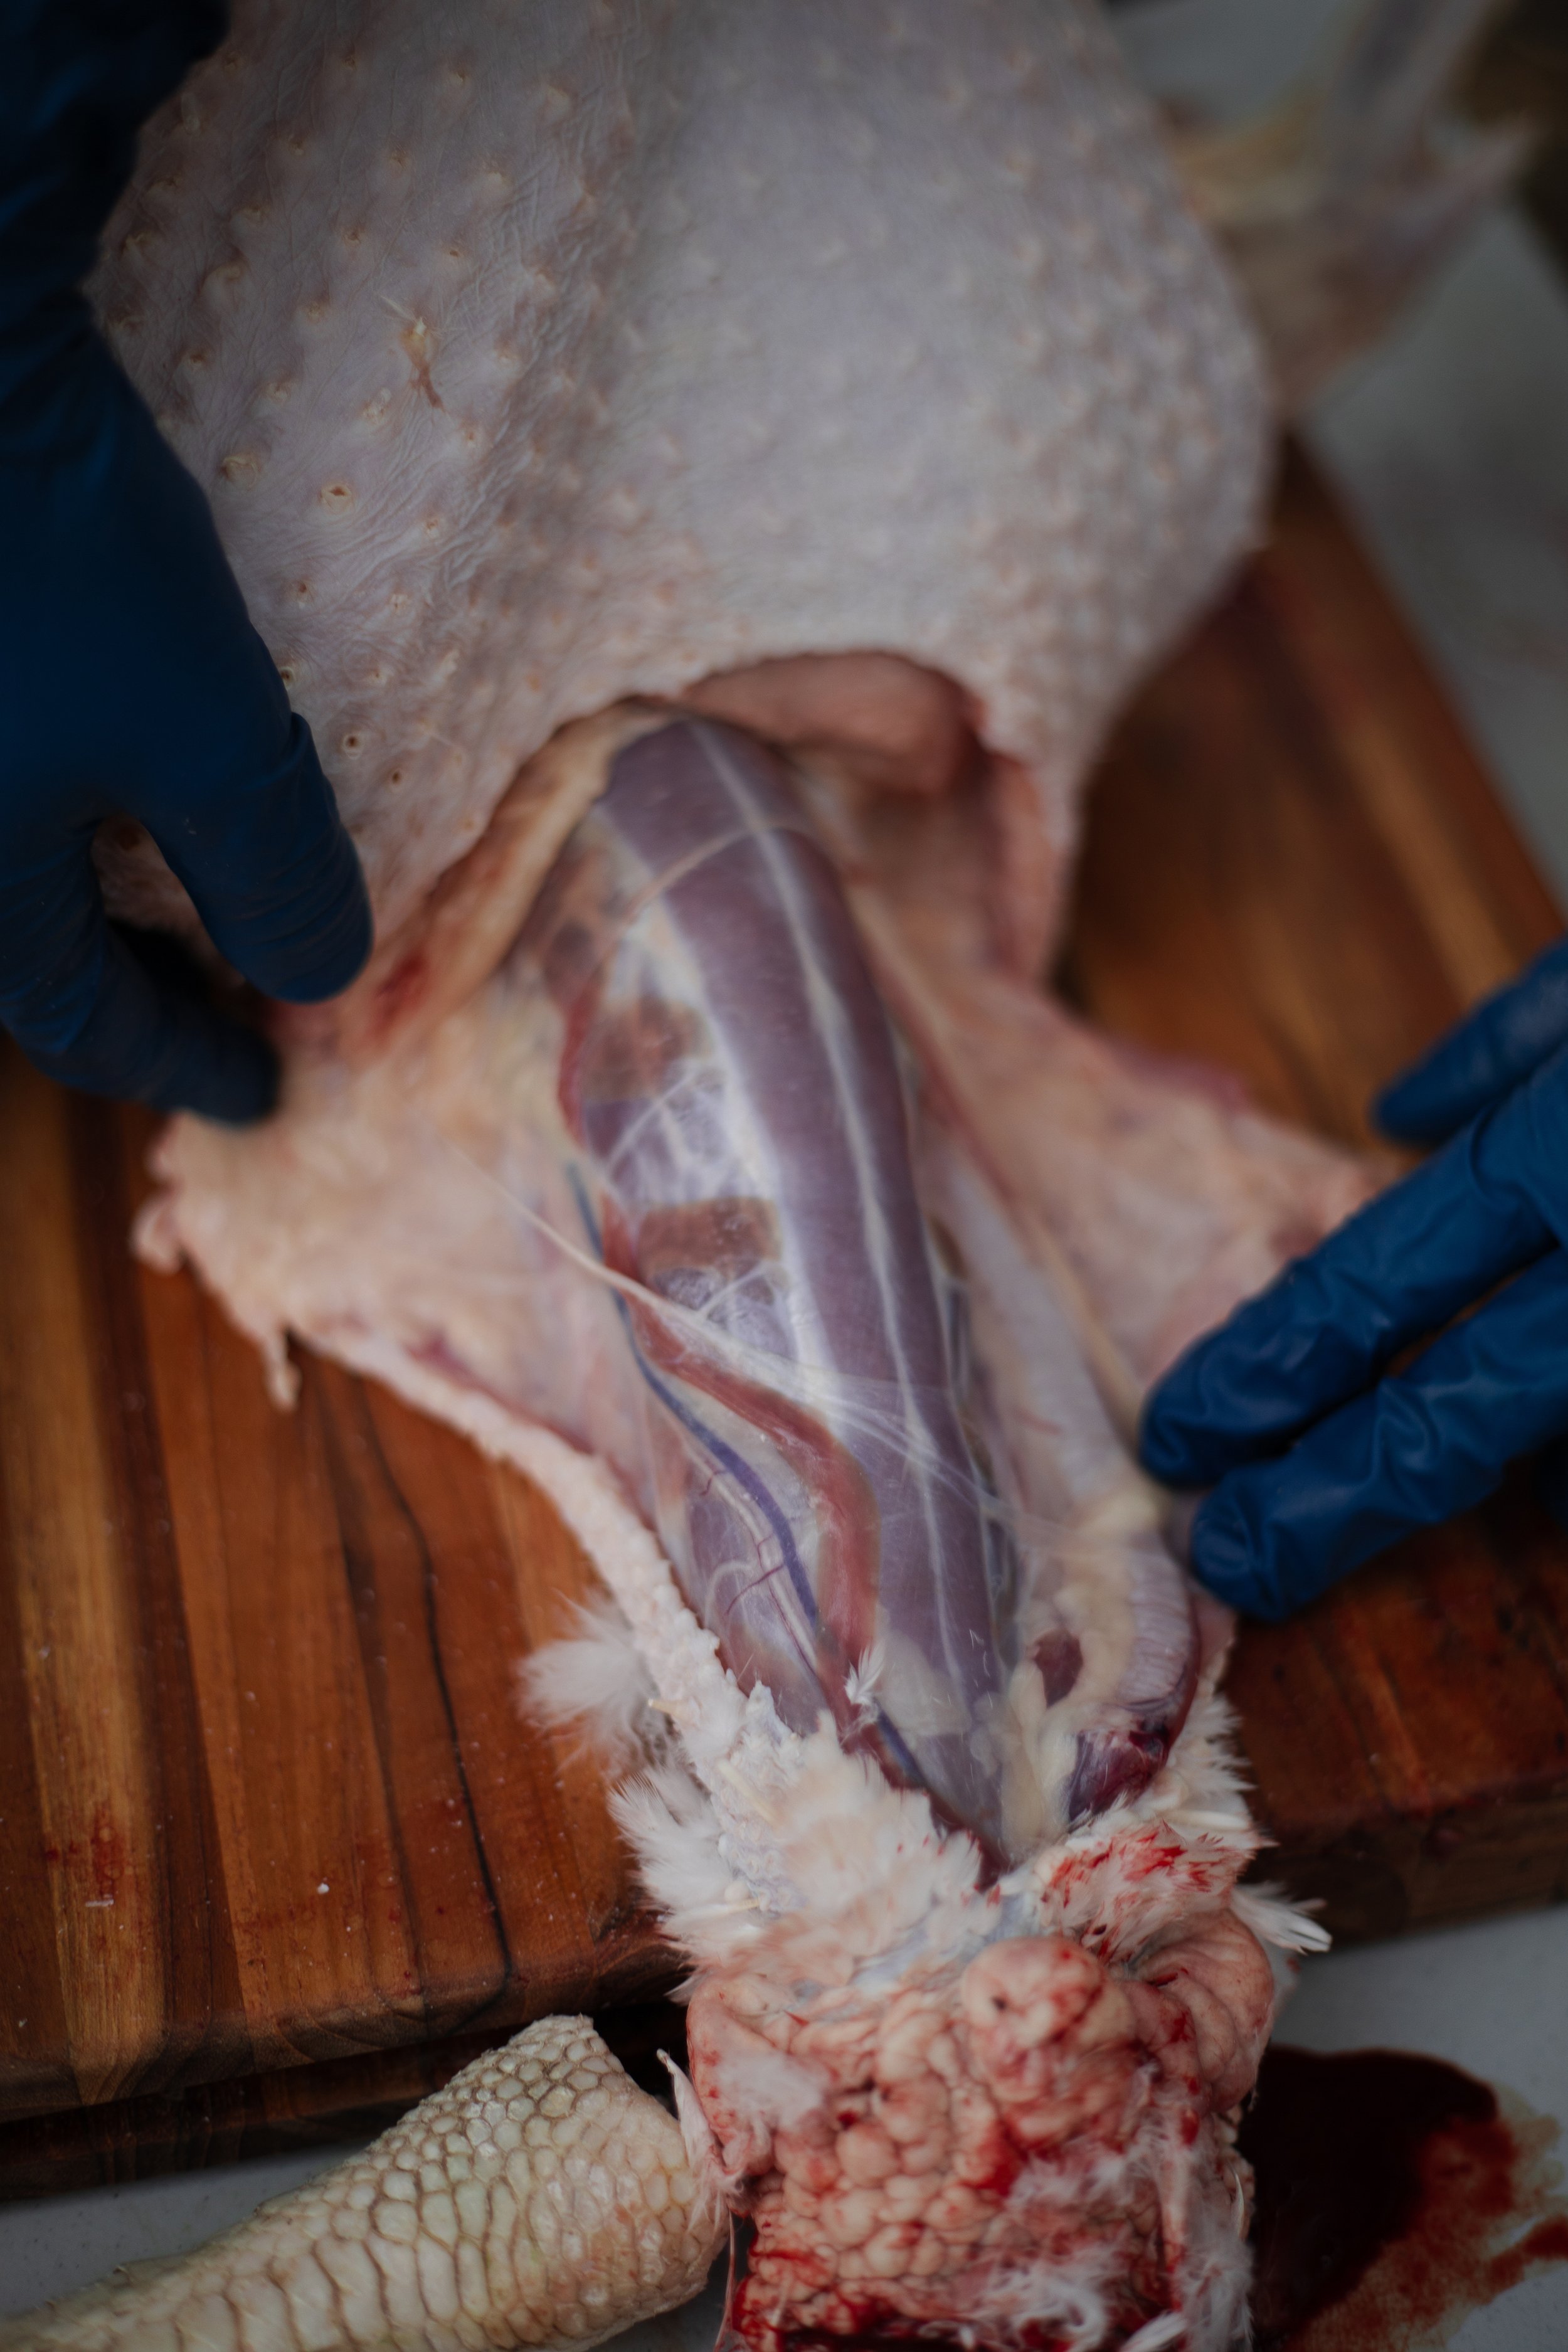

Locate the Trachea, Esophagus, and Crop. With the neck muscle now exposed, locate the trachea (wind pipe; it is ribbed) and the esophagus. You will find that the esophagus is connected to a large sack on the turkey’s right side breast, underneath the skin. This sack is called the crop, which is where the turkey’s food first goes before entering the digestive tract. The crop grinds up the feed for them to be more easily digestible. If you restricted the food intake of the chickens before butchering, this will mostly likely be empty. If not, it may be full of food, grass, rocks, and acid to break down the food. It may even smell like yeast.
If the Crop is Full: Be careful to not break the sack or else you will spread all of the food contents over the meat. If this does happen, use a hose or sprayer to wash this away as soon as possible.


Remove the Neck Parts. Carefully pull the crop away, removing the thin membrane attaching it to the breast meat. Once the crop is detached, pull or cut away the trachea and esophagus as far down the neck and into the chicken’s chest as possible. Discard these parts for scrap. If there is excess neck skin still attached, you can cut this off as well and discard it.
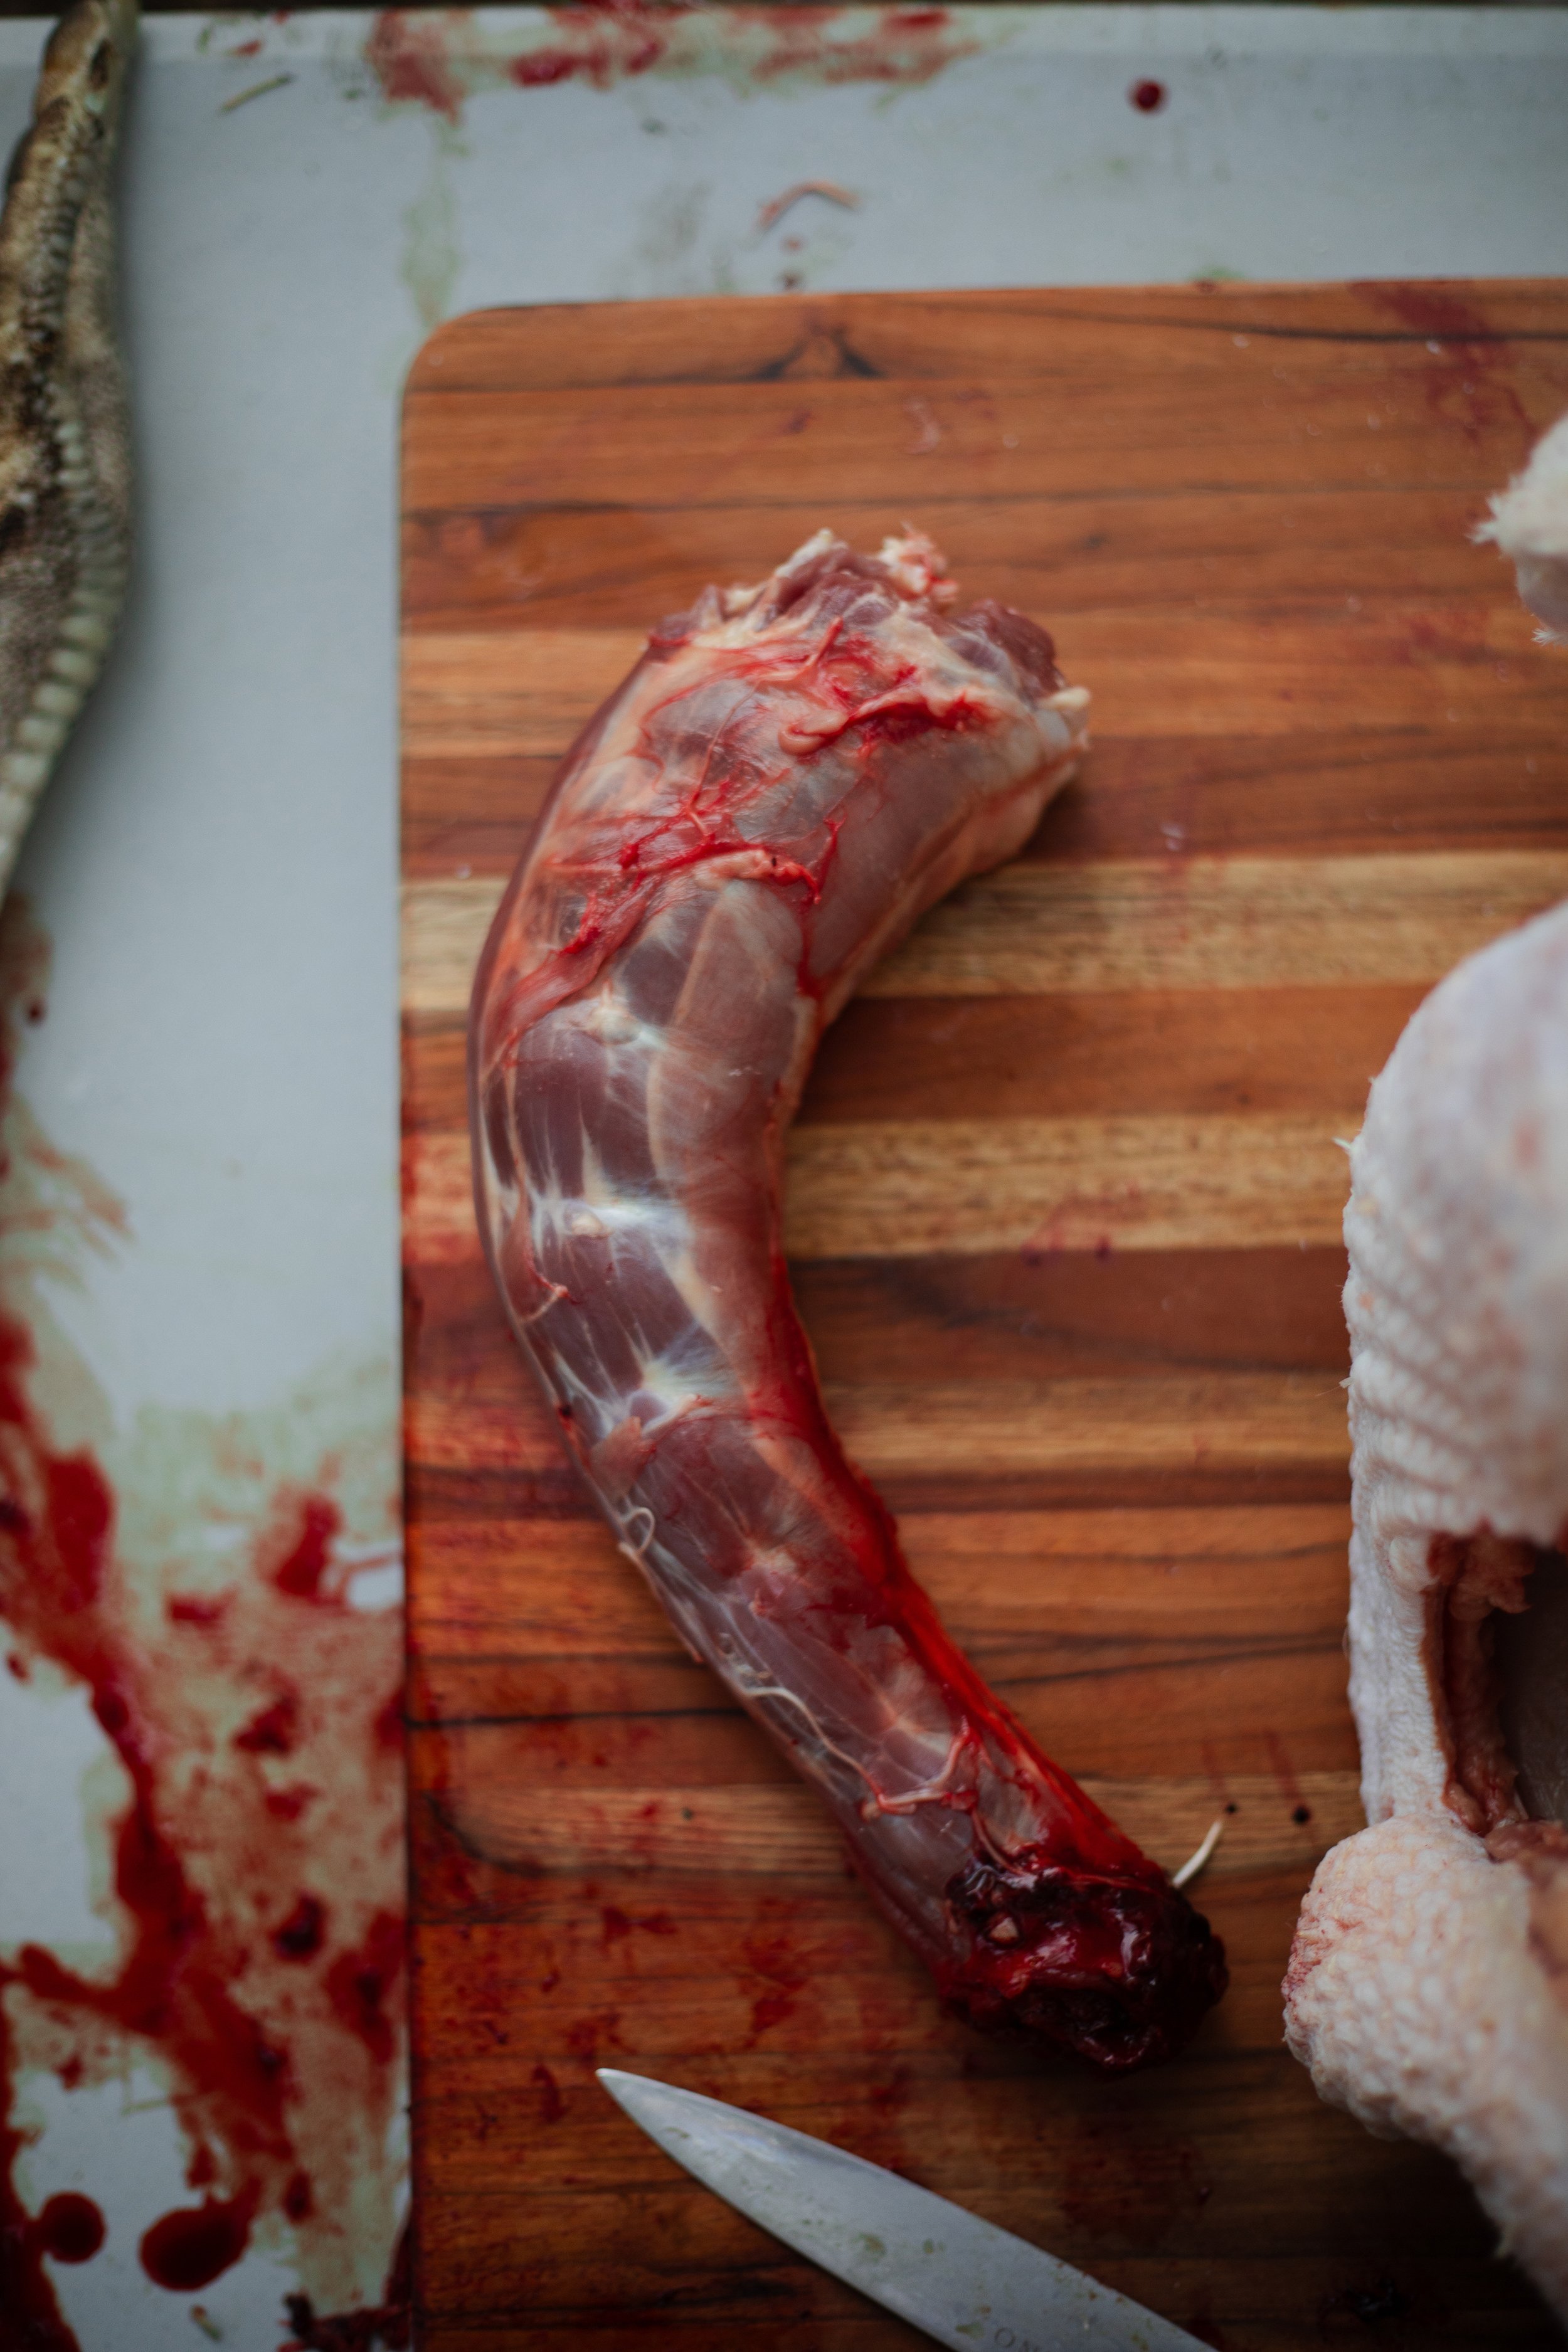
Remove the Neck (optional). You may choose to leave the neck or remove it. This is simply done by cutting as far down the neck as you prefer and slicing in between the vertebrae. You can also rip it off, if that is easier. You may choose to save the neck, so place it in a bucket of parts to save for later.

Step Three: remove internal organs
This is the scariest part, but you can do it!
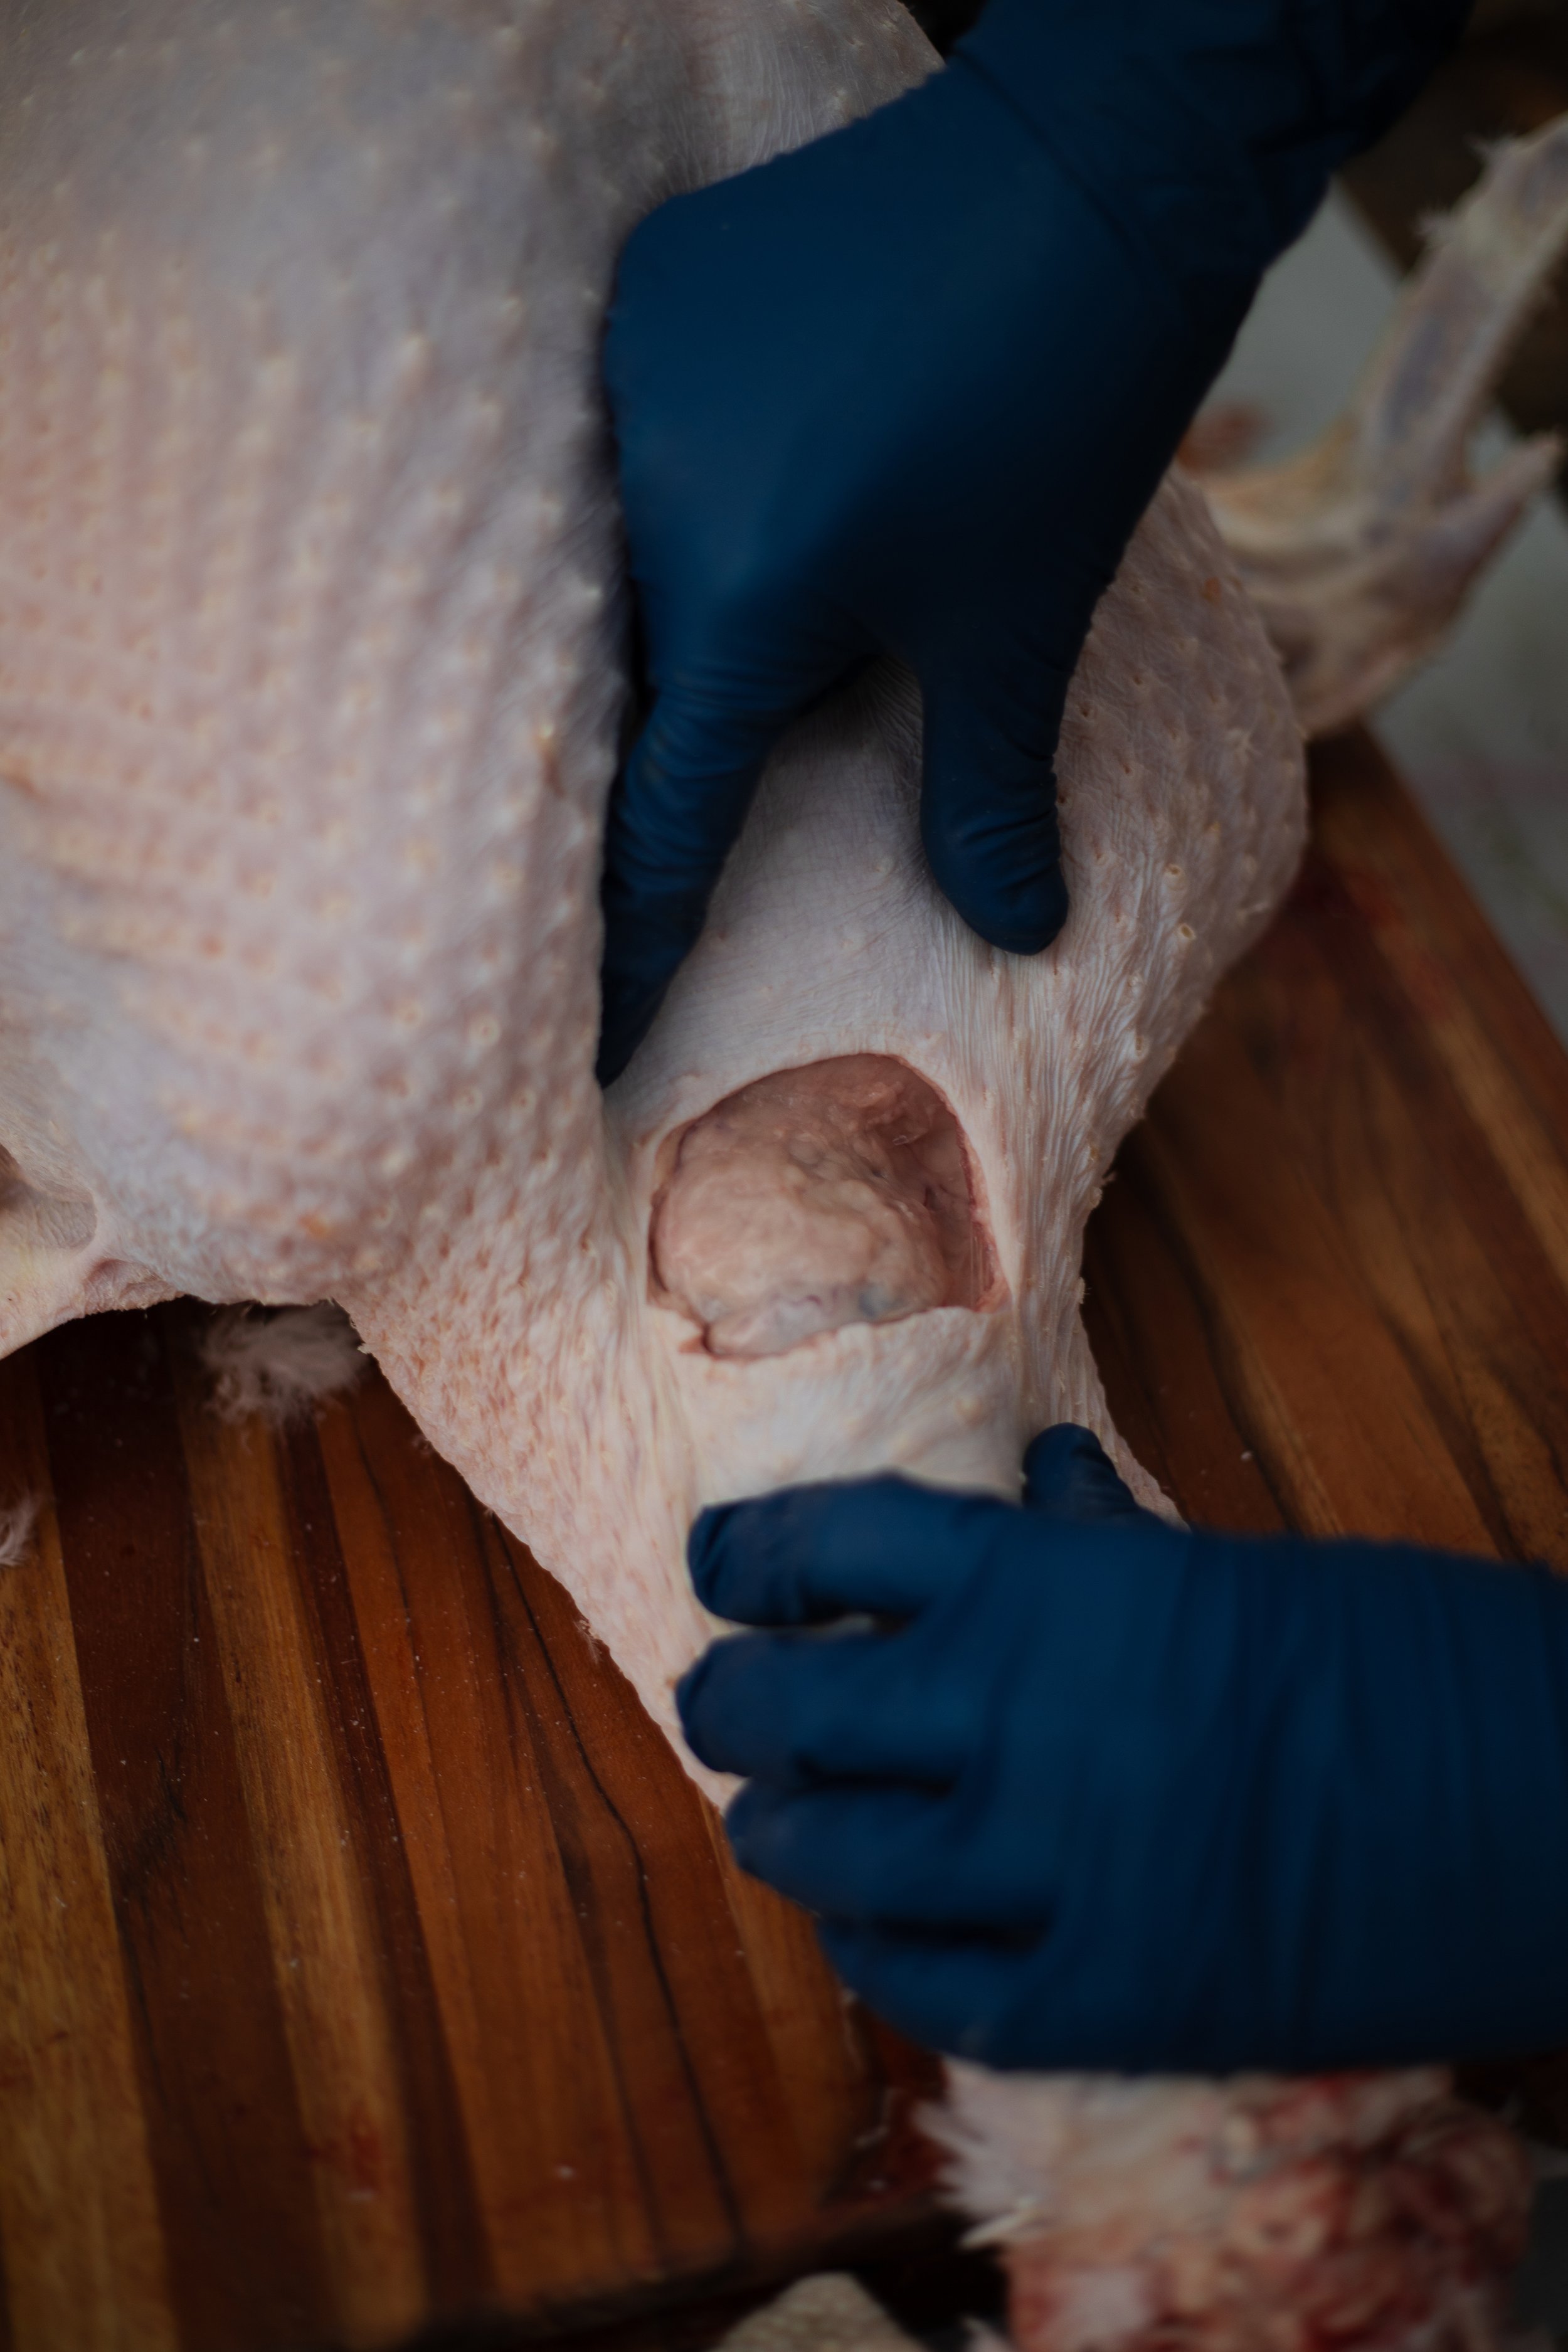
Remove the Tail: Begin by making a small cut through the vertebrae of the spine above the tail and oil gland. Slice through the spine until you feel the vertebrae separate. Be extremely careful to slice slowly and gently to avoid cutting through the intestines.
Locate the Intestines: Once cut, you will be able to see the intestines along with some connective tissue. Gently cut down the sides of the tail and vent (rectum) from the initial cut you made, inside of the pelvic bones, to create some space.
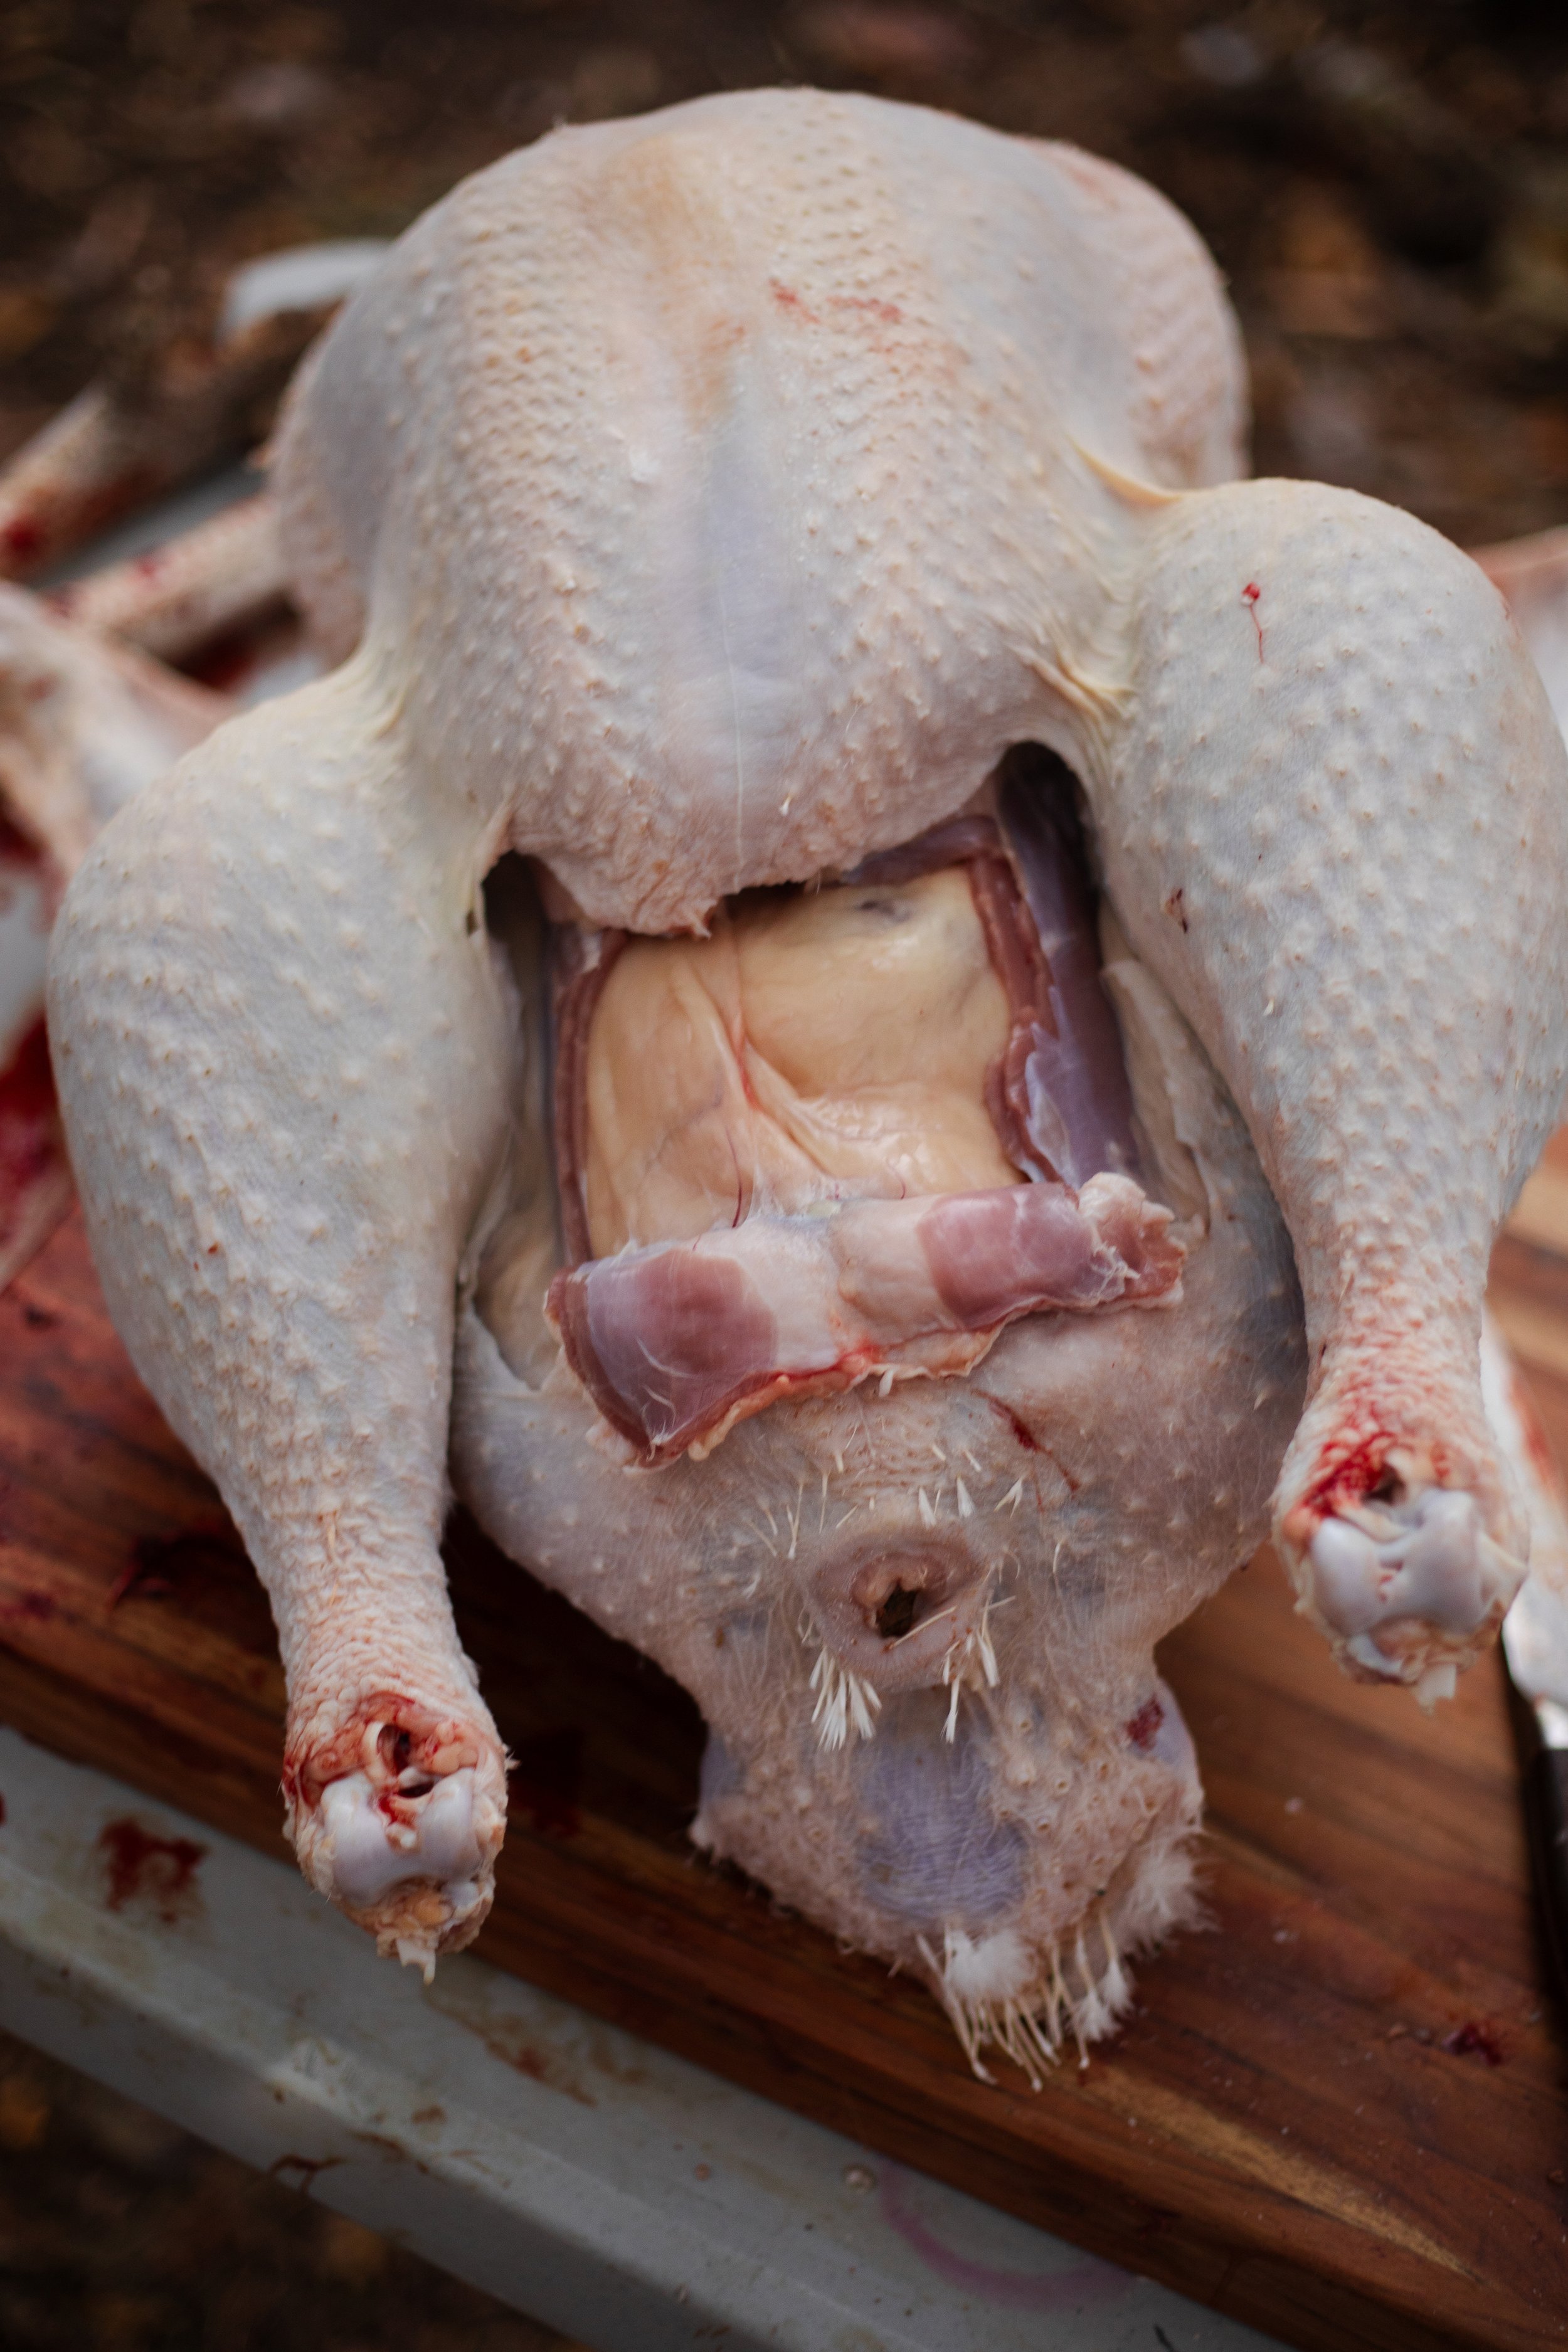
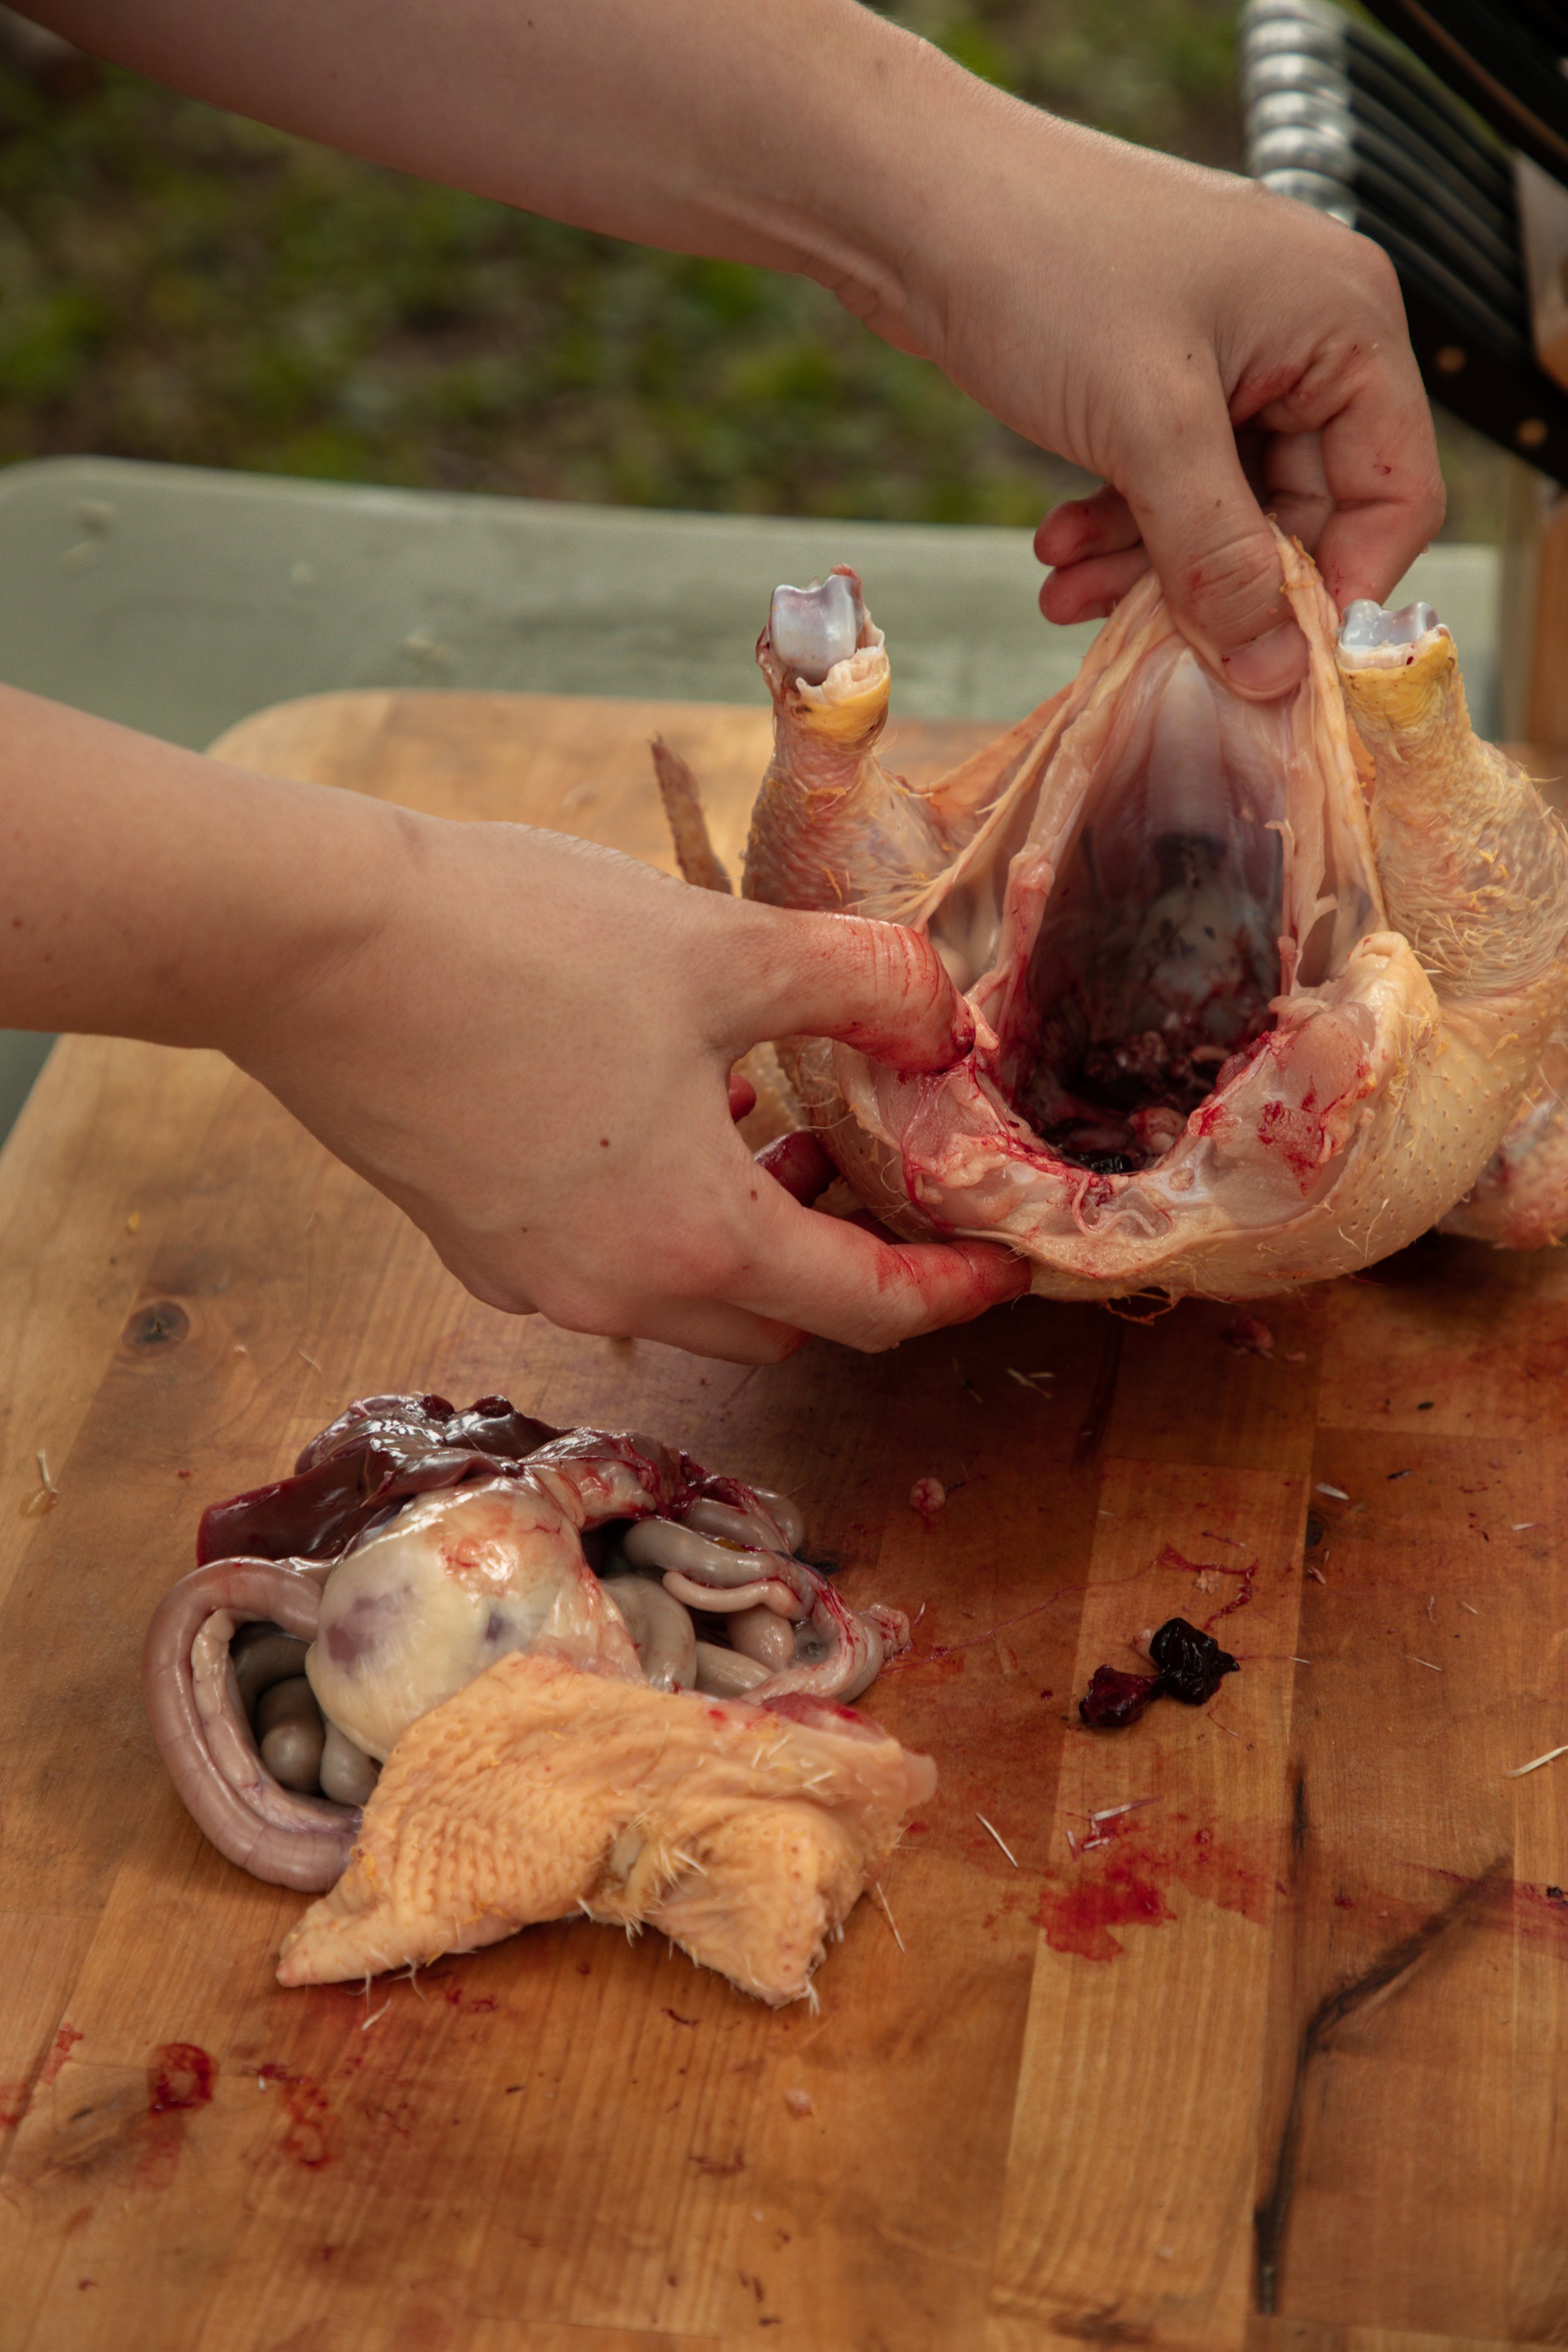
Cut Around the Vent (Rectum): At this point, I flip the turkey over onto its back with the breast facing up. Make a cut just under the bones of the ribcage, cutting through until you can see the internal organs. Be careful not to cut into them. This is easiest to do with kitchen scissors. Slice down the sides of the ribcage and try to meet up with the cuts that you made along the sides of the tail and vent to fully expose the bottom half of the chicken. It will look like a gaping hole, and the internal organs will begin to spill out a bit.
Make Sure Everything is Still Attached: When these cuts are met, the vent (rectum) should still be attached to the large intestine. You should be able to see where that connection is and move it away from the body. This is going to take some experience to learn, but it is best to go slow and familiarize yourself with the anatomy so that you do not accidentally cut through the intestines. Even with food restriction, the intestines are still usually filled with feces and it will leak out if sliced into, and it will contaminate the meat. You will know if you accidentally cut into the intestine because it reeks terribly… I know from experience. If this does happen, remove the intestines quickly and efficiently and wash the turkey all over with clean water immediately.
Remove the Internal Organs & Vent: With your hand, fully reach inside the cavity of the turkey and pull out the internal organs with your hands. It’s really that simple.
Choose Your Cut: At this point, you can choose to leave your turkey whole or cut the turkey into parts, such as legs, thighs, and breasts.
Put in the Ice Bath: The turkey is now finished and is ready for packaging. If you are processing several turkeys at once, place the finished turkey into an ice bath to chill as soon as possible before moving onto the next bird. This will prevent any contamination and growth of bacteria between birds, and help to get them cold before going into the freezer.
Nose-to-Tail Butchering: Using the Whole Turkey
But what do you do with the rest of the turkey parts? Some of these parts are used for cooking, and others can be used for in the garden or for feeding animals. Here is some insight on the Nose-To-Tail method of butchering an animal:
Head: The turkey’s head can be used for eating, and this is quite common in eastern parts of the world (more with chickens than turkeys). You can process the head in a similar fashion to the the rest of the body. You can leave it attached to the body, if you want. Dunk it in hot water and remove the feathers on the head. Leave or remove the beak and cook the entire head whole. If you do not want to eat the head, it can be boiled down and the gelatinous broth can be fed to dogs or cats.
Neck: The neck is a tasty part of the turkey and is often used for making the gravy (save the neck for me, Clark!). Because it is mostly made up of bones and cartilage, it’s perfect for flavoring the pan drippings of a roasted turkey, or making broth. You can eat it in any way that you would normally eat any other part of the turkey.
Heart: Mild and lean, the turkey heart is incredibly delicious. This organ can be cooked alongside the meat during roasting, over the fire, boiled, etc. It’s quite tasty in a soup or stew, and you don’t really notice that you are eating it if you chop it up first.
Liver: The liver of a turkey is eaten like the liver of any other animal. It is high in iron and tastes wonderful sautéed with onions and garlic in some butter or olive oil and lots of salt and pepper.
Gizzard: The gizzard is where the turkey’s food is finally ground up and turned into fuel for the body or waste. It is round and deep red in color with a white, circular membrane around it. This needs to be cut into and cleaned out as it is usually filled with food. Then, it can be sauted or fried.
Intestines: The intestines are edible, though you will want to thoroughly wash them before cooking. They are most often served in Asian cuisine and are a popular street food. Personally, I have never eaten the intestines, mainly from lack of confidence. I generally just burn them, or I have washed, boiled, and fed them to the barn cats.
Feet: The feet are amazing! Made up of 70% collagen, they are an incredibly healthful part of the turkey’s body. They can be roasted or fried, but I like to boil them down into bone broth.
Bones: Save the bones of your turkeys! They can be boiled for several hours and turned into liquid gold, otherwise known as bone broth.
9. Packaging & Freezing:
Packaging Tips:
Let the turkeys rest for 12 to 24 hours in the fridge before cooking or freezing. This helps the meat to relax after rigor mortis sets in.
Use a vacuum food sealer with extra-large freezer bags to prepare your turkey for freezer storage. Otherwise, wrap your turkey in a double layer of butcher paper and plastic wrap.
Label and date your turkey and log its weight for help with cooking time.
A freshly butchered turkey will last in the fridge for about 3 to 4 days.
Freezer Storage
Store whole or cut-up turkeys in the deep freezer for up to 12 months.
Consider breaking down the turkey into breasts, thighs, wings, and bones for stock and easy cooking.
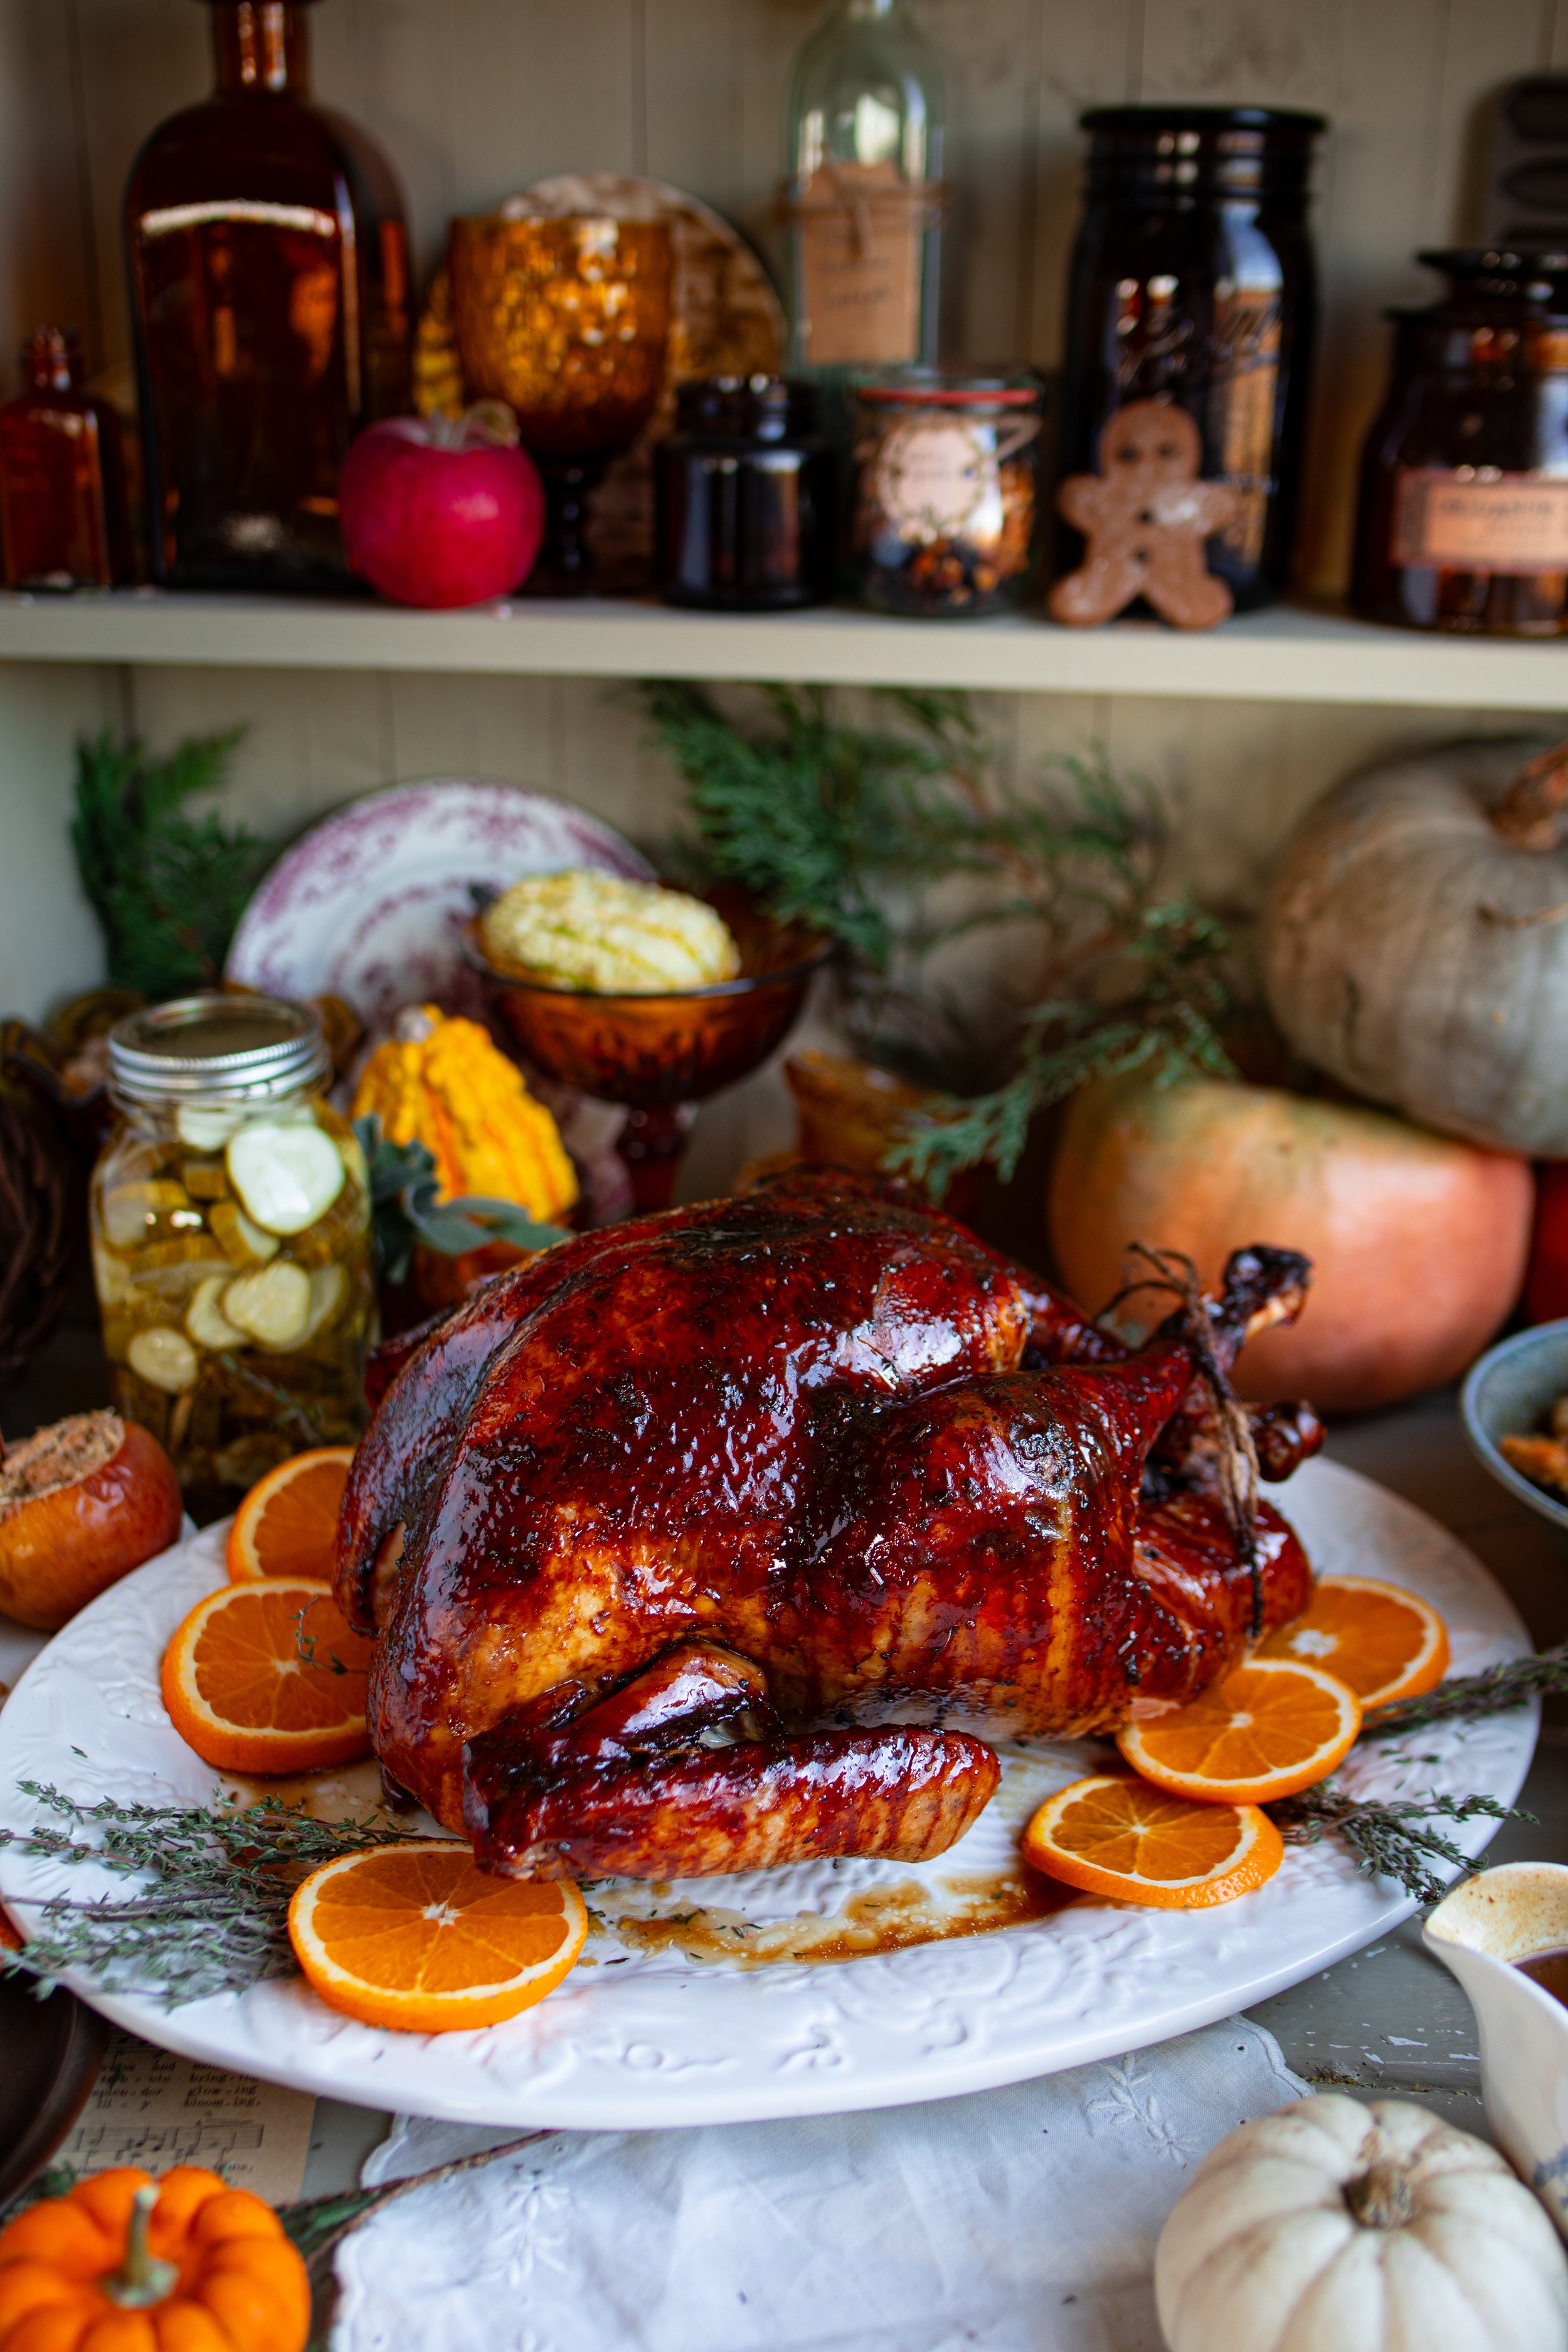
Cooking & Preserving Home-Raised Turkey
Homegrown turkey is leaner and more flavorful than store-bought turkeys. You will need to adjust your cooking times and methods:
Brine heritage birds for added moisture.
Roast at lower temperatures for longer periods of time.
Save bones for the best stock and bone broth you’ve ever tasted!
Here are some of my favorite recipes for cooking and preserving turkey:
Common Questions
Can turkeys and chickens be raised together?
Yes, but this should be done with care and mindfulness. It is often recommended to raise them separately as chickens can be carriers of blackhead disease, and they are asymptomatic. Turkeys are highly susceptible to blackhead disease, and there is currently not vaccination or treatment available. However, you still can raise them together. It’s just always good to know the risks of doing so. Turkeys also need higher amounts of protein than chickens and have different housing requirements (such as larger doors to enter and exit the coop).
How many turkeys should I raise in the first year?
Start with 2 to 4 birds. This is enough to learn without being overwhelmed. It is also smart to have more than 1 in case one of them dies.
Can I sell homegrown meats to the public?
If you are going to do this yourself, you should know that it is illegal to sell processed meat to others without it being inspected by the USDA. Raising and butchering homegrown meat is only a feasible option if it is for your personal use, not for resale.
You can apply for a license to resell meats at a small scale. In the past, we had a successful CSA program (Community Supported Agriculture), where we partnered with a small family licensed production that raised chicken and hogs. If you live in the United States, you need to go through a series of inspections from the USDA and Food Safety Inspection Service. This involves various types of inspections, including whether you plan to sell at the federal or state level, USDA certified organic labeling, and nutritional information.
I do know from experience that it is incredibly difficult to get approved to sell raw domestic raised poultry. They have to be butchered in an approved facility, and there must be an inspector present on the day that the birds are being processed. They also must be flash frozen. This includes a lot of professional equipment and fees.
final thoughts:
Raising your own turkeys is one of the most meaningful steps you can take toward food security and sustainability. It require commitment and care, but the rewards are monumental to your health and the health of animals.
Overall, this entire process is, well… a PROCESS. It takes several hours to get through a round of turkeys, and we are dead tired by the end of it. The first turkey is always the hardest, and we are countlessly grateful for the life that it gave to feed our family. I have been on both sides of the fence for meat eating. I was vegan for two years and plant based for other times in my life. I honestly believe that if you are going to eat meat, this is the best option for doing so, or finding it from a local farm that is able to have their meat inspected and approved for selling.
If you have any questions about our process, please let me know! I am happy to chat about it with you. I hope that this post eased your mind and helped you to learn more about raising your own turkeys and how to butcher them.
xoxo Kayla

