3-Hour Baguette: A Quick Artisanal Delight
This post may contain affiliate links, please see our privacy policy for more information.
Make a crusty, golden baguette in just three hours—no overnight rise needed! This quick and easy homemade 3-Hour Baguette recipe delivers a bakery-style loaf with a crisp crust and soft, airy interior. Perfect for sandwiches, dipping, or enjoying warm with butter, it’s a simple way to bring fresh-baked bread to your table any day of the week!

what is a baguette?
This 3-hour baguette recipe isn’t a traditional baguette—it’s more like a basic French bread baked in a baguette style. Unlike classic baguettes that require long fermentation with a poolish or highly hydrated yeast starter, this quick version delivers a crisp crust and airy interior in just a few hours. Perfect for sandwiches, dipping, or enjoying fresh, this time-saving baguette recipe brings you bakery-quality results without the wait—try it with my Steak Sandwich with Caramelized Onions and Mushrooms and Garlic Dill Spread!
Why You’ll Love This Recipe
Quick and Convenient: Enjoy freshly baked baguettes in just three hours, perfect for spontaneous baking desires.
Simple Ingredients: Requires only basic pantry staples—water, yeast, salt, and flour.
Versatile Use: Ideal for sandwiches, as a side for soups, or simply enjoyed with butter.
Gathering Ingredients:
Water.
Active dry yeast. Use active dry yeast for best results.
Kosher salt.
Flour. High-gluten bread flour is recommended for a chewier texture, but all-purpose flour can be used as a substitute.

How to shape the baguettes:
Step One: Begin by pressing out the dough into a rectangular shape. Then, taking one of the shorter ends, fold it into the middle of the rectangle like a business letter.

Step Two: Repeat this with the other short end of the dough, pressing it into the middle of the rectangle and slightly overlapping the first fold.

Step Three: Then, enclose the seam you just created and pinch it closed, all the way across the loaf. Pinch the ends closed and repeat this process, creating a really tight cylindrical shape.
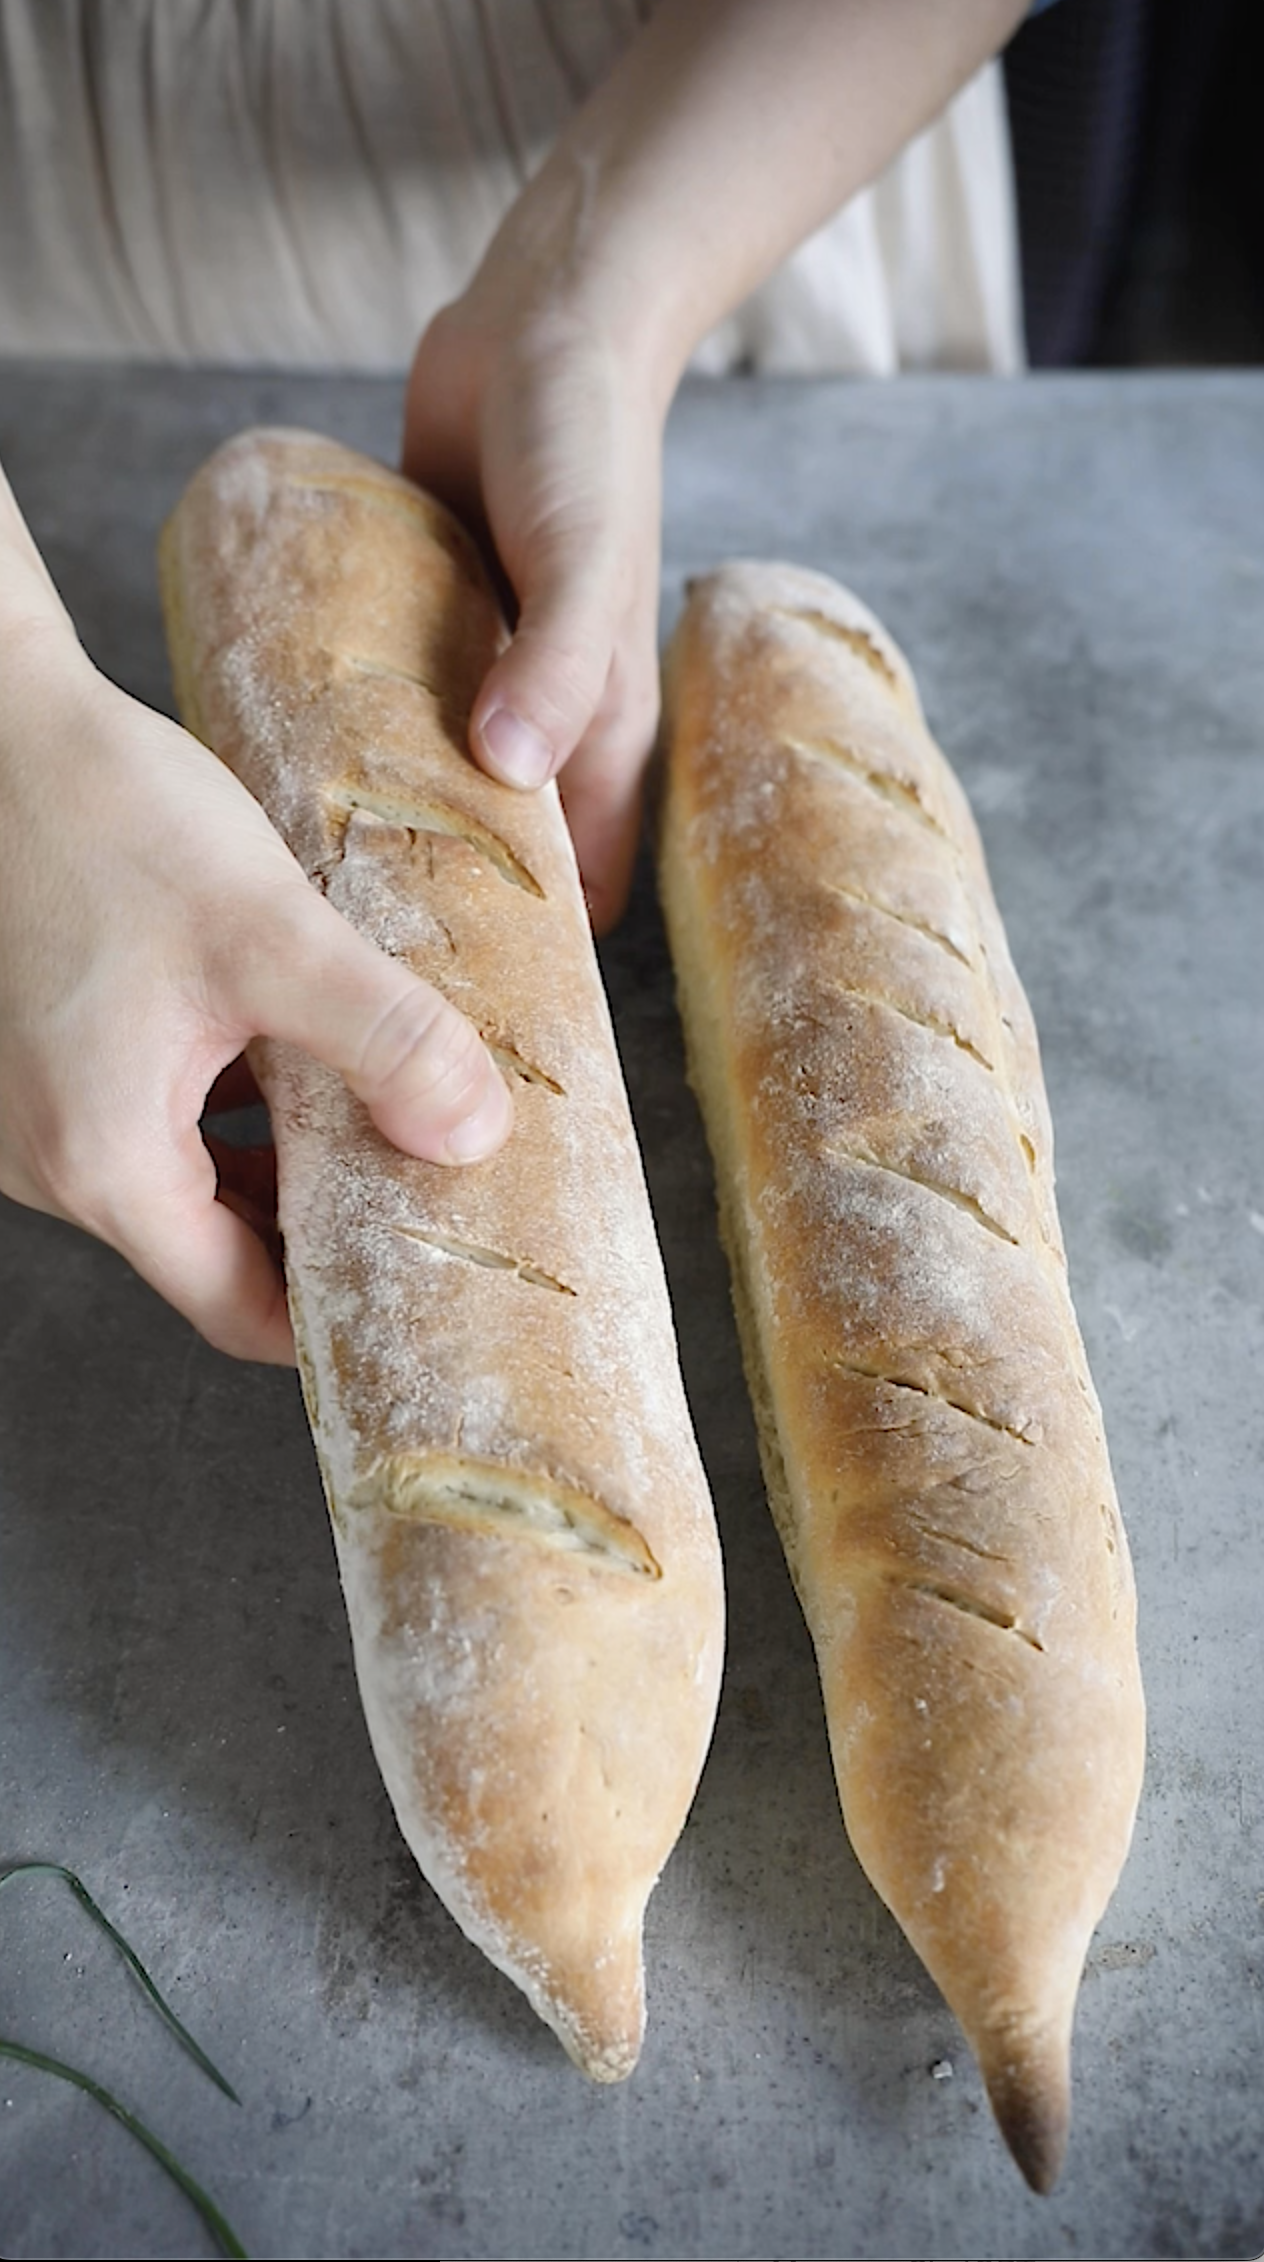
Step Four: Pull the dough on the counter towards you to create an even tighter shape. Then, with both of your hands, evenly rolls out the dough to about 16-inches (40-cm) long, tapering the ends so that they are pointy.

Tips for making perfect 3-hour baguettes
Proper Hydration: Ensure the water temperature is around 110°F (43°C) to activate the yeast effectively.
Kneading: Achieve a smooth, elastic dough that slightly sticks to the touch for optimal texture.
Shaping: When forming the baguettes, ensure they are evenly shaped and properly sealed to maintain structure during baking.

Tips for baking the baguettes:
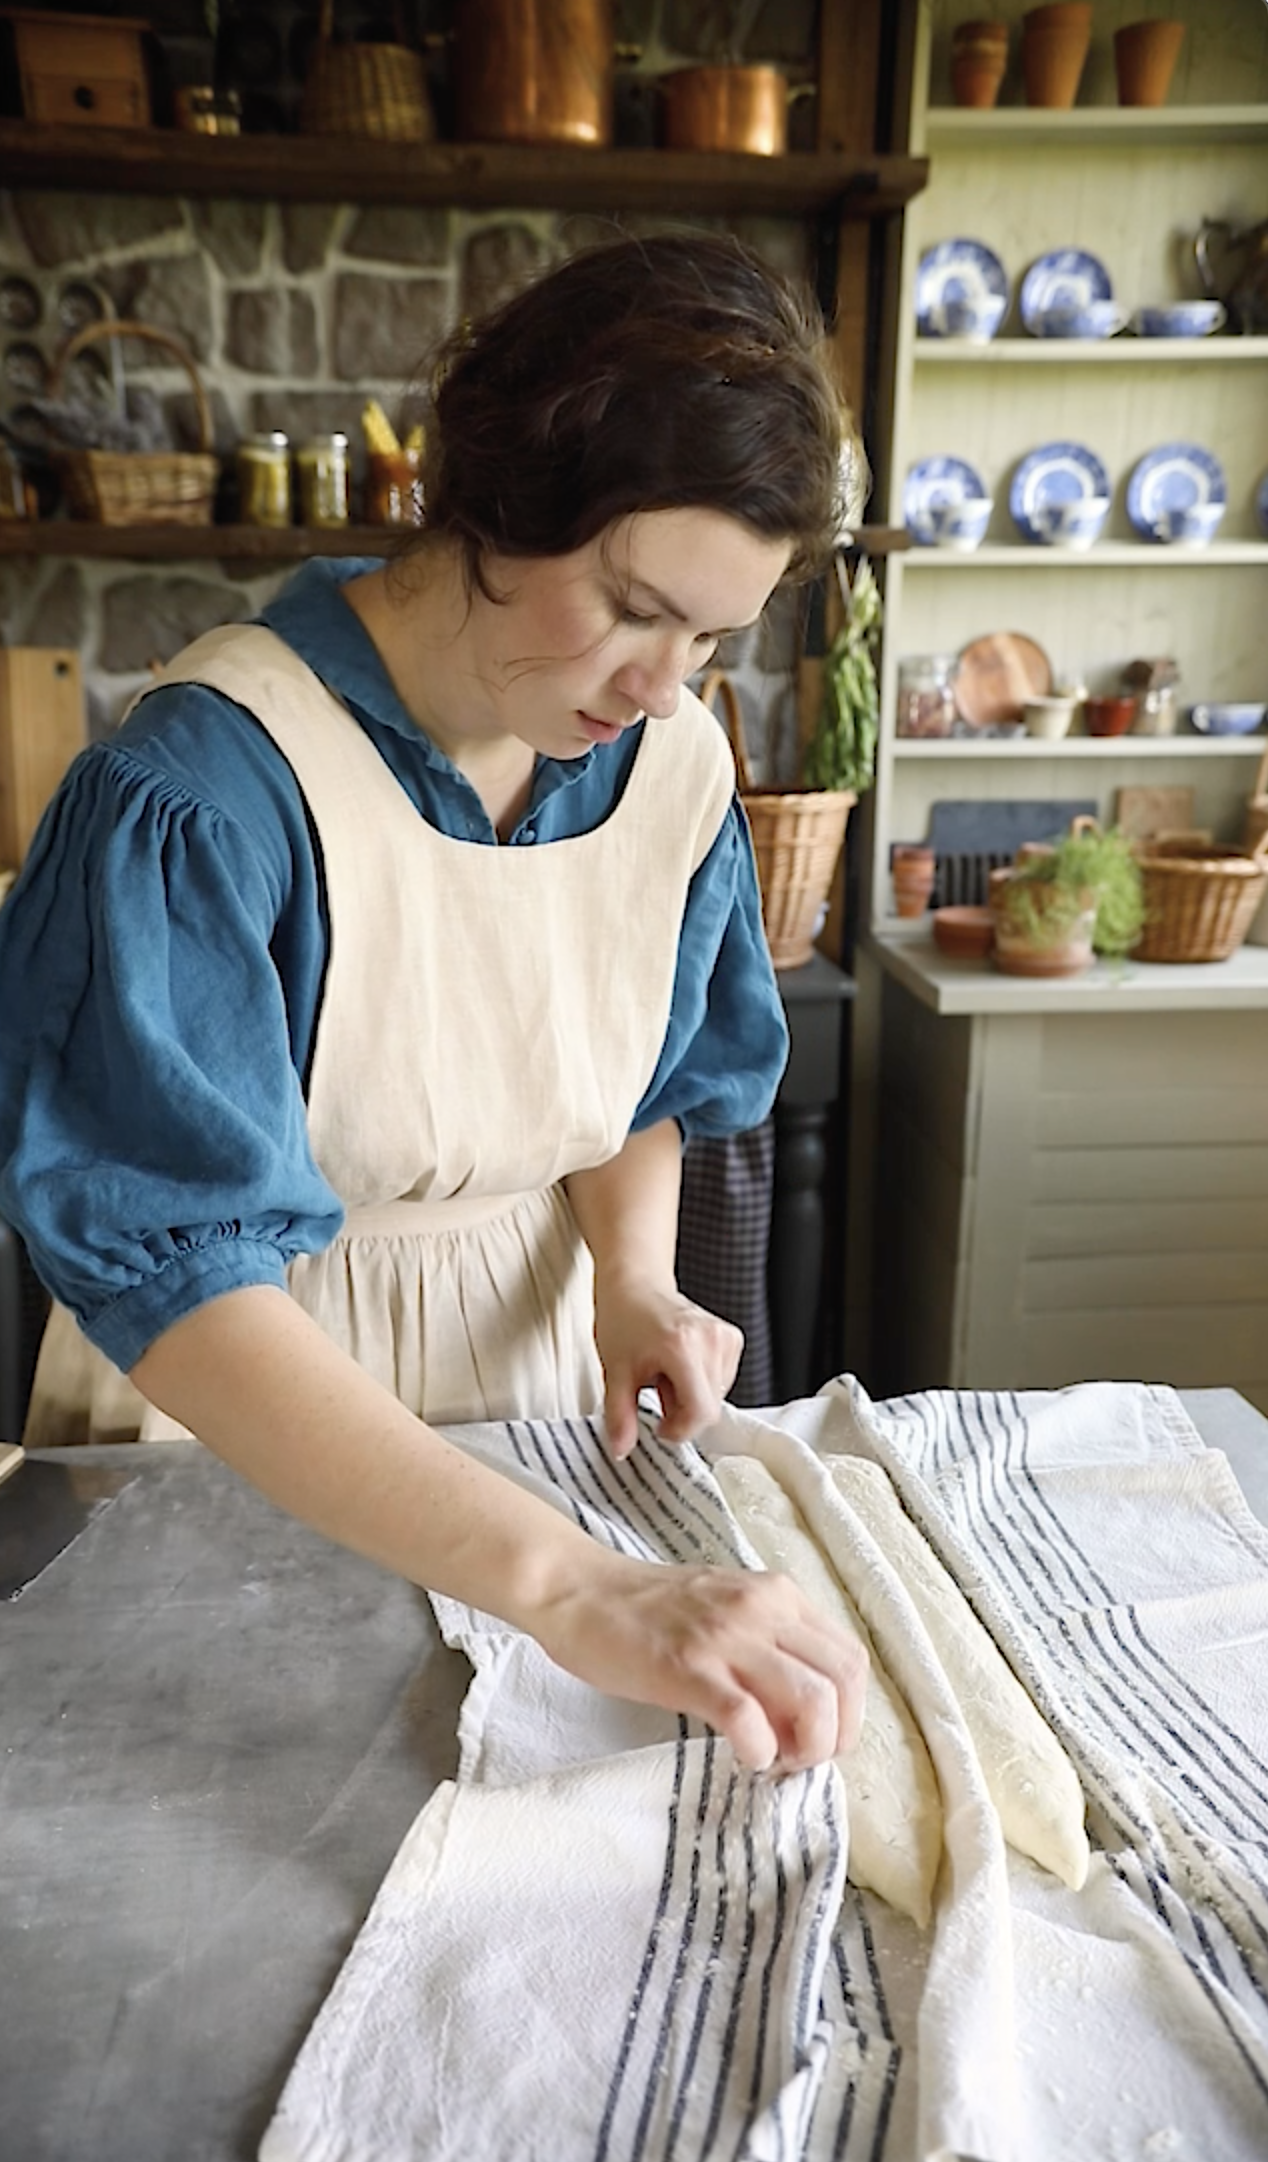
Once the baguette dough has been shaped into its final long and slender loaves, it's almost time to bake! After a short proofing time, the shaped French baguettes should be placed onto a couche, a thick linen cloth traditionally used for proving bread. While a couche is not required, it helps maintain the loaf’s shape by preventing spreading. Using a thinner material, such as a flour sack towel, can cause the dough to sag outward, resulting in a flatter artisan baguette.
To ensure even spacing, place the loaves onto the floured couche, folding the cloth between each baguette so they do not touch or merge during proofing. Covering the loaves with the excess fabric helps retain moisture, allowing for better texture and a light, airy crumb.
Once the baguettes are fully proofed, they are carefully transferred to a baguette baking pan. These perforated pans allow steam to circulate around the loaves, ensuring an even, crispy golden crust. Before baking, the baguettes are slashed on top with a bread lame or sharp knife, which helps control expansion in the oven. Finally, they are placed into a super-hot, steamy oven, creating the signature crusty baguette with a beautifully golden-brown finish.

final thoughts:
This 3-hour baguette recipe offers a quick and satisfying way to enjoy artisanal-quality bread without the extended preparation time. Whether you're a seasoned baker or a novice, this recipe provides a straightforward approach to creating delicious baguettes at home.
xoxo Kayla
3 Hour Baguette

Ingredients
- 1 1/2 cups (380 ml) water
- 2 tsp (8 g) active dry yeast
- 1 1/2 tsp (9 g) kosher salt
- 4 cups (500 g) high-gluten bread flour or all-purpose flour, plus more for dusting
Instructions
- In a small saucepan, heat the water to 110°F (43°C).
- In the bowl of a standing electric mixer fitted with a dough hook, pour the warm water into the bowl and sprinkle the yeast on top. Let the mixture sit for about 10 minutes to allow the yeast to bloom, or grow and become bubbly. Whisk in the salt.
- Gradually begin to add the flour 1 cup (125 g) at a time on low speed. Increase the speed as the dough begins to come together, kneading on medium-high speed for 6 to 8 minutes. It is ready when the dough no longer clings to the sides of the bowl and is smooth, elastic, and a little bit sticky. This dough in particular is very pillowy and soft.
- Knead the dough on the countertop into a ball, pulling it toward you on the counter while simultaneously tucking the bottom of the dough underneath itself. Place the dough into a large, lightly-greased bowl and cover it with plastic wrap or a damp tea towel. Let the dough rest for about 15 minutes.
- After the resting period, gently deflate the dough by pressing down on it. Stretch and pull the dough by lifting up a corner of it, pulling away from the dough, and folding it over the top of the dough ball. Repeat this all around the circle of dough and tuck the ends underneath, forming a new ball. Cover the bowl back up and let the dough rise until doubled, 1 to 1 1/2 hours.
- Deflate the dough again. Bring it onto your countertop and divide the dough into two equal sized pieces. If necessary, lightly flour your countertop. Press the dough out on the counter with your fingertips into a 4 x 6–inch (10 x 15–cm) rectangle.
- To shape the baguette, fold half of the dough towards the center of the rectangle, like a business letter, and press it into the dough to seal. Fold the other half of the dough toward the center and press it in to seal.
- Taking the edge of the dough, roll it over the center seam you just created and press the loaf together, pinching and rolling along the entire length
- of the little cylinder to enclose the loaf. Flip the loaf over with the seam
- on the counter, dragging the loaf toward you to close the seam and create some tension on the loaf. Once the bread is firmly sealed, roll it out into a log about 16 inches (40 cm) long. Taper the very ends of the bread to create pointy tips. Repeat with the second loaf of bread.
- Transfer the shaped loaves to a couche or floured kitchen towel for the final proof. To create space for both loaves, pull up part of the fabric in between the two loaves; then cover the loaves with the remaining material or plastic wrap. Let the bread rise until nearly doubled, about 45 minutes. They are ready to bake when you make an indentation in the dough with your finger and it remains rather than popping back up.
- While the loaves proof for a second time, preheat the oven to 475°F (246°C). Place a shallow pan of water in the bottom of the oven to create steam. Line an 18 x 13–inch (46 x 33–cm) baking sheet with parchment paper.
- Once the loaves have puffed, it is time to shape them into wheat stalks. Carefully transfer the loaves to the prepared baking sheet. With a sharp pair of kitchen scissors, make a neat cut into the loaf crosswise, about
- 2 inches (5 cm) from the tapered end. Lift and set the piece of cut dough, which looks a bit like a leaf, to one side of the loaf. Make a second cut another 2 inches (5 cm) above the previous cut, moving the dough over to the opposite side of the loaf. Repeat this process all up the length of the loaf, leaving the opposing tapered end straight. Shape the second loaf in a similar fashion.
- Bake the loaves in the preheated oven for 20 to 25 minutes, or until the loaves are a deep golden brown and sound hollow when tapped upon with your fingertips or a spoon. Let the loaves rest for 15 to 20 minutes before pulling apart!
- To store the bread, keep it at room temperature wrapped in plastic or a cloth bread bag for about 1 week.
Notes
This recipe is from my new cookbook, The Cottagecore Baking Book, coming out on February 20th, 2024. Click here to pre-order your copy!