How to Make Your Own Vintage Halloween Buckets
This post may contain affiliate links, please see our privacy policy for more information.
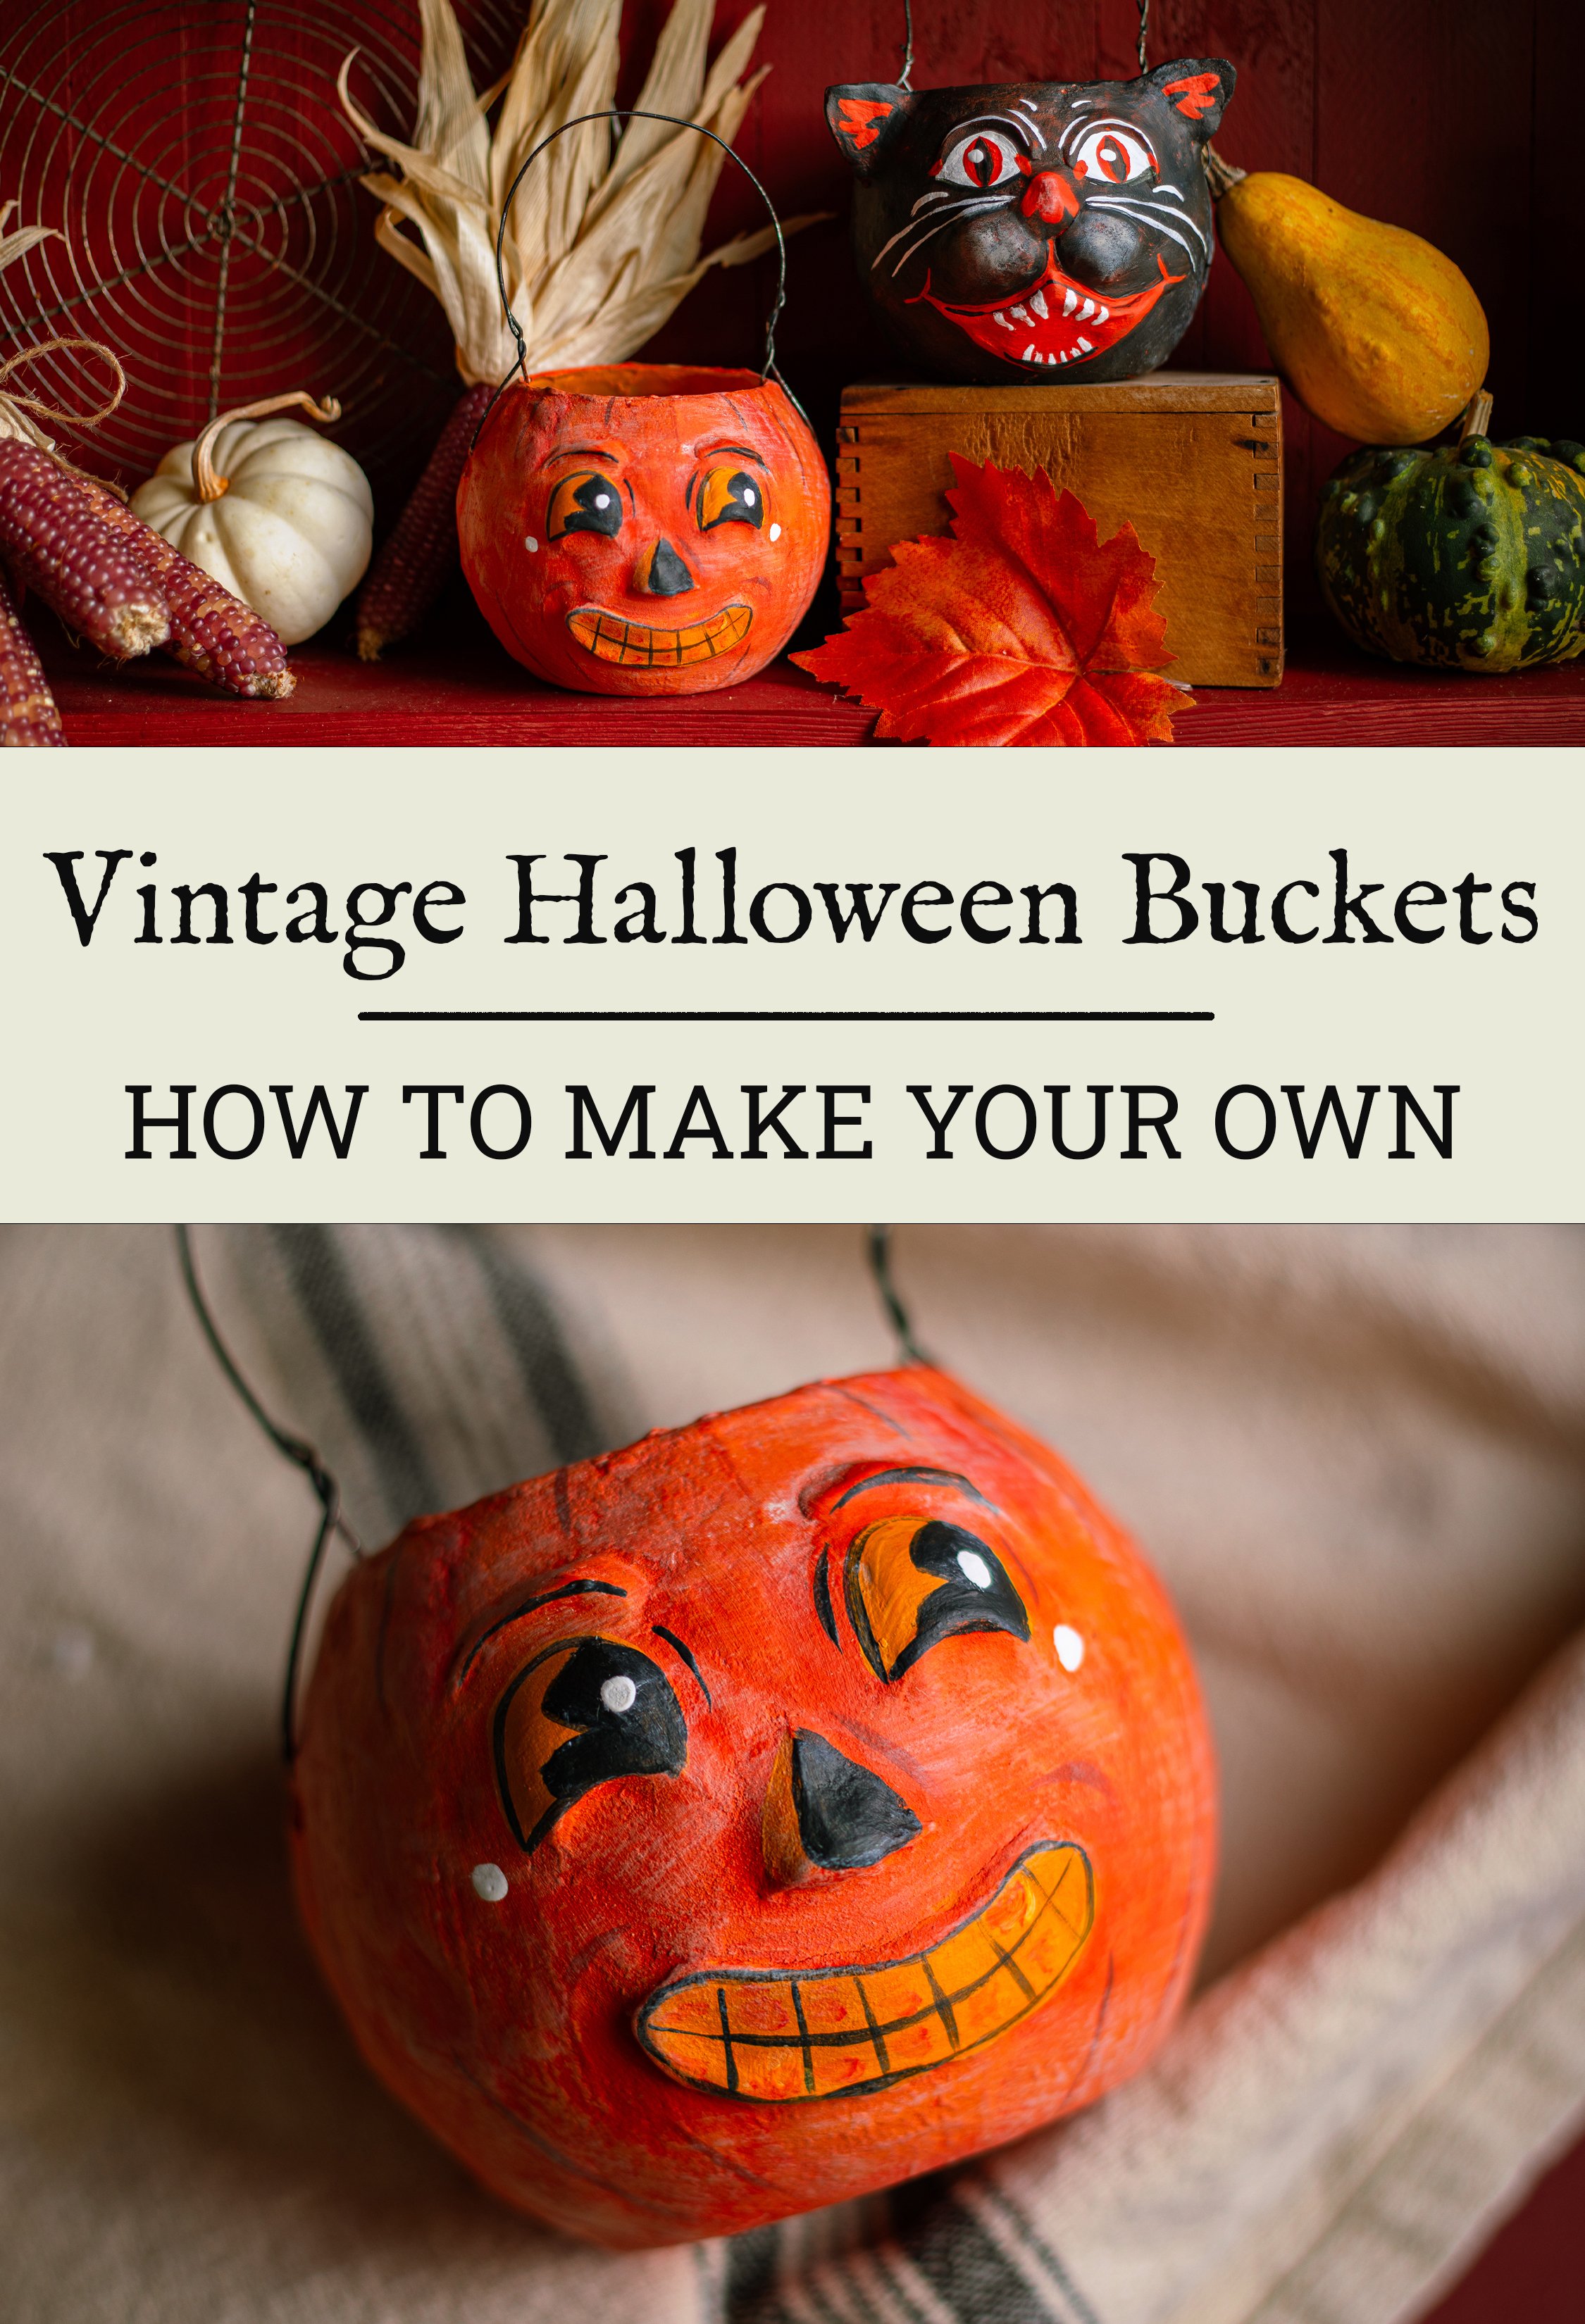
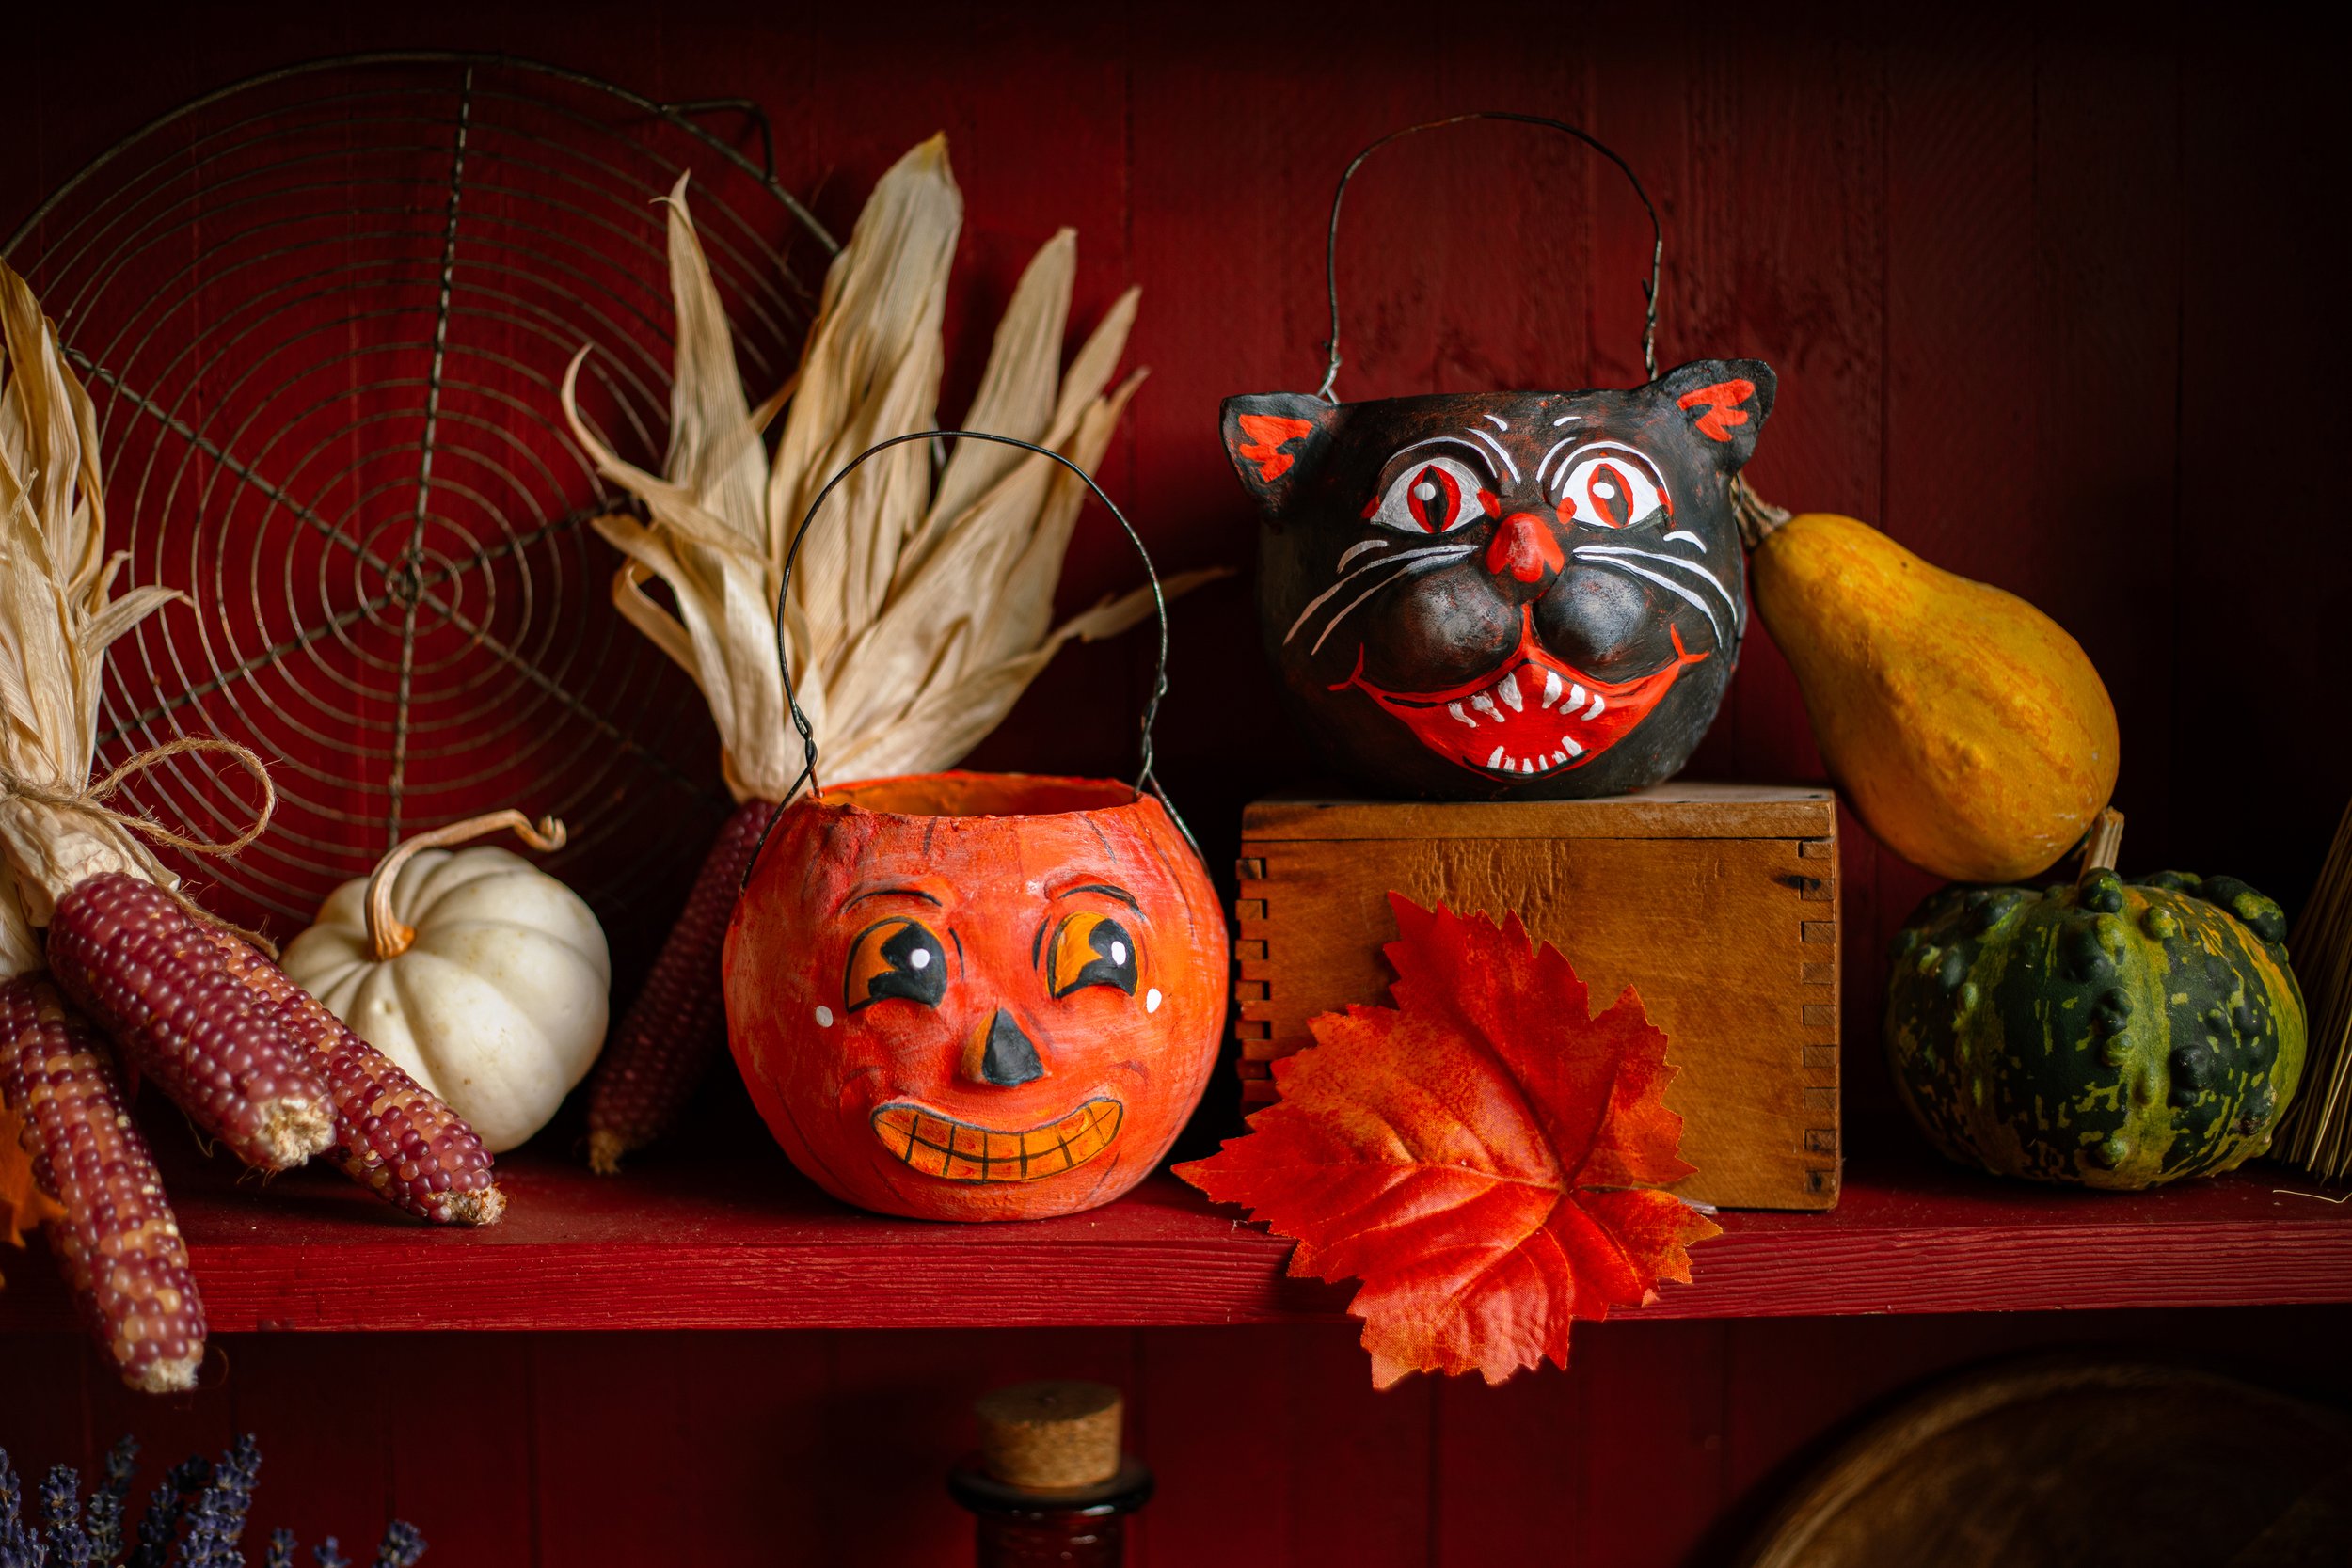
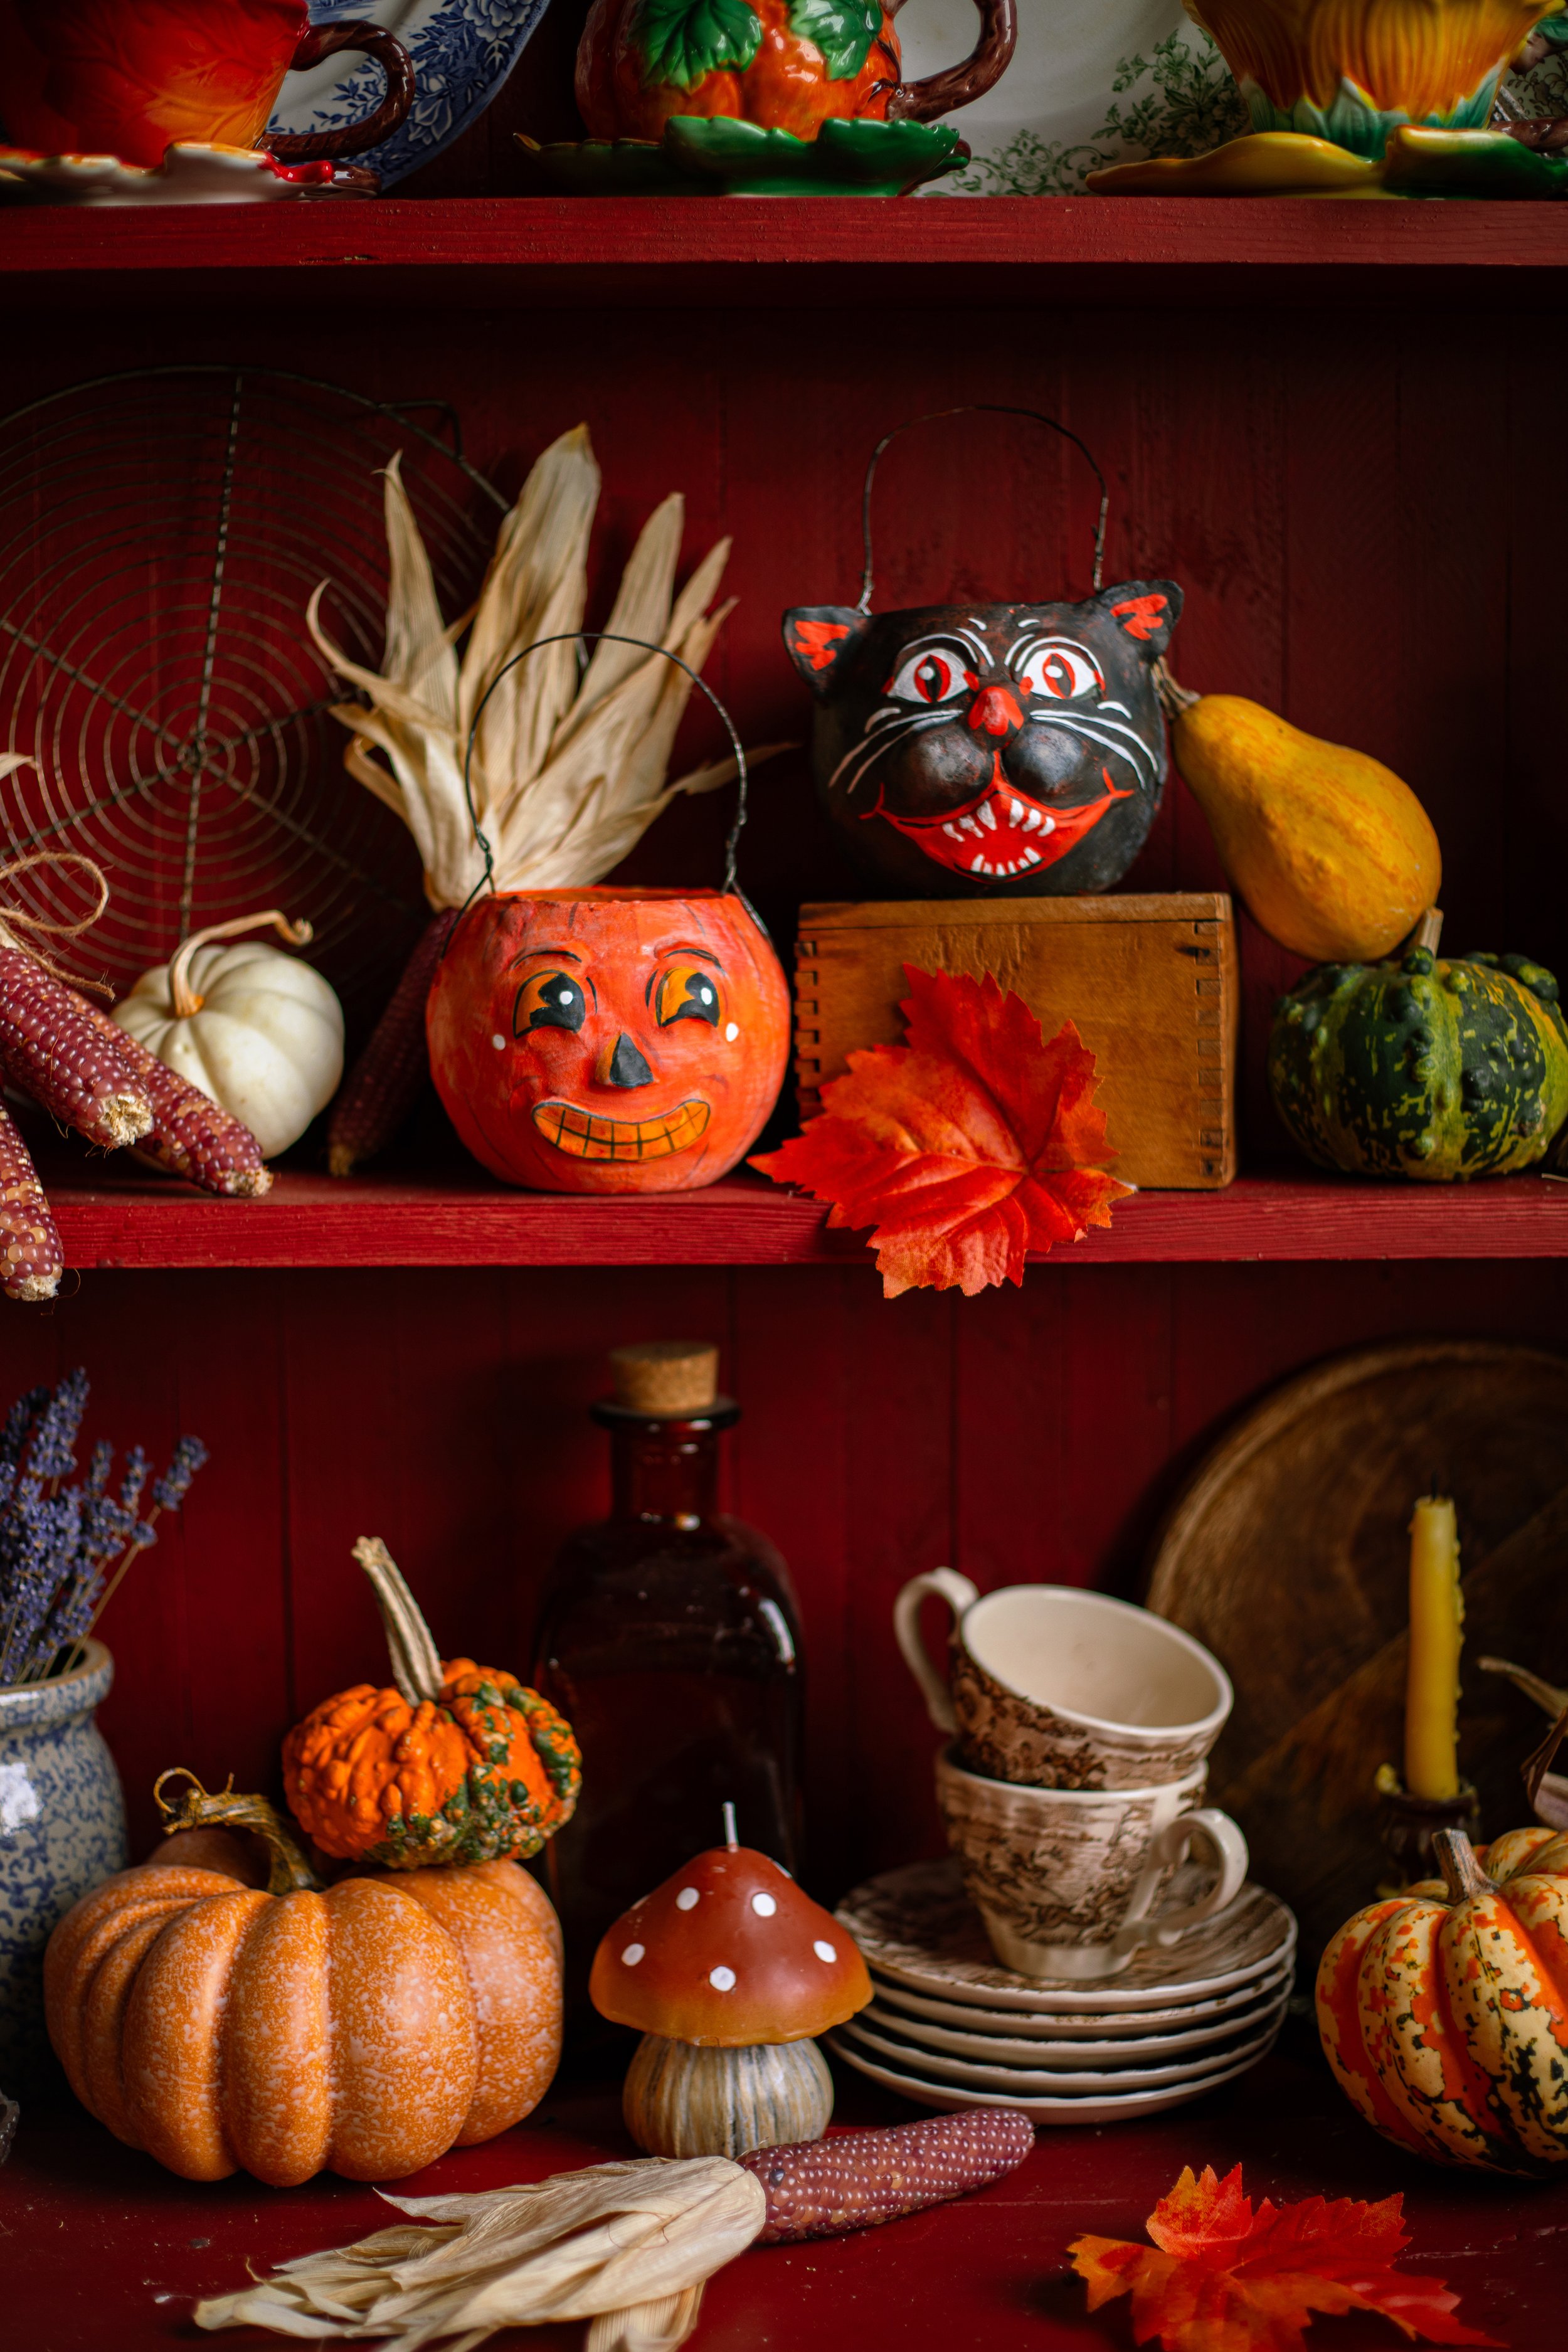
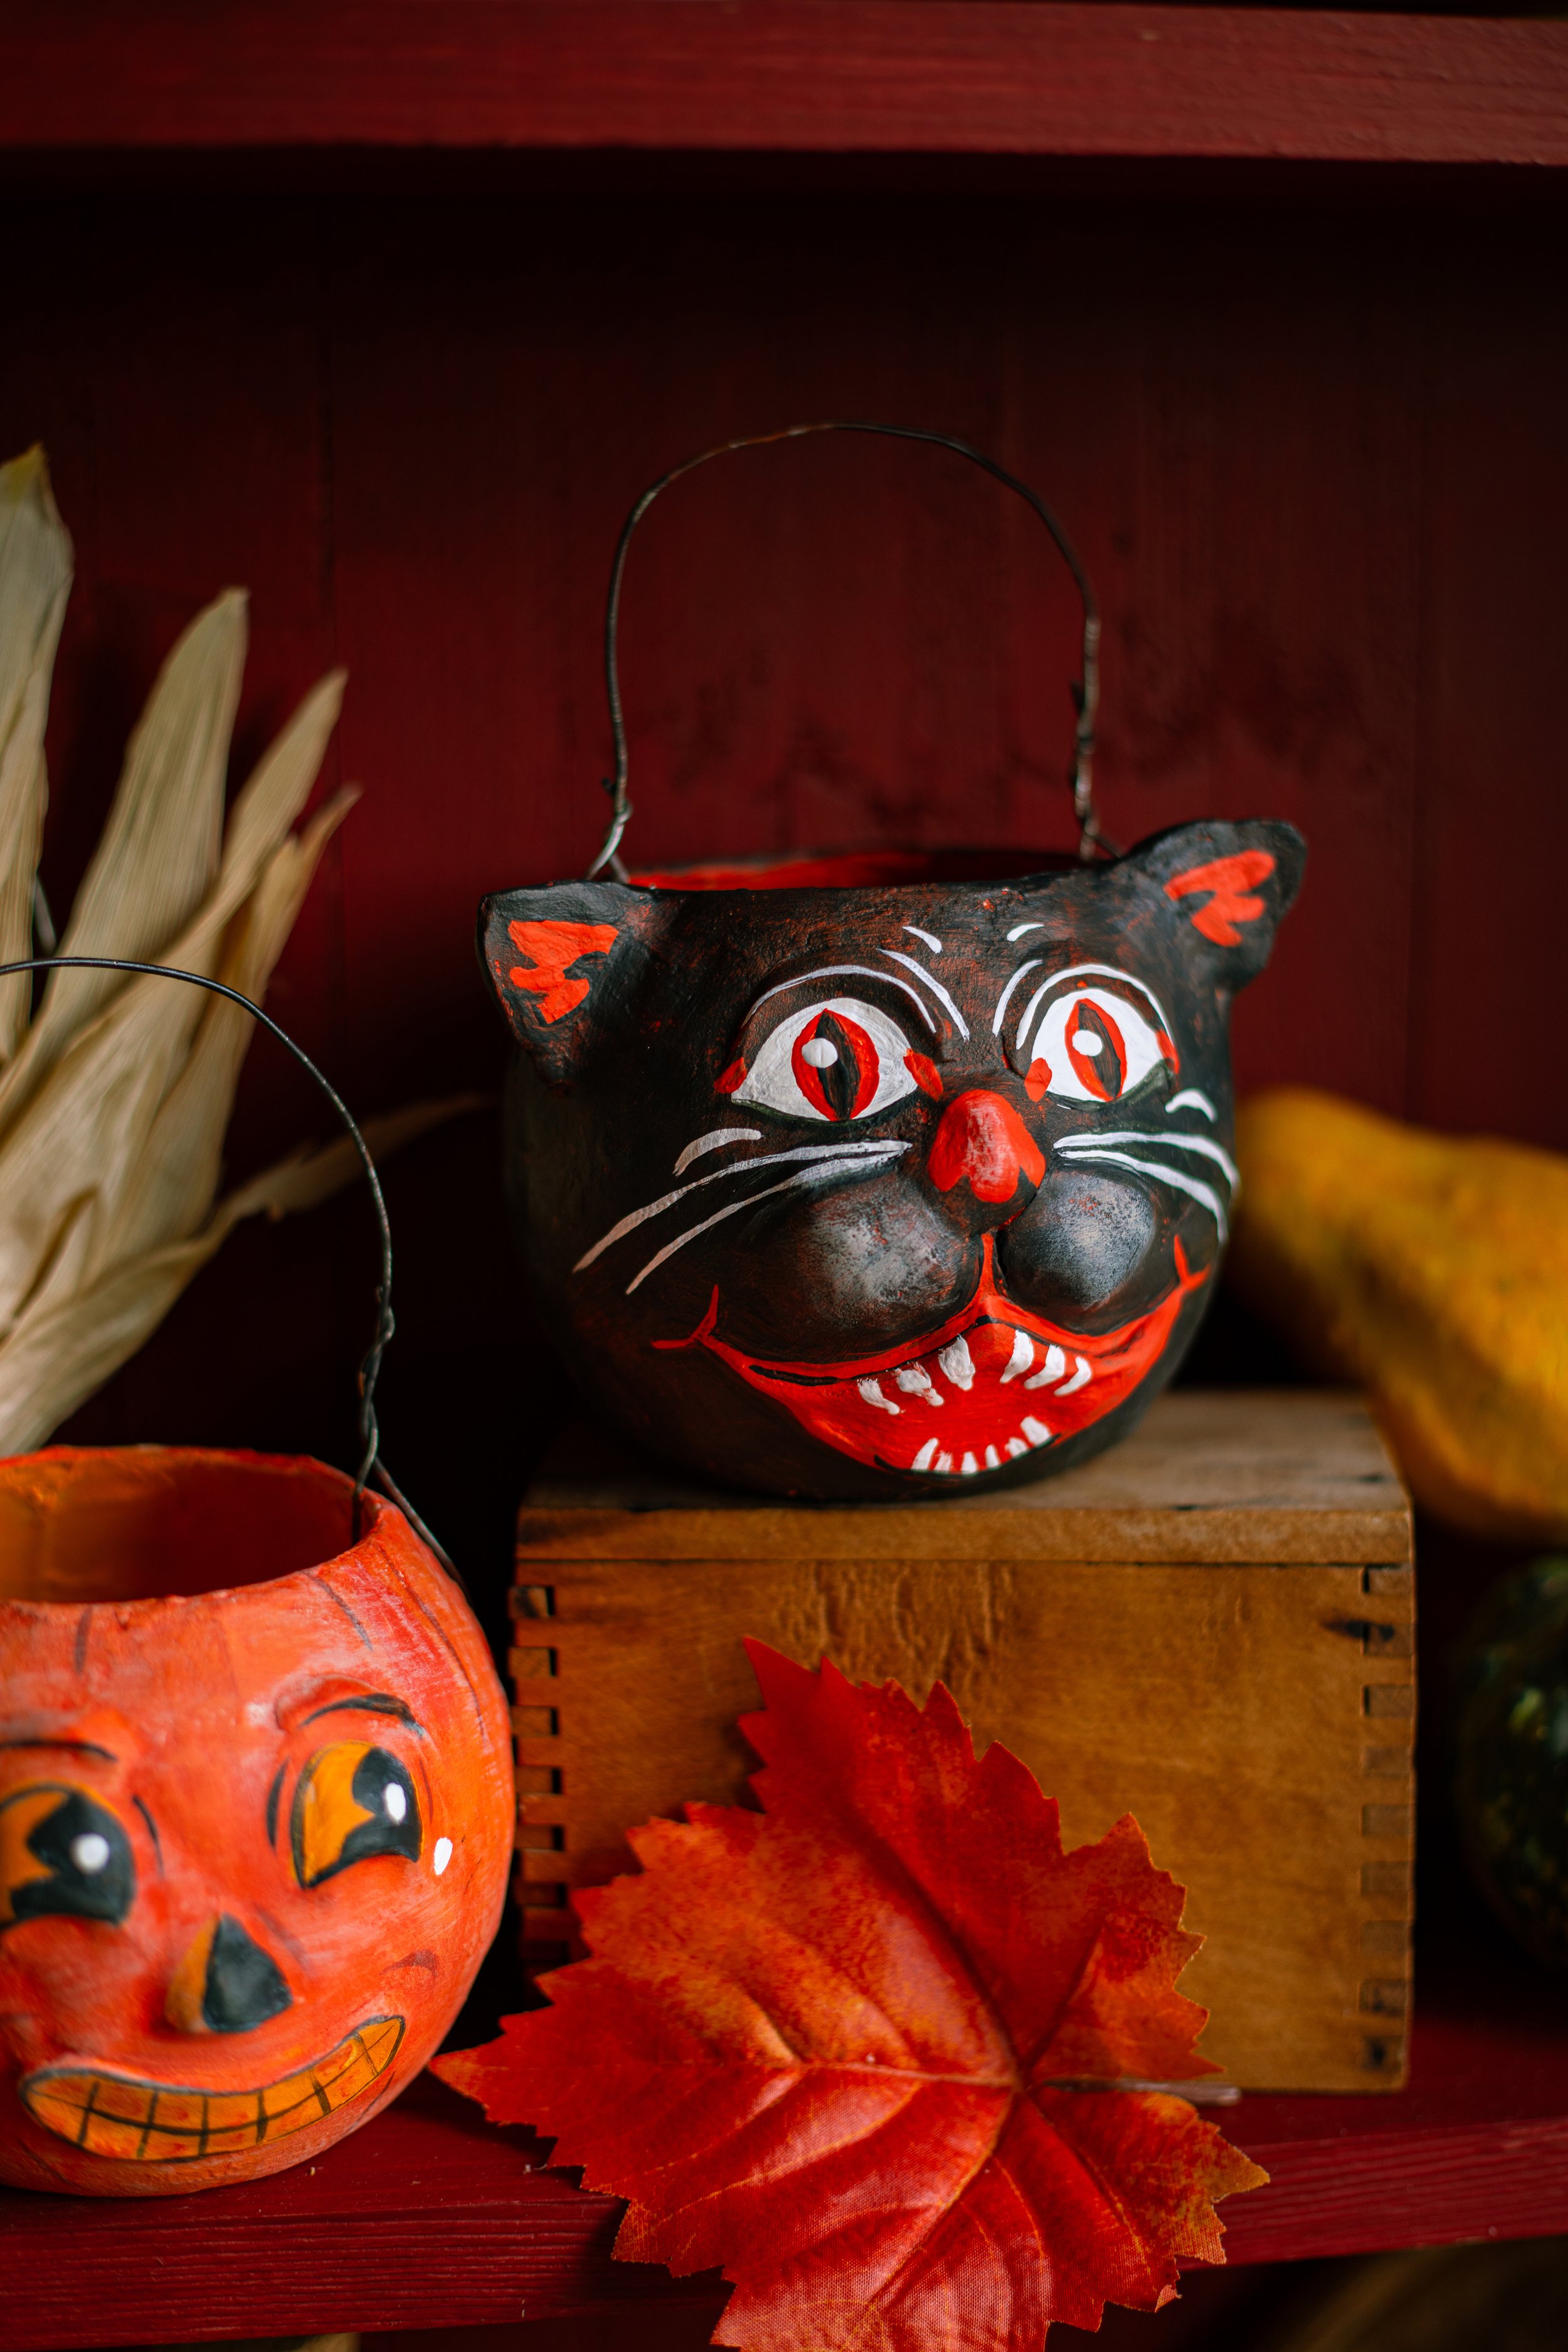
Have you ever seen a vintage papier-mâché Halloween bucket? These adorable antique buckets are now considered a spooky memory from Halloween celebrations of old (and they often cost a small fortune!). In this tutorial, I will be sharing how you can make your own vintage Halloween buckets with simple materials at home. This historical-inspired Halloween craft is a fun and creative way to celebrate the spooky season!
What are Vintage Halloween Buckets?
If you have ever gone into an antique store in the US, you may have seen antique Halloween buckets on the shelf, sculpted from papier-mâché. The oldest buckets are just over one hundred years old and are typically sold at a costly price!
By the turn of the century, more people in the United States were beginning to celebrate Halloween as a manufactured holiday. It was around this time that Halloween parties became popularized. It was common for young children and teenagers to vandalize their neighbors’ properties as a “trick” during this haunted night. To try and fix this nationwide issue, many communities began pushing the idea that Halloween was a family-friendly event and a fun celebration for children.
By the 1920s and 1930s, trick-or-treating started to become an annual practice. But where were these children meant to store their candy? This is how the papier-mâché buckets came about! The original buckets were made for decorations, but they soon were the ideal container for children to collect candies and sweets from neighbors. Because of their lightweight material and various shapes and unique designs, these iconic buckets were a favorite Halloween tradition.
Today, a true antique Halloween bucket can sell for $100 to $800! This is usually not in most people’s budget. If you are looking for unique DIY vintage Halloween decoration ideas, then you are going to love how easy this vintage Halloween bucket craft tutorial is!
Why you’ll Love This Project
Budget-friendly: On top of saving yourself several hundred dollars on a true antique piece, this project is incredibly affordable to make! All you need are some simple household items like clay or newspaper and flour for traditional papier-mâché.
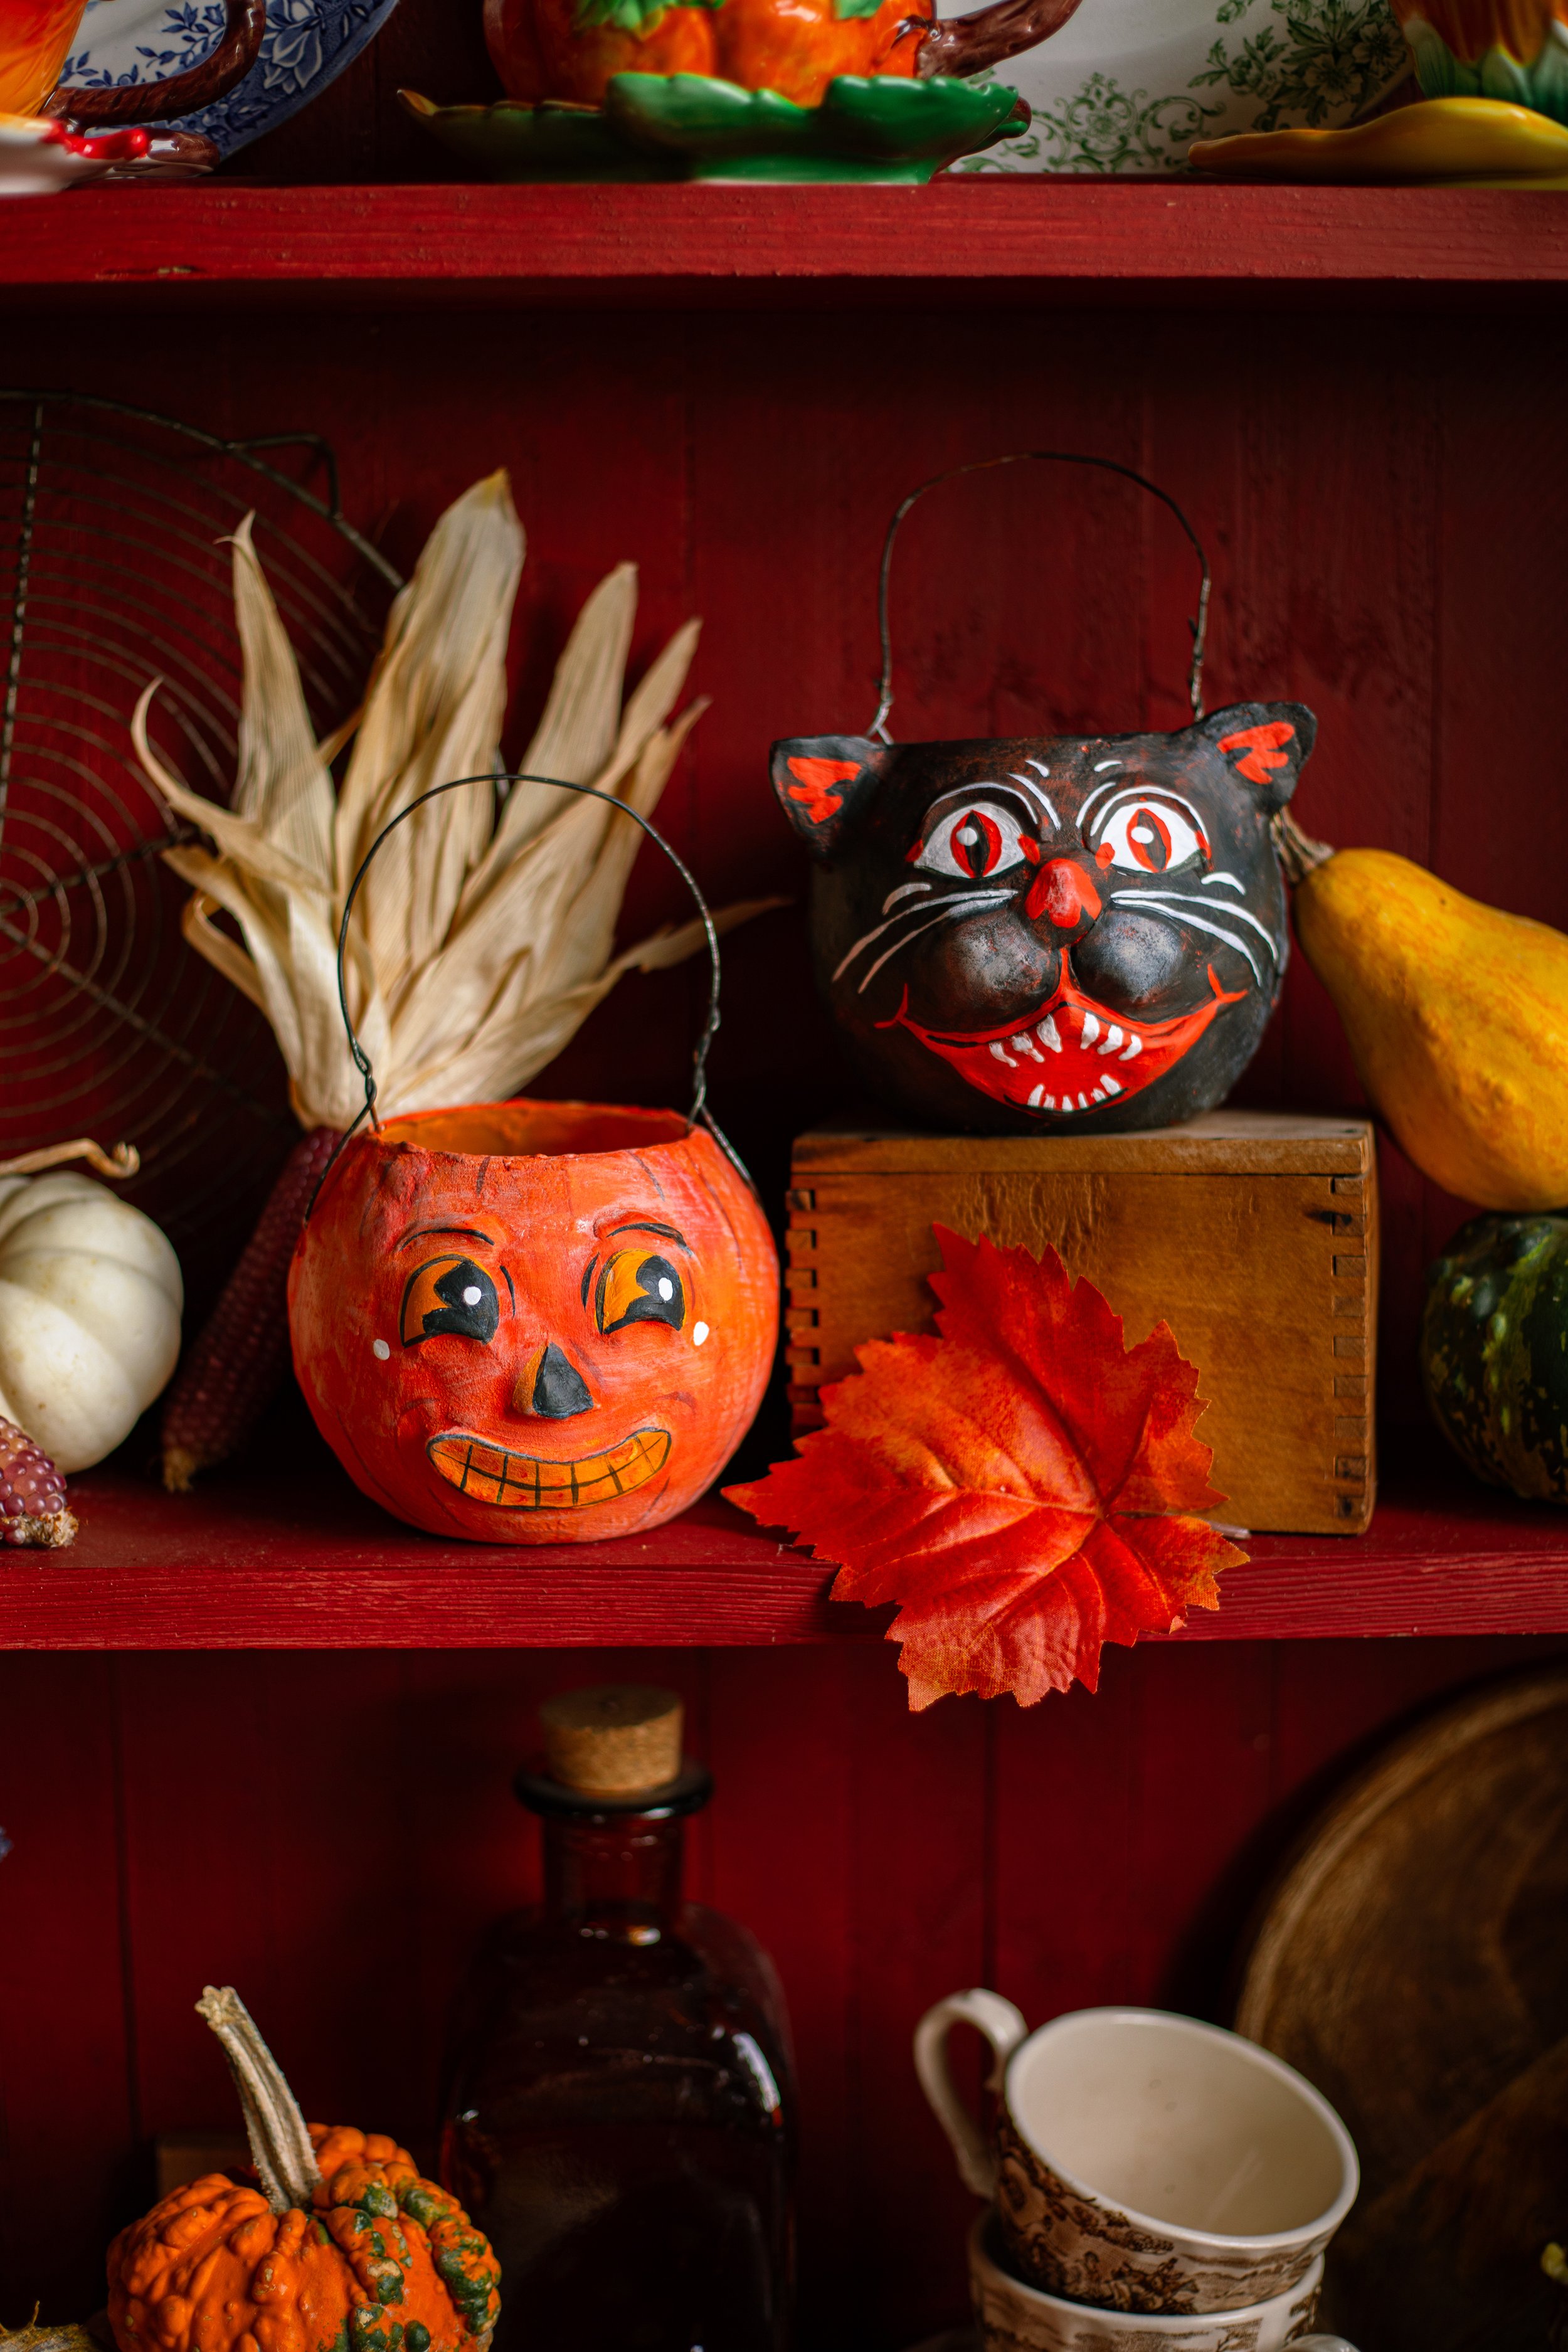
Customizable: Vintage Halloween buckets were made into all types of cute designs from jack-o-lanterns to cats, ghosts to goblins, and even witches!
Vintage style: If you love vintage and vintage-inspired decor, then this is the perfect little folk art craft for you.
Reusable: This decoration, once finished, will last for years. You can pass it on for generations as a unique art piece for your family’s home!
Fun for all ages: This kid-friendly Halloween craft is fairly simple, making it easy enough for older kids to make on their own and young kids make with some help from an adult.

Supplies You Will Need:
To make your own DIY vintage Halloween buckets, you will need to gather a few crafting supplies. I decided to make these buckets with paper clay rather than true papier-mâché, as this made the project much faster and easier to make.
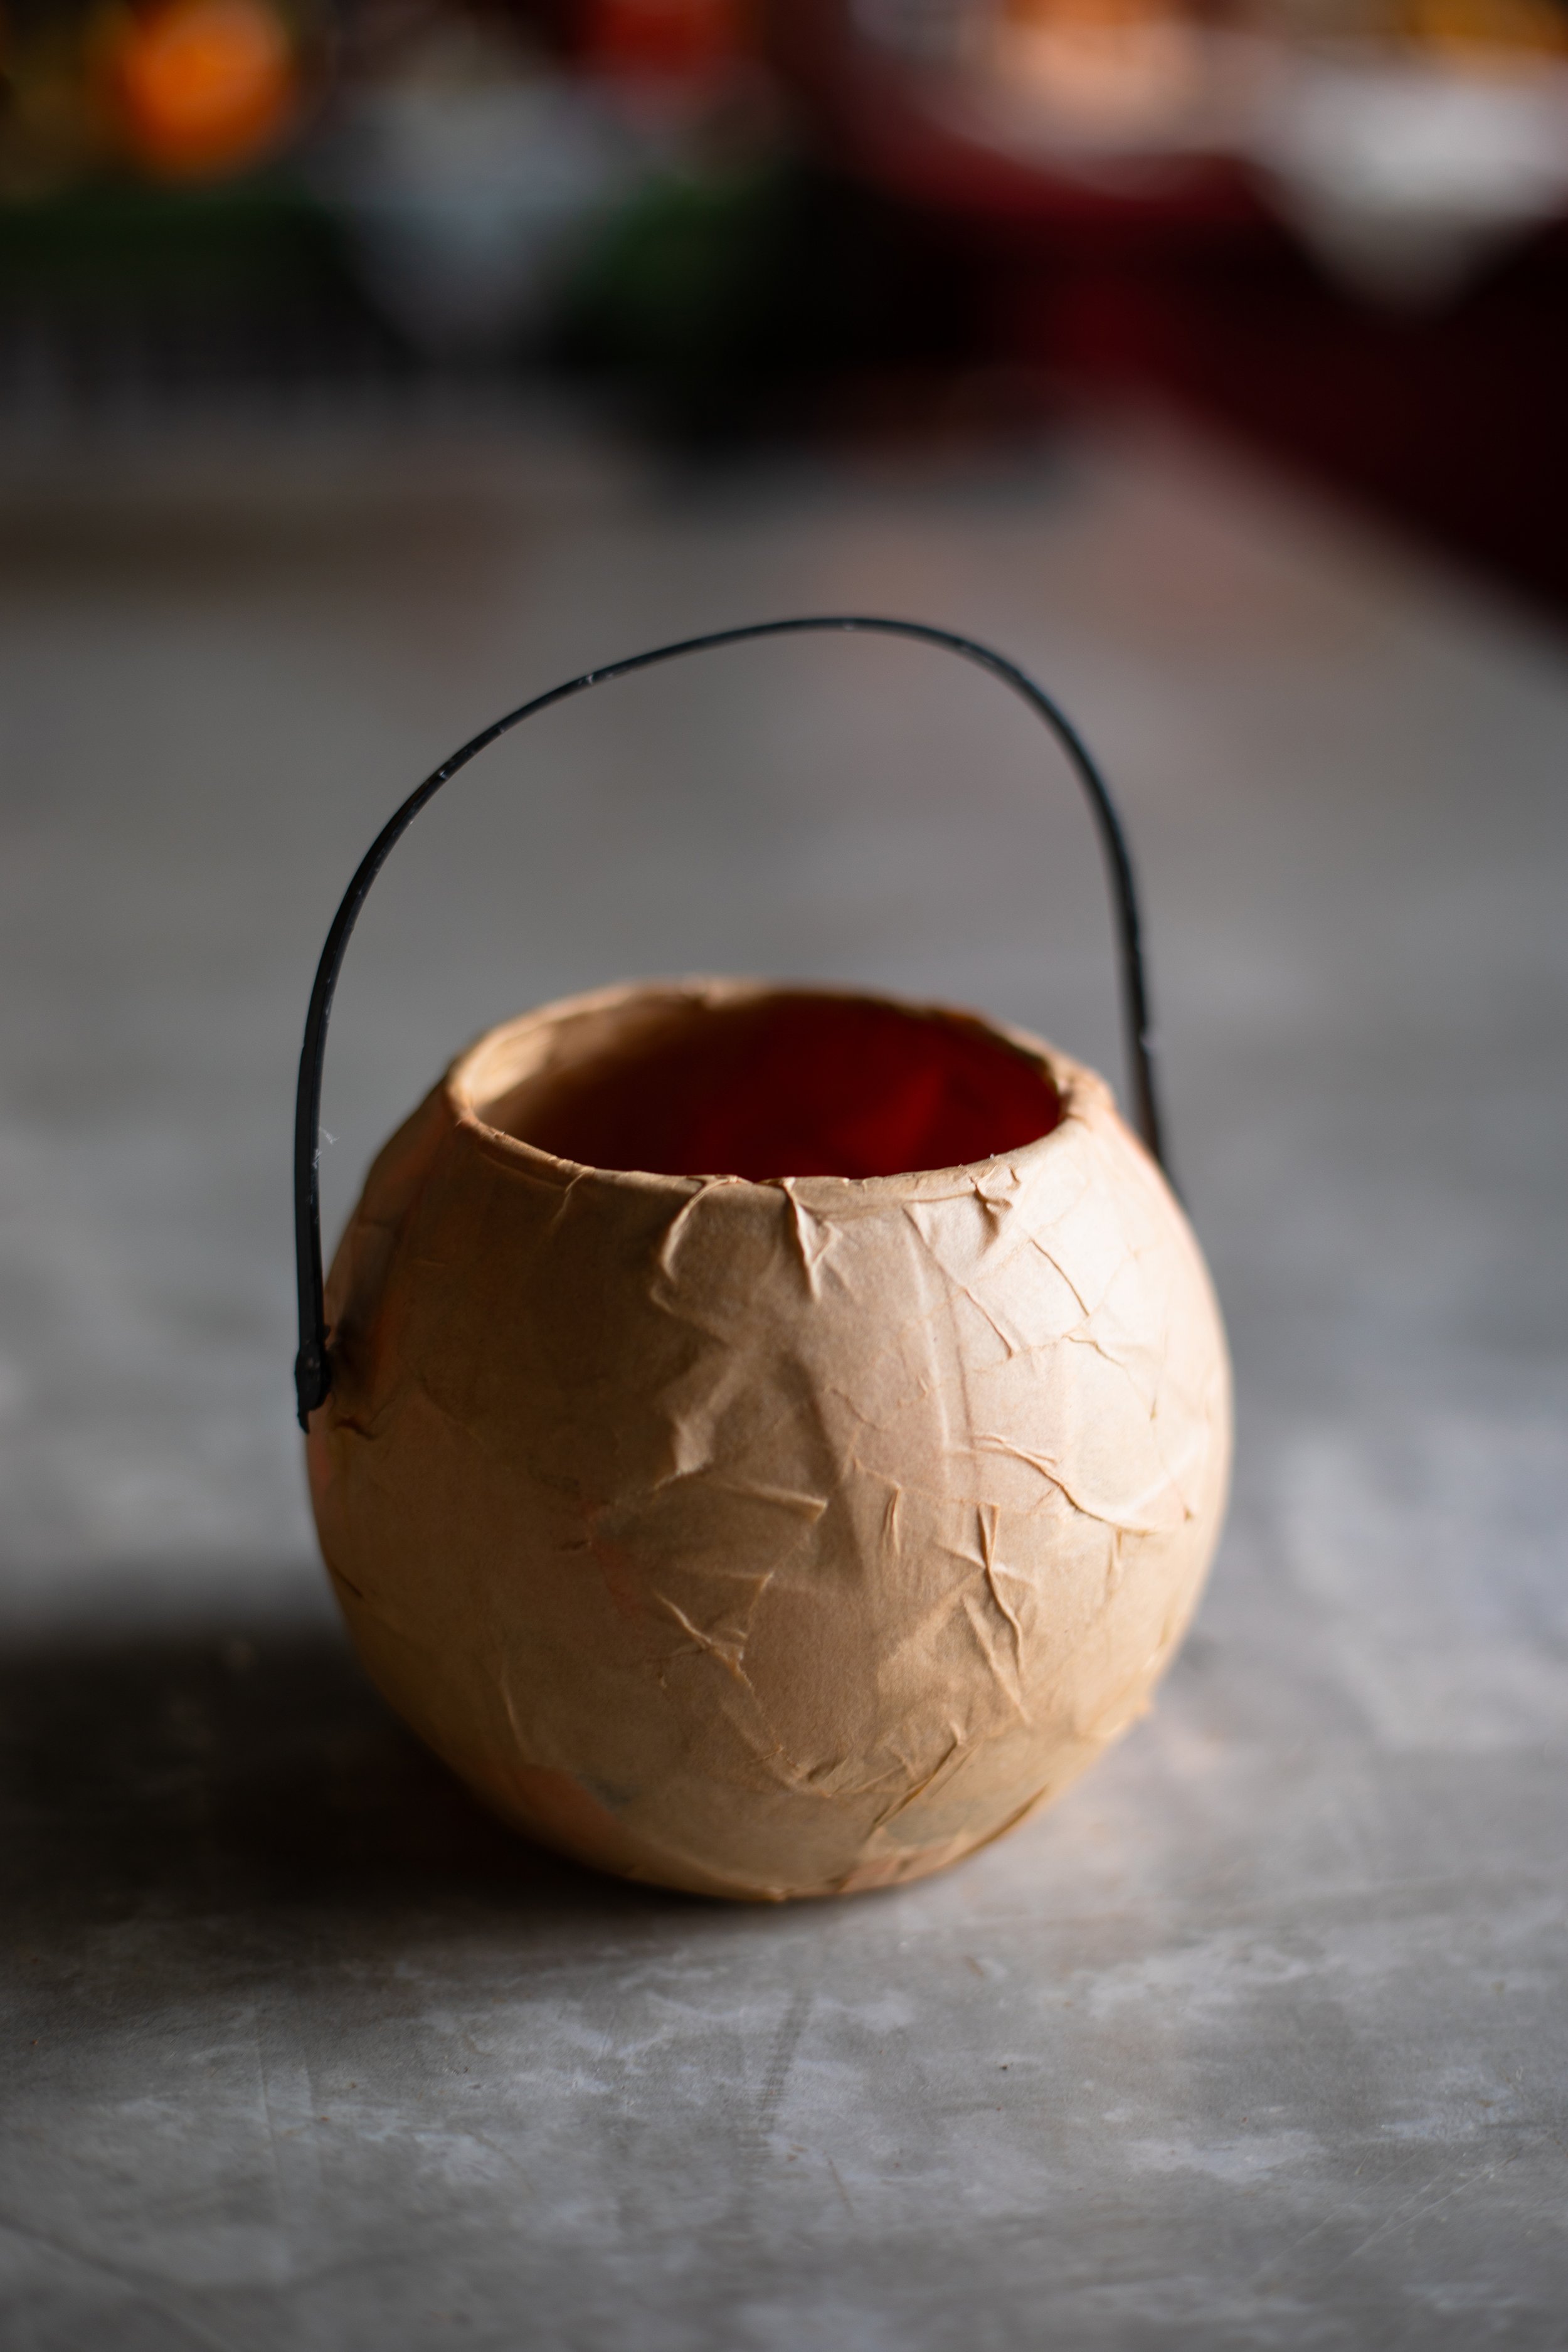
Plastic Halloween Buckets. To make things easier, it’s a good idea to use a plastic Halloween bucket as a base. These buckets are already shaped exactly how you want them, sturdy, and affordable. For this tutorial, I decided to use mini 4.5-inch pumpkin buckets. You can use any size jack-o-lantern bucket that you like, such as the classic 8-inch bucket.
Brown Craft Paper. You can use any paper that you like, such as newspaper. You will want something thicker than tissue paper for the clay to adhere to— newspaper or pages from old magazines are a great alternative!
Mod Podge. Glue for sticking on your paper.
Paintbrushes. You will want an assortment of paintbrushes. You will need a thicker brush for painting on the Mod Podge and smaller brushes for painting the finished bucket.
Paper Clay. I chose to use paper clay for this project as it is lightweight and dries quickly. This clay is incredibly easy to mold and work with, and it gives off a similar finished look to paper mache!
Acrylic Paints. You can use other types of paints for this project, but I think acrylic works best on paper clay and is more affordable!
Black Wire. For the bucket's handle, I used a thin black wire that you can easily find in the floral area of most craft supply stores.
Finding Inspiration:
If you have ever seen true antique Halloween buckets, you know that the faces can be a bit creepy! I personally love the look of these buckets, and I think they are a unique and creative piece of history. It can be really fun to look for inspiration from true antique paper mache buckets or even modern folk art buckets.
I also have found that a good source of inspiration for making these buckets are vintage Halloween postcards and illustrations. There are so many cute and unique faces. This is where the creators of Over the Garden Wall found inspiration for the show as well!
Video Tutorial
Step-by-Step Instructions
Step One: Create the Base Shape
Gather your supplies and place a large piece of craft paper or some surface protector on your work surface to prevent any glue or clay residue to remain on your table.
Step Two: Make the Papier-Mâché Layer
Begin by tearing up small pieces of craft paper. With a wide paint brush, begin painting Mod Podge over the surface of the pumpkin bucket and applying the pieces of craft paper. Paint over each piece of craft paper with more glue so that they become sealed to the bucket. Continue working your way around the bucket, including on the bottom and the inside. Once covered, leave the bucket propped to dry completely. This usually a few hours. For faster drying, place the bucket on a wire cooling rack so that air can circulate.
Step Three: Add the Paper-Clay
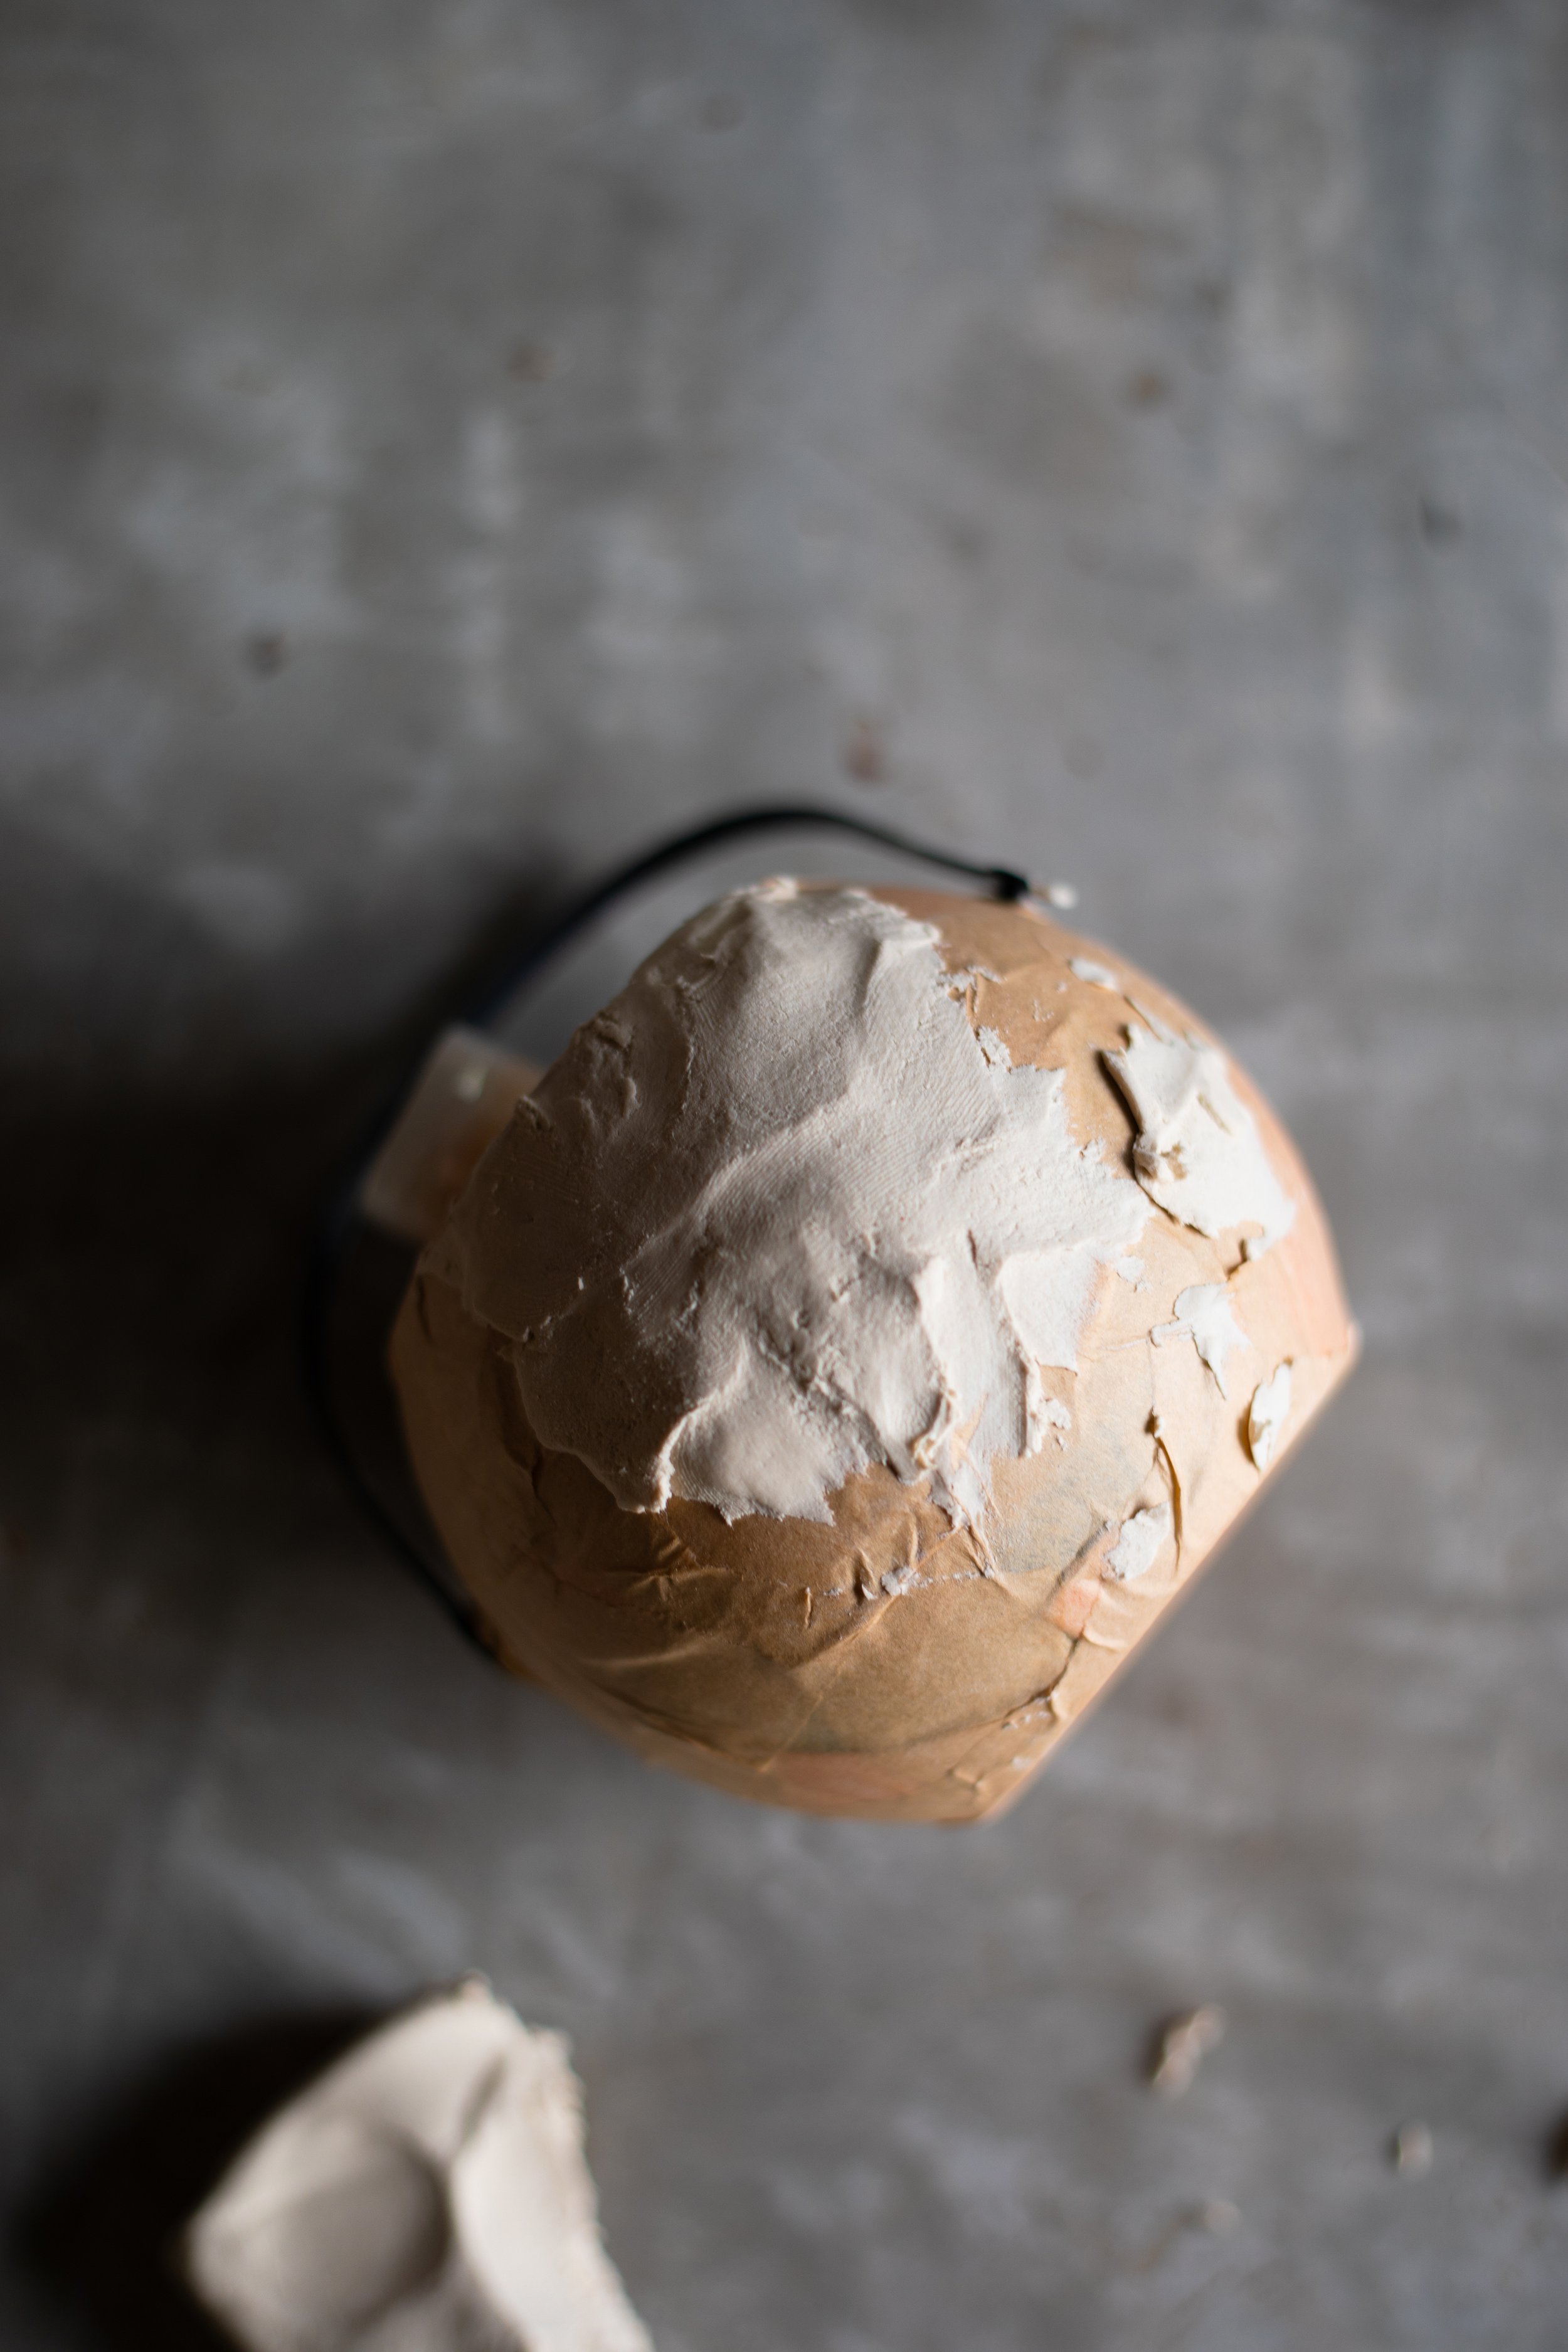
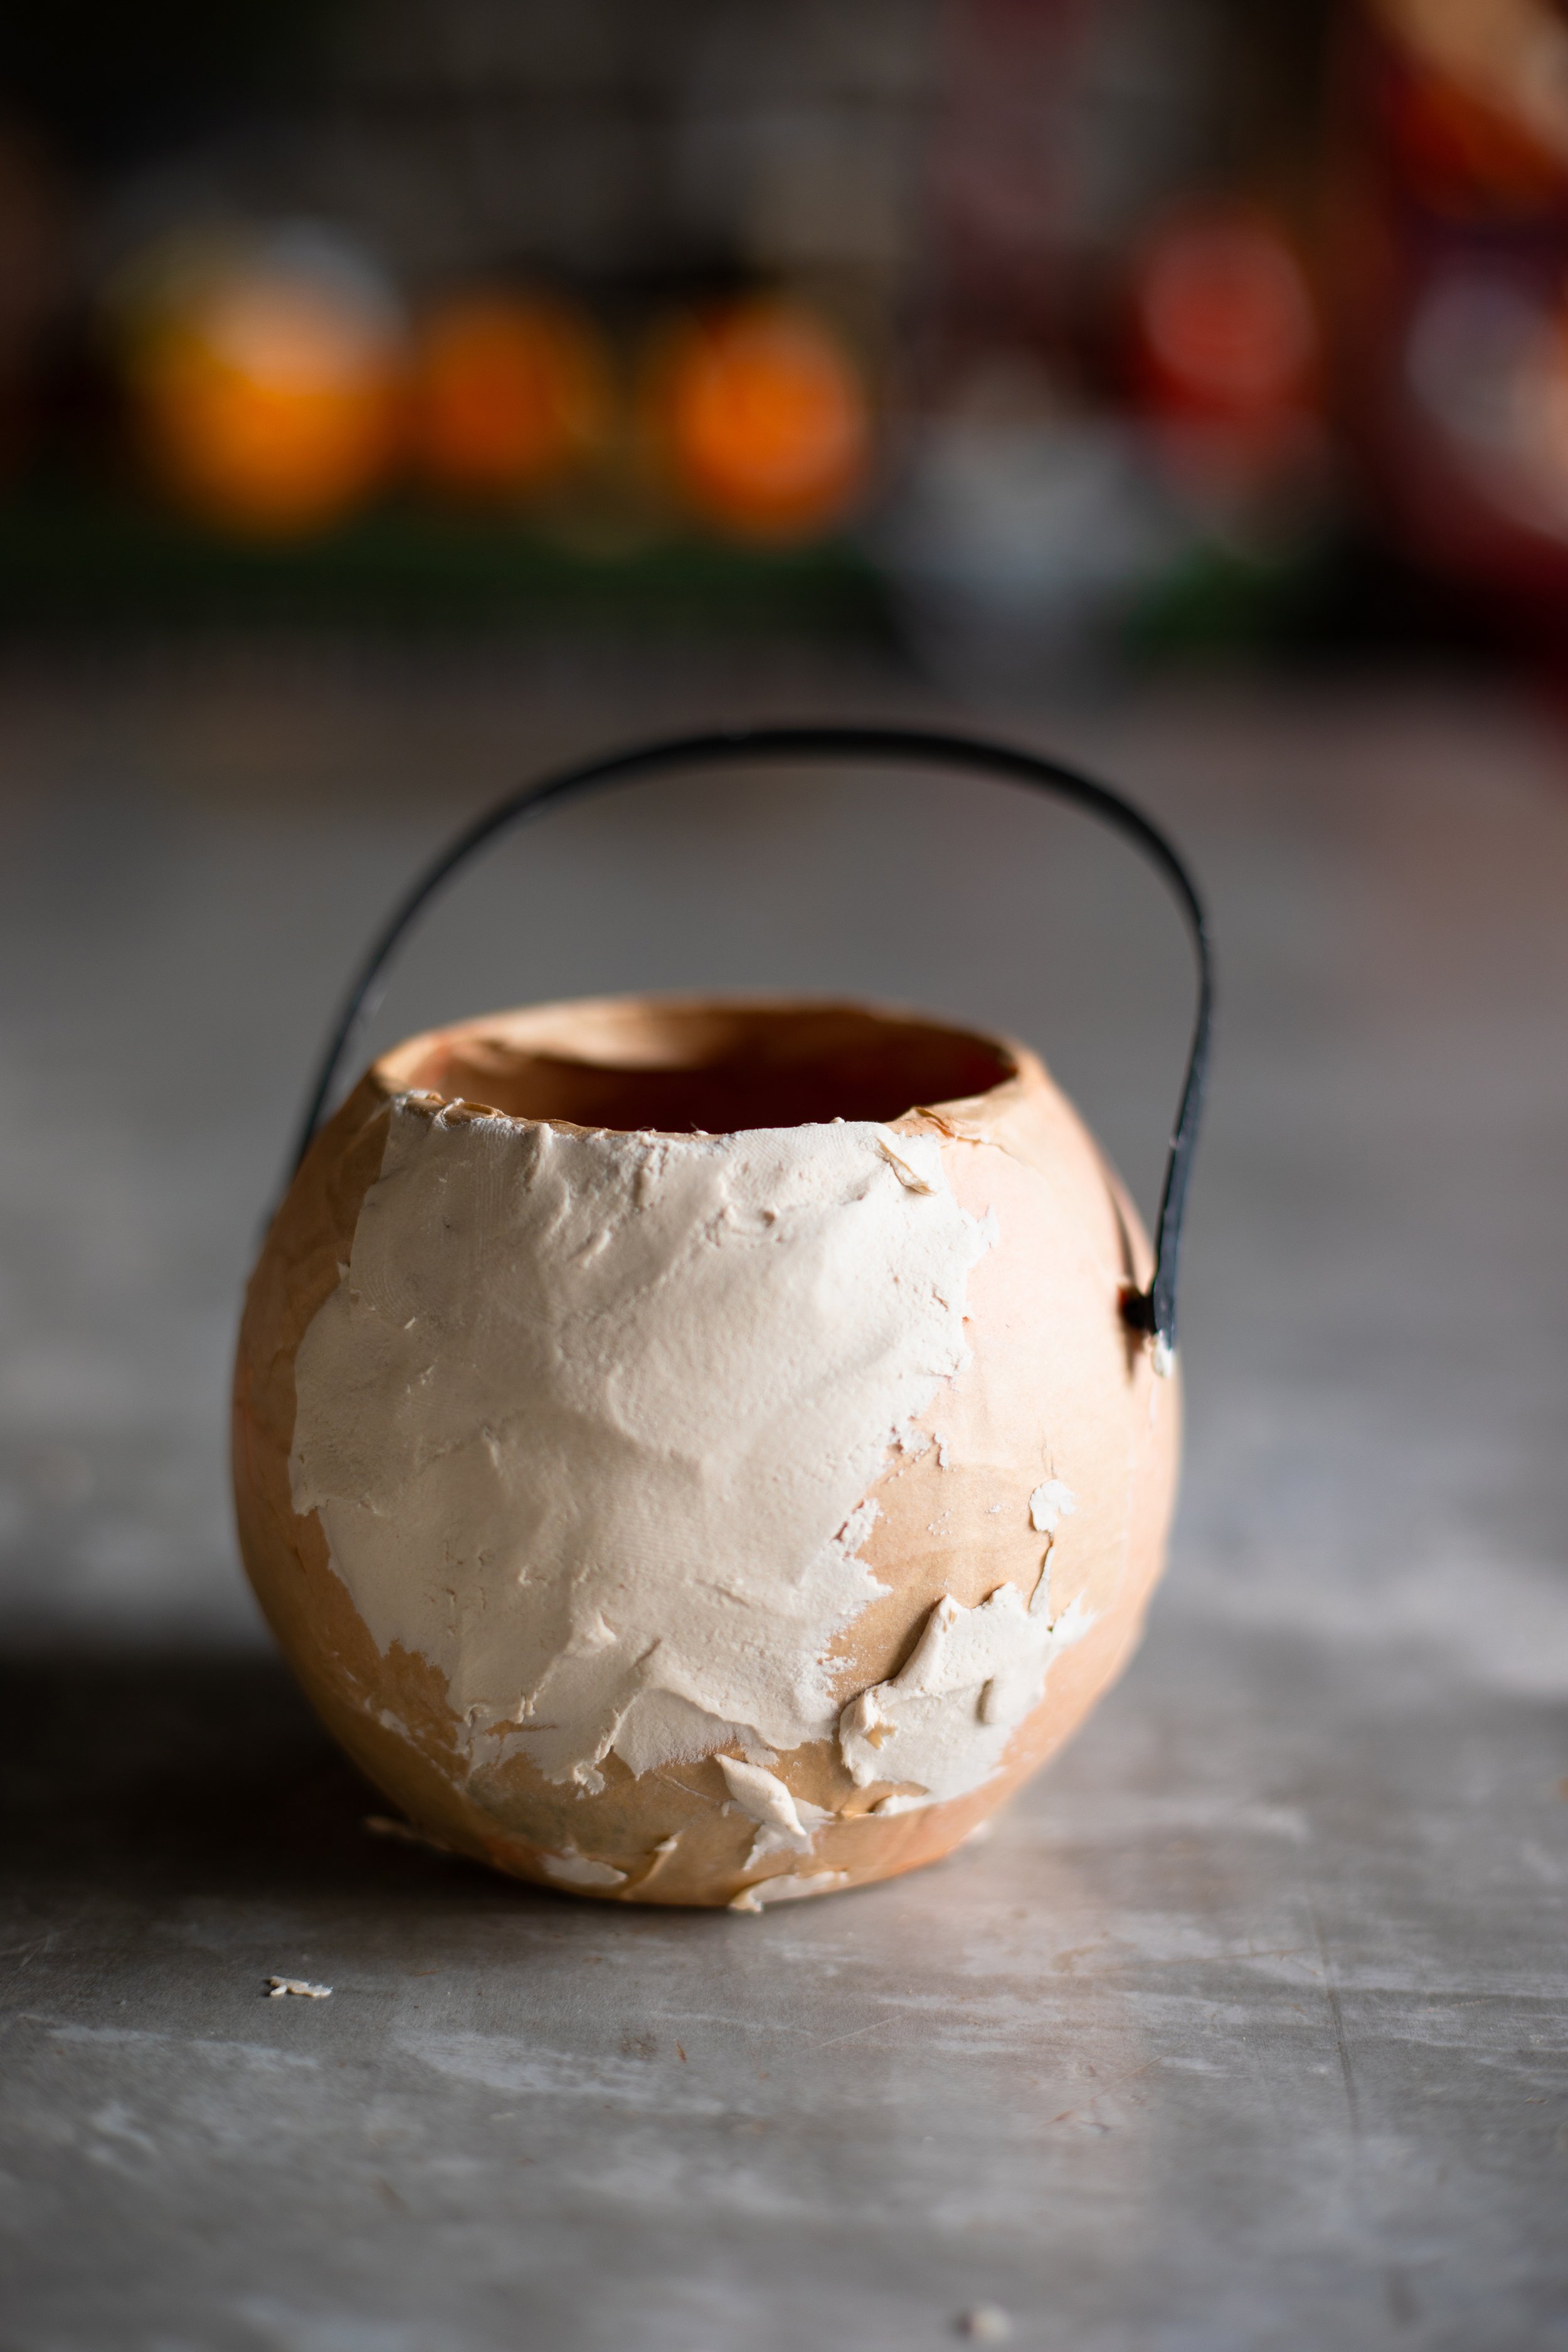
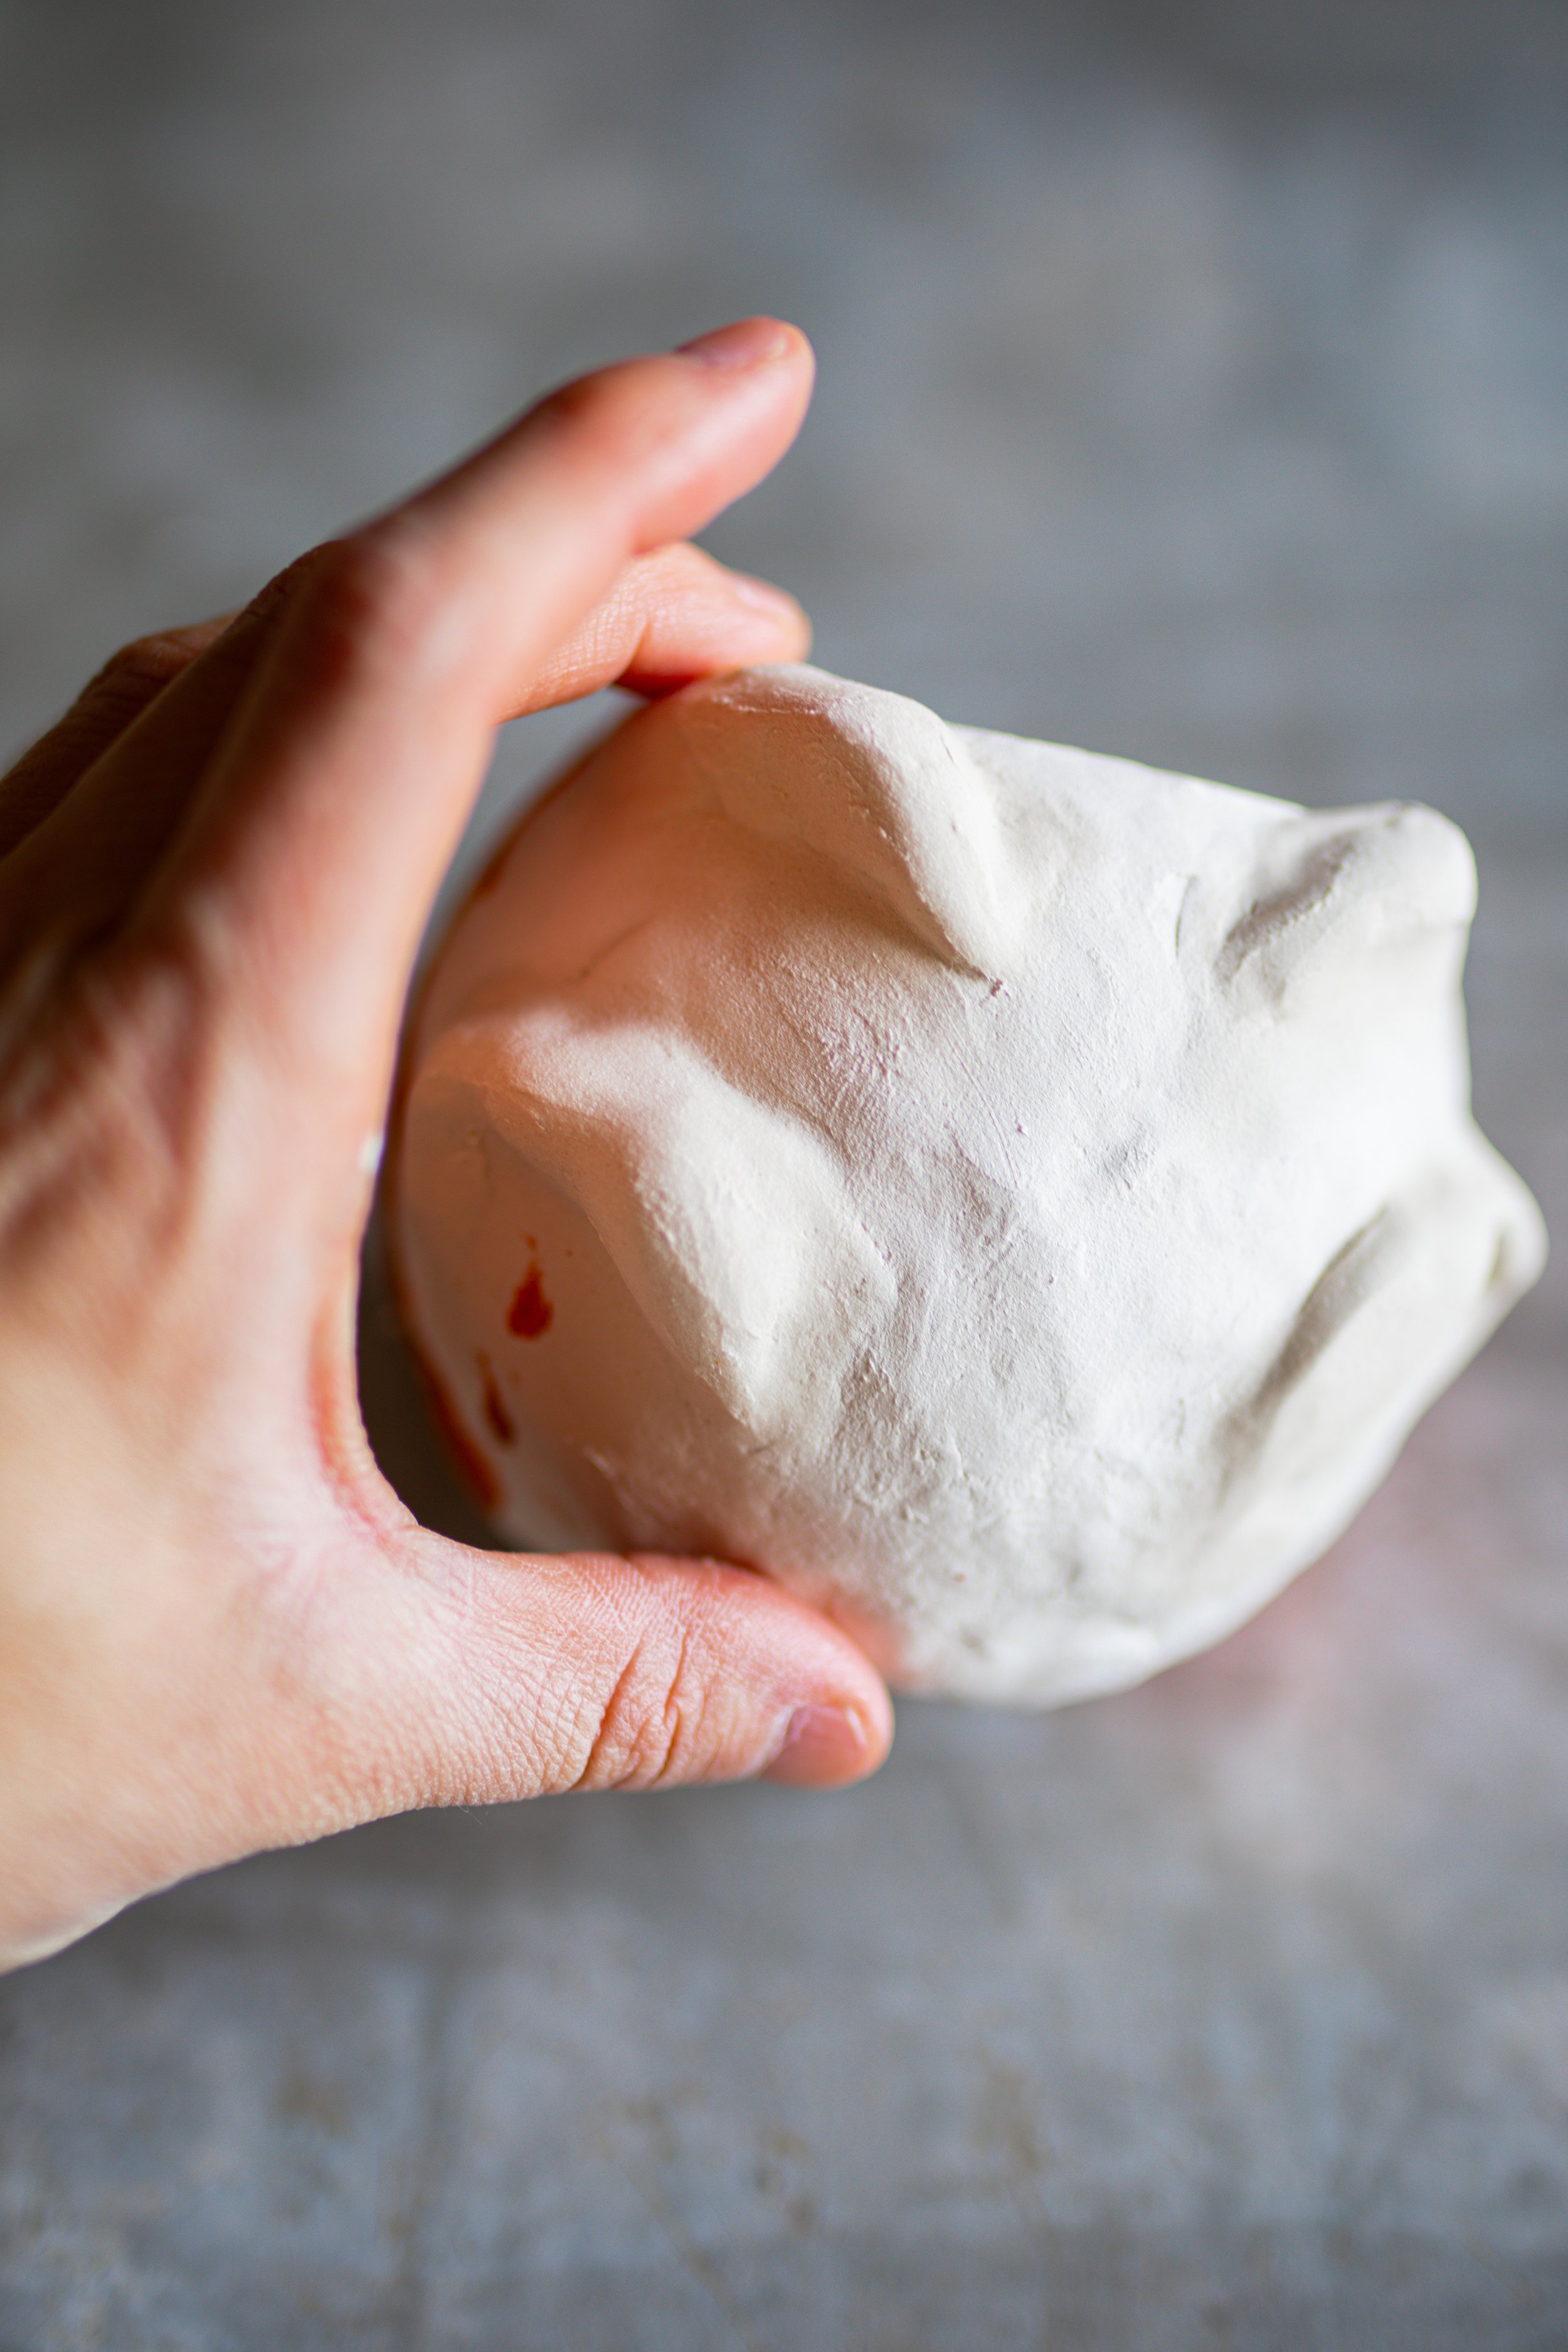
Once the glue has fully dried, it’s time to start sculpting. I chose to leave the bucket’s plastic handle attached until I was finished applying the paper clay so that I did not accidentally fill the hole with clay.
Place a small dish of water near you as you apply the clay in small pieces over the surface of the paper. Spread the soft clay all over the outside of the bucket until it’s completely covered. You can apply the clay in a fairly thin layer. If you can see the bucket through the clay, it’s too thin. The thicker you may the clay, the heavier your bucket will be and the longer it will take to dry.
You will find a rhythm as you apply the clay. Dip your fingers into the dish of water to help spread the clay around and smooth out any lumps or bumps. I find the lumpier it is, the more it looks like a true vintage bucket!
Step Four: Let Dry Overnight
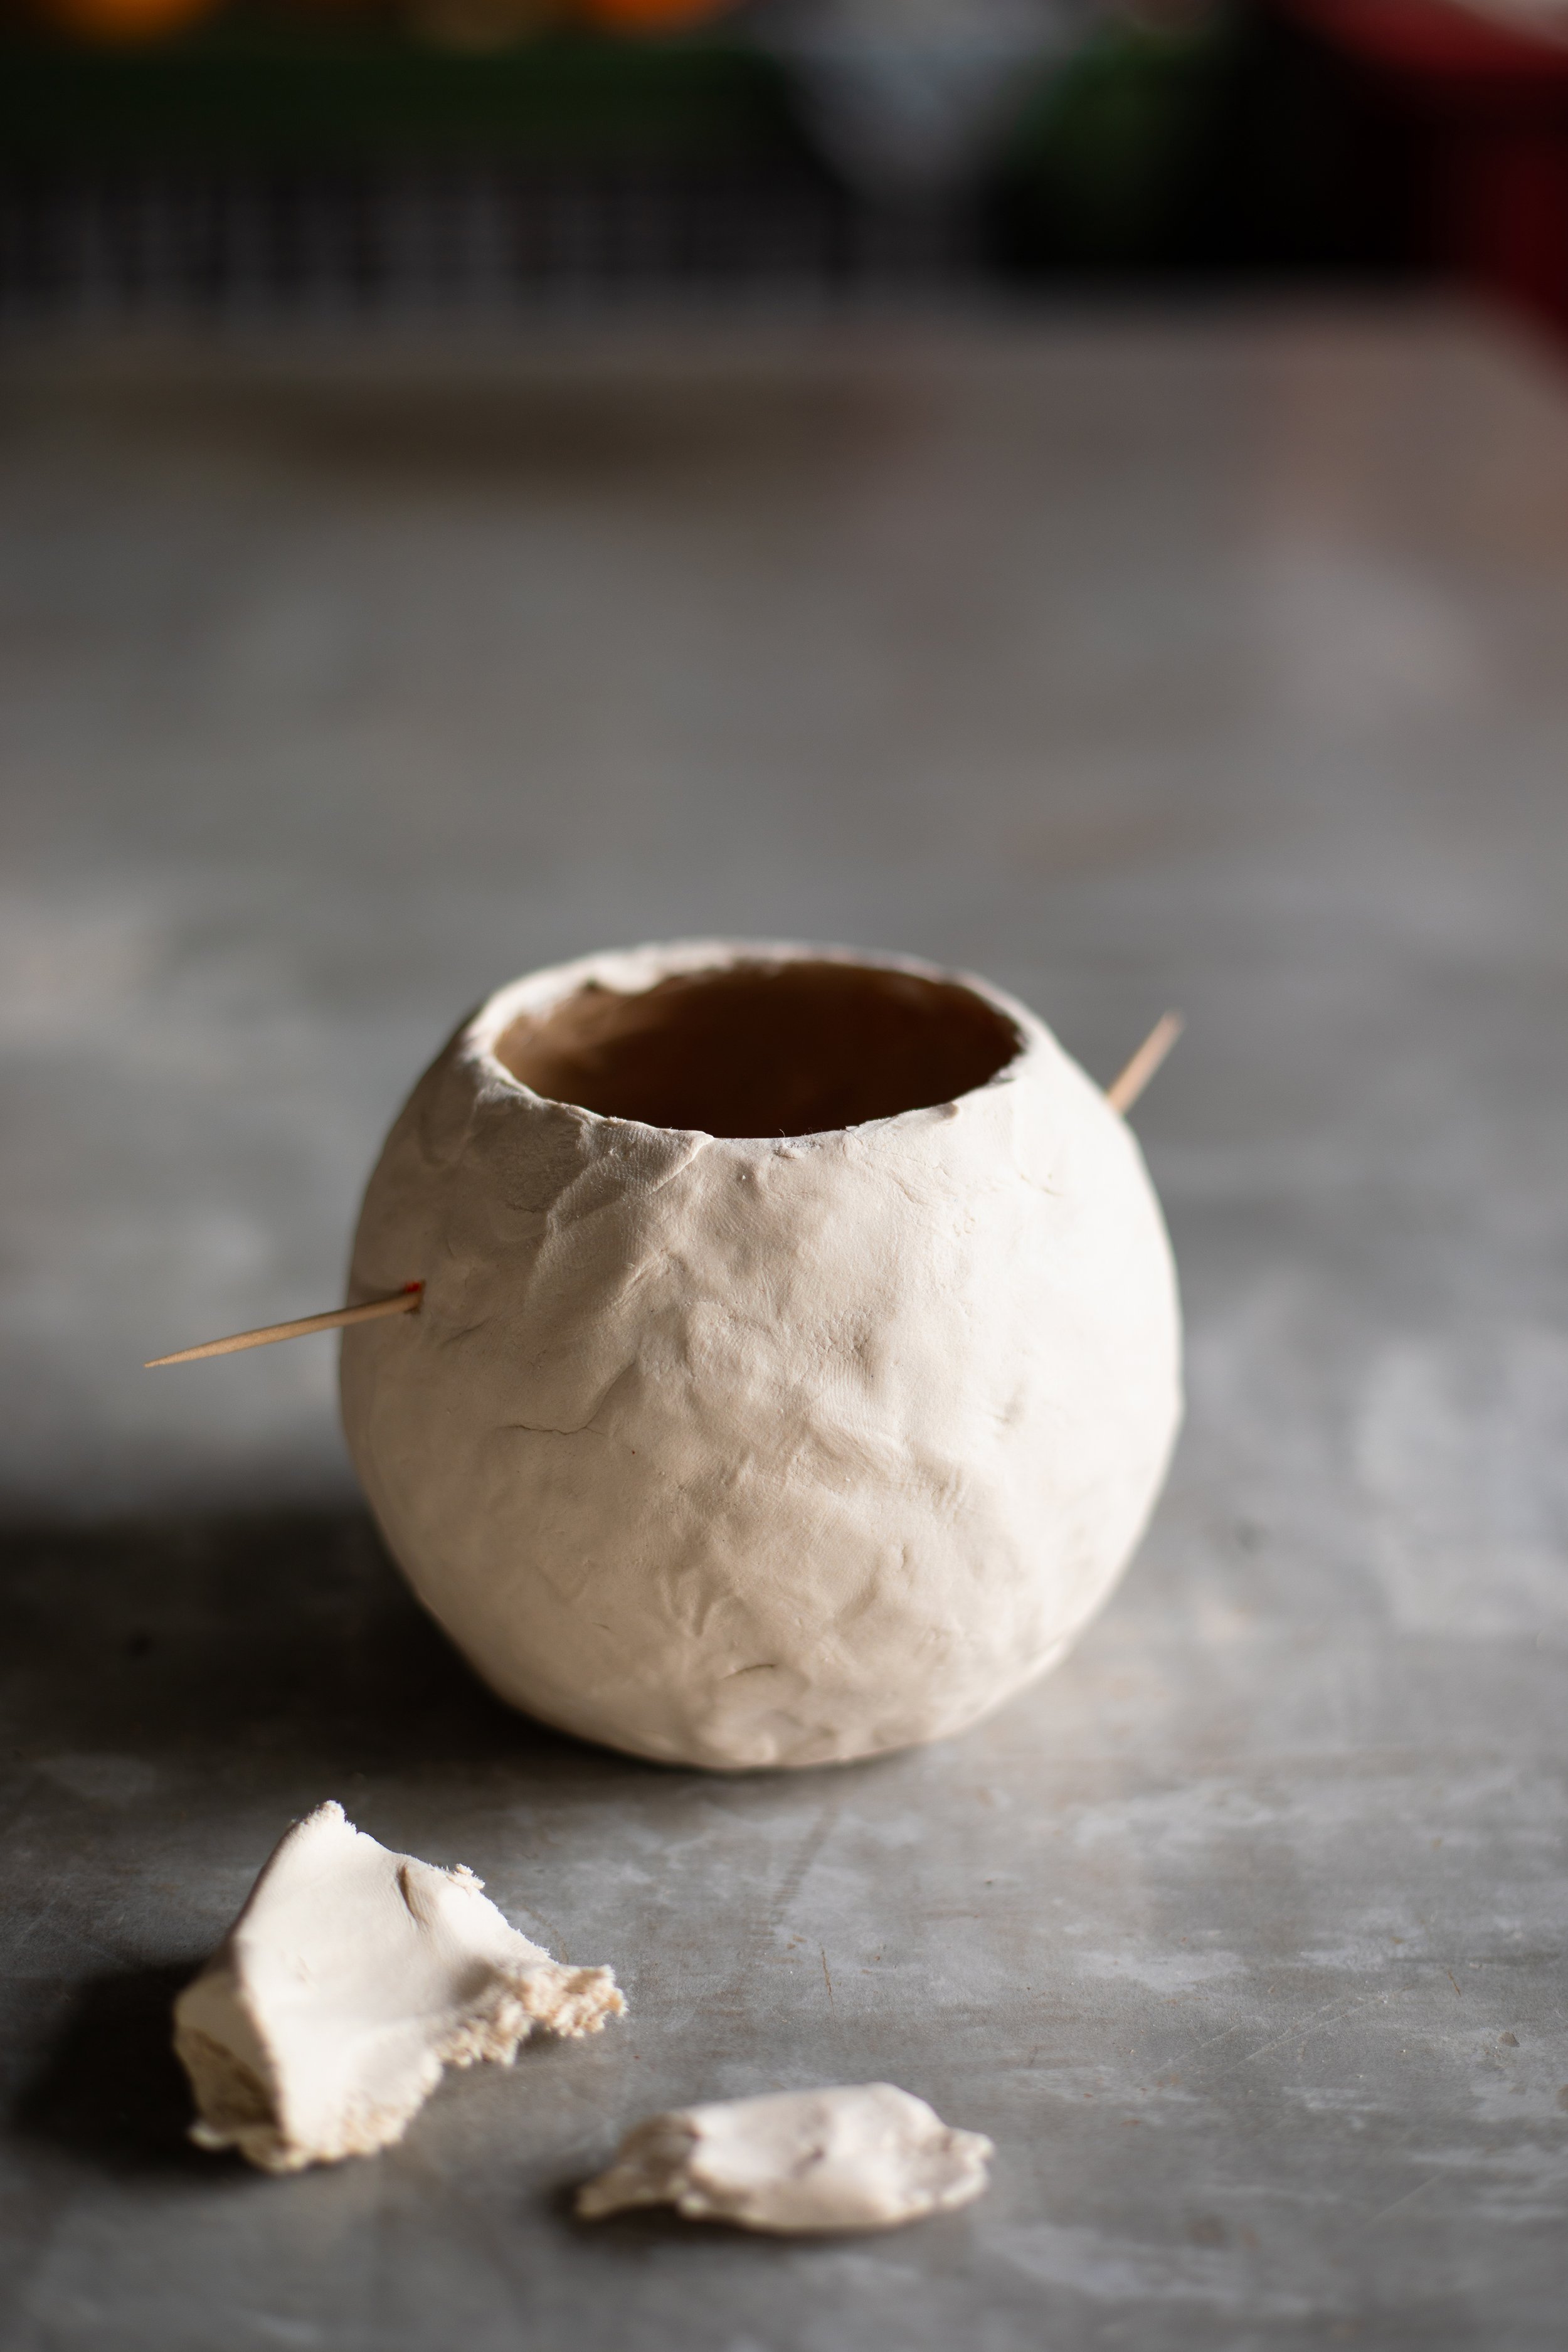
Once the bucket is fully covered with paper clay, remove the plastic handle. If you want, you can place a few toothpicks or small dowel rods into the handle holes to hold their place.
Leave the bucket to dry fully, about 24 hours. You can move onto the next step while the clay is still wet, though this does make it easier to pull off any of the surface clay! I think it’s easier to wait for the surface to dry before building up with more clay.

Step Five: Sculpt the Face
Once the clay has dried fully, you can begin adding some shaping to the face of the bucket. I decided to make pumpkin faces and a cat. I also want to try making a vintage style witch bucket!
Apply the clay in large lumps and use your fingers to press the clay into the shapes that you want. Most vintage buckets include details like rounded cheeks and eyebrows, ears, and noses. There are so many different ways to make a vintage Halloween bucket so have fun with it!
Leave the clay to dry completely again, usually about 24 hours.

Step Six: Paint the Bucket
When the paper clay has fully dried, you can begin painting your bucket! With some acrylic paints, cover the surface of your bucket in a base color.
To create an “aged” or “vintage” look to the bucket, it can help to add a tiny bit black or brown paint into your base color. This helps dirty up the bucket and adds more depth to the overall color palette. I also like to dry brush layers of cream, brown, or black over the outside of the bucket after it’s finished to really help age the final look!
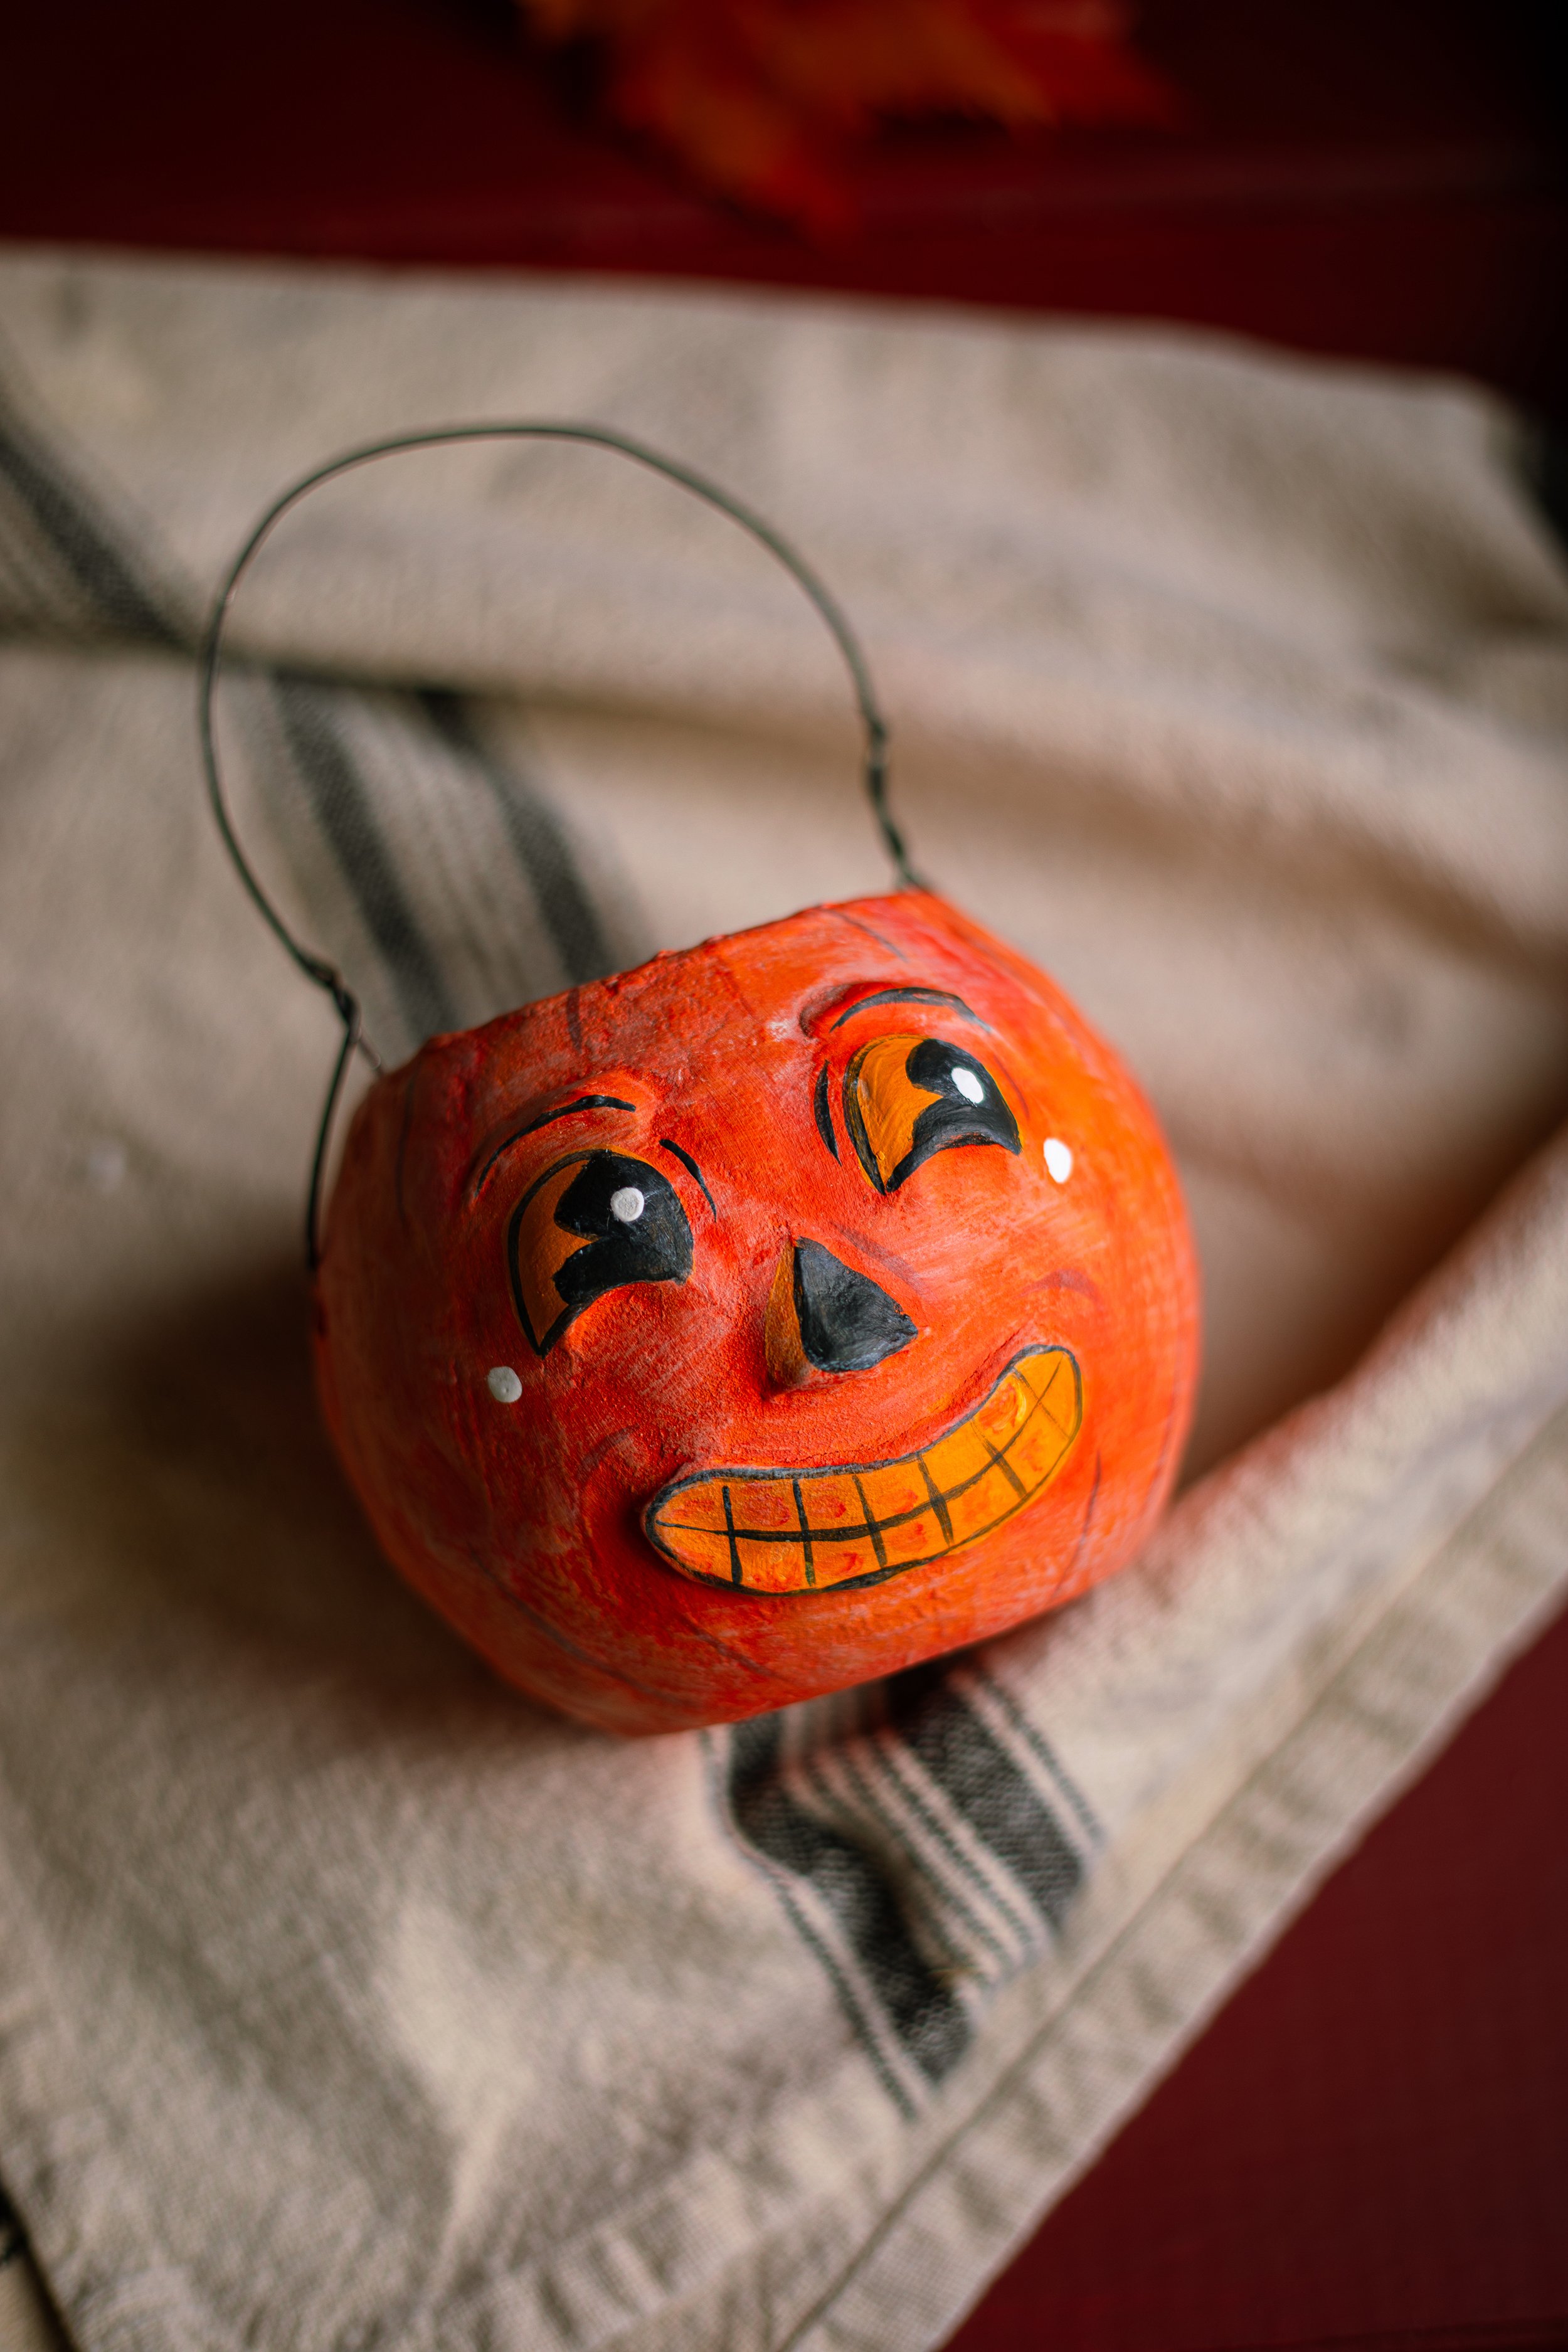
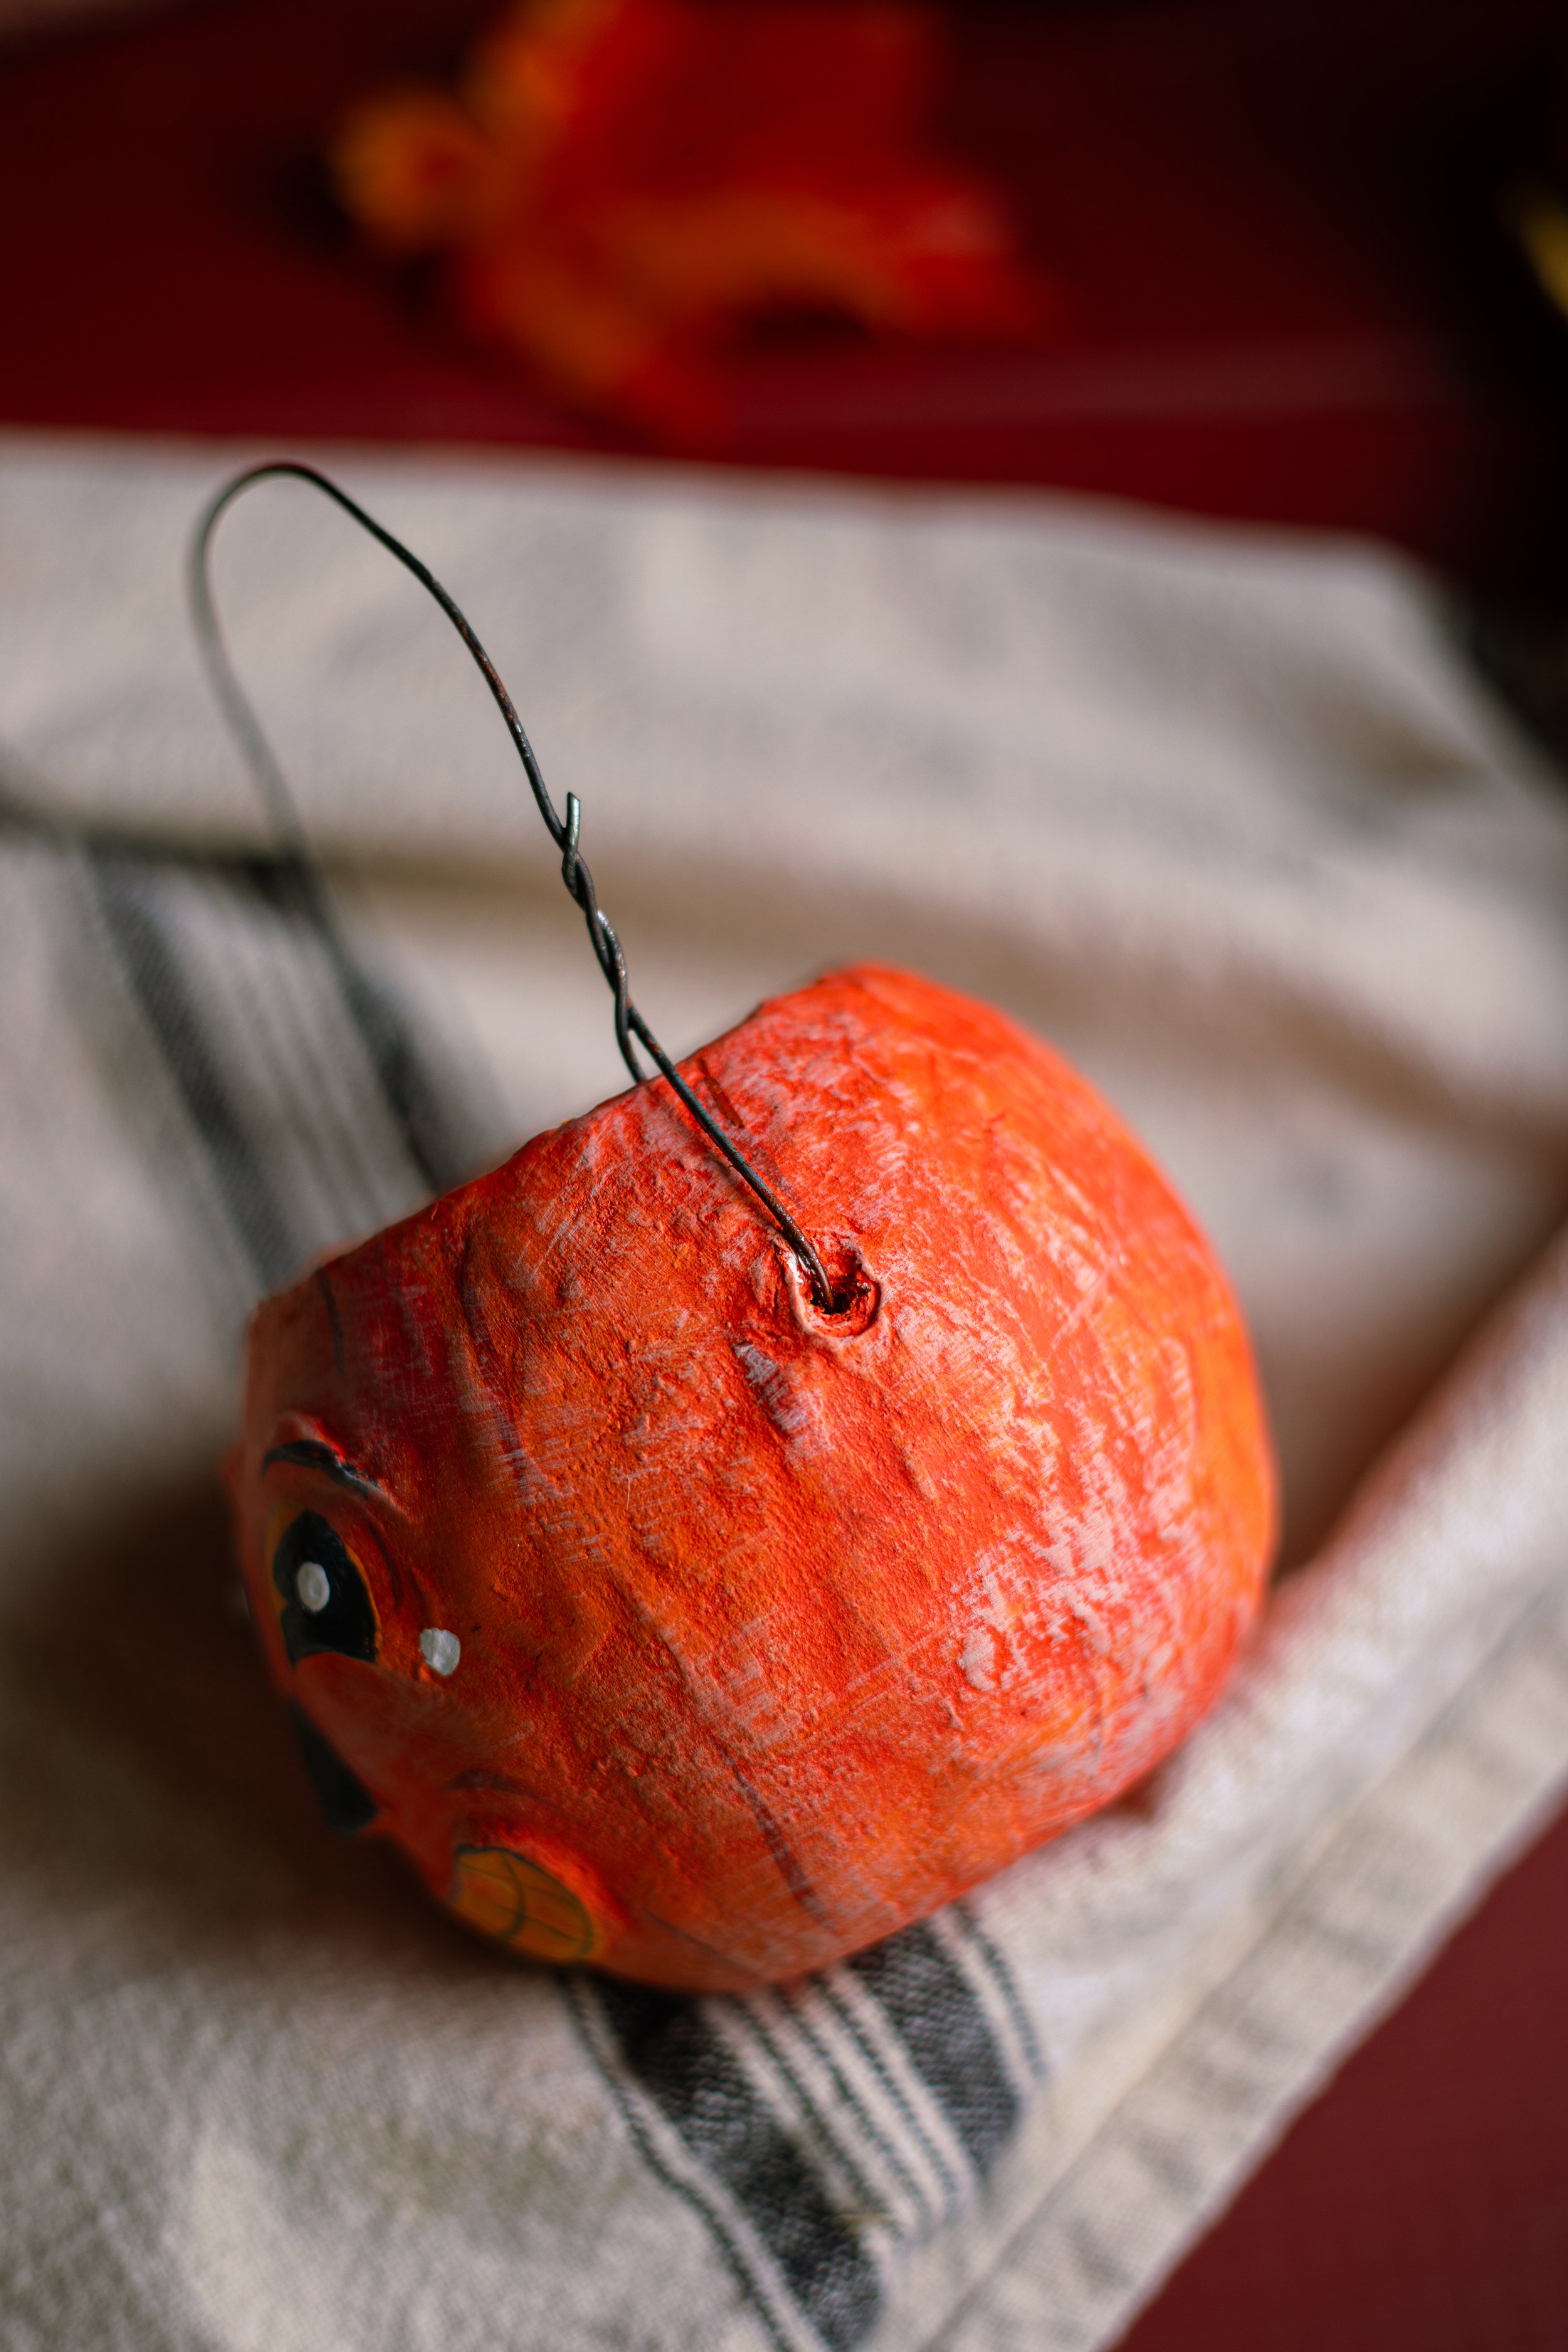
Step Seven: Add a Wire Handle
Once the paint has finished drying, you can apply the black wire. This really gives the final bucket an antique and historical look, I think!
Thread the wire through the handle holes and twist it slightly around itself. Your bucket is finished!

Tips for Sculpting
Paper clay is incredibly easy to work with, so shaping and sculpting faces on your vintage Halloween buckets will be fairly simple. Here are a few tips that can help you to create a truly cute historical Halloween bucket!
Don’t be afraid to use your fingers. The feeling of wet paper clay can be a bit odd, but don’t be afraid to shape and mold things with your hands. If you are not wanting fingerprints on your final bucket, they can easily be smoothed out with water and disappear almost instantly. However, I think the fingerprint marks give the final buckets a lot of character!
Use Sculpting Tools. If you are looking to create a more complicated bucket, you can easily use sculpting tools for cutting, scraping, and smoothing.
Layer It Up. Paper clay layers incredibly well! Start with small pieces of clay and begin placing them where you want. You can easily remove the lumps and move them around. Once placed where you like, smooth out the edges and then begin layer up the clay on top of itself until it looks the way you want it!
Creative Variations
Mini or Large Pumpkins: You can use Halloween buckets of any size for this project! Make large, medium, or mini buckets. Mini buckets are great for shelves and mantles, while large buckets look adorable in your entryway or at the base of your fireplace.
Glitter Finish: Brush Mod Podge over the top of your bucket and sprinkle with a fine glitter for a sparkly finish!
Party Favors: Make your buckets as a cute party favor for a Halloween gathering. You can even personalize them for family or friends!
Storage and Reuse Tips
When Halloween is over, store your papier-mâché in a cool, dry place such as a storage closet or humidity-controlled basement.
Wrap the buckets in tissue paper or bubble wrap if packing away for next year.